manuals.online logo
Brands
  1. Home
  2. •
  3. Brands
  4. •
  5. PASCO
  6. •
  7. Accessories
  8. •
  9. PASCO CI-6561 User manual

PASCO CI-6561 User manual

Instruction Sheet
for the PASCO
Model CI-6561
Carbon Dioxide Sensor
012-08402A
Introduction
The Carbon Dioxide (CO2) Gas Sensor measures
carbon dioxide concentration in the atmosphere or an
enclosed space, such as a terrarium. The sensing
element uses NDIR (non-dispersive infrared)
technology .
The sensor consists of an infrared (IR) source and an
IR thermopile element. The thermopile element is
covered with a narrow band filter that only passes IR
energy at 4.27 microns; a wavelength that is absorbed
by the CO2gas. As CO2 concentration increases, the
IR energy ‘seen’ by the thermopile decreases. The
relationship between the CO2 gas concentration and
the absorption of IR energy is similar to that of Beer’s
Law.
Although calibration of the Carbon Dioxide Sensor is
generally not required, a calibration button allows
users the option of calibrating. A selectable switch on
top of the sensor allows the user to select between two
ranges: 0 to 10,000 and 0 to 100,000 ppm.
Suggested Applications
• Plant respiration vs. photosynthesis
• Cellular respiration
• Animalrespiration
• Air quality evaluations
• Sublimation of solid CO2
• Rate of CO2generation in reactions
• Decomposition of organic materials in soils
• Measurement of carbon dioxide concentration from
various sources, such as from a greenhouse, expired
air before and after exercise, automobile exhaust
emissions, or various locations in a city.
Equipment included:
• Carbon Dioxide Sensor (CI-6561)
• Bottle (721-003)
Additional equipment required:
•ScienceWorkshop® interface
• DataStudio software (version 1.8.0 or later)
Carbon Dioxide Sensor
bottle
probe
stopper
Carbon Dioxide Sensor 012-08402A
2
®
Equipment Setup Calibration Procedure for the Carbon
Dioxide Sensor
Calibration of the CI-6561 Carbon Dioxide Sensor is
not required, as the sensor contains a factory
calibration. If you wish better accuracy, you may
calibrate the sensor in typical atmospheric conditions
(around 400 ppm).
Note: Unlike most ScienceWorkshop sensors, the
Carbon Dioxide Sensor has a sensor-based calibration
routine.
Perform a single point calibration:
1. Go outside and collect a sample of fresh air
(approximately 400 ppm CO2).
2. Insert the sensor assembly and probe into the
upright sampling bottle. Be sure the stopper fits
snugly into the neck of the bottle (See Figure 2).
3. Bring the sensor/bottle assembly inside and connect
it to a ScienceWorkshop interface. Ensure the
interface is turned on and connected to a computer.
4. On the top of the Carbon Dioxide Sensor, move the
range switch button to the 10K range position.
(Note: This is the default position.)
5. In the DataStudio Setup window, double click on
the CO2 Sensor icon (to open the Sensor Properties
dialog); then click on the Measurement tab, and
select the 10K concentration range. Click OK.
6. In DataStudio, open a display and click the Start
button to observe the carbon dioxide reading. Wait
at least 90 seconds for the reading to stabilize.
7. Press the Calibrate button on the sensor and hold
for 3 seconds. The green light will stay on to
indicate calibration has begun.
1. Use the supplied bottle to collect a sample of
carbon dioxide gas. Insert the sensor probe with
stopper into the bottle.
2. Connect the Carbon Dioxide Sensor to an analog
channel (A, B, or C) on a ScienceWorkshop
interface.
3. Open DataStudio. In the Welcome to DataStudio
window, double click “Create Experiment.”
4. In the Sensors list of the Experiment Setup
window, click and drag the
Carbon Dioxide Sensor icon
to the same analog channel
(A, B, or C) on the picture
of the interface.
5. Use the switch on the top of
the sensor to select a
measurementrange:
10K: 0 to 10,000 ppm or
100K: 0 to 100,000 ppm.
6. In the Setup window, double click on the CO2
Sensor icon, click on the Measurement tab, and
select the concentration range (10K or 100K). The
range is 10K by default. Click OK.
7. (Optional): To calibrate the sensor, follow the
calibration instructions on this page.
Note: To change the sampling rate (rate of data
collection), use the Plus and Minus buttons in the
General tab of the Sensor Properties dialog. The
sampling rate depends on the interface used. The
default rate is 1 sample/second. One sampling cycle
occurs every time the green light flashes. Although
the sample rate of the interface can be set much
higher, the sensor only updates once per second.
8. To collect data, open a display and click the Start
button on the main toolbar.
8. Wait approximately one minute. When the green
light flashes again, calibration is finished.
Figure 1: Range
Switch
012-08402A Carbon Dioxide Sensor
3
®
Collecting Carbon Dioxide Samples
Use the supplied sampling bottle to collect air or other
samples, such as an atmospheric sample or the CO2
gas produced from germinating seeds. Small amounts
of solid samples, such as plants or other organisms,
can be placed in the bottom of the bottle.
CAUTION: Do not try to remove the probe
from the sensor. The probe is not removable.
To collect an atmospheric sample: When collecting
air, keep the bottle upright and the neck open (without
the stopper). Wait long enough to allow atmospheric
air to fill the bottle. Insert
the probe with stopper
into the top neck of the
bottle. Ensure the stopper
fits snugly into the neck
of the bottle before taking
a reading.
To collect expired air or
other gas samples:
Collect the sample in a
plastic bag and clamp the
bag. To take a reading,
unclamp the bag and
immediately place the
plastic bag over the probe and stopper. In some cases,
a valve, tubing with stopcock, or chamber may be
necessary to prevent atmospheric gas from entering
the bag and mixing with the collected sample.
9. To verify the calibration, observe the sensor’s
reading in DataStudio. The reading should be stable
at approximately 400 ppm (±50 ppm).
Note: If the sensor’s reading drifts or seems too high
or low, recalibrate.
Figure 2: Sensor
placement in bottle
Suggested Experiment: Cellular Respiration
of Peas
Equipment required: 1/4 cup of pea seeds, piece of
dark cloth, CI-6561 CO2 Gas Sensor with bottle and
stopper, ScienceWorkshop interface, DataStudio,
Temperature Sensor (optional)
1. Connect the Carbon Dioxide Gas Sensor to a
ScienceWorkshopinterface.
2. Put the dry pea seeds into the bottle supplied with
the sensor. Insert the probe with stopper and
sensor into the bottle.
3. In your data collection software, click the Start
button to take a reading of the concentration of
carbon dioxide gas in the bottle. Record data for
about 10 minutes; this is the baseline reading
before germination.
4. Disconnect the sensor from the sensor/bottle
assembly.
5. Moisten the peas with a few teaspoons of water.
Place a dark cloth over the bottle, and allow the
peas to germinate in the bottle overnight.
6. Following germination, reconnect the sensor to the
interface and click the Start button. Monitor the
CO2 gas reading for about 10 minutes.
CAUTION: Do not allow the probe or sensor
assembly to get wet at any time!
7. Compare the rate of carbon dioxide generation
before and after germination. Explain your results.
What is causing the change in carbon dioxide
concentration?
8. (Optional): Repeat step 6 with the bottle placed in
water baths of different temperatures.
Note: If you have a Temperature Sensor or
thermometer available, you can monitor both the CO2
and temperature every 5 minutes for 20 minutes.
Carbon Dioxide Sensor 012-08402A
4
®
Limited Warranty
PASCO scientific warrants the product to be free from
defects in materials and workmanship for a period of
one year from the date of shipment to the customer.
PASCO will repair or replace, at its option, any part of
the product which is deemed to be defective in
material or workmanship. The warranty does not
cover damage to the product caused by abuse or
improper use. Determination of whether a product
failure is the result of a manufacturing defect or
improper use by the customer shall be made solely by
PASCO scientific. Responsibility for the return of
equipment for warranty repair belongs to the
customer. Equipment must be properly packed to
prevent damage and shipped postage or freight
prepaid. (Damage caused by improper packing of the
equipment for return shipment will not be covered by
the warranty.) Shipping costs for returning the
equipment after repair will be paid by PASCO
scientific.
Address: PASCO scientific
10101 Foothills Blvd.
Roseville, CA 95747-7100
Phone: (916) 786-3800
FAX: (916) 786-8905
e-mail: [email protected]
Web site: www.pasco.com
Sensor Specifications:
Sensor Range: 0 to 10K (0 to 10,000 ppm CO2)
0 to 100K (0 to 100,000 ppm CO2)
Resolution: 0 to 10K (5 ppm)
0 to 100K (50 ppm)
Accuracy: 0 ppm to 10,000 ppm: 100 ppm or 10%
of value, whichever is greater
10,000 ppm to 50,000 ppm; 20% of
value
Over 50,000 ppm; qualitative only
Repeatability: 50 ppm or 5% of value, whichever is
greater
Humidity range: 5 to 95% relative humidity;
noncondensing
Temp. range: 20ºC to 30ºC
Sensor Usage Tips:
Do not place the Carbon Dioxide Sensor in liquid
samples, such as water or beverages. Immersing
the Carbon Dioxide Sensor in liquids will
permanently damage the sensor.
Using the Carbon Dioxide Sensor in dusty or windy
environments, or in direct sunlight may cause
anomalous readings. Always store the sensor in the
plastic zip-lock bag to minimize sensor reading
distortion from the dust, dirt, etc.
Sample Data/Results
Respiration data
Germinating data
Copyright Notice
The PASCO scientific 012-08402A Carbon Dioxide
Manual is copyrighted and all rights reserved.
However, permission is granted to non-profit
educational institutions for reproduction of any part of
the 012-08402A Carbon Dioxide Manual, providing
the reproductions are used only for laboratories and
are not sold for profit. Reproduction under any other
circumstances, without the written permission of
PASCO scientific, is prohibited.
germinating peas at
room temperature
chilled peas
(germinated)

Other PASCO Accessories manuals

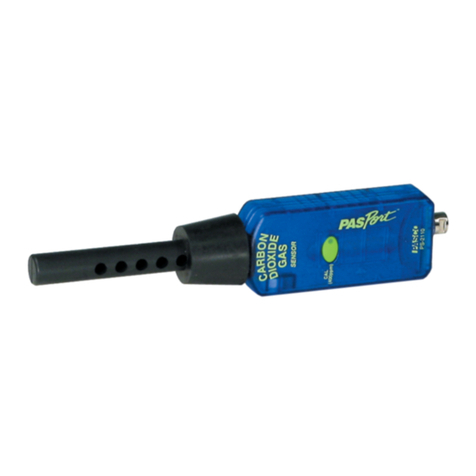
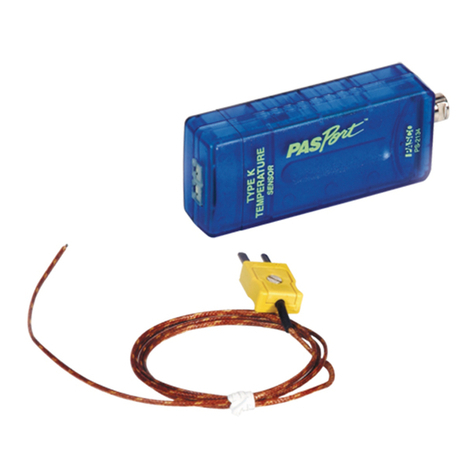
PASCO PS-3218 User manual

PASCO

PASCO PS-3218 User manual

PASCO PS-3210A User manual

PASCO

PASCO PS-3210A User manual

PASCO CI-6538 User manual

PASCO

PASCO CI-6538 User manual

PASCO PAS Port PS-2186 User manual

PASCO

PASCO PAS Port PS-2186 User manual

PASCO PASPort PS-2132 User manual

PASCO

PASCO PASPort PS-2132 User manual

PASCO PS-3236 User manual

PASCO

PASCO PS-3236 User manual

PASCO PS-2154A User manual

PASCO

PASCO PS-2154A User manual

PASCO CI-6460 User manual

PASCO

PASCO CI-6460 User manual

PASCO Pasport PS-2111 User manual

PASCO

PASCO Pasport PS-2111 User manual

PASCO PS-3211 User manual

PASCO

PASCO PS-3211 User manual

PASCO PASPORT PS-2104 User manual

PASCO

PASCO PASPORT PS-2104 User manual

PASCO PS-3204 User manual

PASCO

PASCO PS-3204 User manual

PASCO PASPORT PS-2177 User manual

PASCO

PASCO PASPORT PS-2177 User manual

PASCO PASPort PS-2126A User manual

PASCO

PASCO PASPort PS-2126A User manual

PASCO CI-6537 User manual

PASCO

PASCO CI-6537 User manual

PASCO PS-3219 User manual

PASCO

PASCO PS-3219 User manual

PASCO UI-5101 User manual

PASCO

PASCO UI-5101 User manual

PASCO CI-6555 User manual

PASCO

PASCO CI-6555 User manual

PASCO PS-3224 User manual

PASCO

PASCO PS-3224 User manual

PASCO PS-3248 User manual

PASCO

PASCO PS-3248 User manual

PASCO PS-3208 User manual

PASCO

PASCO PS-3208 User manual

PASCO Physical Pendulum Accessory User manual

PASCO

PASCO Physical Pendulum Accessory User manual

PASCO PasPort PS-2106A User manual

PASCO

PASCO PasPort PS-2106A User manual

PASCO PASPort PS-2120 User manual

PASCO

PASCO PASPort PS-2120 User manual

Popular Accessories manuals by other brands

HomeSeer HS-LS100+ user manual

HomeSeer

HomeSeer HS-LS100+ user manual

Gin Gliders Camino Assembly manual

Gin Gliders

Gin Gliders Camino Assembly manual

Pivot Breath Sensor quick start guide

Pivot

Pivot Breath Sensor quick start guide

SICK WLA16P operating instructions

SICK

SICK WLA16P operating instructions

American Standard Rise and Shine Toilet Seat 5325.024 Specifications

American Standard

American Standard Rise and Shine Toilet Seat 5325.024 Specifications

AVE 45383 manual

AVE

AVE 45383 manual

Chard KS-2 Care and use guide

Chard

Chard KS-2 Care and use guide

Airspan Air4Gp installation guide

Airspan

Airspan Air4Gp installation guide

Whale INSTANT MATCH SDP134T Installation guidelines

Whale

Whale INSTANT MATCH SDP134T Installation guidelines

Denon DN-HC4500 - DJ Mixer USB Controller operating instructions

Denon

Denon DN-HC4500 - DJ Mixer USB Controller operating instructions

Interlogix International Shock Sensor installation instructions

Interlogix

Interlogix International Shock Sensor installation instructions

A&D AD-4328 specification

A&D

A&D AD-4328 specification

Velleman DB4-ED38003 user manual

Velleman

Velleman DB4-ED38003 user manual

Recon MOD Live user guide

Recon

Recon MOD Live user guide

Baumer 10161025 manual

Baumer

Baumer 10161025 manual

Panasonic AR42P9W - Plasma Panel anti-glare Filter Fitting instructions

Panasonic

Panasonic AR42P9W - Plasma Panel anti-glare Filter Fitting instructions

Easy Track PT190306001 quick start guide

Easy Track

Easy Track PT190306001 quick start guide

Banner Q4X Series quick start guide

Banner

Banner Q4X Series quick start guide

manuals.online logo
manuals.online logoBrands
  • About & Mission
  • Contact us
  • Privacy Policy
  • Terms and Conditions

Copyright 2025 Manuals.Online. All Rights Reserved.