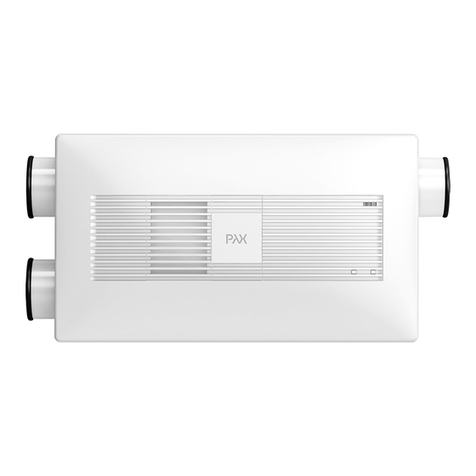
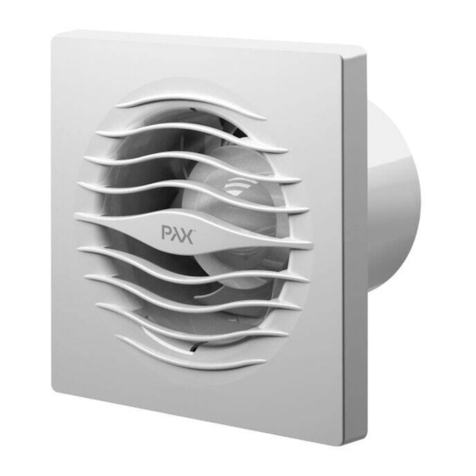
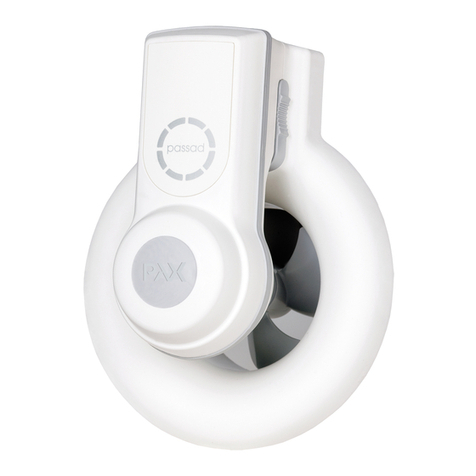
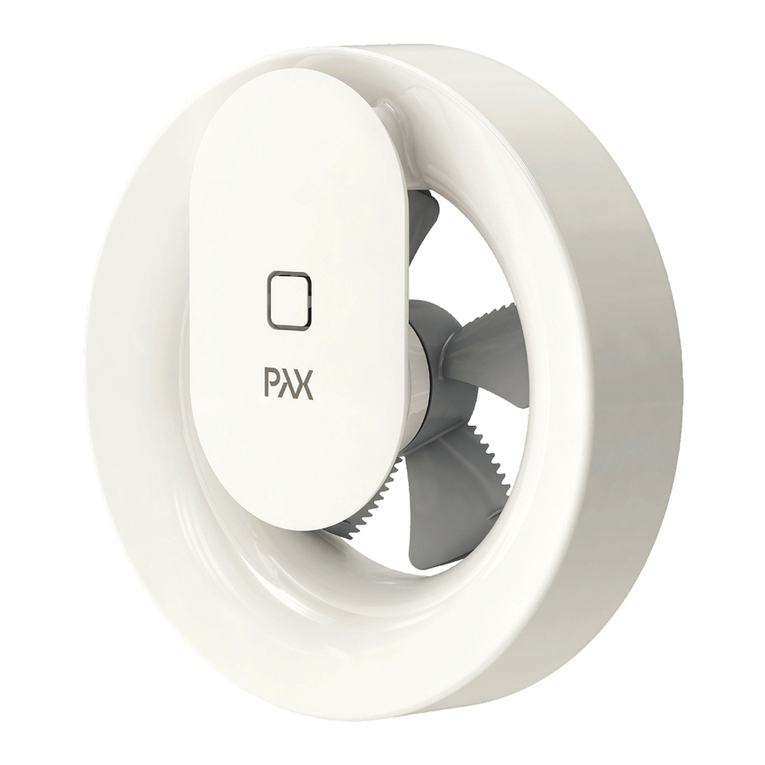
PAX Norte User manual

Content / Contenu
Important / Important 2-5
Exhaust ventilation 6
Ventilation d’échappement 7
Accessories / Accessoires 8
Installation guide / Manuel d’installation 9-13
Electrical connection 14
Raccordement électrique 15
Automatic functions 16
Fonctions automatiques 17
Cleaning / Nettoyage 18-19
Warranty conditions 20
Conditions de garantie 21
Pin Code / Code d’identication 22
EN / FR
EN / FR
EN
FR
EN / FR
EN / FR
EN
FR
EN
FR
EN / FR
EN
FR
EN / FR
009-500031-USA/Canada- 20180417
Fan / Ventilateur
Norte

2
EN: Read this!
EN
IMPORTANT!
- READ AND SAVE THESE INSTRUCTIONS. (UL)
- FOR USE IN ONE- AND TWO- FAMILY DWELLING ONLY. (UL)
- INSTALL IN INTERIOR WALL/CEILING. (CSA/UL)
- For General Ventilating Use Only. (UL)
- Acceptable for use over bathtub or shower when installed in GFCI
protected branch circuit. (UL)
- SUITABLE FOR CEILING INSTALLATION OVE TUB OR SHOWER. (CSA)
- The fan is designed for xed installation and must be installed
by a qualied electrician.
- To reduce the risk of injury to persons, install fan at least 2,1 m (7 Feet)
above oor. (UL)
- MOUNT WITH THE LOWEST MOVING PARTS AT LEAST 2,1 METERS
ABOVE FLOOR OR GRADE LEVEL. (CSA)
- Automatically operated device. To reduce the risk of injury disconnect
from power supply before servicing. (UL)
- Do Not Use To Exhaust Hazardous Or Explosive Materials And Vapors. (UL)
- FOR USE IN NON FIRE RATED INSTALLATIONS ONLY. (UL)
- DO NOT INSTALL IN COOKING AREA. (CSA)
- For General Ventilation Use Only. Do Not Use To Exhaust Hazardous Or
Explosive Materials And Vapors.
CAUTION
User and installation instructions / Instructions d’installation et d’utilisation

3
FR
FR : À lire attentivement!
IMPORTANT!
- LIRE ET CONSERVER CES INSTRUCTIONS. (UL)
- UTILISATION CONVENANT À UN LOGEMENT D’UNE OU DE DEUX
FAMILLES SEULEMENT. (UL)
- INSTALLER SUR UN MUR INTÉRIEUR OU AU PLAFOND. (CSA/UL)
- Aux ns de ventilation générale seulement. (UL)
- Utilisation acceptable au-dessus d’une baignoire ou d’une douche lorsque
raccordé à un circuit terminal protégé par disjoncteur diérentiel de fuite
àla terre (DDFT). (UL)
- CONVIENT À UNE INSTALLATION AU PLAFOND, AU-DESSUS DE LA
BAIGNOIRE OU DE LA DOUCHE. (CSA)
- Ce ventilateur a été conçu pour être utilisé à un emplacement
xeet doit être installé par un électricien qualié.
- Pour réduire le risque de dommages causés à des personnes, installer le
ventilateur à une hauteur d’au moins 2,1 m du sol. (UL)
- INSTALLER DE FAÇON À DISPOSER LES PIÈCES LES MOINS MOBILES
ÀUNE HAUTEUR D’AU MOINS 2,1 M DU PLANCHER OU DU SOL. (CSA)
- Appareil à fonctionnement automatique. Pour réduire le risque de blessure,
le débrancher du module d’alimentation avant d’en eectuer l’entretien. (UL)
- Ne pas utiliser pour éventer des matières dangereuses ou des substances
et des vapeurs explosives. (UL)
- UTILISATION ADAPTÉE UNIQUEMENT AUX INSTALLATIONS NON
RÉSISTANTES AU FEU. (UL)
- NE PAS INSTALLER DANS UNE AIRE DE CUISINE. (CSA)
- Aux ns de ventilation générale seulement. Ne pas utiliser pour éventer des
matières dangereuses ou des substances et des vapeurs explosives.
ATTENTION
User and installation instructions / Instructions d’installation et d’utilisation

4
EN: Read this!
EN
WARNING – TO REDUCE THE RISK OF FIRE, ELECTRIC SHOCK,
OR INJURY TO PERSONS, OBSERVE THE FOLLOWING:
a) Installation work and electrical wiring must be done by qualied person(s)
in accordance with all applicable codes and standards, including re-rated
construction.
b) Sucient air is needed for proper combustion and exhausting of ga-
ses through the ue (chimney) of fuel burning equipment to prevent back
drafting. Follow the heating equipment manufacturer’s guideline and safety
standards such as those published by the National Fire Protection Associa-
tion (NFPA), and the American Society for Heating, Refrigeration and Air
Conditioning Engineers (ASHRAE), and the local code authorities.
c) When cutting or drilling into wall or ceiling, do not damage electrical wiring
and other hidden utilities.
d) Ducted fans must always be vented to the outdoors.
e) If this unit is to be installed over a tub or shower, it must be marked as app-
ropriate for the application and be connected to a GFCI (Ground Fault Circuit
Interrupter) – protected branch circuit.
WARNING – TO REDUCE THE RISK OF FIRE, ELECTRIC SHOCK,
OR INJURY TO PERSONS, OBSERVE THE FOLLOWING:
a) Use this unit only in the manner intended by the manufacturer.
If you have questions, contact the manufacturer.
b) Before servicing or cleaning unit, switch power o at service panel and
lock the service disconnecting means to prevent power from being swit-
ched on accidentally. When the service disconnecting means cannot be
locked, securely fasten aprominent warning device, such as a tag, to the
service panel.
WARNINGWARNING
WARNINGWARNING
User and installation instructions / Instructions d’installation et d’utilisation

5
FR
FR : À lire attentivement!
AVERTISSEMENT – POUR RÉDUIRE LES RISQUES D’INCENDIE,
D’ÉLECTROCUTION OU DE DOMMAGES CAUSÉS À DES
PERSONNES, RESPECTER CE QUI SUIT :
a) Les travaux d’installation et de câblage électrique doivent être eectués
par des personnes qualiées conformément à tous les codes et à toutes les
normes applicables, notamment en matière de construction résistante au feu.
b) Une quantité susante d’air est nécessaire pour assurer une combustion
et une évacuation adéquates par l’échappement (la cheminée) des gaz
provenant des appareils à combustion an d’éviter un contre-tirage. Suivre
les directives et les normes de sécurité du fabricant de l’appareil de chauage
comme celles publiées par la NFPA (National Fire Protection Association),
l’ASHRAE (American Society for Heating, Refrigeration and Air Conditioning
Engineers) et les autorités locales de réglementation.
c) Ne pas endommager le lage électrique et autre équipement non visible
pendant la coupe ou le perçage dans un mur ou au plafond.
d) Les ventilateurs de conduit doivent toujours être canalisés vers l’extérieur.
e) Si cet appareil doit être installé au-dessus d’une baignoire ou d’une douche,
celui-ci doit être identié comme étant adéquat à cette n et raccordé à un
circuit terminal protégé par disjoncteur diérentiel de fuite à la terre (DDFT).
AVERTISSEMENT – POUR RÉDUIRE LES RISQUES D’INCEN-
DIE, D’ÉLECTROCUTION OU DE DOMMAGES CAUSÉS À DES
PERSONNES, RESPECTER CE QUI SUIT :
a) N’utiliser cet appareil qu’aux ns prévues par le fabricant. Pour toute
question, communiquer avec le fabricant.
b) Avant d’eectuer l’entretien ou le nettoyage de l’appareil, éteindre
l’interrupteur du panneau de service et verrouiller le dispositif de
sectionnement électrique an d’éviter une mise sous tension accidentelle.
Lorsqu’il n’est pas possible de verrouiller le dispositif de sectionnement
électrique, attacher solidement un témoin, comme une étiquette, au panneau
de service, de sorte qu’il soit bien en vue.
AVERTISSEMENT
AVERTISSEMENT
User and installation instructions / Instructions d’installation et d’utilisation

6
EN
The Pax Norte fan is designed to boost the basic
ventilation of your home* and provide forced
ventilation of humidity and odours from wet
rooms (WC/bathroom/shower room/laundry
room) or to function as a heat distributor.
The fan can be tted in ducts with natural
draught ventilation (ceiling, Figure 1) and/or wit-
hout natural draught ventilation (wall, Figure 2)**.
Norte ts ducts with a diameter of 100 – 140
mm. For larger ducts (up to 160 mm diameter),
the Pax cover plate (accessory) must be used.
To ensure that it neither disturbs nor is distur-
bed by other ventilation, the fan must always be
installed in its own duct. Make sure that the duct
is clear of obstructions. Avoid insect mesh, lters
and other objects that may obstruct the ow of
air. To prevent condensation in natural draught
ducts (in the winter), the ducts must be insulated
where they pass through unheated areas such as
cold attics.
The fan is designed for use in a temperature
range of 5 to 50 °C. If the fan is installed in a cold
area or if it has been stored in a cold place before
installation, it may run slowly when started for
the rst time. The fan will work normally when it
reaches its working temperature.
Make sure that air can enter the room, for
example through a large gap under the door or by
using the Pax transfer air unit (accessory). We re-
commend the use of genuine Pax accessories to
ensure that the fan works properly and delivers
the correct capacity.
EN: Thank you for choosing
a Pax Norte fan –
the original!
1
2
* Primarily detached houses and holiday homes, but can also be
used in multi-dwelling buildings with separate, airtight, well-
insulated ventilation ducts.
** With natural draught ventilation, air is carried upwards through
ventilation ducts and out of the building (see Figure 1). For natural
draught ventilation to work, the air inside the building must
be warmer (and therefore lighter) than the air outside. Natural
draught ventilation therefore works best during the winter. Natural
draught ventilation will be reduced or absent if the temperature
dierential (inside/outside) is small or non-existent in the summer.
For this reason, buildings are often poorly ventilated when the
weather is warm. This can be remedied with a Pax fan that works
continuously at low speed
User and installation instructions / Instructions d’installation et d’utilisation

7
FR
Le ventilateur Pax Norte a été conçu pour accroître
la puissance de votre système de ventilation
domestique de base* et orir une ventilation
forcée an d’évacuer l’humidité et les odeurs des
pièces humides (w.c./salle de bain/salle d’eau/
buanderie) ou pour servir de répartiteur de chaleur.
Ce ventilateur s’installe dans les conduits avec
une ventilation à tirage naturel (plafond, Figure 1)
ousans ventilation à tirage naturel (mur, Figure 2)**.
Le modèle Norte est adapté aux conduits
ayant un diamètre compris entre 100 et 140mm.
Pour les conduits plus larges (jusqu’à 160 mm
de diamètre), une plaque de montage Pax
(accessoire) doit être utilisée.
An d’éviter toute interférence entre le
ventilateur et un autre système de ventilation,
celui-ci doit toujours être installé dans son propre
conduit. Assurez-vous que le conduit est exempt
de toute obstruction. Évitez les moustiquaires,
ltres et autres objets pouvant entraver le ux d’air.
Pour éviter la formation de condensation dans
les conduits à tirage naturel (en hiver), isolez les
conduits aux endroits où ils traversent des zones
non chauées, par exemple dans une cave ou un
grenier.
Ce ventilateur a été conçu pour être utilisé à
une température ambiante comprise entre 5 et
50 °C. S’il est installé dans un lieu plus froid ou a
été entreposé dans une pièce froide avant son
installation, il est possible qu’il fonctionne plus
lentement à la première utilisation. Le ventilateur
fonctionnera normalement après avoir atteint sa
température de service.
Assurez-vous que la pièce est susamment
aérée, par exemple en laissant un espace
important sous la porte ou en utilisant l’unité
de transfert d’air Pax (accessoire). Nous vous
recommandons d’utiliser des accessoires
Pax d’origine an de garantir que le ventilateur
fonctionne correctement et au régime requis.
FR : Merci d’avoir choisi
un ventilateur original
PaxNorte.
1
2
* Destiné principalement aux maisons individuelles et aux résidences
secondaires, mais peut également être utilisé dans les bâtiments à
logements multiples possédant des conduits de ventilation séparés,
étanches à l’air et bien isolés.
** Dans le cas d’une ventilation à tirage naturel, l’air est envoyé vers le
haut par les conduits de ventilation, jusqu’en sortie du bâtiment (voir
Figure 1). Pour que la ventilation à tirage naturel fonctionne, l’air situé à
l’intérieur du bâtiment doit être plus chaud (et donc plus léger) que l’air
à l’extérieur. La ventilation à tirage naturel est donc plus ecace en
hiver. Elle peut être absente ou limitée si la diérence de température
(intérieur/extérieur) est faible ou nulle, par exemple en été. Les
bâtiments équipés de ce type de ventilation sont donc mal ventilés
par temps chaud. Pour remédier à ce problème, vous pouvez utiliser
un ventilateur Pax qui fonctionne en permanence à faible vitesse.
User and installation instructions / Instructions d’installation et d’utilisation

8
Accessories
1. Backdraught shutter Norte 8127-1:
2. Cover plate white 8143-6,
for duct dimensions Ø140-160
Accessoires
1. Obturateur de refoulement, Norte, 8127-1 :
2. Plaque de montage (blanc, 8143-6)
pourunconduit de Ø 140-160
Accessories
Accessoires
1.
2.
EN/FR
User and installation instructions / Instructions d’installation et d’utilisation

9
For the installer / À l’usage de l’installateur – EN/FR
Installation guide / Manuel d’installation
Installation / Installation
1. 2.
4.3.

10 Installation guide / Manuel d’installation
EN/FR – For the installer / À l’usage de l’installateur
6.
Ø110m /
Ø 110 mm
5mm
8.7.
5.

11
Installation guide / Manuel d’installation
For the installer / À l’usage de l’installateur – EN/FR
?mm
? mm
?
? mm
mm
~1-2°
9.
45°
45°
R75
45°
45°
10. 11.
Floor/étage
At least 2,1 m.
Au moins 2,1 m.
EN: NB! Wiring of 100-240 V AC must be
performed by qualied electrician.
FR : Remarque : Le câblage de
l’alimentation 100-240 V c.a. doit être
réalisé par un électricien qualié.

12 Installation guide / Manuel d’installation
SILICON
R75
30°
65°
95°
SILICON
1
2
3
12.
15.
14.
13.
EN/FR – For the installer / À l’usage de l’installateur

13
Installation guide / Manuel d’installation
100-240V
100-240 V c.a./50-60 Hz
AC/50-60Hz
12VDC/12 V c.c.
100-240V
100-240 V c.a./50-60 Hz
AC/50-60Hz
+
16.
0
10
1
17. 18. 19. 20.
EN: Electrical connection Pax Norte auto. see page 14 for English.
NB! Wiring of 100-240 V AC must be performed by a authorized electrician.
NB! Pax recommends that the 12 VDC electrical connection is also carried out by an authorized electrician.
FR :
Raccordement électrique du ventilateur Pax Norte à fonctionnement automatique (voir version française, p. 15).
Remarque : Le câblage de l’alimentation 100-240 V c.a. doit être réalisé par un électricien autorisé.
Remarque : Pax recommande que le raccordement électrique 12 V c.c. soit également réalisé par un
électricien autorisé.
For the installer / À l’usage de l’installateur – EN/FR

14
N
L
100-240VAC
S
T
12VDC
+
_M
T
1A
100-240VAC
12VDC
EN: NB! e integrated all-pole switch S only
functions at 100-240 V AC wiring.
EN: Connection of 100-240 V AC
and 12 V DC must not be done
simultaneously.
EN: NB! Pax recommends
that electrical connection
of 12VDC be perfor-
med by authorized
installer.
100-240 V c.a./50-60 Hz
L N T
Live Neutral Live switch
N
L
100-240VAC
S
T
12V DC
+
_
M
100-240VAC
12V DC
T
EN: NB! e integrated all-pole switch S only
functions at 100-240 V AC wiring.
EN: Connection of 100-240 V AC
and 12 V DC must not be done
simultaneously.
EN: Electrical connection Norte: auto.
100-240VAC 50/60Hz
Factory-set continuous basic ventilation, automatic forcing
at elevated humidity levels and under the inuence of
shanges in light. Option of accelerated air ow with 15
minutes run-on using manual switch T.
EN: NB! Wiring of 100-240 V AC must be performed
by a qualied electrician.
EN EN
22.
21.
EN
EN/FR – For the installer / À l’usage de l’installateur
Installation guide / Manuel d’installation

15
100-240 V c.a./50-60 Hz
L N T
phase neutre interrupteur
(phase)
N
L
100-240 V c.a.
S
T
12 V c.c.
+
_
M
100-240 V c.a.
12 V c.c.
T
FR : Remarque : Le commutateur intégré S
omnipolaire fonctionne uniquement
surl’alimentation 100-240 V c.a.
FR : Le raccordement électrique doit
se faire en même temps pour
l’alimentation 100-240 V c.a. et
l’alimentation 12 V c.c.
FR : Raccordement électrique du ventilateur Pax Norte
àfonctionnement automatique 100-240 V c.a. 50/60 Hz
Réglage d’usine de ventilation en continu, avec forçage
automatique en cas de taux d’humidité élevé et de
changement de luminosité. Débit d’air accéléré (facultatif)
avec durée de fonctionnement prédénie de 15 minutes
àl’aide de l’interrupteur manuel (T).
FR : Remarque : Le câblage de l’alimentation 100-240 V c.a.
doit être réalisé par un
électricien qualié.
FR FR
N
L
100-240 V c.a.
S
T
12 V c.c.
+
_M
T
1A
100-240 V c.a.
12 V c.c.
FR : Remarque : Le commutateur intégré S
omnipolaire fonctionne uniquement
surl’alimentation 100-240 V c.a.
FR : Le raccordement électrique doit
se faire en même temps pour
l’alimentation 100-240 V c.a. et
l’alimentation 12 V c.c.
FR : Remarque : Pax recommande
que le raccordement électrique
12 V c.c. soit réalisé par un
électricien autorisé.
24.
23.
FR
For the installer / À l’usage de l’installateur – EN/FR
Installation guide / Manuel d’installation

16 User and installation guide / Manuel d’installation et d’utilisation
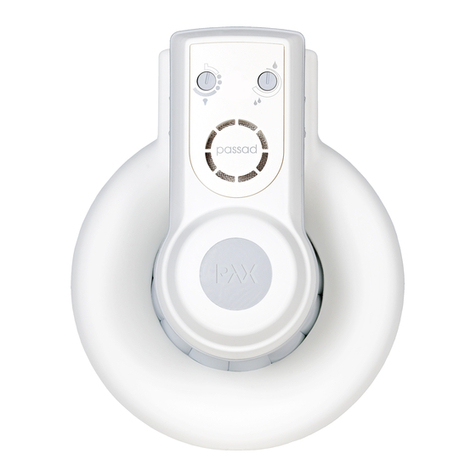
EN/FR – To the user / À l’usage de l’utilisateur
Basic setting:
Pax Norte is programmed to cope with the vast
majority of installations.
The fan works continuously with a basic ow of
approximately 30 m³/h. When the light changes,
when a light is switched on or when shadows
change when someone moves in the room, the
ow increases to approximately 60 m³/h.
If the humidity rises rapidly, for example when the
shower is on, the fan goes up to maximum ow at
approximately 95 m³/h.
When the humidity has been removed, the fan re-
verts to the basic ow of approximately 30 m³/h.
If other settings or functions are desired, down-
load the Norte app from the App Store or Google
Play. The app is called “Pax Wireless”.
Requirements for functionality via app
Versions of the operating system is updated
continuously, for information go to:
www.pax.se
Fault indication:
Red LED on the fan indicates power failure when
the calendar function has been activated.
Reset by syncing the app with the fan.
EN: Pax Norte®
Automatic functions
and settings via app
Activate the app:
You have to have a code to activate the app. The
code is unique to each fan. Enter the code or scan
it using your phone. Your unique code is on the right
leg of the motor unit (Figure T).
T.
Learn more about all the possibilities with our
app at www.pax.se

17
User and installation guide / Manuel d’installation et d’utilisation
To the user / À l’usage de l’utilisateur – EN/FR
Réglage par défaut :
Le ventilateur Pax Norte est programmé pour
s’adapter à la majorité des installations.
Il fonctionne en continu avec un débit d’air de
base d’environ 30 m³/h. Lorsque la luminosité
change, par exemple lorsque vous allumez
une lampe ou que les ombres bougent avec le
déplacement des personnes dans la pièce, le
débit d’air augmente à environ 60 m³/h.
Si l’humidité augmente rapidement, par exemple
lorsque la douche fonctionne, le ventilateur passe
en débit maximum, soit environ 95 m³/h.
Une fois l’humidité revenue à la normale, le
ventilateur revient à son réglage de base
d’environ 30m³/h. Si vous souhaitez utiliser
d’autres fonctions ou réglages, téléchargez
l’application Norte depuis l’App Store ou Google
Play. Le nom de l’application est « Pax Wireless ».
Exigences relatives à l’utilisation de l’application
Les versions du système d’exploitation sont
régulièrement mises à jour. Pour en savoir plus,
visitez le : www.pax.se
Indication de panne :
Le voyant à DEL rouge du ventilateur indique
une panne d’alimentation lorsque la fonction
calendrier a été activée.
Réinitialisez la fonction en synchronisant
l’application avec le ventilateur.
FR : Pax NorteMD
Fonctions et réglages
automatiques de l’application
Activation de l’application :
Un code est nécessaire pour activer l’application.
Ce code est spécique à chaque ventilateur.
Saisissez le code ou scannez-le à l’aide de votre
téléphone. Ce code spécique gure sur la patte
de xation droite de l’unité moteur du ventilateur
(Figure T).
T.
Pour en savoir plus sur les possibilités qu’ore
notre application, consultez le site www.pax.se.

18
Strong solvents must not be used on the fan.
The fan must not be dipped in or sprayed with water.
For the fan to continue to function and maintain its
capacity, it must be cleaned at least twice a year,
more often if necessary.
– Before cleaning, switch o the power to the fan.
For a 100-240 Vconnection, use the all-pole
switch in Figure U by switching it o (0). For a 12 V
connection, turn o the power at the appropriate
external switch.
– Detach the motor unit by grasping it as shown
in (Figure V). Pry o the motor unit by leveraging
against the cover withyour knuckles. Ensure that
EN: Cleaning
0
10
1
U. V.
you have the motor unit in a secure grip soyou do
not drop it when it is detached.
– Clean the opening, the duct and the motor unit with
a damp cloth (if necessary, use a mild detergent).
– The impeller is cleaned directly on the motor (NB
the impeller cannot be detached).
– If the fan has an external backdraught shutter,
the shutter blades should be cleaned gently. The
backdraught shutter must be located in the duct
between the fan and the outer wall.
– Replace the motor unit in the frame member
Recycling
Discarded fans should be submitted as electronic
waste to a recycling centre.
“Automatically Operated Device”
– To Reduce The Risk Of Injury
Disconnect From Power Supply Before Servicing”
WARNINGWARNING
User and installation guide / Manuel d’installation et d’utilisation
EN/FR – To the user / À l’usage de l’utilisateur

19
N’utilisez pas de solvant puissant pour nettoyer
cetappareil.
Ne trempez pas leventilateur dans l’eau et ne
pulvérisez pas d’eau dessus. Pour que le ventilateur
continue à fonctionner normalement et qu’il reste
performant, vous devez le nettoyer au moins deux
fois par an, plus souvent si nécessaire.
– Avant de commencer le nettoyage, coupez
l’alimentation du ventilateur. Dans le cas d’une
alimentation 100-240 Vc.a., utilisez pour ce faire le
commutateur omnipolaire indiqué à la Figure U, en
le plaçant en position Arrêt (0). Dans le cas d’une
alimentation 12 Vc.c., coupez l’alimentation à l’aide
du commutateur externe approprié.
– Détachez l’unité moteur en la tenant comme
indiqué à la FigureV. Retirez l’unité en faisant
levier avec vos phalanges contre le cache. Tenez
FR : Nettoyage
0
1
0
1
U. V.
fermement l’unité moteur pour ne pas la laisser
tomber une fois détachée.
– Nettoyez l’ouverture, le conduit et l’unité moteur
àl’aide d’un chion humide (si nécessaire, utilisez
un détergent doux).
– Nettoyez les pales directement sur l’unité moteur
(iln’est pas possible de les démonter).
– Si le ventilateur est équipé d’un obturateur de
refoulement, nettoyez-en doucement les lames.
L’obturateur de refoulement doit être placé dans
leconduit, entre le ventilateur et le mur extérieur.
– Remettez l’unité moteur en place sur le support.
Recyclage
Mettez au rebut le ventilateur dans un centre de
recyclage, avec les déchets électroniques.
« Appareil à fonctionnement automatique »
– Pour réduire le risque de blessure :
Débrancher du module d’alimentation avant
d’eectuer l’entretien
User and installation guide / Manuel d’installation et d’utilisation
To the user / À l’usage de l’utilisateur – EN/FR
AVERTISSEMENT

20
EN: Warranty conditions
The Pax Norte has a ve-year warranty for
defects in manufacturing and materials. The war-
ranty is subject to the following conditions:
– The fan must have been installed by a qualied
electrician.
– The fan must have been assembled and
installed in accordance with the advice and
instructions in this user and installation guide.
– The fan must be cleaned regularly in accord-
ance with the advice and instructions in this
user and installation guide.
– The fan must be installed and used indoors.
– The fan must be installed so Rain and Snow
must not get into the exhaust duct.
The exhaust duct must always be protected
with an cap or wall grill outdoor.
– The fan must not be used in exposed environ-
ments (for example in industrial or other envi-
ronments where there is a risk of the fanbeing
exposed to solvents, a high dust density,
gases, etc.).
User and installation guide / Manuel d’installation et d’utilisation
EN/FR – To the user / À l’usage de l’utilisateur
Other manuals for Norte
1
Table of contents
Other PAX Fan manuals
Popular Fan manuals by other brands

NuAire
NuAire MEV-B Installation and Maintenance

Mitsubishi Electric
Mitsubishi Electric V-15ZMW-E instruction manual

NuTone
NuTone CFO52BQ instructions

Britec
Britec AIR HEAT 3 WIFI Instructions for use

The Modern Fan Company
The Modern Fan Company Torsion installation instructions

El-Björn
El-Björn TF 18EL manual

HIDRIA
HIDRIA R10G-2810KR-ES50B-13C2 user guide

Alpine
Alpine BPRPHP14 Series Installation and maintenance instructions

Mitsubishi Electric
Mitsubishi Electric EWF-50FTA40A quick start guide

Monte Carlo Fan Company
Monte Carlo Fan Company 3OWR60D Series Owner's guide and installation manual

anko
anko HEGTF102 user manual

Westinghouse
Westinghouse ETL-ES-Solana-WH09 use and care manual