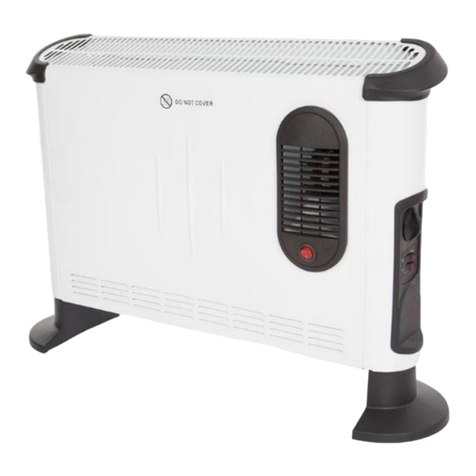
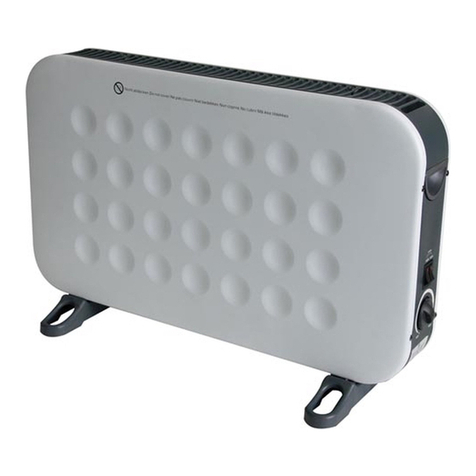
Perel SMART1310 User manual

SMART1310
USER MANUAL 3
HANDLEIDING 13
MODE D'EMPLOI 23
MANUAL DEL USUARIO 33
BEDIENUNGSANLEITUNG 43
INSTRUKCJA OBSŁUGI 53
MANUAL DO UTILIZADOR 63
This product is only suitable for well-insulated spaces or occasional use.
Dit product is uitsluitend geschikt voor goed geïsoleerde plaatsen of voor incidenteel gebruik.
Ce produit ne peut être utilisé que dans des locaux bien isolés ou de manière occasionnelle.
Este producto está indicado únicamente en lugares abrigados o para una utilización puntual.
Dieses Produkt ist nur für gut isolierte Räume oder für den gelegentlichen Gebrauch geeignet.
Ten produkt jest odpowiedni tylko do sporadycznego użytku lub do stosowania w dobrze izolowanych pomieszczeniach.
Este produto é adequado apenas para espaços bem isolados espaços ou utilização ocasional.

SMART1310
V. 01 –07/06/2021 2 ©Velleman nv

SMART1310
V. 01 –07/06/2021 3 ©Velleman nv
USER MANUAL
1. Introduction
To all residents of the European Union
Important environmental information about this product
This symbol on the device or the package indicates that disposal of the device after its lifecycle
could harm the environment. Do not dispose of the unit (or batteries) as unsorted municipal
waste; it should be taken to a specialized company for recycling. This device should be
returned to your distributor or to a local recycling service. Respect the local environmental
rules.
If in doubt, contact your local waste disposal authorities.
Thank you for choosing Perel! Please read the manual thoroughly before bringing this device
into service. If the device was damaged in transit, do not install or use it and contact your
dealer.
2. Safety Instructions
Read and understand this manual and all safety signs before using
this appliance.
Warning: In order to avoid overheating, do not cover the heater.
For household use only.
CAUTION –Some parts of this product can become very hot and
cause burns. Particular attention has to be given where children and
vulnerable people are present.
•Children of less than 3 years should be kept away unless
continuously supervised.
Children aged from 3 years and less than 8 years shall only
switch on/off the appliance provided that it has been placed or
installed in its intended normal operating position and they have
been given supervision or instruction concerning use of the
appliance in a safe way and understand the hazards involved.
Children aged from 3 years and less than 8 years shall not plug
in, regulate and clean the appliance or perform user
maintenance.
•This appliance can be used by children aged from 8 years and
above, and persons with reduced physical, sensory or mental
capabilities or lack of experience and knowledge if they have
been given supervision or instruction concerning the use of the
appliance in a safe way and understand the hazards involved.
Children shall not play with the appliance. Cleaning and user
maintenance shall not be made by children without supervision.

SMART1310
V. 01 –07/06/2021 4 ©Velleman nv
•If the external flexible cable or cord of this appliance is damaged,
it shall be exclusively replaced by the manufacturer or his service
agent or a similar qualified person in order to avoid a hazard.
•Do not use this appliance in the immediate surroundings of a
bath, a shower or a swimming pool.
•The appliance must not be located immediately below a socket
outlet.
•Some parts of this product can become very hot and cause burns.
Do not touch the appliance when in use or shortly after use. Do
not rest the power cable on the appliance when hot.
•This appliance must not be supplied through an external
switching device, such as a timer, or connected to a circuit that is
regularly switched on and off by the utility.
•The use of an extension lead or multi-plug adaptor is not advised
when connecting this appliance to the mains. Connection through
these devices could lead to a risk of overloading, overheating and
even fire at the extension lead or adaptor due to inadequate
connection quality.
•Install the appliance in a vertical position and at a distance of
minimum 0.5 m away from furniture and other objects. Never
operate the appliance near inflammable or explosive materials or
gases.
•Do not use the appliance in rooms when these are occupied by
persons not capable of leaving the room on their own, unless
constant supervision is provided.
•The first time you use the appliance, a little smoke and smell due
to the protective substances applied to the heating element
before transport may be given off. This is normal and should not
be considered a fault.
3. General Guidelines
•Refer to the Velleman®Service and Quality Warranty on the last pages of this manual.
•All modifications of the device are forbidden for safety reasons. Damage caused by user
modifications to the device is not covered by the warranty.
•Only use the device for its intended purpose. Using the device in an unauthorised way will
void the warranty.
•Damage caused by disregard of certain guidelines in this manual is not covered by the
warranty and the dealer will not accept responsibility for any ensuing defects or problems.
•Nor Velleman nv nor its dealers can be held responsible for any damage (extraordinary,
incidental or indirect) –of any nature (financial, physical…) arising from the possession,
use or failure of this product.
•Keep this manual for future reference.

SMART1310
V. 01 –07/06/2021 5 ©Velleman nv
4. Technical Specifications
power supply .................................................................................. 220-240 V~, 50/60 Hz
power consumption....................................................................................... 1800-2000 W
WLAN frequency ................................................................................................... 2.4 GHz
max. RF power .................................................................................................18.41 dBm
colour......................................................................................................................white
dimensions ........................................................................................605 x 210 x 375 mm
weight................................................................................................................... 3.2 kg
Information requirements for electric local space heaters
Model identifier(s):
Item
Symbol
Value
Unit
Item
Unit
Heat output
Type of heat input, for electric storage local space
heaters only (select one)
Nominal heat
output
Pnom
2,0
kW
manual heat charge control, with integrated
thermostat
no
Minimum heat
output (indicative)
Pmin
0,75
kW
manual heat charge control with room and/or
outdoor temperature feedback
no
Maximum
continuous heat
output
Pmax,c
2,0
kW
electronic heat charge control with room and/or
outdoor temperature feedback
no
Auxiliary electricity consumption
fan-assisted heat output
no
At nominal heat
output
elmax
2,000
kW
Type of heat output/room temperature control (select
one)
At minimum heat
output
elmin
0,75
kW
single-stage heat output and no room
temperature control
no
In standby mode
elSB
0,001
kW
two or more manual stages, no room
temperature control
no
with mechanic thermostat room temperature
control
no
with electronic room temperature control
no
electronic room temperature control plus day
timer
yes
electronic room temperature control plus week
timer
no
Other control options (multiple selections possible)
room temperature control, with presence
detection
no
room temperature control, with open window
detection
no
with distance control option
no
with adaptive start control
no
with working time limitation
yes
with black bulb sensor
yes
Contact details
Velleman NV
Legen Heirweg, 33 9890 Gavere, Belgium

SMART1310
V. 01 –07/06/2021 6 ©Velleman nv
5. Assembly
Fit the included feet to the unit before using the
appliance. These are to be attached to the base of the
heater using the four included self-tapping screws, taking
care to ensure that they are located correctly in the
bottom ends of the side mouldings.
6. Overview
Refer to the illustrations on page 2 of this manual.
Heater
1
air outlet
4
on-off switch
2
control panel
5
temperature sensor
3
handle
6
air inlet
Control Panel
1
selected heating level
9
running time
2
fan
10
selected temperature
3
frost protection
11
measured temperature
4
selected temperature unit
12
on-off button
5
fan button
13
IR eye
6
temperature increase
14
Wi-Fi button
7
temperature decrease
15
heat setting button
8
timer button
16
Wi-Fi LED
Remote Control
1
on-off
5
fan
2
Wi-Fi
6
temperature decrease
3
temperature increase
7
timer
4
heat setting
7. Use
Powering the Appliance
•Connect the appliance to the mains and switch it on. The current ambient temperature is
displayed.
•Select the heating mode (750 W/1250 W/2000 W + frost protection).
Setting the Temperature
•Set the desired temperature with the temperature increase/decrease button. The setting
range is 5 °C to 37 °C. The appliance will automatically enter the stand-by mode as soon
as the room temperature reaches the set temperature, and restart heating when the
ambient temperature drops 1 °C below the set temperature.
•In frost protection mode, an appliance in stand-by will automatically switch to the highest
heating mode (2000 W) as soon as the room temperature drops to 5 °C and switch off
when the ambient temperature reaches 9 °C.

SMART1310
V. 01 –07/06/2021 7 ©Velleman nv
Timer
•Set the timer (increments of 1 hour) with the timer button. The timer will automatically
count down; the appliance will automatically enter stand-by mode after the countdown has
finished.
Fan
•Activate and de-activate the fan with the fan button. The fan will disperse the heat better
across the room.
Memory
•This heater features an internal memory and will memorize the last set temperature before
switch-off.
8. Tuya Smart App
Downloading the App
•Download the Tuya Smart app from your chosen app store or by scanning the appropriate
QR code below.
iOS
Android
Activating/De-Activating the Wi-Fi
•Switch on the appliance.
•Press and hold the Wi-Fi button on the remote control or control panel for 3 seconds. The
Wi-Fi LED will flash quickly to indicate the appliance is connected.
•You can disconnect the appliance from the Wi-Fi by simply switching off the appliance, or
by pressing and holding the Wi-Fi button on the remote control or control panel for 5
seconds.
Registering the Tuya Smart App
1. Press the register button.
2. Read the privacy policy
and agree.
3. Enter your e-mail address
and phone number, and
press Continue.

SMART1310
V. 01 –07/06/2021 8 ©Velleman nv
4. A verification code will be
sent. Enter the code into
the app.
5. Set a valid password.
6. The app is now
registered.
Creating Rooms
The Tuya Smart app is designed so it can work with multiple compatible smart devices in your
home. When a new appliance is added, it is assigned to one of the rooms you have created.
1. Press the Add Home
button.
2. Enter your home name.
3. Set a geographic location
(see below).
4. To add a new room,
select your room and click
the Add Another Room
button (see below).
5. To remove a room,
uncheck the undesired
room.
6. Confirm by clicking the
Done button.
Setting Your Location
Adding a Room
Move the orange home pointer with your
finger. Press the Confirm button when the
pointer is at the approximate location.
Enter the name of the room and press the
Done button to confirm.

SMART1310
V. 01 –07/06/2021 9 ©Velleman nv
Connecting the Heater
Set the appliance in stand-by mode with the Wi-Fi LED blinking. Also, ensure your phone is
connected to the Wi-Fi network.
1. Open the app and click +
or the Add Device button
to add the appliance.
2. Select the heater in the
Home Appliance tab.
3. Click the AP Mode button.
4. Make sure the Wi-Fi LED
on the heater is blinking.
Click the Confirm button.
5. Enter your Wi-Fi password
and press Confirm.
6. The appliance will now
pair (please retry if this
was unsuccessful).
Controlling the Appliance through the App
1. Voice Control: Press to give vocal instructions.
2. Heater Name: Press to enter the Device screen
(see below).
3. Home: Press to return to the home screen.
4. Smart Scene: Allows you to set up
programmes.
5. Profile: Modify your personal settings.
6. Add Device: Add an appliance and set it up.

SMART1310
V. 01 –07/06/2021 10 ©Velleman nv
Device Screen
1. Back: Return to the home screen.
2. Desired Temperature: Target
temperature.
3. Decrease Temperature: Range 5 to
37 °C.
4. Power: Switch the unit on/off.
5. Mode: Select the preset mode.
6. Level: Select the heat setting.
7. Countdown Timer: Set up your timer.
8. Settings: Set up multiple options.
9. Increase Temperature: Range 5 to
37 °C.
10. Current Mode: Selected heater mode.
11. Edit Name: Modify the name of the
appliance.
12. Device Name.
Smart Scenes
Smart Scenes allows you to customize the operation of your heater. Below is an example.
1. Click the Smart tab at the bottom
of the screen.
2. Add a scene by clicking +.
3. Enter the scene name. Click on +
to add an action.
4. Select an action and set the values.
Once all functions have been added, press the Save button.

SMART1310
V. 01 –07/06/2021 11 ©Velleman nv
Automation
Set an action, which will be automatically triggered. Below is an example.
1. Click the Smart tab at the
bottom of the screen.
2. Click the Automation
button.
3. Click + or the Add
Automatic Action button
to add an action.
4. Set up an action, similarly to a
Smart Scene above. Set a trigger
condition and add an action.
5. Select the trigger condition (multiple triggers are
combinable).
Once all functions have been added, press the Save button.
Me Profile Tab
Home Management
Manage your Tuya account.
Message Center
View notifications from connected appliances.
Help Center
Provides assistance.
More Services
Allows your appliance to be integrated to other appliances.

SMART1310
V. 01 –07/06/2021 12 ©Velleman nv
9. Connection Troubleshooting
1. Check whether the appliance and Wi-Fi connection mode are switched on.
2. Make sure to enter the correct Wi-Fi password (case sensitive).
3. Ensure your phone is connected to the Wi-Fi network. The network signal (2.4 GHz) should
be strong.
10. Care and Maintenance
Cleaning
•Before cleaning, switch of the appliance, disconnect from the mains and allow to cool
completely.
•Occasionally wipe with a damp cloth to keep it looking new. Do not use harsh chemicals,
cleaning solvents or strong detergents.
•Never immerse the appliance in water or any other liquid. Protect it from splashes and
spraying liquid.
Storage
•Store the appliance in its original package in a cool and dry place.
RED Declaration of Conformity
Hereby, Velleman NV declares that the radio equipment type SMART1310 is in compliance with
Directive 2014/53/EU.
The full text of the EU declaration of conformity is available at the following internet address:
www.velleman.eu.
Use this device with original accessories only. Velleman nv cannot be held
responsible in the event of damage or injury resulting from (incorrect) use of this
device. For more info concerning this product and the latest version of this manual,
please visit our website www.velleman.eu. The information in this manual is subject
to change without prior notice.
© COPYRIGHT NOTICE
The copyright to this manual is owned by Velleman nv. All worldwide rights reserved.
No part of this manual may be copied, reproduced, translated or reduced to any electronic
medium or otherwise without the prior written consent of the copyright holder.

SMART1310
V. 01 –07/06/2021 13 ©Velleman nv
HANDLEIDING
1. Inleiding
Aan alle ingezetenen van de Europese Unie
Belangrijke milieu-informatie betreffende dit product
Dit symbool op het toestel of de verpakking geeft aan dat, als het na zijn levenscyclus wordt
weggeworpen, dit toestel schade kan toebrengen aan het milieu. Gooi dit toestel (en eventuele
batterijen) niet bij het gewone huishoudelijke afval; het moet bij een gespecialiseerd bedrijf
terechtkomen voor recyclage. U moet dit toestel naar uw verdeler of naar een lokaal
recyclagepunt brengen. Respecteer de plaatselijke milieuwetgeving.
Hebt u vragen, contacteer dan de plaatselijke autoriteiten betreffende de
verwijdering.
Bedankt voor uw aankoop! Lees deze handleiding grondig door voor u het toestel in gebruik
neemt. Werd het toestel beschadigd tijdens het transport, installeer het dan niet en raadpleeg
uw dealer.
2. Veiligheidsvoorschriften
Lees en begrijp deze handleiding en de veiligheidsinstructies vóór
ingebruikname.
Waarschuwing: Dek het toestel nooit af om oververhitting te
voorkomen.
Enkel geschikt voor huishoudelijk gebruik!
OPGELET - Sommige onderdelen kunnen zeer warm worden en
brandwonden veroorzaken. Wees bijzonder voorzichtig in de
aanwezigheid van kinderen en kwetsbare personen.
•Houd kinderen jonger dan 3 jaar buiten het bereik van het
toestel, tenzij ze continu onder toezicht staan.
Kinderen tussen 3 jaar en 8 jaar mogen het toestel enkel in- en
uitschakelen op voorwaarde dat het toestel werd geplaatst of
geïnstalleerd zoals voorgeschreven en de kinderen onder toezicht
staan of aanwijzingen hebben gekregen over het veilige gebruik
van het toestel en de potentiële gevaren ervan begrijpen.
Kinderen tussen 3 jaar en 8 jaar mogen het toestel niet
aansluiten, instellen, reinigen of onderhouden.
•Dit toestel is geschikt voor gebruik door kinderen vanaf 8 jaar,
door personen met fysieke, zintuiglijke of verstandelijke
beperkingen, of door personen met gebrek aan ervaring en
kennis, op voorwaarde dat dit onder toezicht gebeurt van een
persoon die verantwoordelijk is voor hun veiligheid of hun
aanwijzingen heeft gegeven, hoe zij het toestel moeten gebruiken
en zich bewust zijn van de risico's die het gebruik van het toestel
met zich meebrengt. Kinderen mogen niet met het toestel spelen.

SMART1310
V. 01 –07/06/2021 14 ©Velleman nv
De reiniging en het onderhoud van het toestel mogen niet worden
uitgevoerd door kinderen, tenzij ze onder toezicht staan.
•Indien de externe, flexibele kabel beschadigd is, dan moet deze
door de fabrikant, diens servicedienst, of een gelijkwaardig
bekwaam persoon vervangen worden, om gevaar te vermijden.
•Gebruik dit toestel niet in de onmiddellijke nabijheid van een bad,
een douche of een zwembad.
•Plaats het toestel niet vlak onder een stopcontact.
•Sommige onderdelen kunnen zeer warm worden en brandwonden
veroorzaken. Raak het toestel niet aan wanneer in gebruik of kort
na gebruik. Leg de voedingskabel niet op het warme toestel.
•Dit toestel mag niet gevoed worden via een extern
schakeltoestel, zoals een timer, of aangesloten zijn op een circuit
dat regelmatig in- en uitgeschakeld wordt door de
energieleverancier.
•Gebruik geen verdeelstekker of verlengsnoer om het toestel op
het lichtnet aan te sluiten. Het gebruik van deze toestellen kan
leiden tot overbelasting, oververhitting en zelfs tot brand.
•Plaats het toestel in verticale positie en houd op een
minimumafstand van 0.5 m van meubels en andere voorwerpen.
Gebruik het toestel nooit in de buurt van brandbare, explosieve
materialen of gassen.
•Gebruik het toestel niet in een ruimte waarin zich personen
bevinden die de ruimte niet op eigen kracht kunnen verlaten,
tenzij er constant toezicht aanwezig is.
•Wanneer u het toestel voor het eerst gebruikt, kan een beetje
rook en geur vrijkomen door de beschermende middelen die vóór
het transport op het verwarmingselement zijn aangebracht. Dit is
normaal en moet niet als een defect worden beschouwd.
3. Algemene richtlijnen
•Raadpleeg de Velleman®service- en kwaliteitsgarantie achteraan deze handleiding.
•Om veiligheidsredenen mag u geen wijzigingen aanbrengen. Schade door wijzigingen die
de gebruiker heeft aangebracht valt niet onder de garantie.
•Gebruik het toestel enkel waarvoor het gemaakt is. De garantie vervalt automatisch bij
ongeoorloofd gebruik.
•De garantie geldt niet voor schade door het negeren van bepaalde richtlijnen in deze
handleiding en uw dealer zal de verantwoordelijkheid afwijzen voor defecten of problemen
die hier rechtstreeks verband mee houden.
•Noch Velleman nv noch zijn verdelers kunnen aansprakelijk gesteld worden voor schade
(buitengewoon, incidenteel of onrechtstreeks) –van welke aard dan ook (financieel,
fysisch…) voortvloeiend uit het bezit, gebruik of falen van dit product.
•Bewaar deze handleiding voor verdere raadpleging.

SMART1310
V. 01 –07/06/2021 15 ©Velleman nv
4. Technische specificaties
voeding .......................................................................................... 220-240 V~, 50/60 Hz
verbruik ...................................................................................................... 1800-2000 W
WLAN-frequentie .................................................................................................. 2.4 GHz
max. RF-vermogen ........................................................................................... 18.41 dBm
kleur .......................................................................................................................... wit
afmetingen ........................................................................................605 x 210 x 375 mm
gewicht ................................................................................................................. 3.2 kg
Informatie-eisen voor elektrische toestellen voor lokale ruimteverwarming
Typeaanduiding(en):
Item
Symbool
Waarde
Eenheid
Item
Eenheid
Warmteafgifte
Type warmte-input, uitsluitend voor elektrische
warmteopslagtoestellen (selecteer één)
Nominale
warmteafgifte
Pnom
2,0
kW
Handmatige sturing van de warmteopslag, met
geïntegreerde thermostaat
neen
Minimale
warmteafgifte
(indicatief)
Pmin
0,75
kW
Handmatige sturing van de warmteopslag, met
kamer- en/of buitentemperatuurfeedback
neen
Maximale continue
warmteafgifte
Pmax,c
2,0
kW
Elektronische sturing van de warmteopslag, met
kamer- en/of buitentemperatuurfeedback
neen
Aanvullend elektriciteitsverbruik
door een ventilator bijgestane warmteafgifte
neen
Bij nominale
warmteafgifte
elmax
2,000
kW
Type warmteafgifte/sturing kamertemperatuur
(selecteer één)
Bij minimale
warmteafgifte
elmin
0,75
kW
eentrapswarmteafgifte, geen sturing van de
kamertemperatuur
neen
In stand-bymodus
elSB
0,001
kW
twee of meer handmatig in te stellen trappen,
geen sturing van de kamertemperatuur
neen
met mechanische sturing van de
kamertemperatuur door thermostaat
neen
met elektronische sturing van de
kamertemperatuur
neen
elektronische sturing van de kamertemperatuur
plus dag-tijdschakelaar
ja
elektronische sturing van de kamertemperatuur
plus week-tijdschakelaar
neen
Andere sturingsopties (meerdere selecties mogelijk)
sturing van de kamertemperatuur, met
aanwezigheidsdetectie
neen
sturing van de kamertemperatuur, met
openraamdetectie
neen
met de optie van afstandsbediening
neen
met adaptieve sturing van de start
neen
met beperking van de werkingstijd
ja
met black-bulbsensor
ja
Contactgegevens
Velleman NV
Legen Heirweg 33, 9890 Gavere, België

SMART1310
V. 01 –07/06/2021 16 ©Velleman nv
5. Montage
Bevestig de meegeleverde voetstukken aan het toestel
voordat u de verwarming in gebruik neemt. Deze
voetstukken dienen aan de onderkant van het toestel te
worden bevestigd d.m.v. de vier meegeleverde,
zelftappende schroeven. Zorg ervoor dat de schroeven
correct in de onderste eindes van de zijmallen van de
verwarming zijn geplaatst.
6. Omschrijving
Raadpleeg de afbeeldingen op pagina 2 van deze handleiding.
Convector
1
luchtuitlaat
4
aan/uit-schakelaar
2
controlepaneel
5
temperatuursensor
3
handgreep
6
luchtinlaat
Bedieningspaneel
1
geselecteerde verwarmingsstand
9
looptijd
2
ventilator
10
geselecteerde temperatuur
3
vorstbeveiliging
11
gemeten temperatuur
4
geselecteerde
temperatuureenheid
12
aan/uit-knop
5
ventilatorknop
13
IR-oog
6
temperatuur hoger
14
wifi-knop
7
temperatuur lager
15
knop verwarmingsstand
8
timerknop
16
wifi-led
Afstandsbediening
1
aan-uit
5
ventilator
2
wifi
6
temperatuur lager
3
temperatuur hoger
7
timer
4
verwarmingsstand
7. Gebruik
Het toestel inschakelen
•Steek de stekker in het stopcontact en schakel het toestel in. De huidige
omgevingstemperatuur wordt weergegeven.
•Selecteer de gewenste modus (750 W/1250 W/2000 W + vorstbeveiliging).
De temperatuur instellen
•Stel de gewenste temperatuur in met de knop temperatuur lager/hoger. Het instelbereik
gaat van 5 °C tot 37 °C. Het toestel schakelt automatisch naar standby-modus wanneer de
gewenste kamertemperatuur is bereikt. De convector start opnieuw wanneer de
kamertemperatuur 1 °C onder de ingestelde temperatuur zakt.

SMART1310
V. 01 –07/06/2021 17 ©Velleman nv
•In vorstbeveiligingsmodus schakelt een toestel in stand-by automatisch het
maximumvermogen (2000 W) in zodra de kamertemperatuur onder 5 °C daalt en schakelt
het uit zodra de temperatuur 9 °C bereikt.
Timer
•Stel de timer (in stappen van 1 uur) in met de timerknop. Het aftellen begint automatisch;
Na het aftellen schakelt het toestel automatisch naar standby-modus.
Ventilator
•Schakel de ventilator in/uit met de ventilatorknop. De ventilator verspreidt de warmte
beter de ruimte in.
Geheugen
•Deze convector is uitgerust met een intern geheugen en onthoudt de laatst ingestelde
temperatuur voordat deze wordt uitgeschakeld.
8. Tuya Smart-app
De app downloaden
•Download de Tuya Smart-app in de App Store of scan de QR-code hieronder.
iOS
Android
Wifi in-/uitschakelen
•Schakel het toestel in.
•Houd de wifi-knop op de afstandsbediening of het bedieningspaneel 3 seconden ingedrukt.
De wifi-led knippert snel om aan te geven dat het toestel verbonden is.
•Schakel het toestel uit door de convector uit te schakelen, of houd de wifi-knop gedurende
5 seconden ingedrukt.
De Tuya Smart-app registreren
1. Druk op de knop Register.
2. Lees de privacyverklaring
en accepteer deze.
3. Voer uw gegevens in en
klik op Continue.

SMART1310
V. 01 –07/06/2021 18 ©Velleman nv
4. Er zal een verificatiecode
naar uw e-mailadres
worden verzonden. Voer
de code in de applicatie
in.
5. Stel een wachtwoord in.
6. De app is nu
geregistreerd.
Ruimtes creëren
De Tuya Smart-app is compatibel met verschillende slimme apparaten. Wanneer een nieuw
toestel wordt toegevoegd, dan wordt het toegewezen aan een specifieke ruimte in uw huis.
1. Klik op de knop Add
Home.
2. Voer de naam van uw
huis in.
3. Selecteer de geografische
locatie (zie hieronder).
4. Om een nieuwe ruimte
toe te voegen, selecteer
de ruimte en klik op de
knop Add Another Room
(zie hieronder).
5. Om een ruimte te
verwijderen, verwijder het
vinkje bij de
desbetreffende ruimte.
6. Bevestig door op Done te
klikken.
Uw geografische locatie instellen
Een ruimte toevoegen
Verplaats de oranje cursor met uw vinger. Klik
op Confirm om de locatie van uw huis te
bevestigen.
Voer de naam van de ruimt in en bevestig met
de knop Done.

SMART1310
V. 01 –07/06/2021 19 ©Velleman nv
De convector verbinden
Zet de convector in standby-modus. De wifi-led knippert. Zorg ervoor dat de wifi-modus van
uw telefoon is ingeschakeld.
1. Open de toepassing en
klik op + of Add Device
om het toestel toe te
voegen.
2. Selecteer de convector in
het tabblad Home
Appliance.
3. Klik op AP-modus.
4. Zorg ervoor dat de wifi-
led op de convector
knippert. Klik op de knop
Confirm.
5. Voer het wifi-wachtwoord
in en klik op Confirm.
6. De convector is nu
verbonden (probeer
opnieuw als de verbinding
is mislukt).
De convector bedienen via de app
1. Spraakbediening: Klik om gesproken
instructies te geven.
2. Naam van de convector: Klik op om naar het
menu Device te gaan (zie hieronder).
3. Home: Klik op om terug te keren naar het
beginscherm.
4. Smart Scene: Mogelijkheid om programma's in
te stellen.
5. Profiel: Verander uw persoonlijke instellingen.
6. Toestel toevoegen: Voeg een toestel toe en
configureer.

SMART1310
V. 01 –07/06/2021 20 ©Velleman nv
Apparaatscherm (Device)
1. Terugkeren: Terug naar het beginscherm.
2. Gewenste temperatuur:
Doeltemperatuur.
3. Temperatuur lager: Bereik -5 °C tot 37
°C.
4. Power: Het toestel in-/uitschakelen.
5. Mode: Selecteer de voorgeprogrammeerde
modus.
6. Level: Selecteer het gewenste
verwarmingsvermogen.
7. Countdown Timer: Stel uw timer in.
8. Settings: Configureer verschillende opties.
9. Increase Temperature: Bereik -5 °C tot
37 °C.
10. Geselecteerde modus: Geselecteerd
verwarmingsvermogen.
11. Naam wijzigen: Wijzig de naam van het
toestel.
12. Apparaatnaam.
Smart Scenes
Met Smart Scenes kunt u de werking van uw convector aanpassen. Een voorbeeld hieronder.
1. Klik op het tabblad Smart onderaan
het scherm.
2. Voeg een scène toe door op + te klikken.
3. Voer de naam van de scène in. Klik
op + om een actie toe te voegen.
4. Selecteer een actie en stel de waarden in.
Zodra alle functies zijn toegevoegd, klik op Save.
Table of contents
Languages:
Other Perel Heater manuals