TECHNICAL NOTICE TRAC GUIDE-TRAC GUIDE LT-TRAC CLUB P0018300D (280622)
5
EN
These instructions explain how to correctly use your equipment. Only certain techniques and
uses are described.
The warning symbols inform you of some potential dangers related to the use of your
equipment, but it is impossible to describe them all. Check Petzl.com for updates and
additional information.
You are responsible for heeding each warning and using your equipment correctly. Any misuse
of this equipment will create additional dangers. Contact Petzl if you have any doubts or
difficulty understanding these instructions.
1. Field of application
Personal protective equipment (PPE) used for fall protection from height.
Trolley for adventure park ziplines (Type B mobile connection device). Suitable for use in
adventure parks that meet the requirements of the EN 15567: 2015 standard.
TRAC CLUB and TRAC GUIDE LT trolleys for standard ziplines.
TRAC GUIDE trolley for long ziplines.
The selection of your system’s components (lanyards, connectors, mobile connection devices,
harnesses), as well as their assembly and installation, must be done by competent persons to
be suitable for the adventure park where they will be used.
This product must not be pushed beyond its limits, nor be used for any purpose other than
that for which it is designed.
Responsibility
WARNING
Activities involving the use of this equipment are inherently dangerous.
You are responsible for your own actions, decisions and safety.
Before using this equipment, you must:
- Read and understand all Instructions for Use.
- Get specific training in its proper use.
- Become acquainted with its capabilities and limitations.
- Understand and accept the risks involved.
Failure to heed any of these warnings may result in severe injury or death.
This product must only be used by competent and responsible persons, or those placed under
the direct and visual control of a competent and responsible person.
You are responsible for your actions, your decisions and your safety and you assume the
consequences of same. If you are not able, or not in a position to assume this responsibility, or
if you do not fully understand the Instructions for Use, do not use this equipment.
2. Nomenclature
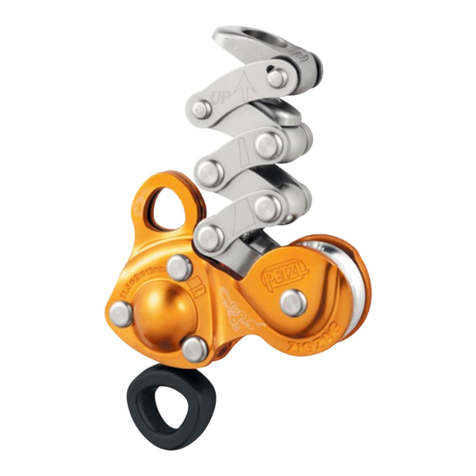
TRAC CLUB:
(1) Frame, (2) Sheave axles, (3) Sheaves, (4) Impact surfaces, (5) Impact surface screws, (6)
Second carabiner support notch, (7) Trigger, (8) Locking gate, (9) Locking hole, (10) CARITRAC
clip, (11) Lanyard attachment spacer, (12) Lanyard attachment screw.
TRAC GUIDE / TRAC GUIDE LT:
(1) Frame, (2) Sheave axles, (3) Sheaves, (4) Impact surfaces, (5) Impact surface screws, (6)
Second carabiner support notch, (7) Carabiner insertion hole for TRAC GUIDE trolley, (8)
Spacer, (9) Spacer screw, (10) Carabiner frame, (11) Gate, (12) Rivet, (13) Locking sleeve,
(14) Keylock.
TRAC CLUB: single row ball bearings.
TRAC GUIDE LT: single row ball bearings.
TRAC GUIDE: double row ball bearings.
CARITRAC:
(1) CARITRAC accessory for storage on the harness, (2) CARITRAC screw.
Principal materials: aluminum (trolley frame), stainless steel (sheaves), nylon (impact surfaces
and trigger).
3. Inspection, points to verify
Your safety depends upon the integrity of your equipment.
Petzl recommends a detailed inspection by a competent person at least once every 12
months. WARNING: your intensity of use may cause you to inspect your PPE more frequently.
Follow the procedures described at Petzl.com. Record the results on your PPE inspection
form: type, model, manufacturer contact info, serial number or individual number, dates:
manufacture, purchase, first use, next periodic inspection; problems, comments, inspector’s
name and signature.
Before each use
Trolley: verify that the sheaves turn freely, check the condition of the frame, the sheave grooves
and the axles. Verify the absence of deformation, cracks, marks, wear, corrosion. Make sure
the screws are securely tightened (correct installation, lack of play...).
Carabiner: verify the absence of deformation, cracks, marks, wear, corrosion. Open the locking
gate and verify that it closes and locks itself automatically when released. The Keylock hole
and the locking hole must not be blocked or plugged.
During use
It is important to regularly monitor the condition of the product and its connections to the other
equipment in the system. Make sure that all items of equipment are correctly positioned with
respect to each other.
4. Compatibility
Verify that this product is compatible with the other elements of the system in your application
(compatible = good functional interaction).
Equipment used with your trolley must meet current standards in your country (e.g. EN 12277
harness, EN 17109: 2020 lanyard).
TRAC CLUB (see diagrams)
TRAC GUIDE and TRAC GUIDE LT (see diagrams)
Use only the carabiner for the TRAC GUIDE trolley to attach the lanyard to the trolley.
WARNING: this carabiner must only be used with the TRAC GUIDE and TRAC GUIDE LT
trolleys. It is not suitable for other uses.
WARNING
- If using any other lanyard on these three trolleys, carry out a compatibility test (risk
assessment, check for any possibility of poor positioning...). In addition, for the TRAC CLUB
trolley, do the following test: insert the lanyard attachment spacer into the lanyard termination
(without inserting the screw) and flip it over so that the spacer’s head points toward the ground.
The spacer should fall out of the termination when you flip it over. If so, the TRAC CLUB trolley
may be used with the lanyard using the spacer and screw.
- The TRAC CLUB, TRAC GUIDE and TRAC GUIDE LT trolleys must not be used on any
type of lifeline other than steel cable of circular cross section (examples: 17 strands 9 wires, 9
strands 17 wires...) with a diameter between 9 and 13 mm, or any 9-13 mm diameter rope.
5. Installing the lanyard on the trolley
For a double lanyard, be sure to install the shorter lanyard arm on the trolley.
5a. TRAC CLUB: attaching a lanyard to the trolley (see diagrams)
Use only your TRAC CLUB’s original screw. Apply thread-lock to the screw before assembly.
5b. TRAC GUIDE / TRAC GUIDE LT: installing the connector and the lanyard on the
trolley (see diagrams)
To ensure proper performance of your device, the screws must be correctly installed and
tightened to the indicated torque. Using a torque wrench is the only way to verify that the
tightening torque is correct.
6. Installing the trolley on the zipline
6a. Installation on the zipline
WARNING: the trolley must always be used with the gate closed and locked. Nothing must
interfere with its ability to close itself automatically.
WARNING: a carabiner is strongest when loaded on the major axis, with the gate closed.
Loading a carabiner in any other way is dangerous.
6b. Zipline precautions
WARNING: the installation and use of a zipline requires the abilities of an expert.
- When installing your zipline, be sure to carry out preliminary adjustment tests (zipline tension,
slope...) with different weights to verify the compatibility of the trolley with your setup.
- When on the zipline, use a back-up system with your trolley.
- Be sure to give all of the warning information to the user.
- Wet or icy conditions can affect the trolley’s efficiency.
- WARNING: this trolley is not designed to impact a braking system at full speed.
- WARNING: the ball bearings on the TRAC CLUB and TRAC GUIDE LT trolleys make them go
faster than the TRAC GUIDE. A zipline designed to work with the TRAC GUIDE must not be
used with a TRAC CLUB or TRAC GUIDE LT (or TANDEM SPEED).
- TRAC CLUB breaking strength: 23 kN.
- TRAC GUIDE and TRAC GUIDE LT breaking strength: 20 kN.
- Working load limit: 1.4 kN.
7. Storage on the harness
When the trolley is stored on the harness, beware of the risk of snagging the loop formed by
the lanyard.
Installing the CARITRAC on the harness. See diagrams.
The CARITRAC is compatible only with the TRAC GUIDE, TRAC GUIDE LT and TRAC CLUB
trolleys. WARNING - danger of death: do not attach yourself to a CARITRAC.
8. Additional Information
This product meets the requirements of Regulation (EU) 2016/425 on personal protective
equipment. The EU declaration of conformity is available at Petzl.com.
When to retire your equipment:
WARNING: an exceptional event can lead you to retire a product after only one use, depending
on the type and intensity of usage and the environment of usage (harsh environments, marine
environments, sharp edges, extreme temperatures, chemicals...).
A product must be retired when:
- It has been subjected to a major fall or load.
- It fails to pass inspection. You have any doubt as to its reliability.
- You do not know its full usage history.
- When it becomes obsolete due to changes in legislation, standards, technique or
incompatibility with other equipment...
Destroy these products to prevent further use.
Icons:
A. Unlimited lifetime - B. Acceptable temperatures - C. Usage precautions - D. Cleaning
- E. Drying - F. Storage/transport - G. Maintenance - H. Modifications/repairs (prohibited
outside of Petzl facilities, except replacement parts) - I. Questions/contact
3-year guarantee
Against any material or manufacturing defect. Exclusions: normal wear and tear, oxidation,
modifications or alterations, incorrect storage, poor maintenance, negligence, uses for which
this product is not designed.
Warning symbols
1. Situation presenting an imminent risk of serious injury or death. 2. Exposure to a potential
risk of accident or injury. 3. Important information on the functioning or performance of your
product. 4. Equipment incompatibility.
Traceability and markings
a. Meets PPE regulatory requirements. Notified body performing the EU type examination - b.
Number of the notified body responsible for the production control of this PPE - c. Traceability:
datamatrix - d. Diameter - e. Trolley serial number - f. Year of manufacture - g. Month of
manufacture - h. Batch number - i. Individual identifier - j. Standards - k. Read the Instructions
for Use carefully - l. Model identification - m. Beware of impacts - n. Strength - o. Manufacturer
address - p. Carabiner serial number - q. Year of manufacture - r. Day of manufacture - s.
Supplier identifier - t. Individual identifier
FR
Cette notice explique comment utiliser correctement votre équipement. Seuls certains usages
et techniques sont présentés.
Les panneaux d’alerte vous informent de certains dangers potentiels liés à l’utilisation de votre
équipement, mais il est impossible de tous les décrire. Prenez connaissance des mises à jour
et informations complémentaires sur Petzl.com.
Vous êtes responsable de la prise en compte de chaque alerte et de l’utilisation correcte de
votre équipement. Toute mauvaise utilisation de cet équipement sera à l’origine de dangers
additionnels. Contactez Petzl si vous avez des doutes ou des difficultés de compréhension.
1. Champ d’application
Équipement de protection individuelle (EPI) contre les chutes de hauteur.
Poulie pour tyrolienne de parcours acrobatique en hauteur (Dispositif de connexion mobile
de type B). Convient à l’utilisation dans un parcours acrobatique en hauteur répondant aux
exigences de la norme EN 15567 : 2015.
Poulie TRAC CLUB et poulie TRAC GUIDE LT pour les tyroliennes standards.
Poulie TRAC GUIDE pour les grandes tyroliennes.
Le choix des composants de votre système (longes, connecteurs, dispositifs de connexion
mobile, harnais), ainsi que leur montage et installation, doivent être faits par des personnes
compétentes, en adéquation avec le parcours acrobatique en hauteur où ils seront utilisés.
Ce produit ne doit pas être sollicité au-delà de ses limites ou dans toute autre situation que
celle pour laquelle il est prévu.
Responsabilité
ATTENTION
Les activités impliquant l’utilisation de cet équipement sont par nature
dangereuses.
Vous êtes responsable de vos actes, de vos décisions et de votre sécurité.
Avant d’utiliser cet équipement, vous devez :
- Lire et comprendre toutes les instructions d’utilisation.
- Vous former spécifiquement à l’utilisation de cet équipement.
- Vous familiariser avec votre équipement, apprendre à connaître ses performances et ses
limites.
- Comprendre et accepter les risques induits.
Le non-respect d’un seul de ces avertissements peut être la cause de
blessures graves ou mortelles.
Ce produit ne doit être utilisé que par des personnes compétentes et avisées ou placées sous
le contrôle visuel direct d’une personne compétente et avisée.
Vous êtes responsable de vos actes, de vos décisions et de votre sécurité et en assumez
les conséquences. Si vous n’êtes pas en mesure d’assumer cette responsabilité, ou si vous
n’avez pas bien compris les instructions d’utilisation, n’utilisez pas cet équipement.
2. Nomenclature
TRAC CLUB :
(1) Corps, (2) Axes des réas, (3) Réas, (4) Butées, (5) Vis des butées, (6) Encoche de support
du second mousqueton, (7) Gâchette, (8) Doigt de verrouillage, (9) Trou de verrouillage, (10)
Barrette de rangement au CARITRAC, (11) Entretoise de maintien de la longe, (12) Vis de
maintien de la longe.
TRAC GUIDE / TRAC GUIDE LT :
(1) Corps, (2) Axes des réas, (3) Réas, (4) Butées, (5) Vis des butées, (6) Encoche de support
du second mousqueton, (7) Trou d’insertion du mousqueton pour poulie TRAC GUIDE, (8)
Cale, (9) Vis de la cale, (10) Corps du mousqueton, (11) Doigt, (12) Rivet, (13) Bague de
verrouillage, (14) Keylock.
TRAC CLUB : roulements à billes à simple rangée.
TRAC GUIDE LT : roulements à billes à simple rangée.
TRAC GUIDE : roulements à billes à double rangée.
CARITRAC :
(1) Accessoire de rangement au harnais CARITRAC, (2) Vis pour CARITRAC.
Matériaux principaux : aluminium (corps de la poulie), acier inoxydable (réas), polyamide
(butées et gâchette).
3. Contrôle, points à vérifier
Votre sécurité est liée à l’intégrité de votre équipement.
Petzl conseille une vérification approfondie, par une personne compétente, au minimum tous
les 12 mois. Attention, l’intensité de votre usage peut vous amener à vérifier plus fréquemment
votre EPI. Respectez les modes opératoires décrits sur le site Petzl.com. Enregistrez les
résultats sur la fiche de vie de votre EPI : type, modèle, coordonnées du fabricant, numéro de
série ou numéro individuel, dates : fabrication, achat, première utilisation, prochains examens
périodiques, défauts, remarques, nom et signature du contrôleur.
Avant toute utilisation
Poulie : vérifiez que les réas tournent librement, vérifiez l’état du corps, des gorges des réas,
des axes. Vérifiez l’absence de déformations, fissures, marques, usures, corrosion. Vérifiez le
serrage des vis (installation correcte, absence de jeu...).
Mousqueton : vérifiez l’absence de déformations, fissures, marques, usures, corrosion. Ouvrez
le doigt de verrouillage, vérifiez qu’il se ferme et se verrouille automatiquement quand vous le
relâchez. Le trou du Keylock ou de verrouillage ne doit pas être encombré ou bouché.
Pendant l’utilisation
Il est important de contrôler régulièrement l’état du produit et de ses connexions avec les
autres équipements du système. Assurez-vous du bon positionnement des équipements les
uns par rapport aux autres.
4. Compatibilité
Vérifiez la compatibilité de ce produit avec les autres éléments du système dans votre
application (compatibilité = bonne interaction fonctionnelle).
Les éléments utilisés avec votre poulie doivent être conformes aux normes en vigueur dans
votre pays (harnais EN 12277, longe EN 17109 : 2020 par exemple).
TRAC CLUB (voir dessins)
TRAC GUIDE et TRAC GUIDE LT (voir dessins)
Utilisez uniquement le mousqueton pour poulie TRAC GUIDE pour relier la longe à la poulie.
Attention, ce mousqueton doit être utilisé uniquement avec les poulies TRAC GUIDE et TRAC
GUIDE LT. Il ne convient pas pour d’autres usages.
Attention
- Pour l’utilisation de toute autre longe sur ces trois poulies, faites un test de compatibilité
(analyse des risques, étude des possibilités de mauvais positionnement...). En complément
pour la poulie TRAC CLUB, faites le test suivant : insérez l’entretoise de maintien de la longe
dans l’extrémité de la longe, sans insérer la vis et testez le bon coulissement de cette dernière.
L’entretoise doit tomber lorsque vous retournez la longe. Si c’est le cas, la poulie TRAC CLUB
peut être utilisée avec la longe en utilisant l’entretoise et la vis.
- Les poulies TRAC CLUB, TRAC GUIDE et TRAC GUIDE LT ne doivent pas être utilisées sur
d’autres types de lignes de vie que les câbles en acier de section circulaire (exemples : 17
brins 9 torons, 9 brins 17 torons...) dont le diamètre est compris entre 9 et 13 mm ou que
toute corde dont le diamètre est compris entre 9 et 13 mm.
5. Installation de la longe sur la poulie
Pour une longe double, veillez à monter la longe la plus courte sur la poulie.
5a. TRAC CLUB : connexion d’une longe sur la poulie (voir dessins)
Utilisez uniquement la vis d’origine de votre TRAC CLUB. Appliquez du frein filet sur votre vis
avant le montage.
5b. TRAC GUIDE / TRAC GUIDE LT : mise en place du connecteur et de la longe sur la
poulie (voir dessins)
Afin d’assurer les bonnes performances de votre appareil, les vis doivent être installées
correctement et serrées au couple indiqué. Seule l’utilisation d’une clé dynamométrique
permet de vérifier que le couple de serrage obtenu est correct.
6. Installation de la poulie sur la tyrolienne
6a. Mise en place sur la tyrolienne
Attention, la poulie doit toujours s’utiliser doigt fermé et verrouillé. Rien ne doit gêner sa
fermeture automatique.
Attention, un mousqueton offre la résistance maximum dans le grand axe et doigt fermé.
Solliciter un mousqueton de toute autre manière est dangereux.
6b. Précautions d’usage pour la tyrolienne
Attention, l’utilisation et l’installation d’une tyrolienne nécessitent la compétence d’un
spécialiste.
- Lors de l’installation de votre tyrolienne, veillez à effectuer des tests préliminaires de réglage
(tension de la tyrolienne, inclinaison...), avec différents poids, afin de vérifier la compatibilité de
la poulie avec votre installation.
- Lors des tyroliennes, utilisez un système de contre-assurage avec votre poulie.
- Veillez à donner toutes les informations d’alerte à l’utilisateur.
- Sous l’effet de l’humidité ou du gel, le rendement de la poulie peut être modifié.
- Attention, cette poulie n’est pas conçue pour impacter un système de freinage à pleine
vitesse.
- Attention, les roulements à billes des poulies TRAC CLUB et TRAC GUIDE LT vont plus vite
que la TRAC GUIDE. Une tyrolienne conçue pour fonctionner avec la TRAC GUIDE ne doit pas
être utilisée avec une TRAC CLUB ou TRAC GUIDE LT (ou TANDEM SPEED).
- Charge de rupture TRAC CLUB : 23 kN.
- Charge de rupture TRAC GUIDE et TRAC GUIDE LT : 20 kN.
- Valeur d’utilisation maximum : 1,4 kN.
7. Rangement sur le harnais
Lorsque la poulie est rangée au harnais, soyez vigilant au risque d’accrochage dû à la boucle
formée par la longe.
Mise en place du CARITRAC sur le harnais. Voir dessins.
Le CARITRAC est compatible uniquement avec les poulies TRAC GUIDE, TRAC GUIDE LT et
TRAC CLUB. Attention, danger de mort : ne vous connectez pas sur un CARITRAC.
8. Informations complémentaires
Ce produit est conforme au règlement (UE) 2016/425 relatif aux équipements de protection
individuelle. La déclaration de conformité UE est disponible sur Petzl.com.
Mise au rebut :
ATTENTION, un événement exceptionnel peut vous conduire à rebuter un produit après une
seule utilisation (type et intensité d’utilisation, environnements d’utilisation : milieux agressifs,
milieux marins, arêtes coupantes, températures extrêmes, produits chimiques...).
Un produit doit être rebuté quand :
- Il a subi une chute ou un effort important.
- Le résultat des vérifications du produit n’est pas satisfaisant. Vous avez un doute sur sa
fiabilité.
- Vous ne connaissez pas son historique complet d’utilisation.
- Quand son usage est obsolète (évolution législative, normative, technique ou incompatibilité
avec d’autres équipements...).
Détruisez ces produits pour éviter une future utilisation.
Pictogrammes :
A. Durée de vie illimitée - B. Températures tolérées - C. Précautions d’usage - D.
Nettoyage - E. Séchage - F. Stockage/transport - G. Entretien - H. Modifications/
réparations (interdites hors des ateliers Petzl, sauf pièces de rechange) - I. Questions/
contact
Garantie 3 ans
Contre tout défaut de matière ou fabrication. Sont exclus : usure normale, oxydation,
modifications ou retouches, mauvais stockage, mauvais entretien, négligences, utilisations
pour lesquelles ce produit n’est pas destiné.
Panneaux d’alerte
1. Situation présentant un risque imminent de blessure grave ou mortelle. 2. Exposition à un
risque potentiel d’incident ou de blessure. 3. Information importante sur le fonctionnement ou
les performances de votre produit. 4. Incompatibilité matérielle.
Traçabilité et marquage
a. Conforme aux exigences du règlement EPI. Organisme notifié pour l’examen UE de type
- b. Numéro de l’organisme notifié pour le contrôle de production de cet EPI - c. Traçabilité :
datamatrix - d. Diamètre - e. Numéro de série de la poulie - f. Année de fabrication - g. Mois
de fabrication - h. Numéro de lot - i. Identifiant individuel - j. Normes - k. Lire attentivement
la notice technique - l. Identification du modèle - m. Attention aux chocs - n. Résistance - o.
Adresse du fabricant - p. Numéro de série du mousqueton - q. Année de fabrication - r. Jour
de fabrication - s. Identifiant fournisseur - t. Identifiant individuel
