manuals.online logo
Brands
  1. Home
  2. •
  3. Brands
  4. •
  5. Philips
  6. •
  7. Steam Cleaner
  8. •
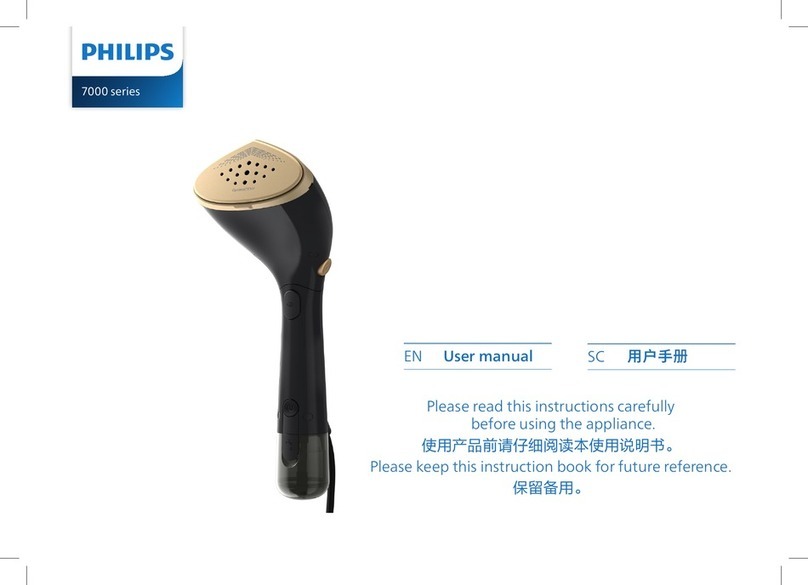
  9. Philips Active Touch GC555 User manual

Philips Active Touch GC555 User manual

Register your product and get support at
www.philips.com/welcome
GC555, GC550
ActiveTouch
User manual
Petunjuk Penggunaan
사용자 설명서
Manual pengguna
คมือผใช
Hướng dẫn sử dụng
使用手冊
用户手册
2
3
4
6
7
8
9
10
12
13
14
19
27
3
4
5
6
EN Note: Fill the water tank with tap water
only. Do not add perfume, vinegar, starch,
descaling agents, ironing aids or other
chemicals in the water tank.
ID Catatan: Isilah tangki air hanya dengan
air keran. Jangan menambahkan parfum,
cuka, kanji, bahan pembersih kerak, bahan
pembantu penyetrikaan atau bahan kimia
lainnya ke dalam tangki air.
KO 참고: 물탱크는 수돗물로만
채우십시오. 물탱크에 향수, 식초, 풀,
석회질 제거제, 다림질 보조제, 기타
화학약품을 첨가하지 마십시오.
MS Nota: Isi tangki air dengan air pili sahaja.
Jangan tambah wangian, cuka, kanji, agen
penyahkerak, alat bantuan menyeterika atau
bahan kimia lain di dalam tangki air.
TH หมายเหตุ: เติมนลงในแทงคนดวยนประปา
เทานั้น หามใสนหอม, นสมสายชู, แปง, นยา
ขจัดคราบตะกรัน, นยารีดผาเรียบ หรือสารเคมี
อื่นๆ ลงในแทงคน
VI Lưu ý: Chỉ châm nước máy vào ngăn chứa
nước. Không thêm nước hoa, dấm, hồ vải,
chất tẩy rửa, chất phụ trợ ủi hay những hóa
chất khác vào ngăn chứa nước.
ZH-T 注意:請僅以自來水注入水箱。請勿將
香水、醋、澱粉、除水垢劑、熨燙添加
劑或其他化學物質加入水箱中。
ZH-S 注意:仅为水箱注入自来水。请勿将香
水、醋、淀粉、除垢剂、熨烫助剂或其
他化学药品加入水箱中。
800 ml
000ml
00ml
00ml
00ml
800 ml
000ml
00ml
00ml
00ml
7
8
EN Note: Both steam settings are safe to use
on any fabric. If you need more steam, use
setting .
ID Catatan: Kedua setelan uap aman
digunakan pada jenis kain apa pun. Jika
Anda memerlukan uap lebih banyak,
gunakan setelan .
KO 참고: 두 스팀 설정은 모든 섬유에
안전하게 사용할 수 있습니다. 더
많은 스팀이 필요하면 설정을
사용합니다.
MS Nota: Kedua tetapan stim adalah selamat
untuk digunakan pada sebarang fabrik.
Jika anda memerlukan lebih banyak stim,
gunakan tetapan .
TH หมายเหตุ: การตั้งคาไอนทั้งสองแบบเปนการ
ตั้งคาที่ปลอดภัยสำาหรับทุกเนื้อผา หากคุณตอง
การไอนมากขึ้นใหใชการตั้งคา .
VI Lưu ý: Cả hai cài đặt hơi nước đều an toàn
cho bất kỳ loại vải nào. Nếu bạn cần hơi
nước nhiều hơn, hãy sử dụng cài đặt .
ZH-T 注意:兩種蒸氣設定皆可安全使用在
任何衣料上。若您需要更多蒸氣,請
使用設定 。
ZH-S 注意:两种蒸汽设置均可安全用于任
何面料。如果您需要更多蒸汽,请使
用设置。
GC555
9
EN Note:The steam supply hose becomes
warm during steaming.This is normal.
ID Catatan: Selang pasokan uap menjadi
hangat selama penguapan. Hal ini normal.
KO 참고: 스팀을 분사하는 동안
스팀호스가 따뜻해지는 것은
정상적인 현상입니다.
MS Nota: Hos bekalan stim menjadi panas
semasa menstim. Ini adalah normal.
TH หมายเหตุ: สายไอนจะรอนขึ้นในขณะใชงาน
ซึ่งเปนเรื่องปกติ
VI Lưu ý: Vòi cung cấp hơi nước sẽ nóng lên
trong khi ủi. Điều này là bình thường.
ZH-T 注意:蒸燙期間,蒸氣膠管溫度會逐
漸升高。這是正常現象。
ZH-S 注意:蒸汽熨烫期间,蒸汽输送管会
变热。这是正常现象。
10
EN The pleat maker is used to make pleats
on shirts and trousers. Always point the
steamer head upwards to prevent water
dripping out of the steamer head.
ID Pembuat limpitan digunakan untuk
membuat limpitan di baju dan celana.
Selalu arahkan kepala penyembur uap ke
atas untuk mencegah air menetes dari
kepala penyembur uap.
KO 주름선 생성기는 셔츠 및 바지에
주름을 잡을 때 사용합니다. 물이
스팀기 헤드 밖으로 튀는 것을
방지하기 위해 스팀기 헤드를 항상
위쪽으로 향하게 하십시오.
MS Pembuat lisu digunakan untuk membuat
lisu pada kemeja dan seluar. Kepala
penstim hendaklah setiap kali menunjuk
ke atas agar air tidak menitis keluar dari
kepala penstim.
TH อุปกรณทำารอยจีบใชทำารอยจีบบนเสื้อเชิ้ตและ
กางเกง ใหเคลื่อนอุปกรณทำารอยจีบตามแนวตั้ง
ตรงเสมอ เพื่อปองกันหยดนจากหัวพนไอน
VI Dụng cụ xếp li được dùng để tạo nếp gấp
cho áo sơ-mi và quần. Luôn hướng đầu
bàn ủi hơi lên trên để tránh hơi nước nhỏ
giọt từ đầu bàn ủi hơi.
ZH-T 壓摺器的用途是為襯衫和褲子壓出摺
線。使用時請一律將蒸氣噴頭朝上,
以免水從蒸氣噴頭滴出。
ZH-S 褶皱机用于在衬衫和裤子上打褶皱。
请始终将蒸汽喷头朝上,以防蒸汽喷
头中的水滴出。
GC555
11
12
EN Press the suction button. Suction force
pulls the fabric closer to the steamer
head and stretches it for better steam
penetration and easier wrinkle removal.
The appliance produces some motor
sound and air comes out of the sides of
the steamer. Moisture can appear on the
sides of the steamer head.This is normal.
ID Tekan tombol isap. Daya isap akan
menarik kain lebih dekat ke kepala
penyembur uap dan merentangkannya
agar penetrasi uap menjadi lebih baik
dan kerutan lebih mudah dihilangkan.
Alat akan menghasilkan suara motor dan
udara keluar dari samping penyembur uap.
Kelembaban bisa terjadi di samping kepala
penyembur uap. Hal ini normal.
KO 흡입 버튼을 누르십시오. 흡입력으로
옷감을 스팀기 헤드에 밀착하여 스팀이
더 잘 침투하며 주름을 쉽게 제거할
수 있습니다. 제품에서 모터 소리가
나고 공기가 스팀기 측면으로 배출되며
스팀기 헤드 측면에 습기가 찰 수
있습니다. 이는 정상적인 현상입니다.
MS Tekan butang sedutan. Daya sedutan
menarik fabrik rapat ke arah kepala
penstim dan meregangkannya untuk
penembusan stim yang lebih baik dan
pembuangan kedut yang lebih mudah.
Perkakas mengeluarkan sedikit bunyi
motor dan udara keluar dari sisi penstim.
Kelembapan mungkin kelihatan pada sisi
kepala penstim. Ini adalah normal.
TH กดปุ่มการดูด พลังการดูดจะดึงเนื้อผาใหเขา
ใกลกับหัวพนไอนและยืดใหตึง เพื่อ
ใหไอนซึมลึกเขาถึงเนื้อผาไดดีขึ้นและยัง
ขจัดรอยยับไดงายขึ้นอีกดวย เครื่องจะมีเสียง
มอเตอรและอากาศออกมาจากดานขางของ
เครื่องพนไอน อาจมีความชื้นที่ดานขางของหัว
พนไอน ซึ่งถือเปนเรื่องปกติ
VI Bấm nút hút. Lực hút sẽ hút bề mặt vải lại
tiếp xúc gần hơn với đầu bàn ủi hơi và căng
mặt vải ra để hơi nước thấm sâu vào vải
nhanh hơn giúp ủi phẳng các nếp nhăn dễ
dàng hơn. Thiết bị có tạo ra tiếng động từ
mô-tơ và có hơi thoát ra từ hai bên của bàn
ủi. Hơi nước có thể sẽ xuất hiện ở hai bên
của đầu bàn ủi. Điều này là bình thường.
ZH-T 按吸力按鈕。吸力會將布料吸往蒸氣
噴頭,然後將其伸展拉平,這樣蒸氣
的深入滲透效果會更好,擺平縐褶也
更輕鬆。本產品會發出些許馬達聲,
蒸汽機的側邊也會排出一些氣體。而
蒸氣噴頭的側邊會有一些水氣。這些
都是正常現象。
ZH-S 按下吸尘按钮。吸力将衣物拉近蒸汽喷
头,然后拉伸衣物,以获得更佳的蒸汽
渗入效果,从而轻松除去褶皱。本产品
会产生一些马达声音,气体会从蒸汽挂
烫机的侧边溢出。湿气可能出现在蒸汽
喷头的侧边。这是正常现象。
13
EN Note: Always empty the water tank
after use.
ID Catatan: Selalu kosongkan tangki air
setelah digunakan.
KO 참고: 사용 후에는 물탱크를 항상
비우십시오.
MS Nota: Kosongkan tangki air setiap kali
selepas penggunaan.
TH หมายเหตุ: เทนออกจากแทงคนเมื่อใชงาน
เสร็จทุกครั้ง
VI Lưu ý: Luôn đổ hết nước ra khỏi ngăn
chứa nước sau khi sử dụng.
ZH-T 注意:每次使用後請務必清空水箱。
ZH-S 注意:使用后,始终倒空水箱。
14
EN Note: Never use scouring pads, abrasive
cleaning agents or aggressive liquids such
as alcohol, petrol or acetone to clean the
appliance. Clean the appliance and wipe
any deposits off the steamer head with
a damp cloth and a non-abrasive liquid
cleaning agent.
ID Catatan: Jangan menggunakan sabut gosok,
bahan pembersih atau zat cairan yang
bersifat abrasif, seperti alkohol, bensin
atau aseton untuk membersihkan alat.
Bersihkan alat dan seka endapan apa pun
dari kepala penyembur uap dengan kain
lembab dan bahan pembersih cair non-
abrasif.
KO 참고: 제품을 세척할 때 수세미,
연마성 세제나 휘발유, 아세톤과 같은
강력 세제를 사용하지 마십시오.
제품을 세척하고 젖은 천에 비마모성
액체 세제를 묻혀 스팀기 헤드에 묻은
불순물을 닦아내십시오.
MS Nota: Jangan sekali-kali menggunakan pad
penyental, agen pembersih yang melelas
atau cecair yang agresif seperti alkohol,
petrol atau aseton untuk membersihkan
perkakas. Bersihkan perkakas dan sapu
sebarang mendapan daripada kepala
penstim dengan kain lembap dan agen
pencuci cecair tidak melelas.
TH หมายเหตุ: ในการทำาความสะอาดอุปกรณ
หามใชแผนใยขัด นยาทำาความสะอาดที่มีฤทธิ์
กัดกรอนสูง หรือของเหลวที่มีฤทธิ์รุนแรง เชน
แอลกอฮอล นมัน หรืออะซีโทน ใหทำาความ
สะอาดเครื่องและใชผาชุบนยาทำาความสะอาด
ที่ไมทำาใหเกิดการกัดกรอนบิดพอหมาดเช็ดสิ่ง
สกปรกออกจากหัวพนไอน
VI Lưu ý: Không bao giờ sử dụng các miếng
tẩy rửa, các chất tẩy rửa có tính ăn mòn
hoặc các chất lỏng mạnh như cồn, xăng
hoặc axeton để lau chùi thiết bị. Vệ sinh
thiết bị và lau sạch các chất gỉ khỏi đầu
bàn ủi hơi bằng một miếng vải ẩm và dung
dịch tẩy rửa không có tính ăn mòn.
ZH-T 注意:請勿使用鋼絲絨、具有磨蝕性
的清潔劑或侵蝕性的液體 (例如酒精、
汽油或丙酮) 清潔本產品。請用濕布和
非磨蝕性的液體清潔劑清潔並擦掉蒸
氣噴頭上的任何沈積物。
ZH-S 注意:切勿使用钢丝绒、研磨性清洁
剂或腐蚀性液体(例如酒精、汽油或
丙酮)来清洁本产品。用湿布和非腐
蚀性液体清洁剂清洁本产品,并擦去
蒸汽喷头中的沉积物。
15
16
EN Clean the grille when fluff is collecting on
the grille.
ID Bersihkan kisi jika bulu-bulu terkumpul di
kisi.
KO 헤드그릴에 잔털이 쌓였을 경우
헤드그릴을 청소하십시오.
MS Bersihkan gril apabila bulu-bulu terkumpul
pada gril.
TH ทำาความสะอาดตะแกรงเมื่อมีเศษขุยผาสะสม
บนตะแกรง
VI Lau chùi miếng lưới thông hơi khi thấy có
lông tóc bám vào miếng lưới.
ZH-T 濾網柵口上若有毛絮堆積時,請加以
清潔。
ZH-S 当栅格上积聚有绒毛时,请清洁栅
格。
17
EN Note: Rinse the water tank twice after
5 times of use.This prevents too much
water from dripping out of the steamer
head during steaming.
ID Catatan: Bilas tangki air dua kali setelah
5 kali penggunaan. Ini untuk mencegah
air terlalu banyak menetes dari kepala
penyembur uap selama proses penguapan.
KO 참고: 5회 다림질 후 물탱크를 두 번
헹궈 스팀이 분사되는 동안 많은 양의
물이 스팀기 헤드 밖으로 튀는 것을
방지하십시오.
MS Nota: Bilas tangki air dua kali selepas 5 sesi
penggunaan. Ini dapat mengelakkan terlalu
banyak air daripada menitis keluar dari
penstim semasa menstim.
TH หมายเหตุ: ลางแทงคนดวยนสะอาดสองครั้ง
หลังจากการใชงาน 5 ครั้ง วิธีนี้เปนการปองกัน
ไมใหนหยดออกจากหัวพนไอนขณะรีดผา
มากเกินไป
VI Lưu ý: Súc rửa ngăn chứa nước hai lần sau
5 lần sử dụng bàn ủi. Điều này sẽ tránh
được việc quá nhiều nước rỉ ra từ đầu bàn
ủi hơi trong khi ủi.
ZH-T 注意:使用 5 次後請沖洗水箱兩次。
這個動作可防止蒸燙時蒸氣噴頭滴出
太多水。
ZH-S 注意:请在使用 5 次后冲洗水箱 2
次。这可避免熨烫过程中过多的水从
蒸汽喷头滴出。
800 ml
000ml
00ml
00ml
00ml
800 ml
000ml
00ml
00ml
00ml
18
19
Problem Possible cause Solution
EN The appliance does not heat up. There is a connection problem Check the mains plug and the wall socket.
You have not switched on the
appliance.
Press the on/off button to switch on the appli-
ance.
The appliance does not produce
any steam.
The steamer has not heated up
sufficiently.
Let the appliance heat up for approx. 2 minutes.
Steam has condensed in the hose. Lift the steamer head to straighten the hose
vertically.This allows any condensation to flow
back into the water tank.
The water level is below the MIN
level indication.
Fill water tank to the MAX level indication.
You have placed the steamer
on a table or chair instead of on
the floor.
Place the steamer on the floor.
The steam output is irregular. Steam has condensed in the hose
or in the steamer head.
Lift the steamer head to straighten the hose
vertically.This allows any condensation to flow
back into the water tank.
You have placed the steamer
on a table or chair instead of on
the floor.
Place the steamer on the floor.
Water droplets drip from the
steamer head.
Steam has condensed in the hose. Lift the steamer head to straighten the hose
vertically.This allows any condensation to flow
back into the water tank.
You have left the steamer head
and/or the steam supply hose
in horizontal position for a long
time.
Lift the steamer head to straighten the hose
vertically.This allows any condensation to flow
back into the water tank.
You have placed the steamer
on a table or chair instead of on
the floor.
Place the steamer on the floor.
The appliance produces a croak-
ing sound.
When the hose forms a U-shape,
condensation present in the
hose cannot flow back into the
water tank.
Lift the steamer head to straighten the hose
vertically.This allows any condensation to flow
back into the water tank.
You have left the steamer head
and/or the steam supply hose
in horizontal position for a long
time.
Lift the steamer head to straighten the hose
vertically.This allows condensation to flow back
into the water tank.
Water spills out of the filling
opening when the cap is closed.
You have put too much water in
the water tank
Do not fill the water tank above the MAX
levelindication.
An excessive amount of water
drips out of the steamer head
when the appliance is heating up.
The water in the appliance is
dirty or has been left inside the
appliance for a long time.
Remove all water from the water tank and rinse
it with clean water, see
The suction power is weakening. Fluff has collected in the grille and
has clogged up the openings.
Regularly clean the grille to prevent fluff from
clogging up the grille openings.
The suction function does not
work.
You are not pressing the suction
button continuously.
To use the suction function, press the suction
button continuously
When I use the suction
function,the suction is not strong.
You are making fast strokes. Make slow downward strokes when you use the
suction function.
20
Masalah Penyebab Solusi
ID Alat tidak memanas. Ada masalah sambungan Periksa steker listrik dan stopkontak dinding.
Anda belum menyalakan alat. Tekan tombol on/off untuk menghidupkan alat.
Alat tidak menghasilkan
uap.
Penyembur uap tidak cukup panas. Biarkan alat memanas selama kurang lebih 2
menit.
Uap mengembun dalam selang. Angkatlah kepala penyembur uap untuk melurus-
kan selang secara vertikal. Ini berfungsi mengalir-
kan kondensasi kembali ke tangki air.
Batas air berada di bawah tanda
batas MIN.
Isilah tangki air hingga tanda batas MAX.
Anda meletakkan penyembur uap
di atas meja atau di kursi, bukan di
atas lantai.
Letakkan penyembur uap di atas lantai.
Keluaran uap tidak
beraturan.
Uap mengembun dalam selang
atau dalam kepala penyembur
uap.
Angkatlah kepala penyembur uap untuk melurus-
kan selang secara vertikal. Ini berfungsi mengalir-
kan kondensasi kembali ke tangki air.
Anda meletakkan penyembur uap
di atas meja atau di kursi, bukan di
atas lantai.
Letakkan penyembur uap di atas lantai.
Air menetes dari kepala
penyembur uap.
Uap mengembun dalam selang. Angkatlah kepala penyembur uap untuk melurus-
kan selang secara vertikal. Ini berfungsi mengalir-
kan kondensasi kembali ke tangki air.
Anda meletakkan kepala penyem-
bur uap dan/atau selang pasokan
uap pada posisi horizontal dalam
waktu lama.
Angkatlah kepala penyembur uap untuk melurus-
kan selang secara vertikal. Ini berfungsi mengalir-
kan kondensasi kembali ke tangki air.
Anda meletakkan penyembur uap
di atas meja atau di kursi, bukan di
atas lantai.
Letakkan penyembur uap di atas lantai.
Alat mengeluarkan
bunyi menguak.
Bila selang membentuk huruf U,
kondensasi yang ada dalam selang
tidak dapat mengalir kembali ke
dalam tangki air.
Angkatlah kepala penyembur uap untuk melurus-
kan selang secara vertikal. Ini berfungsi mengalir-
kan kondensasi kembali ke tangki air.
Anda meletakkan kepala penyem-
bur uap dan/atau selang pasokan
uap pada posisi horizontal dalam
waktu lama.
Angkatlah kepala penyembur uap untuk melu-
ruskan selang secara vertikal. Ini berfungsi untuk
mengalirkan kondensasi kembali ke tangki air.
Air menciprat dari
lubang pengisian saat
tutupnya ditutup
Anda terlalu banyak mengisikan
air ke dalam tangki
Jangan mengisi tangki air di atas tanda batas MAX.
Terlalu banyak air mene-
tes keluar dari kepala
penyembur uap saat alat
sedang memanas.
Air di dalam alat kotor atau ter-
lalu lama berada di dalam alat.
Buang semua air dari tangki air dan bilas dengan
air bersih, lihat
Daya isap melemah. Gumpalan serat kain mengumpul
di kisi-kisi dan menyumbat lubang.
Bersihkan secara teratur kisi-kisi untuk mencegah
gumpalan serat menyumbat lubang kisi-kisi.
Fungsi isap tidak bekerja. Anda tidak terus menekan
tombol isap.
Untuk menggunakan fungsi isap, tekan terus
tombol isap
Saat saya menggunakan
fungsi isap,daya isap
tidak cukup kuat.
Anda melakukan gerakan yang
cepat.
Perlambat gerakan saat Anda menggunakan
fungsi isap.

This manual suits for next models

1

Other Philips Steam Cleaner manuals

Philips FC7012 Operating manual

Philips

Philips FC7012 Operating manual

Philips ClearTouch GC536 User manual

Philips

Philips ClearTouch GC536 User manual

Philips GC576 User manual

Philips

Philips GC576 User manual

Philips GC558 User manual

Philips

Philips GC558 User manual

Philips GC361 User manual

Philips

Philips GC361 User manual

Philips FC7020/81 User manual

Philips

Philips FC7020/81 User manual

Philips ProTouch GC617 User manual

Philips

Philips ProTouch GC617 User manual

Philips ComfortTouch GC552 User manual

Philips

Philips ComfortTouch GC552 User manual

Philips PerfectCare 8000 Series User manual

Philips

Philips PerfectCare 8000 Series User manual

Philips GC514 User manual

Philips

Philips GC514 User manual

Philips Steam&Go GC320 Series User manual

Philips

Philips Steam&Go GC320 Series User manual

Philips GC8723/20 User manual

Philips

Philips GC8723/20 User manual

Philips Pro Touch GC670 User manual

Philips

Philips Pro Touch GC670 User manual

Philips PerfectCare Pure GC7610/20 User manual

Philips

Philips PerfectCare Pure GC7610/20 User manual

Philips Steam&Go GC351/26 User manual

Philips

Philips Steam&Go GC351/26 User manual

Philips GC551 User manual

Philips

Philips GC551 User manual

Philips Steam&Go GC320 Series User manual

Philips

Philips Steam&Go GC320 Series User manual

Philips DailyTouch GC506 User manual

Philips

Philips DailyTouch GC506 User manual

Philips 8000 Series User manual

Philips

Philips 8000 Series User manual
Philips DailyTouch GC503 User manual

Philips

Philips DailyTouch GC503 User manual

Philips GC299 User manual

Philips

Philips GC299 User manual

Philips CompactTouch GC400 Series User manual

Philips

Philips CompactTouch GC400 Series User manual
Philips FC7020/01 User manual

Philips

Philips FC7020/01 User manual

Philips GC482 User manual

Philips

Philips GC482 User manual

Popular Steam Cleaner manuals by other brands

Morphy Richards 70495 user manual

Morphy Richards

Morphy Richards 70495 user manual

Shark S3101NZ owner's manual

Shark

Shark S3101NZ owner's manual

VAPamore Primo MR-100 Instruction book and users guide

VAPamore

VAPamore Primo MR-100 Instruction book and users guide

Va-Tran MPS-I-302 instructions

Va-Tran

Va-Tran MPS-I-302 instructions

Iwata HP-C manual

Iwata

Iwata HP-C manual

Hoover FH50047 owner's manual

Hoover

Hoover FH50047 owner's manual

Ariens 921056 Operator's manual

Ariens

Ariens 921056 Operator's manual

White and Brown DB 717 “MAGELLAN” user manual

White and Brown

White and Brown DB 717 “MAGELLAN” user manual

Bissell Swiffer™ BISSELL® STEAMBOOST™ Steam Mop... Warranty

Bissell

Bissell Swiffer™ BISSELL® STEAMBOOST™ Steam Mop... Warranty

Shark S3251SL owner's manual

Shark

Shark S3251SL owner's manual

Shark S3550 N owner's guide

Shark

Shark S3550 N owner's guide

MOSCHE WHL-603 user guide

MOSCHE

MOSCHE WHL-603 user guide

Scarlett SC-GS130S03 instruction manual

Scarlett

Scarlett SC-GS130S03 instruction manual

YATO YT-85803 Original instructions

YATO

YATO YT-85803 Original instructions

ARIETE X Vapor Deluxe 4146 manual

ARIETE

ARIETE X Vapor Deluxe 4146 manual

Lavor Skyvap instructions

Lavor

Lavor Skyvap instructions

Smartek ST-80N operating instructions

Smartek

Smartek ST-80N operating instructions

Rowenta GS6010 Instructions for use

Rowenta

Rowenta GS6010 Instructions for use

manuals.online logo
manuals.online logoBrands
  • About & Mission
  • Contact us
  • Privacy Policy
  • Terms and Conditions

Copyright 2025 Manuals.Online. All Rights Reserved.