manuals.online logo
Brands
  1. Home
  2. •
  3. Brands
  4. •
  5. Phoenix
  6. •
  7. Safe
  8. •
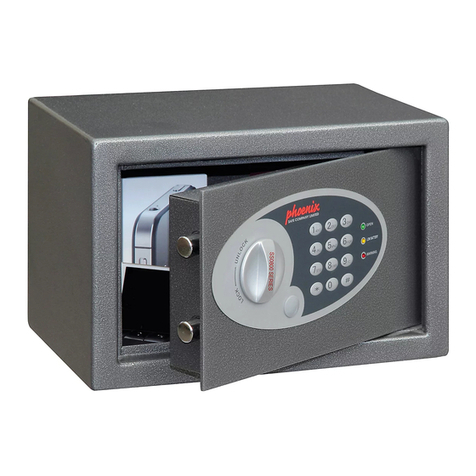
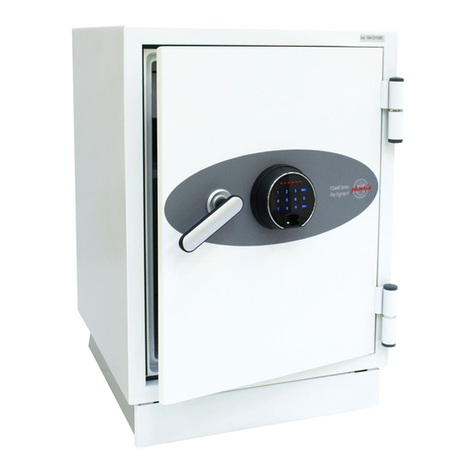
  9. Phoenix FS1920E Product information sheet

Phoenix FS1920E Product information sheet

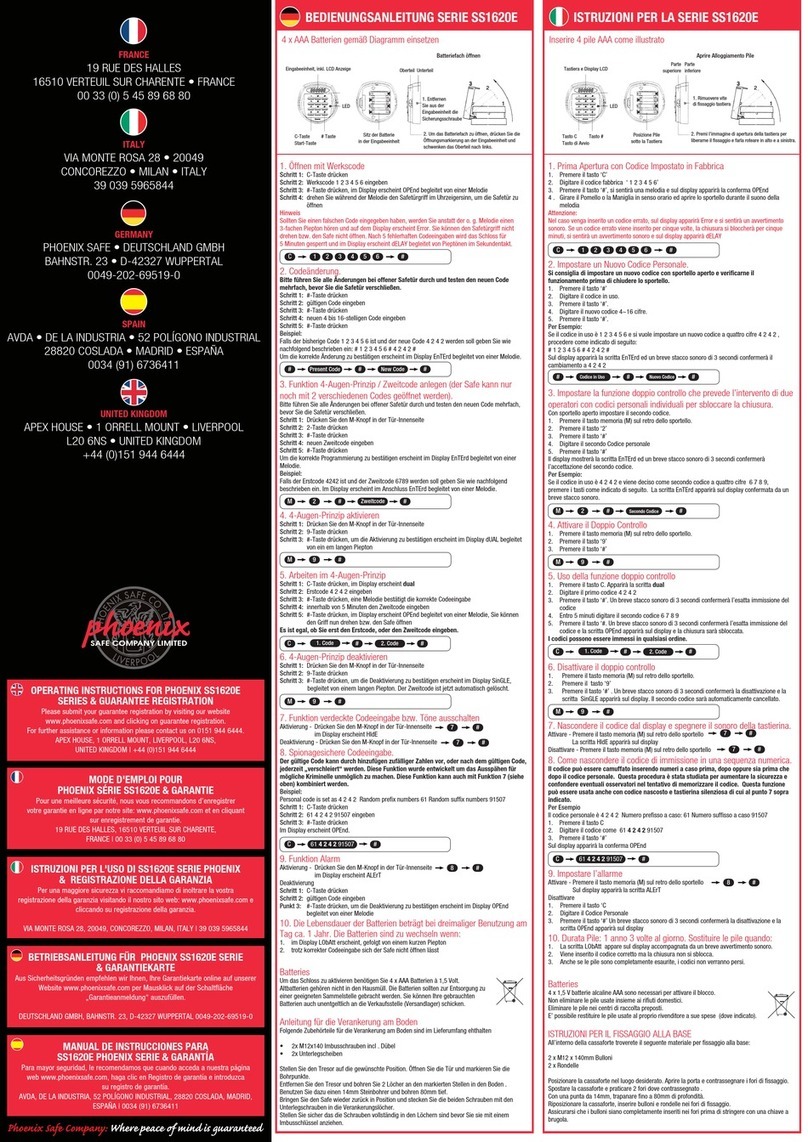
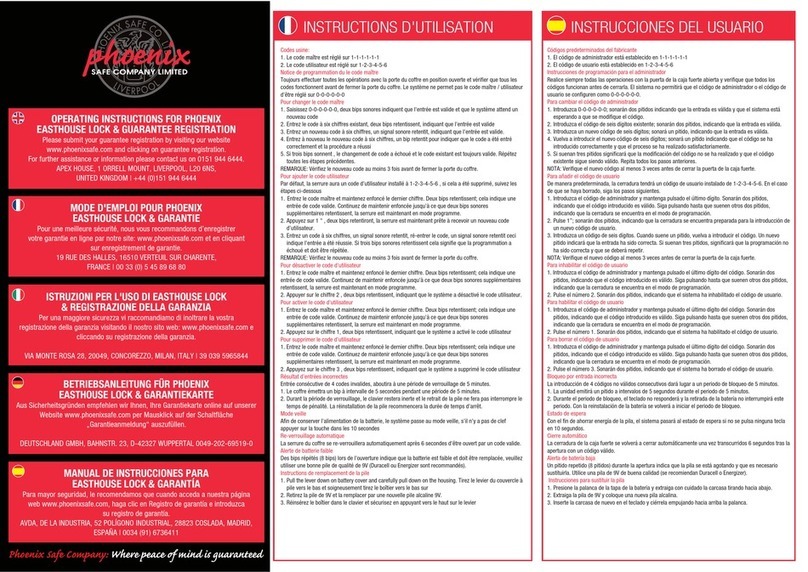
Ph Sf Cpny r eac n s gurte
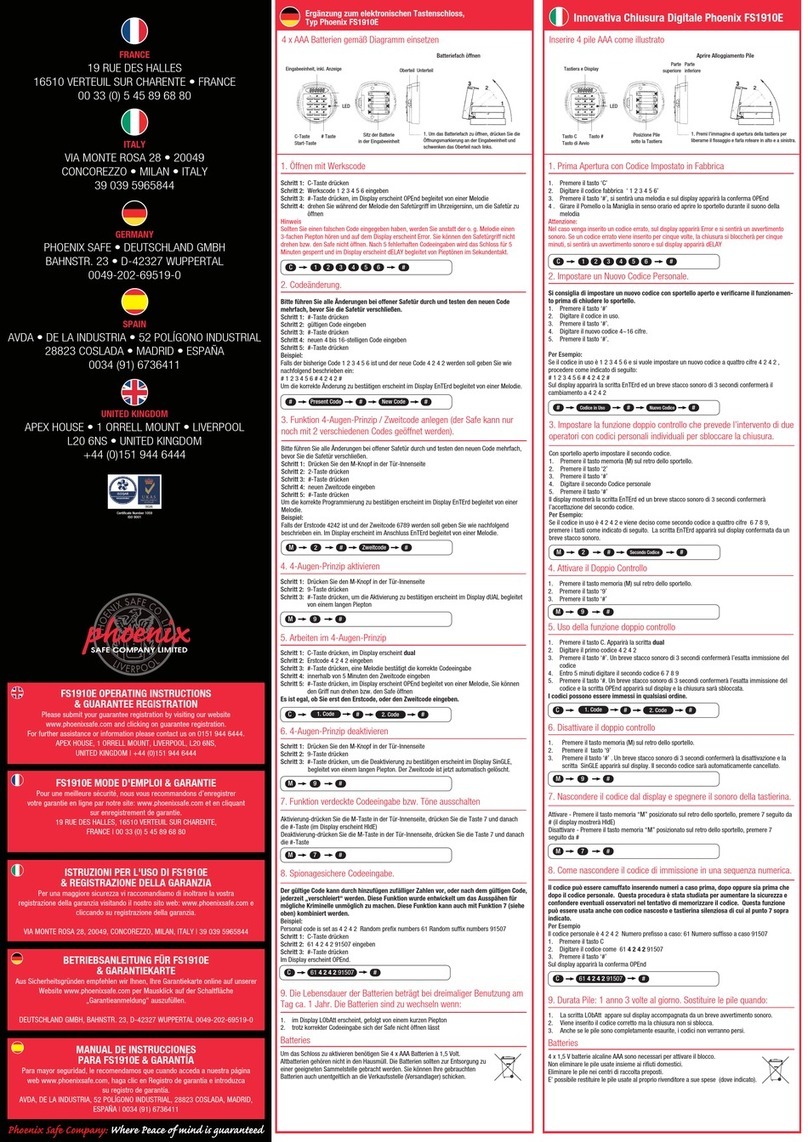
1. OPENING THE LOCK
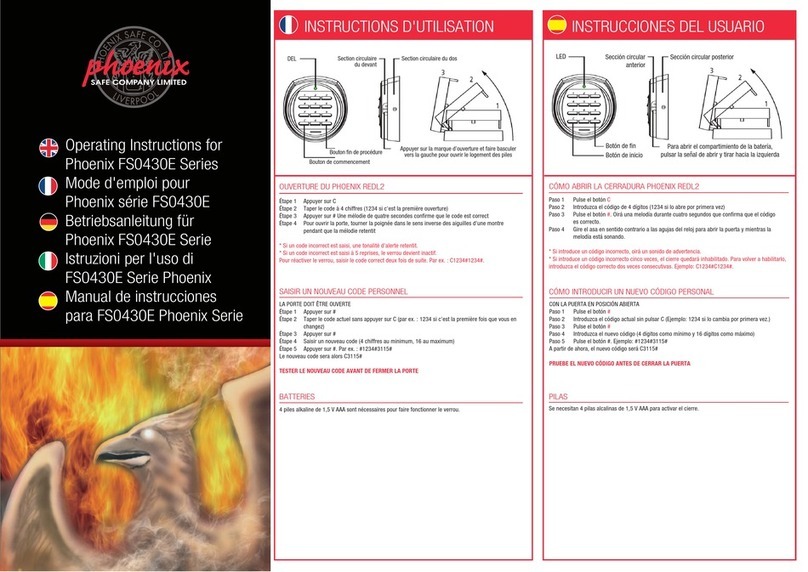
1.1. Press«ON» – single acoustic signal and green LED;
1.2. Enter master or user code, consisting of 6...8 symbols (master code
set up in the factory, 1-2-3-4-5-6, the user code is not activated);
1.3. Press«ENTER». After the green LED is activated the lock is ready to
open during 5 seconds.
2. PROGRAMMING
2.1 Master-code programming:
• Press «ON»;
• Press «ENTER»;
• Press «1»;
• Press «ENTER»;
• Enter valid master-code and press «ENTER»;
• Enter new master-code (6 symbols minimum, 8 symbols maximum)
and press«ENTER»;
• Enter new master-code again and press «ENTER».
A correct input of the valid or new master-code followed by a double
acoustic signal and green LED. An incorrect input of the actual or new
master-code followed by a single long beep and red L.E.D..
2.2 User-code programming (using master-code)
• Press «ON»;
• Press «ENTER»;
• Press «2»;
• Press «ENTER»;
• Enter valid master-code and press«ENTER»;
• Enter user-code (6 digits minimum and 8 digits maximum) and
press«ENTER»;
• Enter user-code again and press «ENTER».
2.3 User-code programming (without using master-code)
• Press «ON»;
• Press «ENTER»;
• Press «3»;
• Press «ENTER»;
• Enter valid user-code and press«ENTER»;
• Enter new user-code (6 minimum, 8 maximum) and press «ENTER»;
• Enter new user code again and press «ENTER».
2.4 Deleting the user-code
• Press «ON»;
• Press «ENTER»;
• Press «0»;
• Press «ENTER»;
• Enter valid master-code and press«ENTER»;
The user code is deleted, only the master-code is valid.
2.5 Dual code programming (master code and user code must al-
ready be programmed to enable this function)
• Press «ON»;
• Press «ENTER»;
• Press «7»;
• Press «ENTER» (If only master code is active, there will be a short
acoustic signal and red LED will be turn on. The lock will then turn o󰀨,
and the red LED will no longer be visible).
• Enter valid master code and press «ENTER»;
2.6 Opening the lock using dual code function:
• Press «ON»;
• Enter valid master code;
• Press «ENTER»;
2.6.1 There will be a short acoustic signal accompanied by green LED.
2.6.2 During the next 60 seconds with intervals of 5 seconds there will be
short acoustic signals accompanied by green LED. During this time a valid
user code must be entered, followed by «ENTER».
2.6.3 If the user code is entered correctly, the lock will open, accompanied
by a short acoustic signal and green LED.
2.6.4 If the user code is not entered or is entered incorrectly during the
60 seconds, there will be a long acoustic signal accompanied by red
LED. The lock then powers down and the opening procedure has to be
repeated from the beginning.
2.6.5 If the master code is entered incorrectly, there will be a long acoustic
signal accompanied by red LED. The lock then powers down.
2.7 Turning o󰀨 Dual Code:
• Press «ON»;
• Press «ENTER»;
• Press «8»;
• Press «ENTER»;
• Enter valid master code and press «ENTER»
2.8 Programming of Time delay and Opening time window.
The time delay (TD) function refers to the period of time which must
elapse before the lock can be opened. The opening time window (OTW) is
the period during which the lock may be opened after the TD has elapsed.
Any valid code can be provided with a TD or OTW function.
• Press «ENTER»;
• Press «6»;
• Press «ENTER»;
• Enter valid user code or master-code and press «ENTER»;
• Enter a 2-digit number that will stand for the TD (01 -99 minutes) and a
number for the OTW (1-9 minutes). For example: 092 – 9 minutes for
TD, and 2 minutes – for the OTW.
Opening with the help of the programmed TD and OTW.
• Press «*»;
• Input valid user-code or master-code: green visual signal
• Automatic start of TD: red visual and acoustic signals every 5 seconds
• After end of TD – acoustic signal
• Automatic start of OTW: green visual and acoustic signal every 5
seconds
• Enter valid code once again during OTW: green visual signal
• By pressing «ENTER» during TD period this function is interrupted. The
entire sequence must then be repeated in order to open again.
Cancellation of programmed TD/OTW
• Press «ON» ;
• Press «ENTER» ;
• Press «6» ;
• Press «ENTER» ;
• Input valid user or master code and press «ENTER»;
• Input 0-0-0 for cancelation of TD and OTW.
2.9 Sound O󰀨/ On
• Push «ON» button ;
• Push «ENTER» button ;
• Push «5» button ;
• Push «ENTER» button ;
• Input the actual master-code and push «ENTER» button; Acoustic and
light signals are the same as when programming the master-code.
3. INSUFFICIENT POWER SUPPLY
Low voltage is shown by the red LED and quintuple acoustic signal. There
is still su󰀩cient energy for opening. Any change of code is not possible
whilst a low battery indication is displaying.
4. ERROR DIAGNOSES WHEN CHANGING THE ACTUAL
MASTER CODE.
This is the service function and it is indispensable for authenticity of the
master-code input.
• Push «ON» button;
• Push «ENTER» button;
• Push «4» button;
• Push «ENTER» button;
• Input the service-code «160400» and push «ENTER» button;
• If the lock has ever been opened with the help of the actual master-
code, after pushing «ENTER» button-quintuple buzz will follow and the
green L.E.D./ will blink 5 times.
V1 FEB 2019
FS1920E OPERATING INSTRUCTION
& GUARANTEE REGISTRATION
Ph Sf Cpny r eac n s gurte
5. BATTERIES
1 x 9V Alkaline Battery is required to activate the lock.
Used batteries should not be disposed of with normal
domestic waste. These should be disposed of at approved
collection points. You may also return used batteries to your
retailer at their expense (where applicable).
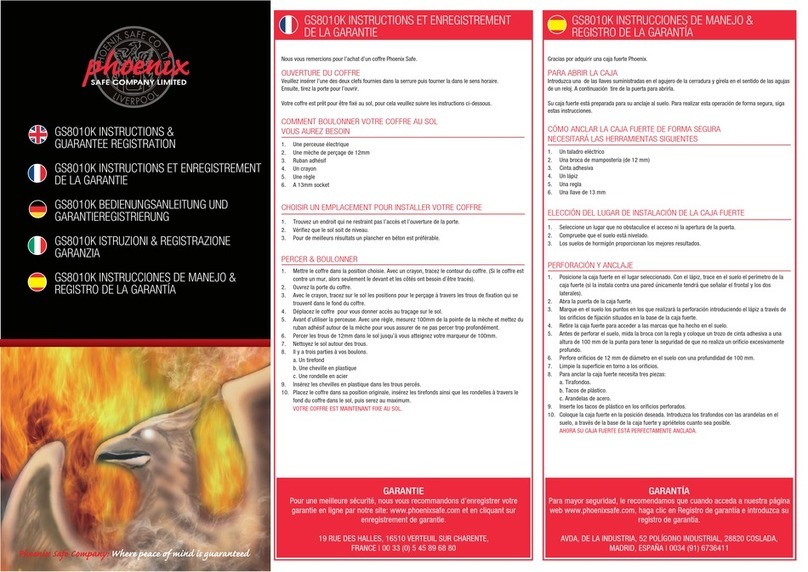
BASE FIXING FOR THE FS1920 SERIES
Thank you for purchasing a Phoenix Safe. Your safe is ready prepared for
base xing / rear xing (dependent on the model purchased), with xing
bolts for concrete supplied.
To x your safe, follow the instructions to the below, using the dimensions
in the table.
DIMENSION OF
THE ANCHOR
BOLT
LENGTH OF
THE ANCHOR
BOLT (L), MM
DIAMETER
OF THE DRILL
BIT (D), MM
DEPTH TO
DRILL (M), MM
MINIMUM
DEPTH TO
INSERT THE
BOLT (H), MM
M12/180mm 180 12 150 81
1. OUVRIR LE COFFRE
1.1. Appuyez sur “ON” - simple signal sonore et voyant vert
1.2. Entrez code maître ou code utilisateur de 6...8 symboles ( code usine
installée1.2.3.4.5.6, le code utilisateur n’est pas activé);
1.3. Appuyez “ ENTER”. Une fois le voyant LED vert activé , la serrure
peut être ouverte pendant 5
secondes.
2. PROGRAMMATION
2.1 Programmation du code maître:
• Appuyez “ON”
• Appuyez “ENTER”
• Appuyez “1”
• Appuyez “ENTER”
• Entrez le code maître actuel et appuyez sur “ENTER”
• Entrez un nouveau code maître ( 6 chi󰀨res minimum , 8 chi󰀨res
maximum) et appuyez “ENTER”;
• Entrez encore une fois le nouveau code maître et appuyez sur
“ENTER”.
Signaux visuel et sonore sont les mêmes que lors de l’ouverture. La pro-
grammation du nouveau ou valide code maître - Double signaux sonores
et voyant vert. Programmation incorrecte du nouveau code ou valide
code maître - ( moins de 6 chi󰀨res ou incorrect entrée lors de la 2ème
répétition) - simple long bip et LED rouge . Aprés une entrée incorrecte -
répétez la programmation en appuyant sur “ENTER”
2.2 Programmation d’un code utilisateur ( utilisant le code maître)
• Appuyez “ON”
• Appuyez “ ENTER”
• Appuyez “ 2”
• Appuyez “ENTER”
• Entrez le code maître valide et appuez sur “ENTER”
• Entrez un code utilisateur ( 6 chi󰀨res minimum , 8 chi󰀨res maximum) et
appuyez “ENTER”
• Entrez le code utilisateur une fois de plus puis appuyez “ENTER”
2.3 Programmation du code utilisateur ( sans le code maître)
• Appuyez “ON”
• Appuyez “ ENTER”
• Appuez “3”
• Appuyez “ENTER”
• Entrez code utilisateur valide et appuyez “ENTER”
• Entrez un nouveau code utilisateur ( 6 chi󰀨res minimum , 8 chi󰀨res
maximum) puis appuyez sur “ENTER”;
• Entrez encore une fois le nouveau code utilisateur et appuyez
“ENTER”.
2.4 Annulation du code utilisateur
• Appuyez “ON”
• Appuyez “ENTER”
• Appuyez “ 0”
• Appuyez “ENTER”
• Entrez le code maître valide et appuyez sur “ ENTER”
Le code utilisateur est annulé, seulement le code maître est valide.
2.5 Programmation double code ( code maitre et code utilisateur
doivent être déjà installés pour permettre cette fonction)
• Appuyez “ON”
• Appuyez “ENTER”
• Appuyez “7”
• Appuyez “ENTER” ( seulement si le code maître est activé, il y aura un
court signal sonore et LED rouge. La serrure se fermera, et le voyant
rouge ne se verra plus)
• Entrez le code maître valide et appuyez “ ENTER”
2.6 Ouverture utilisant la double fonction
• Appuyez “ ON”
• Entrez le code maître valide
• Appuyez ‘ENTER”
2.6.1 Si le code maître est entré correctement, puis après la période du
time delay ( si cette fonction est programmée) ou immédiatement ( si
la fonction Time delay n’est pas programmée) il y aura un court signal
sonore suivi du voyant vert.
7 8 9
0
RST UVW XYZ
EnterOn
5 6
7 8 9
0
JK LMN OPQ
RST UVW XYZ
Enter
4
On
2 31
ABC DEF GHI
FRENCH
Drill the hole according to the dimensions (C&D)
Insert the anchor bolt through the base of the safe
and tap down using with the help of a hammer.
Screw the anchor bolt until it will tighten no further.
Clean the hole with a brush to remove debris.
FS1920E OPERATING INSTRUCTION
& GUARANTEE REGISTRATION
Ph Sf Cpny r eac n s gurte
2.6.2 Pendant les prochaines 60 sencondes avec 5 secondes d’interval il
y aura un court signal acoustic puis un voyant vert. Pendant cette période
un code utilsateur correct doit être entré, puis appuyez sur “ENTER”.
2.6.3 Si le code utilisateur est entré correctement , la serrure s’ouvrira,
suivi d’un court signal sonore et voyant vers.
2.6.4 Si le code utilisateur n’est pas entré ou entré incorrectement pen-
dant 60 secondes, il y aura un long signal sonore suivi du voyant rouge.
La serrure se fermera ainsi que le voyant rouge, et la procédure doit être
recommencée depuis le début.
2.6.5 Si le code maître est entré incorrectement, il y aura un long signal
sonore suivi d’un voyant rouge. La serrure se fermera ainsi que le voyant
rouge.
2.7 Désactiver la fonction double code
• Appuyez “ON”
• Appuyez “ENTER”
• Appuyez “8”
• Appuyez “ENTER”
• Entrez le code maître valide et appuyez sur “ENTER”
2.8 Programmation de la fonction Time Delay
Le Time Delay (TD) est la période après avoir saisie le code valide jusqu’à
l’ouverture e󰀨ective de la serrure. Le Opening Time Window ( OTW) est
la période d’ouverture après l’expiration de la période de temporisation ,
au cours de laquelle il est possible d’ouvrir la serrure en entrant le code
valide une fois de plus.
• Appuyez “ENTER”
• Appuyez “6”
• Appuez “ENTER”
• Entrez un code utilisateur ou code maître valide et appuyez sur “
ENTER”
• Entrez un nombre à deux chi󰀨res qui sera pour le TD ( 1-99 minutes) et
un nombre pour le
• OTW ( 1-9 minutes). Par exemple: 092 - 9 minutes pour TD,
et 2 minutes pour OTW.
Ouverture à l’aide du programme TD et OTW
• Appuyez “*”
• Entrez code utilisateur ou code maitre valide: voyant vert
• Commencement automatique du TD: voyant rouge et signal sonore
toutes les 5 secondes.
• Entrez le code valide encore une fois pendant le OTW: voyant vert
• Si le code est correct, la fonction fonctionne comme indiquée dans
3.1.1 ou 3.1.2
En appuyant sur “ ENTER” pendant la période de TD cette fonction est
interrompue. La séquence entière doit être recommencée and’ouvrir.
Annulation du programme TD/OTW
• Appuyez “ON”
• Appuyez “ ENTER”
• Appuyez “6”
• Appuez “ENTER”
• Entrez code utilisateur ou code maître valide puis appuyez “ENTER”
• Enrtrez 0-0-0 pour l’annulation du TD et OTW
2.9 Son On/O󰀨
• Appuyez “ON”
• Appuyez “ENTER”
• Appuyez “5”
• Appuyez “ENTER”
• Entrez le code maître actuel puis appuyez “ENTER”;
Les signaux sonores et visuels sont les mêmes que lors de la programma-
tion du code maître.
3. PUISSANCE INSUFFISANTE
L’alimentation d’une pile faible sera montrée par le voyant rouge et 5
signaux sonores. Il y a néanmoins su󰀩sament d’energie pour ouverture.
Il est interdit d’appuyez sur le bouton “ENTER” pour changer les codes.
Cela est indiqué par un seul long bip et voyant rouge.
4. SERVICE LORS DU CHANGEMENT DU CODE MAÎTRE
ACTUEL
Ceci est la fonction de service et elle est indispensable pour l’authenticité
de l’entrée du code maître.
• Appuyez “ON”
• Appuyez “ ENTER”
• Appuyez “4”
• Appuyez “ENTER”
• Entrez le code de service “ 160400” et appuyez sur le bouton “ENTER”
Si la serrure a déjà été ouverte à l’aide du code maître actuel, aprés avoir
appuyez sur “ ENTER”, 5 sons bourdonnant suivront et le voyant vert LED
clignotera 5 fois.
5. BATTERIES
1 x 9V Alkaline Battery is required to activate the lock.
Used batteries should not be disposed of with normal
domestic waste. These should be disposed of at approved
collection points. You may also return used batteries to your
retailer at their expense (where applicable).
FIXATION AU SOL DE LA SÉRIE FS1920
Merci d’avoir acheté un co󰀨re-fort Phoenix. Votre co󰀨re-fort est prêt pour
une xation au sol/ xation arrière (selon le modèle acheté), avec boulon-
nerie pour sol / mur en béton fournis.
Pour xer votre co󰀨re-fort, suivez les instructions ci-dessous, en utilisant
les dimensions dans le tableau.
DIMENSION
DU BOULON
D’ANCRAGE
LONGUEUR
DU BOULON
D’ANCRAGE
(L), MM
DIAMÈTRE
DE LA
MECHE (D),
MM
PROFONDEUR
A PERCER (M),
MM
PROFONDEUR
MINIMUM POUR
INSÉRER LE
BOULON (H), MM
M12/180mm 180 12 150 81
7 8 9
0
RST UVW XYZ
EnterOn
5 6
7 8 9
0
JK LMN OPQ
RST UVW XYZ
Enter
4
On
2 31
ABC DEF GHI
Percer le trou selon les dimensions (C & D)
Insérez le boulon d’ancrage dans la base du co󰀨re-fort et appuyez
à l’aide d’un marteau.
Vissez le boulon d’ancrage jusqu’à ce qu’il ne tourne plus.
Nettoyez le trou avec une brosse pour enlever les débris.
FS1920E OPERATING INSTRUCTION
& GUARANTEE REGISTRATION
Ph Sf Cpny r eac n s gurte
1. ÖFFNEN DES TRESOR
1.1. Ö󰀨nen mit einem Benutzer- oder Mastercode
• Drücken Sie die Taste „ON“ – Es ertönt ein akustischen Signal und
grünen LED blinkt auf;
• Geben Sie einen gültigen Master- oder Benutzercode (bei Auslieferung
der Mastercode ist
• 1-2-3-4-5-6, der Benutzercode ist nicht aktiviert) ein. Der Code kann
aus 6...8 Zi󰀨ern bestehen;
• Drücken Sie die Taste „ENTER“. Nach korrekter Codeeingabe ertönt
ein Doppelsignal und die grüne LED leuchtet. Drehen Sie nun den
Drehgri󰀨 (links von der Tastatur) binnen fünf (5)
Sekunden nach rechts um den Tresor zu ö󰀨nen.
1.2 Vieraugen-Idenkation (diese Funktion ist gueltig, nur wenn der
Benutzer- und Mastercode aktiviert sind).
1.2.1 Vieraugen-Idenkation einstellen
• Drücken Sie die Taste „ON“;
• Drücken Sie die Taste „ENTER“;
• Drücken Sie die Taste „7“;
• Drücken Sie die Taste „ENTER“ (falls der Benutzercode nicht aktiviert
ist, ertönt ein Signal und die rote LED leuchtet);
• Geben Sie einen gültigen Mastercode ein und drücken die Taste
„ENTER“.
1.2.2 Ö󰀨nen des Tresor mit Vieraugen-Idenkation
• Drücken Sie die Taste „ON“;
• Geben Sie einen gültigen Mastercode ein und drücken die Taste
„ENTER“;
• Während 60 Sekunden geben Sie einen gültigen Mastercode ein und
drücken die Taste „ENTER“.
1.2.3 Vieraugen-Idenkation löschen
• Drücken Sie die Taste „ON“;
• Drücken Sie die Taste „ENTER“;
• Drücken Sie die Taste „8“;
• Drücken Sie die Taste „ENTER“;
• Geben Sie einen gültigen Mastercode ein und drücken die Taste
„ENTER“.
Falls der Master- oder Benutzercode ungültig ist, oder der Benutzercode
nicht aktiviert war, ertönt ein Signal und die rote LED leuchtet, und das
Schloss löscht.
Falls ein ungültiger Master- oder Benutzercode 3 mal eingegeben wurde,
ertönt ein Signal und die rote LED leuchtet, und das Schloss wird für 5
Minuten blockiert.
2. PROGRAMMIERUNG
2.1. Programmierung eines neuen Mastercode:
• Drücken Sie die Taste „ON“;
• Drücken Sie die Taste „ENTER“;
• Drücken Sie die Taste „1“;
• Drücken Sie die Taste „ENTER“;
• Geben Sie einen gültigen Mastercode ein und drücken die Taste
„ENTER“;
• Geben Sie einen neuen Mastercode ein (6 Symbole Minimum,
8 Symbole Maximum) und drücken die Taste „ENTER“;
• Geben Sie den neuen Mastercode noch mal ein und drücken die Taste
„ENTER“.
2.2. Aktivieren des Benutzercodes
• Drücken Sie die Taste „ON“;
• Drücken Sie die Taste „ENTER“;
• Drücken Sie die Taste „2“;
• Drücken Sie die Taste „ENTER“;
• Geben Sie einen gültigen Mastercode ein und drücken die Taste
„ENTER“;
• Geben Sie einen neuen Benutzercode ein (6 Symbole Minimum,
8 Symbole Maximum) und drücken die Taste „ENTER“;
• Geben Sie den neuen Benutzercode noch mal ein und drücken die
Taste „ENTER“.
2.3. Ändern des Benutzercodes
• Drücken Sie die Taste „ON“;
• Drücken Sie die Taste „ENTER“;
• Drücken Sie die Taste „3“;
• Drücken Sie die Taste „ENTER“;
• Geben Sie einen gültigen Benutzercode ein und drücken die Taste
„ENTER“;
• Geben Sie einen neuen Benutzercode ein (6 Symbole Minimum,
8 Symbole Maximum) und drücken die Taste „ENTER“;
• Geben Sie den neuen Benutzercode noch mal ein und drücken die
Taste „ENTER“.
2.4. Löschen des Benutzercodes
• Drücken Sie die Taste „ON“;
• Drücken Sie die Taste „ENTER“;
• Drücken Sie die Taste „0“;
• Drücken Sie die Taste „ENTER“;
• Geben Sie einen gültigen Benutzercode ein und drücken die Taste
„ENTER“;
Der Benutzercode ist gelöscht, nur der Mastercode ist gültig.
2.5 Time Delay Funktion
Die Time Delay (TD) Funktion ist eine Zeitperiode, nachdem es unmöglich
ist, das Schloss zu ö󰀨nen.
Das Ö󰀨nungsfenster (ÖF) ist eine Zeitperiode nach der Time Delay, wenn
es möglich ist, das Schloss zu ö󰀨nen. Jeder gültige Code kann mit der
Time Delay- oder Ö󰀨nungsfensterfunktion sein.
• Drücken Sie die Taste „ON“;
• Drücken Sie die Taste „ENTER“;
• Drücken Sie die Taste „6“;
• Drücken Sie die Taste „ENTER“;
• Geben Sie einen gültigen Mastercode ein und drücken die Taste
„ENTER“;
• Geben Sie eine zweistellige Nummer, die die gültige TD (01-99
Minuten) und auch eine Zi󰀨er für das ÖF (1-9 Minuten).
Zum Beispiel: Sie geben „092“ ein – es bedeutet: 9 Minuten für TD, und 2
Minuten für ÖF.
Ö󰀨nen des Tresor mit Time Delay und Ö󰀨nungsfenster
• Drücken Sie die Taste „ON“;
• Geben Sie einen gültigen Master- oder Benutzercode ein und drücken
die Taste „ENTER“: die grüne LED leuchtet
• Automatischer Start von TD: ein Signal ertönt und die rote LED leuchtet
jede 5 Sekunden
• Ende von TD – ein Signal ertönt
• Automatischer Start von ÖF: ein Signal ertönt und die grüne LED
leuchtet jede 5 Sekunden
• Geben Sie einen gültigen Master- oder Benutzercode während der
ÖF-Zeitperiode ein und drücken die Taste „ENTER“: die grüne LED
leuchtet.
Wenn Sie die Taste „ENTER“ innerhalb TD drücken, bricht diese Funktion
ab. Dann muessen Sie die ganze Reihenfolge wiedermachen.
Löschen von Time Delay/Ö󰀨nungsfenster
• Drücken Sie die Taste „ON“;
• Drücken Sie die Taste „ENTER“;
• Drücken Sie die Taste „6“;
• Drücken Sie die Taste „ENTER“;
• Geben Sie einen gültigen Mastercode ein und drücken die Taste
„ENTER“;
• Geben Sie „0-0-0” ein.
2.6 Stummschaltung
• Drücken Sie die Taste „ON“;
• Drücken Sie die Taste „ENTER“;
• Drücken Sie die Taste „5“;
• Drücken Sie die Taste „ENTER“;
• Geben Sie einen gültigen Mastercode ein und drücken die Taste
„ENTER“;
Akustische und LED-Signale sind gleich, wie bei der
Mastercodeprogrammierung.
3. UNTERSPANNUNGSANZEIGE
Bei Unterspannung ertönen nach drücken der Taste „ON“ fünf (5)
akustischen Signale und die roten LED blinkt auf.
Es ist verboten, die Taste „ENTER“ zu drücken. Es ertönt mit einem
GERMAN
FS1920E OPERATING INSTRUCTION
& GUARANTEE REGISTRATION
Ph Sf Cpny r eac n s gurte
Signal, und die rote LED leuchtet.
Notbestromung / Ö󰀨nung mittels externer Batterie
Halten Sie eine 9V-Block-Batterie auf die beiden Kontakte (siehe Bild) auf
der Tastatur.
4. BATTERIEWECHSEL
Das Batteriefach bendet sich unter der Abdeckung an der
Türinnenseite. Ziehen Sie das Batteriefach aus und entnehm-
en Sie die Batterie vorsichtig aus dem Clip und stecken eine
neue Batterie ein. Stellen Sie das Batteriefach zurück.
BODENVERANKERUNG, SERIE FS1920
Vielen Dank, dass Sie sich für ein Produkt aus dem Hause Phoenix Safe
entschieden haben. Ihr Safe ist für die Boden bzw. Rückenverankerung
(abhängig von dem Modell, dass Sie erworben haben) vorbereitet. Das
Verankerungsmaterial für die Befestigung im Beton ist im Lieferumfang
enthalten.
Um den Safe zu verankern folgen Sie bitte der unten stehenden Anwei-
sung bzw. entnehmen Sie die Angaben aus der unten stehenden Tabelle.
ABMESSUNGEN
DES VERANKER
UNGSMATERIALS
LÄNGE DES
VERANKE-
RUNGSMATRIALS
(L) IN MM
BOHRERDURCH-
MESSER
(D) IN MM
BOHRTIEFE
IN MM
MINDEST
EINSTECKTIEFE
DES VERANKE
RUNGSBOLZENS
(H) IN MM
M12/180mm 180 12 150 81
1. APRIRE LA SERRATURA
1.1. Premere«ON» – singolo segnale acustico e LED verde;
1.2. Digitare codice master o utente composti da 6...8 simboli (codice
master impostato in fabbrica : 1-2-3-4-5-6, il codice utente non è attivo);
1.3. Premere«ENTER». Una volta acceso il LED verde la serratura può
essere aperta entro 5 secondi.
2. PROGRAMMAZIONE
2.1 Programmare il codice Master:
• Premere «ON»;
• Premere «ENTER»;
• Premere «1»;
• Premere «ENTER»;
• Digitare codice master valido e premere «ENTER»;
• Digitare nuovo codice master (6 simboli minimo, 8 simboli massimo) e
premere «ENTER»;
• Digitare ancora nuovo codice master e premere «ENTER».
I segnali visivi e acustici sono gli stessi dell’apertura. Corretto inserimento
di codice master valido oppure nuovo – doppio segnale acustico e LED
verde. Errato inserimento di codice master valido oppure nuovo –(meno di
6 simboli oppure oppure errata digitazione ripetuta). – singolo segnale
acustico prolungato e L.E.D rosso.. Una sequenza errata viene indicata
da un singolo beep prolungato e LED rosso. Dopo un inserimento errato –
ripetere l’inserimento, premere «ENTER».
2.2 Programmare il codice Utente (usando il codice master)
• Premere «ON»;
• Premere «ENTER»;
• Premere «2»;
• Premere «ENTER»;
• Digitare codice master valido e premere «ENTER»;
• Digitare nuovo codice utente (6 simboli minimo, 8 simboli massimo) e
premere «ENTER»;
• Digitare ancora nuovo codice utente e premere «ENTER».
2.3 Programmare il codice Utente (senza usare il codice master)
• Premere «ON»;
• Premere «ENTER»;
• Premere «3»;
• Premere «ENTER»;
• Digitare codice utente valido e premere «ENTER»;
• Digitare nuovo codice utente (6 simboli minimo, 8 simboli massimo) e
premere «ENTER»;
• Digitare ancora nuovo codice utente e premere «ENTER».
2.4 Cancellare il codice Utente
• Premere «ON»;
• Premere «ENTER»;
• Premere «0»;
• Premere «ENTER»;
• Digitare codice master valido e premere «ENTER»;
Il codice utente viene cancellato, solo il codice master è valido.
2.5 Programmazione doppio codice (codice master e codice utente
devono essere già programmati per abilitare questa funzione)
• Premere «ON»;
• Premere «ENTER»;
• Premere «7»;
• Premere «ENTER» (Se è attivo solo il codice master, si sentirà un
breve segnale acustico e il LED si accenderà. La chiusura si spegnerà
e il LED rosso non sarà più visibile).
• Digitare codice master valido e premere «ENTER»;
2.6 Aprire usando la funzione doppio codice:
• Premere «ON»;
• Digitare codice master valido
• Premere «ENTER»;
2.6.1 Se il codice master è corretto, a completamento del periodo di
temporizzazione (se questa funzione e attiva) oppure immediatamente (se
la funzione di temporizzazione non è stata programmata) vi sarà un breve
segnale acustico accompagnato da LED verde.
2.6.2 Durante i successivi 60 secondi con intervalli di 5 secondi ci saranno
brevi segnali acustici accompagnati da LED verde. Durante questo perio-
do deve essere digitato un codice utente valido seguito da «ENTER».
7 8 9
0
RST UVW XYZ
EnterOn
5 6
7 8 9
0
JK LMN OPQ
RST UVW XYZ
Enter
4
On
2 31
ABC DEF GHI
ITALIAN
Bohren Sie das Loch abhängig von den Abmessungen (C&D).
Stecken Sie die Verankerungsbolzen durch den Boden des Safes in das
gebohrte Loch und schlagen sie ihn mit Hilfe des Hammers bis ganz nach
unten.
Ziehen Sie die Befestigungsmutter ganz fest.
Reinigen Sie die Bohrung mit einer Bürste, um den Schmutz zu entfernen.
FS1920E OPERATING INSTRUCTION
& GUARANTEE REGISTRATION
Other Phoenix Safe manuals

Phoenix KS0030E Series User manual

Phoenix

Phoenix KS0030E Series User manual

Phoenix KS0030E User manual

Phoenix

Phoenix KS0030E User manual

Phoenix Dream Series User manual

Phoenix

Phoenix Dream Series User manual

Phoenix KS0030E Series User manual

Phoenix

Phoenix KS0030E Series User manual

Phoenix GS8010K Product information sheet

Phoenix

Phoenix GS8010K Product information sheet

Phoenix FS0352C Product information sheet

Phoenix

Phoenix FS0352C Product information sheet

Phoenix FS2250K Series User manual

Phoenix

Phoenix FS2250K Series User manual

Phoenix KS0030E Series User manual

Phoenix

Phoenix KS0030E Series User manual

Phoenix FS1510E Series User manual

Phoenix

Phoenix FS1510E Series User manual

Phoenix DS2500K User manual

Phoenix

Phoenix DS2500K User manual

Phoenix SS0935E Series User manual

Phoenix

Phoenix SS0935E Series User manual

Phoenix SS0935E Series User manual

Phoenix

Phoenix SS0935E Series User manual

Phoenix FS2230K Series User manual

Phoenix

Phoenix FS2230K Series User manual

Phoenix CITADEL SS1190 Product information sheet

Phoenix

Phoenix CITADEL SS1190 Product information sheet

Phoenix DS2500K Product information sheet

Phoenix

Phoenix DS2500K Product information sheet

Phoenix Diamond Deposit HS1090ED User manual

Phoenix

Phoenix Diamond Deposit HS1090ED User manual

Phoenix SS1170K User manual

Phoenix

Phoenix SS1170K User manual

Phoenix FS0440E User manual

Phoenix

Phoenix FS0440E User manual

Phoenix GS8000K Product information sheet

Phoenix

Phoenix GS8000K Product information sheet

Phoenix Elara HS3550 Product information sheet

Phoenix

Phoenix Elara HS3550 Product information sheet

Phoenix FIRECHIEF FS1650 Product information sheet

Phoenix

Phoenix FIRECHIEF FS1650 Product information sheet

Phoenix Fire Fox SS1621E User manual

Phoenix

Phoenix Fire Fox SS1621E User manual

Phoenix SS1190K Installation and user guide

Phoenix

Phoenix SS1190K Installation and user guide

Phoenix KS0030E Series User manual

Phoenix

Phoenix KS0030E Series User manual

Popular Safe manuals by other brands

Euromate 406210 Original instructions

Euromate

Euromate 406210 Original instructions

SPORTS AFIELD PRESERVE SA72-60WD instruction manual

SPORTS AFIELD

SPORTS AFIELD PRESERVE SA72-60WD instruction manual

Squire Stronghold Keysafe Fitting instructions

Squire

Squire Stronghold Keysafe Fitting instructions

Hornady SnapSafe Trunk Safe II owner's manual

Hornady

Hornady SnapSafe Trunk Safe II owner's manual

Vaultek 10 Series Quick setup

Vaultek

Vaultek 10 Series Quick setup

Arregui CLASS operating instructions

Arregui

Arregui CLASS operating instructions

Technomax Trony Series Instruction handbook

Technomax

Technomax Trony Series Instruction handbook

SPORTS AFIELD INSTINCT BIOMETRIC Series instruction manual

SPORTS AFIELD

SPORTS AFIELD INSTINCT BIOMETRIC Series instruction manual

SPORTS AFIELD SA-HD5-BIO instruction manual

SPORTS AFIELD

SPORTS AFIELD SA-HD5-BIO instruction manual

Olymp GOsafe 110 operating instructions

Olymp

Olymp GOsafe 110 operating instructions

Ankaro ANK EZ I quick start guide

Ankaro

Ankaro ANK EZ I quick start guide

Honeywell 2077D - 1.21 Cubic Foot Anti-Theft Safe user guide

Honeywell

Honeywell 2077D - 1.21 Cubic Foot Anti-Theft Safe user guide

Beaumont SMART KEYBOX user guide

Beaumont

Beaumont SMART KEYBOX user guide

Shure T-Wall Series Assembly instructions

Shure

Shure T-Wall Series Assembly instructions

Toolland BG80050 user manual

Toolland

Toolland BG80050 user manual

Arregui FORMA C Instruction manual and guarantee

Arregui

Arregui FORMA C Instruction manual and guarantee

RICHTER CZECH LA Instructions for use and installation

RICHTER CZECH

RICHTER CZECH LA Instructions for use and installation

EVERSAFE Hard Case instruction manual

EVERSAFE

EVERSAFE Hard Case instruction manual

manuals.online logo
manuals.online logoBrands
  • About & Mission
  • Contact us
  • Privacy Policy
  • Terms and Conditions

Copyright 2025 Manuals.Online. All Rights Reserved.