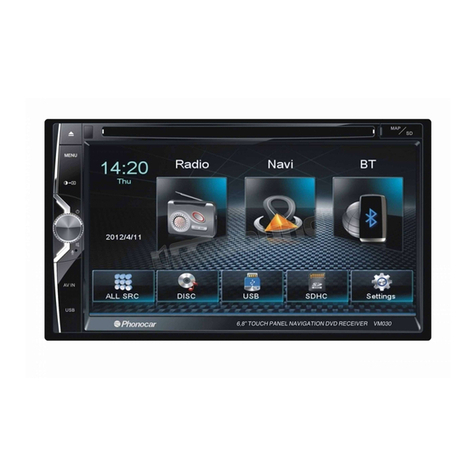
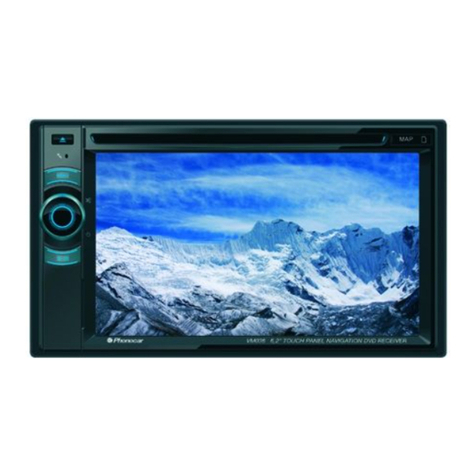
Phonocar VM 038 User manual

MANUALE ISTRUZIONI • INSTRUCTIONS MANUAL
NOTICE DE MONTAGE ET D’EMPLOI • GEBRAUCHSANWEISUNGEN
MANUAL DE INSTRUCCIONES
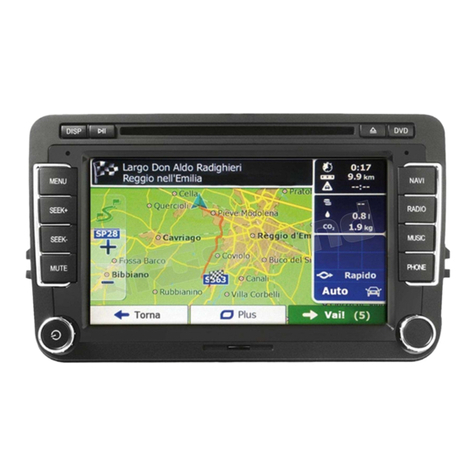
VM 038
6,2” TFT/LCD
DVD RECEIVER
ENGLISH
ITALIANO
FRANÇAIS
DEUTSCH
ESPAÑOL

2
IT/GB
CONNESSIONI • CONNECTIONS
INGRESSO A/V 2
INPUT A/V 2
INGRESSO ANTERIORE A/V
FRONT INPUT A/V AUX IN R 2
AUX IN L 2
AUX IN VIDEO 2
4 5
ANTENNA GPS
GPS AERIAL
USB
MIC
RADIO ANT
1
2
3
FUSE

3
IT/GB
CONNESSIONI • CONNECTIONS
GIALLO
YELLOW
VERDE
GREEN
CAMERA
REVERSE
P.CONT
BRAKE
KEY GND
KEY A
KEY B
+Luci di retromarcia / Lights for Reverse-gear
COLLEGAMENTI PER RETROCAMERA / CONNECTIONS FOR REAR-CAMERA
SERVIZI
FUNCTIONS
ROSA/PINK
BLU-BIANCO/BLUE-WHITE
VERDE-BIANCO/GREEN-WHITE
MARRONE-NERO/BROWN-BLACK
ARANCIONE-BIANCO/ORANGE-WHITE
MARRONE-BIANCO
BROWN-WHITE
REVERSE
P.CONT
BRAKE
KEY GND
KEY A
KEY B
Attivazione retrocamera
Remote amplificatore
Freno a mano (collegamento obbligatorio)
Massa Comandi al volante
Linea A Comandi al volante
Linea B Comandi al volante
VERDE
GREEN
1
ROSA/PINK
BLU-BIANCO/BLUE-WHITE
VERDE-BIANCO/GREEN-WHITE
MARRONE-NERO/BROWN-BLACK
ARANCIONE-BIANCO/ORANGE-WHITE
MARRONE-BIANCO
BROWN-WHITE
Rear-Camera Activation
Amplifier Remote
Hand-Brake (connection absolutely necessary)
Ground for Steering-wheel Commands
Line A Steering-wheel Commands
Line B Steering-wheel Commands

4
IT/GB
CONNESSIONI • CONNECTIONS
2
5
4
3
GRIGIO/GRAY
MARRONE
BROWN
NERO
BLACK
VERDE/GREEN
VERDE-NERO/GREEN-BLACK
BIANCO/WHITE
ROSSO/RED
BIANCO-NERO/WHITE-BLACK
NERO/BLACK
ROSA/PINK
VIOLA/PURPLE
MARRONE/BROWN
VIOLA-NERO/PURPLE-BLACK
BLU/BLUE
GRIGIO-NERO/GRAY-BLACK
GIALLO/YELLOW +12V Positivo batteria
+12V Sottochiave
Massa
IIlluminazione / Dimmer
Accensione antenna elettrica
Silenzia audio
ANTERIORE DESTRO
FRONT RIGHT
MULTIZONA DESTRO / RIGHT
MULTIZONA SINISTRO / LEFT
USCITA VIDEO POSTERIORE 1
DESTRO / RIGHT
SINISTRA / LEFT
INGRESSO VIDEO / VIDEO INPUT
USCITA SUB WOOFER / SUB-WOOFER OUTPUT
ANTERIORE DESTRO / FRONT RIGHT
ANTERIORE SINISTRA / FRONT LEFT
POSTERIORE DESTRO / REAR RIGHT
POSTERIORE SINISTRA / REAR LEFT
USCITA VIDEO POSTERIORE / REAR VIDEO OUTPUT 2
ANTERIORE SINISTRO
FRONT LEFT
POSTERIORE DESTRO
REAR RIGHT
POSTERIORE SINISTRO
REAR LEFT
INGRESSO A/V
INPUT A/V
FRONT R +
FRONT R -
FRONT L +
FRONT L -
REAR R +
REAR R -
REAR L +
REAR L -
MULTIZONE R
MULTIZONE L
REAR VIDEO OUT 1
AUX IN R
AUX IN L
AUX VIDEO
SUB WOOFER
FRONT R
FRONT L
REAR R
REAR L
REAR VIDEO OUT 2
USCITE ALTOPARLANTI
SPEAKERS OUTPUT
ALIMENTAZIONE
POWER-SUPPLY
USCITE PRE-AMP
PRE-AMP OUTPUT
BATT
ACC
GND
ILLUMI
AMP/ANT Remote
MUTE
Durante l’avviamento dell’auto il VM038 potrebbe spegnersi per poi riaccendersi. Per evitare questo inconveniente collegare lo stabilizzatore di tensione 5/146.
The VM038 could turn-out and turn-on again, when the ignition-key gets activated. You can avoid such inconvenience, by connecting the tension stabilizer 5/146.
+12V Battery-Positive
+12V Injection-Key
Ground
Illumination / Dimmer
Activation of Electric Aerial
Mute

5
IT/GB
COMANDI AL VOLANTE CONNESSIONI • STEERING-WHEEL COMMANDS CONNECTION
VERDE
GREEN
VERDE
GREEN
REVERSE
P.CONT
BRAKE
REVERSE
P.CONT
BRAKE
ROSA/PINK
ROSA/PINK
BLU-BIANCO/BLUE-WHITE
VERDE-BIANCO/GREEN-WHITE
MARRONE-NERO/BROWN-BLACK
ARANCIONE-BIANCO/ORANGE-WHITE
MARRONE-BIANCO
BROWN-WHITE
MARRONE-BIANCO / BROWN-WHITE
VERDE / GREEN
ROSA / PINK
GRIGIO / GREY
Corrispondenza colori sugli schemi
Colour-matchings per Scheme.
COMANDI AL VOLANTE CAN-BUS / CAN-BUS STEERING-WHEEL COMMANDS
Utilizzare l’interfaccia CAN BUS 4/070 o 4/073 memorizzando il profilo autoradio su VM041. Assegnare i comandi al volante secondo le istruzioni a pag. 20.
Use Interfaces CAN BUS 4/070 or 4/073 by memorizing the radio-profile VM041. Fix the various steering-wheel commands, by following the Instructions at page 20.
COMANDI AL VOLANTE CON PROTOCOLLO RESISITVO / RESISTIVE PROTOCOL STEERING-WHEEL COMMANDS
Per i collegamenti al connettore auto originale utilizzare gli schemi presenti sul manuale connessioni dell’interfaccia 4/083 o 4/085.
When connecting to the original car-connector, please refer to the connection-schemes shown in the Manual of Interface 4/083 or 4/085.
NERO/BLACK
VIOLA/PURPLE
MARRONE/BROWN
ARANCIONE-BIANCO / ORANGE-WHITE
4/070 - 4/073

6
IT/GB
FUNZIONI • FUNCTIONS
1. Espulsione disco
2. Navigazione
3. Menù principale
4. Microfono
5. Accensione - Volume - Silenziamento Audio
6. Reset
7. Protezione per USB - SD - AV
8. Porta per USB
9. Slot per SDHC Card
10. Ingresso A/V IN
11. Slot micro SD Card per navigazione
12. Feritoia disco
1. Eject disc
2. Enter navigation mode.
3. Menu.
4. Microphone
5. ON-OFF - Adjust volume - Mute
6. Reset
7. Protection for USB - SD - AV
8. USB port
8. SDHC card slot
9. AV-IN input
10. Map Micro SD Card slot
11. Disc CD/DVD slot
1
2
34
5
12
6
7
VOLUME /
RESE T
MAIN
NAVI
9
8
10
11

7
IT/GB
FUNZIONI
TELECOMANDO
• REMOTE-CONTROL FUNCTIONS
1. Menù principale
2. Espulsione disco
3. Selezione lingua DVD
Catalogo musicale
4. Informazioni sullo schermo
5. Zoom
6. Banda radio
7. Invia chiamata telefono
8. Ricerca capitolo/traccia
9. Ripetizione A-B
10. Ripete riproduzione
11. Menù impostazioni
12. Avvia/Interrompe riproduzione - Seleziona
13. Muove cursore nei menu - Ricerca manuale
14. Riproduzione lenta
15. Tastierino numerico
16. Riproduzione casuale
17. Introduzione brani
18. Stop riproduzione
19. Silenziamento audio
20. Regolazione volume
21. Impostazione immagine
22. Avanti-Indietro / Ricerca automatica stazioni
23. Chiude chiamata
24. Cancella informazioni
25. Titoli DVD
26. Menù DVD
27. Seleziona angolo di visione
Mostra catalogo video
28. Sottotitoli DVD / Mostra catalogo foto
29. Accensione/Spegnimento
30. Equalizzatore
1. Return to the home menu.
2. Eject the disc
3. Select DVD language
Music catalog
4. Display information
5. Zoom
6. Select radio band
7. Call out
8. Goto search
9. A-B Repeat
10. Repeat playback
11. Setup menu
12. Play-Pause playback / Enter
13. Move the cursor / Manual tuning
14. Slow playback
15. Numeric keys
16. Random playback
17. Intro playback
18. Stop playback
19. Mute the volume
20. Adjust volume
21. Image setting
22. Previous-Next / Auto tuning
23. Hang up
24. Clear information
25. DVD title
26. DVD menu / PBC
27. Select view angle
Show video catalog
28. Select DVD subtitle language
Show photo catalog
29. Unit power
30. Open EQ setting menu

8
IT/GB
MENÙ • MENU
All’accensione dell’autoradio compare il MENU principale.
Con le icone sullo schermo si seleziona la sorgente o la funzione desiderata.
Non disponibile
Caricamento sfondi da SD Card.
Passa dal menù principale al menù di riproduzione posteriore.
Entra nel menù impostazioni.
Entra nel menù impostazioni equalizzatore.
Menù di riproduzione posteriore, con l’icona ritorna al menù principale.
E possibile riprodurre nell’uscita audio/video posteriore una sorgente
differente da quella anteriore. La sorgente anteriore deve essere Radio o
Navigazione.
Rear Reproduction Menu. With icon , go back to Main Menu.
The reproduction-sources on rear and front Audio/Video-exits can be dif-
ferent from one another. The front source must, in any case, be a Radio or
Navigation-unit.
When you switch-on the car-radio, the Main Menu will appear.
With the icons on the screen, you can choose the Source and the requested
Functions.
Not available.
A number of screen-backgrounds for selection.
Pass from Main Menu to Rear Reproduction-Menu.
Enter the Setting-Menu.
Enter the Equalizer Setting Menu.

9
IT/GB
IMPOSTAZIONI PRINCIPALI
• FORMATOIMMAGINEModicavisualizzazione
dello schermo da wide (16:9) a normale (4:3).
• RETROCAMERA Visualizzazione
specchio/normale
• PARCHEGGIOAbilita/Disabilitavisione
video in movimento.
• DIVXEffettuatalaregistrazionepermette
l’inserimentodelcodicediabilitazioneDiVX.
MAIN SETTINGS
• PICTUREFORMAT.Changescreenfromwide
(16:9) to normal (4:3).
• REAR-CAMERA.Visualization-modemirror/normal.
• PARKING.Activate/DeactivateVideoinmovement.
• DIVX.Afterregistration,DiVX-User-Codecanbe
introduced.
IMPOSTAZIONI DI SISTEMA • SYSTEM SETUP
IMPOSTAZIONI GENERALI
• REGIONERADIOImpostaareadiappartenenza
per la ricezione radio.
• COLORAZIONETASTICambiacoloretasti.
• BEEPAttiva/Disattivailsuonotasti.
• SFONDOSelezionalosfondodelmenù.
• CALIBRAZIONECalibraloschermo.
• SWCProgrammaicomandialvolante.
CALIBRAZIONE SCHERMO
•Lacalibrazioneavvienetoccandoloschermo
secondo la sequenza indicata.
GENERAL SETTINGS
•RADIO-REGION.Introduceradio-receptionArea.
•KEY-COLORS.Changekey-colors.
•BEEP.Activate/Deactivatekey-sound.
•BACKGROUND.SelectMenu-Background.
•CALIBRATION.Effectscreen-calibration.
•SWC.ProgrammingtheSteering-wheel
Commands.
CALIBRATION DISPLAY
• Calibration starts by touching the screen and
following numbers sequence.
Premere l’icona Setup sul pannello del menù principale per modificare i seguenti settaggi: principali, generali, calibrazione schermo, data e ora,
audio, bluetooth, DVD, volumi.
Press Setup icon on the screen to regulate the folowing settings: main, general, calibration display, date and time, audio, bluetooth, DVD, volume.
10
IT/GB
IMPOSTAZIONI DI SISTEMA • SYSTEM SETUP
REGOLAZIONE DATA E ORA
•Posizionarsisullavocedamodicareedeffettuare
le modifiche.
IMPOSTAZIONI AUDIO
• SUBWOOFERAttiva/Disattivasubwoofer.
• FILTROSUBWOOFERImpostailtagliodi
frequenza del subwoofer (80-120-160 Hz).
• DYNBASSAttiva/Disattivaesaltazionebasse
frequenze.(LOUDNESS)
IMPOSTAZIONI AUDIO
• INDICAZIONEDISPLAYCambialalinguadei
menù.
• DVDAUDIOCambialalinguaprincipaledeiDVD.
• DVDSOTTOTITOLICambialalinguaprincipale
dei sottotitoli DVD.
• MENU’DISCOSelezionalalinguadelmenùdei
DVD.
AUDIO SETTINGS
• DISPLAY INDICATIONS. Change
Menus-Language.
• DVD-AUDIO. Change main langue for DVDs.
• DVD-SUBTITLES. Change main Language of
DVD-Subtitles.
• DISC-MENU. Select DVD Menu-Language.
AUDIO SETTINGS
• SUBWOOFER. Activate/Deactivate the Sub-
woofer.
• SUBWOOFER-FILTER. Set Subwoofer Frequen-
cy-cut (80-120-160 Hz).
• DYN BASS. Activate/Deactivate boosting of Low
Frequencies (LOUDNESS)
SETTING DATE AND TIME
• Touch the function required and change
values.

11
IT/GB
IMPOSTAZIONI DI SISTEMA • SYSTEM SETUP
IMPOSTAZIONI BLUETOOTH
• BLUETOOTHAttiva/Disattivabluetooth.
• CONNESSIONEAUTOMATICAAttiva/Disattiva
connessione automatica all’accensione.
• RISPOSTAAUTOMATICAAttivarisposta
automatica sul telefono accoppiato.
• MICROFONOSelezionamicrofonointernoo
esterno.
• CODICEACCOPPIAMENTOImpostailPINper
l’accoppiamento con il telefono. (0000)
BLUETOOTH SETTINGS
• BLUETOOTH. Activate/Deactivate Bluetooth.
• AUTOMATIC CONNECTION. Activate/Deactivate
automatic connection upon Switch-on.
• AUTOMATIC ANSWER. Activate automatic
answer on coupled mobile-phone.
• MICROPHONE. Select internal/external micro
phone.
• COUPLING-CODE. Introduce PIN for mobile-
phone-coupling (000).
IMPOSTAZIONI DVD
• PASSWORDAttivarestrizionivisionisu
riproduzione DVD (impostazione di fabbrica 4321).
• RATINGImpostaillivellodellerestrizioni.
• IMPOSTAZIONIFABBRICARipristinatuttele
impostazioni di fabbrica.
REGOLAZIONE VOLUME
E’ possibile regolare un diverso volume per ogni
sorgente, in modo da evitare sbalzi di livello.
Selezionare la sorgente ed effettuare la regolazione
voluta.
SOURCES VOLUME
Every single Source has its own Volume-Set-
ting. This will exclude the disturbing impact of
intensity-differences when switching from one
Source to another.
DVD- SETTINGS
• PASSWORD. Activate restrictions on DVD-
watching (Factory-setting 4321).
• RATING. Set Watching-Restriction-Level.
• FACTORY SETTINGS. Re-establish all Factory-
settings.

12
IT/GB
RADIO
RICERCA STAZIONI
•Tenendopremutoperpiùdiunsecondoitasti
/ sul telecomando o le icone / sullo
schermo, l’unità ricercherà automaticamente le
stazioni. Per la ricerca manuale premere breve-
mente.
FUNZIONI RADIO
BAND Seleziona Bande Radio 3 FM - 2 AM.
PS Scansione delle frequenze memorizzate.
STOREMemorizzazionedi6stazionidisponibili
per ogni banda. Per memorizzare premere
STOREesceglierelaposizionedesiderata.
Per richiamare una stazione premere sulla
frequenza corrispondente, in basso sullo schermo.
Attiva/DisattivaRDS-PTY-VOLUMETA.
MUTE Silenzia l’audio.
FUNZIONI RADIO
•LOCSelezionalestazionivicineolontane.
•AFRicercadiunafrequenzaalternativacon
informazioni sullo schermo della stazione.
•TAInformazionitrafco.
STATIONS RESEARCH
• By keeping the keys / on the remote-
control, or the icones / on the screen,
pressed for more than 2 seconds, the unit will
automatically start searching stations. Press only
briefly, if you wish to research manually. RADIO-FUNCTIONS
BAND Selects Radio Frequency 3 FM - 2 AM.
PS Scrolling all memorized frequencies.
STORE Memorizing 6 possible Stations
per Frequency-Band. To memorize, press STORE
and choose the requested position. To call a certain
Station, press the corresponding Frequency stated
on the screen-bottom.
Active/DeactivatesRDS-PTY-VOLUMETA.
MUTE Shut Audio off.
RADIO-FUNCTIONS
• DX Select near / remote Stations.
• AF Research an alternative Frequency with
Programme-Details visible on screen.
• TA Traffic-Information.

13
IT/GB
EQUALIZZATORE • EQUALIZER SFONDI • BACKGROUND
EQUALIZZATORE - LOUDNESS
•Premerel’icona per modificare le imposta-
zioni di fabbrica. Tramite le icone è possibi-
le selezionare 8 diverse modalità di equalizzazio-
nepreimpostate:USER-FLAT-POP
ROCK-CLASSIC-JAZZ-TECHNO-OPTIMAL.
In modalità USER è possibile regolare i livelli di
alti, medio e bassi sulle frequenze desiderate.
LPF - MPF - HPF. L’icona riportainOPTIMAL.
FADER - BILANCIAMENTO - SUB WOOFER
•Premerel’icona per accedere alle regolazio-
nidelFADERedelBILANCIAMENTOtramitele
frecce presenti sullo schermo.
PerregolareilvolumedelSUBWpremere
PerregolareilcrossoverpremereSUBWeposi-
zionarsi sulla frequenza di taglio desiderata.
EQUALIZER - LOUDNESS
• Press icon To modify the factory settings.
By means of the icones it is possible to
choose 8 different predetermined equalization-
modes: USER-FLAT-POP-ROCK-CLASSIC-
JAZZ-TECHNO-OPTIMAL.
The USER-mode allows to choose the wanted
Frequency for the High, Medium and Low-tones.
LPF - MPF - HPF. The icone returns to OP-
TIMAL.
FADER - BALANCE – SUB-WOOFER
• Press icon to enter the FADER-settings.
Use arrows on the screen, to effect the BAL-
ANCE-settings.
To set the SUB-Woofer-Volume, press .
To set the crossover, press SUB-W and position
on the wanted Frequency-Cut.
PERSONALIZZAZIONE SFONDO
Dal menù principale premere l’icona per
accedere alla schermata gestione dello sfondo.
Per utilizzare le immagini presenti nella memoria,
premere il nome del file, selezionare l’anteprima e
confermare .PerutilizzareimmaginidaMICRO-
SD Card premere “LEGGISDCARD”.Leimmagini
devono essere in formato BMP 800x480.
BACKGROUND-PERSONALIZATION
Starting from the Main-Menu, press the icon
to enter the background-setting menu. You
can choose new background from pictures
list on the memory or upload from MICRO-SD
CARD pressing “BROWSE SD CARD”. Press
filename to see preview and to select. The
pictures must be BMP file with 800x480 of
resolution.

14
IT/GB
RIPRODUZIONE • PLAYBACK DVD-CD-USB-SD CARD
FUNZIONI USB/SDCARD
All’inserimento di USB/SD CARD il contenuto
verrà visualizzato automaticamente.
Selezionare il tipo di file tramite l’icona relativa.
MUSICA VIDEO IMMAGINI
Passa al livello cartrella superiore.
/ Seleziona file su / file giù.
Avvia o mette in pausa la riproduzione.
Silenzia audio.
Seleziona numero brano da riprodurre.
FUNZIONI DVD
Torna al primo menù DVD.
Cambia la lingua audio.
Cambia la lingua dei sottotitoli.
Ripete traccia/capitolo/disco.
Ripete dal punto A al punto B.
Angle Cambia angolo di visione.
Inserisce il numero traccia/capitolo da
riprodurre, torna al menù del DVD.
Espulsione disco, tasto su telecomando/radio.
DVD-FUNCTIONS
To return to the first DVD-Menu.
To change to another Audio-Language.
To change to another Subtitle-Language.
Repeat Track / Chapter / CD.
To Repeat from A to B.
Angle Change view angle.
To digit number of Track / Chapter to be
reproduced. GobacktotheDVDmenu.
Eject disk, key on remote or radio.
FUNZIONI DVD
Con l’inserimento di un DVD appare il menù del
filmato.
Passa al secondo menù DVD.
Stop alla riproduzione.
Traccia/capitolo precedente o successivo.
Avvia o mette in pausa la riproduzione.
/ Riproduzione veloce avanti/indietro.
Premere in alto a sinistra per tornare al menù
principale.
DVD-FUNCTIONS
As soon as a DVD is introduced, the Film-Menu
will appear.
To procede to the second DVD-Menu.
Stop playing
To get previous/next Track/Chapter.
To Start / Interrupt Reproduction.
/ For fast Forward/Backward reproduction.
Press top left, to return to Main Menu.
USB/SD-FUNCTIONS
As soon as a USB/SD-support is introduced, its
related contents will automatically be visualized.
Select the requested file by pressing the related
icone.
MUSIC VIDEO IMMAGINI
Go to upper Folder-level.
/ Select File up/File Down
To Start / Interrupt playback.
Audio-Muting.
Select track-number for reproduction.

15
IT/GB
RIPRODUZIONE • PLAYBACK DVD-CD-USB-SD CARD
RIPRODUZIONE MUSICA
Selezionare la traccia desiderata per avviare la
riproduzione.
Torna all’elenco file.
/ Traccia successsiva/precedente.
Ripete traccia/cartella/disco.
Riproduzione casuale.
/ Avvia/Interrompe la riproduzione.
Silenzia l’audio.
Inserisce il numero traccia da riprodurre.
MUSIC PLAYBACK
Select the requested Track and start Reproduction.
Menu files.
/ To change to another Track.
Repeat Track / Folder / CD.
Random playback.
/ To Start / Interrupt playback.
To shut Audio off.
To digit number of Track to be
reproduced.
RIPRODUZIONE VIDEO
Torna al primo menù.
Cambia la lingua audio.
Cambia la lingua sottotitoli.
Ripete traccia video.
Riproduzione casuale.
Torna all’elenco file.
Inserisce il numero traccia video da
riprodurre.
VIDEO PLAYBACK
To return to the first menu.
To change to another Audio-Language.
To change to another Subtitle-Language.
Repeat track video.
Random playback.
Menu files.
To digit number of track video to be
reproduced.
RIPRODUZIONE VIDEO
Toccare lo schermo per fare apparire il menù
quando il filmato è in riproduzione.
Passa al secondo menù.
Stop alla riproduzione.
Traccia video precedente o successivo.
Avvia o mette in pausa la riproduzione.
/ Riproduzione veloce avanti/indietro.
Premere in alto a sinistra per tornare al menù
principale.
VIDEO PLAYBACK
If you touch the screen while film is being
shown, the Menu will appear.
To procede to the second-Menu.
Stopplayback.
To get previous/next track video.
To Start / Interrupt Reproduction.
/ For fast Forward/Backward
reproduction.
Press top left, to return to Main Menu.

16
IT/GB
RIPRODUZIONE IMMAGINI
Selezionare il file desiderato per visualizzare
l’immagine. Per far comparire il menù premere la
parte inferiore dello schermo.
Passa al secondo menù.
Immagine precedente o successiva.
Avvia o mette in pausa la riproduzione.
Stop alla riproduzione.
per ruotare l’immagine.
Seleziona immagine da riprodurre.
PICTURE-PLAYBACK
Select the requested file to visualize related
Picture. To get the Menu on the screen, touch
the bottom border of the screen.
To procede to the second menu.
Previous/next
picture .
To Start / Interrupt Reproduction.
Stop playback
To rotate the Picture.
To digit number of pictures to be
reproduced.
RIPRODUZIONE IMMAGINI
Torna al primo menù.
Per muovere l’immagine.
Ingradisce l’immagine (zoom).
Torna all’elenco file.
PICTURE-PLAYBACK
To return to the first menu.
To move the Picture
To enlarge the Picture (zoom)
Menu files
RIPRODUZIONE • PLAYBACK DVD-CD-USB-SD CARD

17
IT/GB
IMPOSTAZIONI BLUETOOTH • BLUETOOTH-SETTINGS
PHONE-PAIRING
Up to 5 phones can be coupled to the Device.
• Activate the Bluetooth-function on the phone
and search for new devices.
• Select PHONOCAR from the devices-list,
digit the password 0000, on request.
As soon as the coupling-process has been suc-
cessfully accomplished, the phone-name will be
shown.
Press to disconnect the phone.
Press to reconnect the phone.
PHONE-BOOK SYNCHRONIZATION
Press to enter the setting options.
Select PHONE-BOOK and confirm with
The phone-book of your telephone will automati-
cally be downloaded into the car-radio’s memory.
The time required for this operation depends on
the number of contacts contained in the phone-
book.
BLUETOOTH-OPTIONS
• AUTO-CONNECT provides for the automatic
phone-connection.
• AUTO ANSWER answers automatically all in-
coming calls.
• PIN modifies the pairing code password.
• DELETE Cancels the coupled devices.
SINCRONIZZAZIONE RUBRICA
Premere per accedere alle impostazioni.
Selezionare RUBRICA e confermare con
Automaticamente la rubrica del telefono verrà
scaricata nella memoria dell’autoradio. Il tempo
per l’operazione varia in base al numero dei
contatti.
OPZIONI BLUETOOTH
•AUTO-CONNESSIONEconnette
automaticamente il telefono.
•RISPOSTAAUTOMATICArisponde
automaticamente alla chiamata.
•PINcambialapassworddiaccopiamento.
•CANCELLAEliminaidispositiviaccoppiati.
ACCOPPIAMENTO TELEFONO
E’ possibile accoppiare fino a 5 telefoni.
•Attivarelafunzionebluetoothsultelefonoe
ricercare nuovi dispositivi.
•SelezionarePHONOCARnellalistadispositivi,
inserire la password 0000 quando richiesta.
Ad accoppiamento avvenuto comparirà il nome
del telefono.
Premere per disconnettere il telefono.
Premere per riconnettere.

18
IT/GB
FUNZIONI BLUETOOTH • BLUETOOTH-FUNCTIONS
CALLING FROM THE SCREEN
• Select Bluetooth from the Main Menu.
• Press one of the icones available on the scre-
en, to call from one of the given phone-books.
missed calls received calls
dialed calls phone-book
calls effected through number-keys
RECEIVING A CALLING
When a phone-call arrives, the VM036 automati-
cally switches to Bluetooth-mode.
Press to answer the phone.
Press to end the conversation or refuse the
in-coming call.
Press to deactivate/activate the hands-free
Device.
BLUETOOTH MUSIC PLAY
If the connected phone supports the A2DP-
Profile, you can listen to music.
If the device supports AVRCP, the musical tracks
can be handled on the touch-screen directly.
/ Previous/next Track.
Start/interrupt reproduction.
CHIAMARE DALLO SCHERMO
•SelezionareBluetoothdalmenùprincipale.
•Premereunadelleiconepresentisulloschermo
per chiamare da uno degli elenchi.
chiamate perse chiamate ricevute
chiamate effettuate rubrica telefonica
chiamata dal tastierino numerico.
RICEVERE UNA CHIAMATA
Quando è in arrivo una chiamata, il VM038 passa
automaticamente in modalità bluetooth.
Premere per rispondere.
Premere per terminare la conversazione o per
rifiutare la chiamata in arrivo.
Premere per escludere/attivare il vivavoce.
RIPRODUZIONE MUSICA BLUETOOTH
Se il telefono connesso supporta il profilo A2DP
è possibile ascoltare i brani musicali.
Se il dispositivo supporta AVRCP sarà possibile
controllare i brani musicali direttamente dal touch
screen.
/ Brano precedente/successivo.
Avvia/interrompe la riproduzione.

19
IT/GB
IMPOSTAZIONE MODULO GPS
•Passaallasecondaschermata
SETTING THE GPS-MODULE
• Go to the second panel
NAVIGAZIONE
AllaprimaattivazionedellamappaiGO(optional)
accedere al menu impostazioni del software.
NAVIGATION
Enter the Software-Setup-Menu on the iGO
maps optional.
•PremereGPS.
• Press GPS.
IMPOSTAZIONI GPS • GPS-SETTINGS
•PremeresullaspuntadiGPSATTIVO
poisuRILEVAMENTOAUTOMATICO.
• Press to tick GPS-ACTIVE then press
AUTOMATIC REVEALING.
•Attenderel’acquisizionedeidatiepremereok.
•RiferirsialmanualeiGOperleistruzionisul
software di navigazione.
• Wait for Data-collection and press ok.
• Check iGO-Manual and follow the related
navigation-software instructions.

20
IT/GB
COMANDI AL VOLANTE • STEERING-WHEEL COMMANDS
MEMORIZZAZIONE COMANDI VOLANTE
SelezionandoKEY1(A)appariràunanestra
dove si dovrà scegliere la funzione spostandosi
con le frecce e confermare premendola.
Questa operazione dovrà essere effettuata per
tutte le funzioni disponibili sul volante.
Premere e sullo schermo appariranno in
sequenza i comandi da memorizzare. Per com-
pletare la programmazione premere per almeno 1
secondo sul volante i tasti corrispondenti.
STORING STEERING-WHEEL COMMANDS
By pressing KEY1 (A), a window will appear
showing a number of available functions. Use the
arrow-keys to move to the requested function
and press for confirmation. This procedures has
to be carried out for each function available on
the steering-wheel. Press so that the list of
memorized commands will appear on the screen.
To complete the programming-procedure, press
the related keys, on the steering-wheel, for more
than 1 second.
NOTA:
Il sistema accetta valori resistivi superiori
a 300 Ωdifferenti tra loro di almeno un 20-30%.
NOTE:
The system accepts resistive values of more than
300 Ohm, with a difference, from one another, of
at least 20-30%.
IMPOSTAZIONE COMANDI VOLANTE
Il VM038 permette di utilizzare i comandi volante
su vetture con protocollo resistivo con la possibi-
lità di memorizzare fino a 8 comandi.
STEERING-WHEEL COMMANDS SETTINGS
Thanks to the VM038 the Steering-wheel Com-
mands are assured even on car-models fitted
with Resistive-protocol, with memorization-
capacity of max. 8commands.
Table of contents
Other Phonocar Receiver manuals

Phonocar
Phonocar VM224 User manual

Phonocar
Phonocar VM 039 User manual

Phonocar
Phonocar VM 035 User manual

Phonocar
Phonocar VM 030 User manual

Phonocar
Phonocar VM 078 User manual

Phonocar
Phonocar VM 057 User manual

Phonocar
Phonocar VM 017 User manual

Phonocar
Phonocar VM 050 User manual

Phonocar
Phonocar VM112D User manual

Phonocar
Phonocar VM115 User manual

Phonocar
Phonocar VM010 User manual

Phonocar
Phonocar VM 044 User manual

Phonocar
Phonocar Golf VII User manual

Phonocar
Phonocar vm 032 User manual

Phonocar
Phonocar VM116 User manual

Phonocar
Phonocar VM103 User manual

Phonocar
Phonocar VM 037 User manual

Phonocar
Phonocar VM 094 User manual

Phonocar
Phonocar VM111 User manual

Phonocar
Phonocar VM 099 User manual