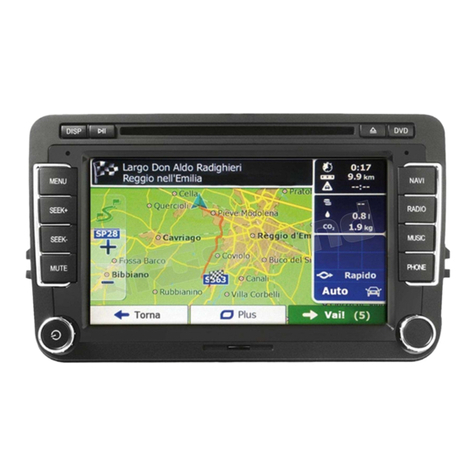
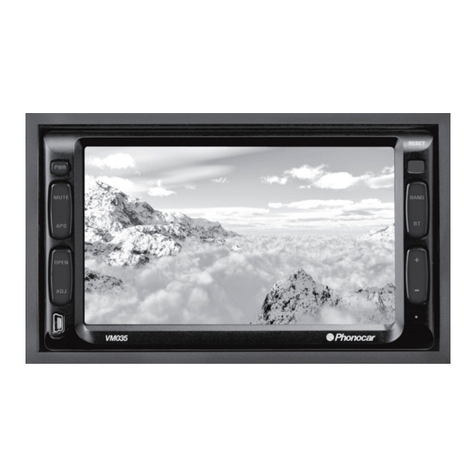
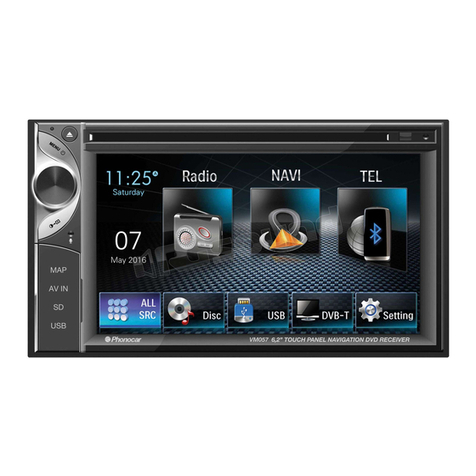
Phonocar VM103 User manual

MANUALE ISTRUZIONI
INSTRUCTIONS MANUAL
NOTICE DE MONTAGE ET D’EMPLOI
GEBRAUCHSANWEISUNGEN
MANUAL DE INSTRUCCIONES
VM103
7” TFT/LCD
2 DIN NAVIGATION
DVD RECEIVER
ENGLISH
ITALIANO
FRANÇAIS
DEUTSCH
ESPAÑOL
SEAT Altea ‘11> - Leon ‘11>
SKODA Fabia ‘07> - Octavia ‘07> - Roomster ‘07>
VOLKSWAGEN Caddy ‘10> - Golf V - Golf VI ‘10>
Maggiolino (New Beetle) - Passat ‘05> - Passat CC ‘08>
Polo ‘09>’14 - Scirocco ‘08> - Sharan ‘10>
Tiguan - Touran

2
IT/GB
• Per l’installazione rivolgersi al personale tecnico qualificato. • Usare solo con impianto elettrico a 12V DC con negativo
a massa. • Scollegare il terminale negativo della batteria del veicolo quando si effettuano le connessioni dell’apparecchio.
• Quando si sostituisce il fusibile, utilizzarne uno con lo stesso valore di amperaggio. • Non aprire l’unità e non tentare di
ripararla, consultare il proprio rivenditore o personale tecnico qualificato. • Assicurarsi che oggetti estranei non entrino
all’interno dell’apparecchio, potrebbero causare malfunzionamenti, generare cortocircuiti elettrici o un’esposizione rischiosa
ai raggi laser se presenti. • Accendere l’apparecchio solo quando la temperatura dell’abitacolo è nella norma. • Mantenere
un volume di ascolto che permetta di udire i suoni provenienti dall’esterno del veicolo (clacson, sirene, etc… • Non colle-
gare alcun cavo in luoghi dove potrebbe ostacolare il funzionamento dei dispositivi di sicurezza dell’auto.
• Installation to be carried out by trained technical personnel • Make sure you have 12V DC, with negative-pole to mass •
First disconnect negative-pole of the car-battery, then effect car-radio connections • When replacing fuse, always use fuse
with same Ampere-value • Never open the unit, nor try to repair yourself. Always ask your Retailer or authorized technical
staff • Make sure that no foreign objects fall into the unit, they would cause malfunctions, short-circuits or exposure to
dangerous laser-rays • When switching-on, make sure that temperate inside passenger-compartment is at a normal level •
Choose a listening-Volume which will allow you to hear external noises (car-horn, sirens etc.) • When placing the cables,
keep away from all car security-devices.
• Se servir du personnel technique qualifié pour l’installation. • Utiliser uniquement dans des installations électriques à 12V
DC avec négatif à masse.
• Débrancher le terminal négatif de la batterie lorsqu’on fait les connexions de l’appareil. • Quand on remplace un fusible, se
servir d’un autre ayant le même ampérage.
• Ne pas ouvrir l’appareil pour essayer de le réparer, contacter votre revendeur ou un personnel technique qualifié • Eviter
que des corps étrangers entrent dans l’appareil, car ils peuvent provoquer des mauvais fonctionnements, des courts circuits;
éviter aussi l’exposition risquée aux rayons laser si présents. • Allumer l’appareil seulement lorsque la température interne
du véhicule est dans la norme • Tenir le volume à un niveau permettant d’écouter les sons en provenance de l’extérieur du
véhicule (Klaxon, sirène etc.…)
• Ne brancher aucun câble dans des endroits pouvant causer les obstacles au fonctionnement des dispositifs de sécurité du
véhicule.
• Die Installation muss durch technische Fachkräfte vorgenommen werden • Nur bei 12V DC verwenden, mit Negativ-Pol
zur Masse • Erst den Negativ-Pol der Auto-Batterie abtrennen, dann die Radio-Anschlüsse herstellen • Beim Auswechseln,
immer Sicherungen derselben Ampere-Stärke verwenden • Nie versuchen, das Gerät zu öffnen oder eigenhändig zu reparie-
ren. Immer den Händler bzw. technische Fachkräfte zu Rate ziehen • Sicherstellen, dass keinerlei Fremdkörper in das Gerät
eindringen können. Diese würden Betriebsstörungen, Kurzschlüsse oder die Entfaltung gefährlicher Laser-Strahlen verur-
sachen • Gerät nur dann einschalten, wenn die Temperatur im Wagen-Innenraum auf normalem Niveau ist • Lautstärke so
einstellen, dass externe Geräusche (Hupe, Sirenen etc.) noch hörbar sind • Kabel fernhalten von allen Sicherheits-Geräten
des Wagens.
• Para la instalación, contactar exclusivamente con empresas especializadas y personal técnicamente calificados. • Usar
solo en vehículos con alimentación de 12V DC y negativo a masa. • Desconectar el terminal negativo de la batería del ve-
hículo cuando se efectúan las conexiones del aparato.• Cuando se sustituye el fusible, utilizar exclusivamente fusibles con
el mismo amperaje. • Non abrir la unidad y no tentar de repararla, consultar al revendedor o personal técnico calificado.
• Asegurarse de que no entren objetos extraños en su interior, podrían causar malfuncionamientos, generar cortocircuitos
eléctricos, además se corre el riesgo de una exposición muy perjudicial a los rayos laser, si están presente • Encender el
aparato solo cuando la temperatura del habitáculo se haya normalizado. • Mantener un volumen de escucha tal que nos
permita escuchar los sonidos del ambiente circunstante. (Claxon, sirenas) • No conectar ningún cable en lugares que podría
obstacular el funcionamiento de los dispositivos de seguridad del coche.
Precauzioni • Warnings • Précautions • Vorsicht • Precauciones


3
IT/GB
CONNESSIONI • CONNECTIONS
1. Non attivo
2. Microfono bluetooth esterno
3. Uscite preamplicate
4. Uscite canale centrale, sub-w, consenso amplicatore
5. Ingresso audio/video
6. Non attivo
7. Freno a mano
8. Non attivo
9. Uscite video 1-2
10. Ingresso USB 1- USB 2
11. Connessioni retrocamera
12. Ingresso cavo originale
1. Not activated
2. External Bluetooth-microphone
3. Pre-amplified Exits
4. Exits for Central Channel, sub-w, amplifier-consense
5. Audio/video-Input
6. Not activated
7. Brake
8. Not activated
9. Video-Exits 1-2
10. Input USB 1- USB 2
11. Rear-Camera Connections
12. Original cable input
FUSE
AM-FM
DIVERSITY
1 3 5
2 4 6
79
8
10
11 12
GPS

4
IT/GB
CONNESSIONI • CONNECTIONS
MIC. BLUETOOTH
CAVO FRENO A MANO / BRAKE CABLE
AUDIO 1 R OUT
AUDIO 1 L OUT
AUDIO 2 R OUT
AUDIO 2 L OUT
CAMERA
GND
+12 V
REVERSE
R-IN
L-IN
V-IN
+12 V
GROUND
TV-CONT
CENT
SUB WOOF
AMP CONT
VIDEO1 L OUT
VIDEO 2 R OUT
NON ATTIVO / NOT ACTIVATED.
Per utilizzare iPOD e iPHONE connettersi ad una delle 2 porte USB 10 con il cavo originale (APPLE).
To use iPOD or iPHONE, connect original APPLE-cable to one of the two USB-ports 10.
È necessario attivare l’uscita tramite il menu’ MEDIA RETRO. L’intensità dell’audio è fissa e non regolabile
dai comandi dell’autoradio.
Exit needs to be activated by entering the MEDIA RETRO-menu. The Audio-volume is fix and cannot be
changed through the radio-controls.
USB 1
USB 2
Per recuperare la presa USB originale se presente. / To maintain the original USB-socket, if available.
2
3
5
7
8
4
9
BIANCO/WHITE
NERO/BLACK
BIANCO/WHITE
GRIGIO/GRAY
GIALLO/YELLOW
GIALLO
YELLOW
GIALLO/YELLOW
ROSSO/RED
GIALLO/YELLOW
ROSSO/RED
VERDE/GREEN
ROSSO/RED
ROSSO/RED
GIALLO/YELLOW
BIANCO/WHITE
BIANCO/WHITE
BLU/BLUE
GIALLO/YELLOW
NERO/BLACK
BLU/BLUE
CANALE CENTRALE / CENTRAL-CHANNEL
USCITA SUBWOOFER / SUBWOOFER-EXIT
CONSENSO AMPLIFICATORE / AMPLIFIER-CONSENSE
USCITA VIDEO 1 SINISTRA / LEFT VIDEO 1 OUTPUT
USCITA VIDEO 2 DESTRA / RIGHT VIDEO 2 OUTPUT
USCITA AUDIO 1 DESTRA / RIGHT AUDIO OUTPUT 1
USCITA AUDIO 1 SINISTRA / LEFT AUDIO OUTPUT 1
USCITA AUDIO 2 DESTRA / RIGHT AUDIO OUTPUT 2
USCITA AUDIO 2 SINISTRA / LEFT AUDIO OUTPUT 2
INGRESSO RETROCAMERA / REAR CAMERA INPUT
MASSA / GROUND
ALIMENTAZIONE / POWER SUPPLY
NON COLLEGARE / DO NOT CONNECT
INGRESSO AUDIO DESTRA / RIGHT AUDIO INPUT
INGRESSO AUDIO SINISTRA / LEFT AUDIO INPUT
INGRESSO VIDEO / VIDEO INPUT
ALIMENTAZIONE / POWER SUPPLY
MASSA / GROUND
USCITA / OUTPUT + 12 V
10
10
11
USB
USB
USB
USB

5
IT/GB
1. Menu principale
2-3. Ricerca canali
4. Silenzia audio
5. Reset
6. Accensione / Spegnimento - Volume
7. Slot micro SD card Navigazione / Media
8. Sintonizzazione frequenze radio
9. Telefono
10. Musica
11. Radio
12. Navigazione
13. Sensore IR
14. DVD
15. Espulsione disco
16. Feritoia inserimento disco
17. Play/Pausa
18. Luminosità schermo
1. Main Menu
2-3. Stations-Research
4. Mute audio
5. Reset
6. ON / OFF - Volume
7. Slot for navigation-micro-SD / Media
8. Radio-Frequency-Research
9. Phone
10. Navigation
11. Radio
12. Music
13. IR-Sensor
14. DVD
15. Eject disc
16. Disc insertion slot
17. Play/Pause
18. Display brightness
FUNZIONI MONITOR • SCREEN-FUNCTIONS
1
2
3
4
5
9
10
11
12
13
1415161718
7 86

6
IT/GB
FUNZIONI
TELECOMANDO
• REMOTE-CONTROL FUNCTIONS
1. POWER Accensione/Spegnimento
2. NAVI Navigazione
3. TOUCH Calibrazione schermo
4. MUTE Silenzia audio
5. CAM Non attivo
6-8. VOL Volume + / -
7. OSD Visualizza informazioni DVD
9. BACK Torna indietro
10. OK Conferma selezione
11. Muove cursore nel menù
12. VIDEO Non attivo
13. RPT Ripetizione brano, cartella, disco
14. DISP Informazioni riproduzione
15-16. Traccia precedente/successiva
17. SRC Goto - Ricerca traccia/capitolo
18. Riproduzione / Pausa
19-20. Traccia precedente/successiva
21-22. Traccia precedente/successiva
23. SRC Goto - Ricerca traccia/capitolo
24. Riproduzione / Pausa
25. SRC Goto - Ricerca traccia/capitolo
26. Riproduzione / Pausa
27. TITLE Menù titoli DVD
28. SUB-T Cambia lingua sottotitoli
29. AUDIO Cambia lingua DVD
30. MENU Impostazioni di sistema
31. SETUP Impostazioni DVD
32. DUAL Funzione REAR MEDIA
33. Espulsione disco
34. CCD Immagini retrocamera
1. POWER ON / OFF
2. NAVI Navigation
3. TOUCH Screen-Calibration
4. MUTE Mute audio
5. CAM
6-8. VOL Volume + / -
7. OSD Visualize DVD-information
9. BACK Previous menu
10. OK Confirm selection
11. Move cursor within menu
12. VIDEO Not active
13. RPT Repeat Track, Folder, Disc
14. DISP Playback-Information
15-16. Previous / Next track
17. SRC Goto – Research Track/Chapter
18. Playback / Pause
19-20. Previous / Next track
21-22. Previous / Next track
23. SRC Goto – Research Track/Chapter
24. Playback / Pause
25. SRC Goto – Research Track/Chapter
26. Playback / Pause
27. TITLE DVD-titles Menu
28. SUB-T Set Subtitles-Language
29. AUDIO Change DVD-language
30. MENU System-Settings
31. SETUP DVD-Settings
32. DUAL REAR
33. Eject disc
34. CCD Rear camera pictures
5
9
6
1 2 3 4
10
11
1229
31
33 7
13
28
30
32
34
1526
1724
1922
8
1427
1625
1823
2021
R
E
A
R
M
E
D
I
A
R
E
A
R
M
E
D
I
A

7
IT/GB
1. POWER Accensione/Spegnimento
2. NAVI Navigazione
3. TOUCH Calibrazione schermo
4. MUTE Silenzia audio
5. CAM Non attivo
6-8. VOL Volume + / -
7. OSD Visualizza informazioni DVD
9. BACK Torna indietro
10. OK Conferma selezione
11. Muove cursore nel menù
12. VIDEO Non attivo
13. RPT Ripetizione brano, cartella, disco
14. DISP Informazioni riproduzione
15-16. Traccia precedente/successiva
17. SRC Goto - Ricerca traccia/capitolo
18. Riproduzione / Pausa
19-20. Traccia precedente/successiva
21-22. Traccia precedente/successiva
23. SRC Goto - Ricerca traccia/capitolo
24. Riproduzione / Pausa
25. SRC Goto - Ricerca traccia/capitolo
26. Riproduzione / Pausa
27. TITLE Menù titoli DVD
28. SUB-T Cambia lingua sottotitoli
29. AUDIO Cambia lingua DVD
30. MENU Impostazioni di sistema
31. SETUP Impostazioni DVD
32. DUAL Funzione REAR MEDIA
33. Espulsione disco
34. CCD Immagini retrocamera
17. SRC Goto – Research Track/Chapter
18. Playback / Pause
19-20. Previous / Next track
21-22. Previous / Next track
23. SRC Goto – Research Track/Chapter
24. Playback / Pause
25. SRC Goto – Research Track/Chapter
26. Playback / Pause
27. TITLE DVD-titles Menu
28. SUB-T Set Subtitles-Language
29. AUDIO Change DVD-language
30. MENU System-Settings
31. SETUP DVD-Settings
32. DUAL REAR
33. Eject disc
34. CCD Rear camera pictures
MENU PRINCIPALE • MAIN MENU
E’ possibile modicarle la posizione delle icone, sostituirle o cancellarle.
L’elenco completo delle applicazioni si trova premendo l’icona APPS.
Tenere premuto su di una icona qualsiasi no a quando non compaiono delle linee sullo schermo.
• Per modicare la posizione tenere premuto su un’icona trascinandola nel punto desiderato.
• Per sostituire: premere sull’icona, compare una nestra con le voci DELETE, EDIT e DEFAULT.
Selezionare DELETE per eliminare l’icona da sostituire, EDIT per scegliere la nuova funzione.
DEFAULT Ripristina le icone come da impostazioni di fabbrica.
Premere una parte qualsiasi dello schermo al di fuori delle linee puntinate per tornare alla funzionalità
menù principale.
It is possible to replace, or cancel or shift the icons into a different position.
A complete list of all applications will appear, by pressing the icon APPS.
Keep whatsoever icon pressed, until the screen will show lines.
• Modify position: keep the related icon pressed and drag the icon into the requested new position.
• Replace: press the related icon, so that a box will appear with the options DELETE, EDIT, DEFAULT.
Select DELETE, to cancel the icon. Then press EDIT, to choose new function.
DEFAULT Re-establish the icons related to the Factory-settings.
Press the screen in any wanted position, but outside the area of the dotted lines, to return to Main Menu.
All’accensione dell’autoradio compare il MENU prin-
cipale, premere l’icona corrispondente alla funzione
desiderata.
When switching-on the car-radio, the Main Menu will
appear. Now press icon related to the requested func-
tion.

8
IT/GB
IMPOSTAZIONI • SETUP
Premere l’icona APPS dal menù principale e poi
OPTIONS per accedere al menù delle impostazioni.
MEDIA RETRO attiva l’uscita audio preamplicata
e le uscite video.
MEDIA RETRO active audio output preamp
and video outputs.
Press icon APPS from the Main Menu.
Then press OPTIONS, to enter the Settings-Menu.
SKIN (INTERFACCIA GRAFICA)
LANGUAGE seleziona la lingua del sistema.
SKINS per cambiare l’aspetto graco dei menù.
Per modicare lo sfondo premere l’icona
BROWSE... in corrispondenza di Wallpaper.
DELETE cancella lo sfondo impostato.
SKIN (GRAPHICAL INTERFACE)
LANGUAGE Choose System-Language
SKINS Change graphical layout of the Menus.
To change screen-background, press icon
BROWSE... next to Wallpaper.
DELETE cancel the selected background.
DATE/TIME
Selezionare il corretto fuso orario e premere l’icona
Apply per conferma.
Premere l’icona Date/Time per regolare data e
orario.
DATE/TIME
Select the related Time-Zone. Confirm by pressing
the icon Apply.
Press icon Date/Time, and set date / time.
DISPLAY
Regola la luminosità dello schermo.
Se è installata una retrocamera sulla vettura
confermare il riquadro CCD CAMERA. In questo
caso all’inserimento della retromarcia lo scher-
mo visualizza automaticamente l’immagine della
retrocamera.
DISPLAY
Set the screen-brightness.
If car is equipped with rear-camera, confirm by
pressing CCD CAMERA. In such case, when rear-
camera is activated, the screen will automatically
visualize the rear-camera pictures.

9
IT/GB
IMPOSTAZIONI • SETUP
SYSTEM
Visualizza la versione attuale del software.
UPDATE per effettuare un eventuale aggiornamento.
CALIBRATION calibra lo schermo. Per effettuare
l’operazione seguire le istruzioni a video.
VEHICLE SETTING permette di accedere alle re-
golazioni di alcune funzioni del veicolo, come sedili
riscaldabili, sensori di parcheggio, aria condizionata
e altro. Se le funzioni sono presenti si potranno
modicare le impostazioni, diversamente le opzioni
saranno inibite.
NAVIGATION PATH permette di selezionare il le
esecutivo della cartograa di navigazione IGO Primo
(Phonocar NV978 Italia e NV988 Europa).
BROWSE per selezionare il le MobileNavigator.exe
sulla SD card.
SYSTEM
Visualize the effective software-version.
UPDATE Effect possible up-dates.
CALIBRATION Screen-calibration. Follow the pro-
cedures directly shown on the screen.
VEHICLE SETTING possibility of setting some
car-functions like heated seats, parking-sensors,
air-conditioning and so on. For the available func-
tions, the related settings can be modified. For
the non-available functions, this option cannot be
carried out.
NAVIGATION PATH Possibility of selecting the
executive-file for the IGO-Primo Navigation-maps
(Phonocar-article NV978 Italy - NV988 Europe).
BROWSE Select the file MobileNavigator.exe on the
SD-card.
AUDIO
Per accedere alle impostazioni audio del sistema.
Effettuare le regolazioni di bassi, medi ed alti spo-
stando i cursori all’interno delle barre di sposta-
mento.
Premere sulla posizione preferita di ascolto per
modicare automaticamente bilanciamento e fader.
AUDIO
Enter the System Audio-Settings.
Effect Settings for Bass, medium, high frequencies,
by shifting the cursor within the regulation-bar.
Select the preferred listening-position, so that
Balance and Fader will automatically adjust them-
selves.
EQ
E’ possibile selezionare una modello preimpostato
tra Classic, Jazz, Pop, Human, Rock.
DEFAULT impostazioni di fabbrica modicabili.
EQ
Possibility of selecting one of the predetermined
modes: Classic, Jazz, Pop, Human, Rock.
DEFAULT Factory-settings available for changes.

10
IT/GB
IMPOSTAZIONI • SETUP
ADVANCE Impostazioni audio avanzate.
Per regolare i diversi livelli di volume.
KEY BEEP Attiva/Disattiva suono tasti.
AUDIO CHANNEL 4CH per sistema audio con:
2 canali anteriori + 2 canali posteriori + subwoofer
AUDIO CHANNEL 5.1CH per sistema audio pre-
disposto per DVD con segnale dolby surround 5.1
composto da:
2 canali anteriori + 1 canale centrale
2 canali posteriori surround + 1 subwoofer.
LOUDNESS Attiva/Disattiva esaltazione audio.
Bass Freq-Treble Freq per modicare le frequenze
di riferimento del Loudness.
Gain regola l’intensità del Loudness.
SUBWOOFER
Cut Off Freq. Imposta il taglio di frequenza
passa/basso del subwoofer
Gain Regola il livello del subwoofer
Phase Imposta la fase del subwoofer (0-180)
CENTER
Cut Off Freq.Imposta il taglio di frequenza
passa/alto del canale centrale.
Gain Regola il livello del canale centrale.
Le regolazioni audio del subwoofer e del canale
centrale vanno effettuate da personale competente,
errate impostazioni possono danneggiare gli altopar-
lanti o disturbare l’udito.
ADVANCE Advanced Audio-Settings.
Set different Volume-levels.
KEY BEEP Activate/Deactivate keys-tone.
AUDIO CHANNEL 4CH for audio-system with:
2 front channels + 2 rear channels + subwoofer
AUDIO CHANNEL 5.1CH for audio-system ready
for DVD with signal for Dolby surround 5.1 com-
posed of:
2 front channels + 1 central channel
2 rear Surround channels + 1 subwoofer.
LOUDNESS Activate/Deactivate Audio-boosting.
Bass Freq-Treble Freq modify the lead-frequencies
for Loudness.
Gain setting the Loudness-intensity.
SUBWOOFER
Cut Off Freq. Setting the subwoofer Low/Pass
frequency-cut
Gain Setting subwoofer-level
Phase Setting the subwoofer-phase (0-180)
CENTER
Cut Off Freq. Setting the Frequency-cut
Pass/High of central channel.
Gain Setting level of central channel.
The audio-settings of subwoofer and central chan-
nel must be carried out by trained personnel. Wrong
settings can damage the speakers or disturb the
human ear.

11
IT/GB
DVD IMPOSTAZIONI • SETTINGS RADIO
Per accedere alle impostazioni premere il tasto
SETUP sul telecomando quando è inserito un Dvd.
LANGUAGE Seleziona la lingua preferenziale del
menù dell’audio e dei sottotitoli.
VIDEO Seleziona il formato di visualizzazione
AUDIO Imposta la compressione audio
RATING Imposta il livello di protezione per i lmati.
To enter the settings, press
SETUP on the remote-control while DVD is inside.
LANGUAGE Select preferred Language for Audio-
Menu and Sub-Titles.
VIDEO Select visualization-format
AUDIO Select Audio-compression
RATING Select Youth Protection-Level.
RICERCA STAZIONI
Ricerca automatica: premere per più di un secondo
le icone sullo schermo, oppure sul
telecomando.
Ricerca manuale: premere brevemente le icone
sullo schermo.
MEMORIZZAZIONE STAZIONI
Individuata la stazione da memorizzare premere
per tre secondi sulla posizione desiderata 89.7 .
FM1-2-3-4 AM Seleziona Bande Radio.
SCANSIONE MEMORIE
Premere brevemente per ascoltare 10 secondi
di ogni frequenza memorizzata
Tenere premuto per ricerca e memorizzazione delle
prime 8 frequenze per ogni banda.
Per richiamare una stazione premere sulla frequen-
za corrispondente, o sul nome dell’emittente.
STATIONS RESEARCH
Automatic Research: keep icons pressed for at
least 1 second, on screen or on remote-
control. Manual Research: press icons briefly
on the screen.
MEMORIZING STATIONS
To memorize the wanted station, press related
position for 3 seconds 89.7 .
FM1-2-3-4 AM Select Radio-Bands.
SCROLLING MEMORIES
Press briefly, to listen, to each memorized fre-
quency, for 10seconds.
Keep pressed to Research and Memorize the first
8 frequencies of each Band.
To choose a Station, press the related Frequency
or Station-name.

12
IT/GB
RADIO
MODIFICA NOME STAZIONE
per accedere alle impostazioni
RENAME STATION Modica il nome dell’ emittente.
MODIFY STATION-NAME
Enter the Settings
RENAME STATION Modify Stations-name.
Premere all’interno del riquadro di testo per far com-
parire la tastiera e modicare il nome dell’emittente.
Premere OK per confermare
CANCEL ritorna al nome precedente
NAME AS FREQ imposta il nome dell’emittente con
la frequenza radio (esempio 107,4).
Press within the text-field, to visualize the keys and
modify Station-name. Press OK to confirm.
CANCEL Back to Menu before.
NAME AS FREQ Set Station-name in relation with
radio-frequency (example 107,4).
ELIMINA STAZIONI RADIO
Selezionare la stazione e premere .
DELETE STATION per eliminare una stazione
DELETE ALL STATIONS per cancellare tutte le sta-
zion per confermare premere OK.
DELETE RADIO-STATIONS
Select Station and press .
DELETE STATION cancel a Station.
DELETE ALL STATIONS cancel all Stations, press
OK to confirm.
IMPOSTAZIONE AREA RADIO
Premere e successivamente selezionare LOCAL
SETTING.
Selezionare l’area di appartenenza.
ATTENZIONE: Ogni volta che viene variata la zona
radio è necessario spegnere l’unità e riaccendere,
diversamente non si potrà ricevere alcuna frequenza.
RADIO-AREA-SETTINGS
Press and select LOCAL SETTING.
Select related Radio-Area.
IMPORTANT: every time you change the Radio-Area,
you have to switch-OFF and ON again, otherwise
there will be no frequency-reception.

13
IT/GB
RDS
L’unità supporta il sistema radio RDS e permette la vi-
sualizzazione delle informazioni inviate dalle emittenti
radio sullo schermo.
AF Quando il segnale di una frequenza è scarso,
l’unità cerca automaticamente la frequenza radio
alternativa della stessa emittente, se disponibile.
TA L’unità si sintonizza automaticamente sull’emitten-
te che sta trasmettendo informazioni sul trafco
PTY Permette di ricercare emittenti che trasmettono
un determinato programma musicale o intrattenimen-
to. E’ possibile scegliere tra 32 diversi programmi.
RDS
The unit supports the RDS-radio system and allows
the on-screen visualization of the info broadcast by
the Stations.
AF When the frequency-signal is too weak, the unit
will automatically search for an alternative radio-
frequency of the same Station, if available.
TA the unit automatically tunes on the Station broad-
casting Traffic-Information.
PTY Research Stations broadcasting certain musical
or entertainment programmes. Possibility of choos-
ing among 32 different programmes.
RADIO

14
IT/GB
Riproduzione/Pausa DVD
Traccia/capitolo precedente
Traccia/capitolo successivo
Avvolgimento veloce, premere più volte per
aumentare la velocità
Avanzamento veloce, premere più volte per
aumentare la velocità
REPEAT Ripetizione traccia/capitolo
Passa al menù successivo
DVD Reproduction/Pause
Track/Chapter before
Track/Chapter after
Fast Rewind, press repeatedly to increase speed
Fast Forward, press repeatedly to increase
speed.
REPEAT Repeat Track/Chapter
Move to next Menu
SET Impostazioni DVD (vedi pag. 14)
AUDIO Seleziona lingua audio DVD
SUB-T Seleziona lingua sottotitoli
TITLE Visualizza le informazioni titolo mentre si è in
riproduzione
DISP Visualizza tempo di riproduzione, tempo
residuo del capitolo e al termine del lm.
MENU Visualizza il menù principale del DVD
Ritorna al menù precedente
NOTA: Il cambio della lingua effettuato dal menù
del DVD è applicato solo alla riproduzione in corso.
Se si vuole selezionare una lingua preferenziale per
qualunque supporto accedere alle impostazioni DVD
(vedi pag. 14)
SET DVD-Settings (see page 14)
AUDIO Select DVD Audio-Language
SUB-T Select Subtitles-Language
TITLE Visualize Titles-information while reproduc-
tion is running.
DISP Visualize Reproduction-Time, remaining
Chapter-time and remaining time to film-ending.
MENU Visualize DVD Main Menu
Return to Menu before
NOTE: The language-change effected from the DVD-
Menu is only applicable to the running reproduction.
If you wish to select a preferential Language for all
kinds of supports, enter the DVD-settings (page 14)
DVD

15
IT/GB
VIDEO
Premere l’icona MOVIE all’interno del menù APPS.
Si aprirà direttamente la nestra VIDEO con all’interno
soltanto i le video compatibili (MPEG1/2, MPEG4,
AVI, WMV). Se non viene visualizzato nessun le,
selezionare il supporto corretto (USB, SD card, etc)
oppure selezionare ALL per visualizzare tutti i les
compatibili di tutti i supporti.
Toccando sullo schermo durante la riproduzione
comparirà le informazioni di riproduzione in sovraim-
pressione.
File precedente/successivo
Avvia/Interrompe riproduzione
X Esce dall’applicazione di riproduzione video.
Touching the screen during Reproduction, the
reproduction-information will appear in written form.
File before/after
Start/Interrupt Reproduction
X Quit Video reproduction-application.
Premere due volte sul lmato da riprodurre oppure
selezionarlo e premere PLAY all’interno del menù
Options
Press twice on the film you wish to reproduce, or
select the requested film from the Options-Menu and
press PLAY.
VIDEO
Press icon MOVIE within the menu APPS.
The VIDEO-window will open directly, containing
only the compatible Video-files (MPEG1/2, MPEG4,
AVI, WMV). If no File is visualized, select the related
support (USB, SD card, etc.) or select ALL to visual-
ize all files compatible with all supports.
FILES AUDIO/VIDEO

16
IT/GB
Premere l’icona FILES presente nel menù APPS
Selezionare l’icona relativa al tipo di le da riprodurre:
AUDIO les audio MP3/WMA
VIDEO les video (vedi pag. 18)
PHOTO les immagini JPEG/BMP/GIF/PNG
OTHER le di Microsoft ofce WORD/EXCEL
POWERPOINT e PDF
OTHER (Altri les)
E’ possibile controllare lo spazio disponibile sui sup-
porti inseriti premendo INFO. Selezionare il supporto
da visualizzare tra LOCAL, USB, SD.
Verrà visualizzato lo spazio totale del supporto e la
suddivisione in base al tipo di les presenti.
OTHER (Other files)
It is possible to check the space available on the
inserted supports, by pressing INFO. Select the sup-
port you wish to visualize from LOCAL, USB, SD.
The display will show the total remaining space of
the selected support and a split-up of the various
file-types.
FOTO
Premere due volte sul le da riprodurre oppure sele-
zionarlo e premere PLAY all’interno del menù Options.
PHOTO
Press twice on the file you wish to reproduce, or
select the requested file from the Options-Menu and
press PLAY.
Press icon FILES available on the APPS-Menu.
Select icon related to the file-type requested for
reproduction:
AUDIO files audio MP3/WMA
VIDEO files video (see page 18)
PHOTO picture-files JPEG/BMP/GIF/PNG
OTHER files related to Microsoft office WORD/EXCEL
POWERPOINT and PDF
FILES AUDIO/IMMAGINI/ALTRI • AUDIO/PICTURES/OTHERS

17
IT/GB
ACCOPPIAMENO DAL TELEFONO
• Attivare la funzione bluetooth sul telefono e ricer-
care nuovi dispositivi.
• Selezionare VOLKSWAGEN ed inserire la
password 1234 quando richiesta e permettere la
connessione automatica. Il VM103 sarà operativo
ogni volta che si entra in auto.
Connessione manuale: selezionare DEVICES dalla
schermata Bluetooth e premere il nome del proprio
telefono. Per disconnettere, selezionare il telefono e
poi premere su DISCONNECT.
PAIRING THROUGH THE MOBILE-PHONE
• Activate the Bluetooth-function on the mobile-
phone and search for new devices.
• Select VOLKSWAGEN and introduce the pass-
word 1234 on request. Now wait for the automatic
connection taking place. The VM103 will be opera-
tive, every time you enter into your car.
Manual Connection: select DEVICES from the
Bluetooth-page and select name of your mobile-
phone. To disconnect, select the mobile-phone and
press DISCONNECT.
ACCOPPIAMENTO DAL VM103
Premere l’icona SEARCH, selezionare il proprio
telefono cellulare quando viene rilevato. Accettare
l’accoppiamento dal telefono cellulare e permettere la
connessione automatica.
DOWNLOAD RUBRICA TELEFONICA
Per scaricare la rubrica premere l’icona CONTACTS
e successivamente SYNC.NOW. Il tempo di down-
load varia in base al numero di contatti presenti sul
telefono.
EFFETTUARE/RICEVERE UNA CHIAMATA
Digitare il numero telefonico e premere .
Termina chiamata.
CONTACTS Chiamata dalla rubrica,
HISTORY visualizza l’elenco delle chiamate.
Selezionare e confermare con .
Sullo schermo compare il numero del chiamante o
il nome indicato in rubrica. Premere l’icona per
accettare e rispondere alla chiamata oppure per
riutarla.
PAIRING THROUGH THE VM103
Press the icon SEARCH, select your mobile-phone,
as soon as localized. Accept mobile-phone-pairing
and wait for the automatic connection taking place.
DOWNLOAD PHONE-BOOK
To download the phone-book, press icons CON-
TACTS and then SYNC.NOW. The download-time
varies in due accordance with the number of con-
tacts available on the mobile-phone.
START/ANSWER A PHONE-CALL
Digit the phone-number and press .
End phone-call.
CONTACTS Call from phone-book,
HISTORY visualize list of phone-calls.
Select and confirm with .
The screen will show the phone-number of the caller,
or the name stated on the phone-book. Press
the icon to accept and answer the phone-call, or
press to refuse.
BLUETOOTH

18
IT/GB
MUSICA BLUETOOTH CON DISPOSITIVI A2DP
Premere l’icona MOBILE MEDIA nel menù Bluetooth.
Se il telefono connesso supporta il prolo A2DP è
possibile ascoltare i brani musicali.
Se il dispositivo supporta AVRCP sarà possibile con-
trollare i brani musicali direttamente dal touch screen.
Brano precedente/successivo.
Avvia/interrompe la riproduzione.
FUNZIONE I-POD
Per utilizzare iPOD e iPHONE (iPhone no a 5) con-
nettersi ad una delle 2 porte USB con il cavo originale
(APPLE). E’ possibile controllare la riproduzione
musicale direttamente dal touch screen e ricaricare al
tempo stesso il dispositivo.
Premere l’icona IPOD all’interno del menù APPS.
Selezionare il brano da riprodurre nei menù:
Playlist - Artist - Album - Genre.
I-POD-FUNCTION
To use iPOD or iPHONE, connect original APPLE-
cable to one of the two USB-ports (I-Phone up to 5).
It is possible to command the musical reproduction
directly on the Touch-screen and, at the same time,
recharge the device.
Press the icon IPOD within the APPS-Menu.
Select the track you wish to reproduce from the fol-
lowing menus: Playlist - Artist - Album - Genre.
MENU per cambiare la modalità di riproduzione:
SHUFFLE ON/OFF riproduzione casuale
SHUFFLE SONGS modalità casuale cartelle/brani/tutto
REPEAT ON/OFF ripetizione
REPEAT ONE SONG modalità ripetizione brano/cartella/
tutto
MENU change reproduction-mode:
SHUFFLE ON/OFF random reproduction
SHUFFLE SONGS random-mode Folder/Track/All
REPEAT ON/OFF repeat
REPEAT ONE SONG Repeat Track/Folder/All
BLUETOOTH-MUSIC WITH DEVICES A2DP
From the Bluetooth-Menu, press the icon MOBILE
MEDIA.
If the connected mobile-phone supports the profile
A2DP, you can listen to the musical tracks.
If the device supports AVRCP, you can command the
musical tracks directly on the Touch-screen.
Track before/after
Start/Interrupt reproduction.
BLUETOOTH iPOD

19
IT/GB
NAVIGAZIONE - NAVIGATION
Inserire la micro SD card nello slot e impostare il le
mobilenavigator.exe come le esecutivo nel setup del
dispositivo (vedi pag. 12)
Il VM103 è compatibile con le mappe di navigazione
NV978 (Italia) e NV988 (Europa).
Introduce the micro-SD card into the slot. Now treat
the file mobilenavigator.exe as an executive file within
the SET-UP-Section of the device (see page 12)
The VM103 is compatible with the navigation-maps
NV976 (Italy) and NV986 (Europe).
Collegare il proprio dispositivo nell’ingresso AUX IN e
regolare il volume all’incirca 80% del livello massimo.
E’ possibile controllare il livello audio direttamente dal
VM103 mentre la selezione delle tracce va effettuata
dal dispositivo.
Premere l’icona [AUDIO SETTING] per modicare le
impostazioni audio (vedi pag. 12-13).
Connect your device to the AUX-IN-Input and set the
Volume to about 80% of its maximum.
The Audio-level can be commanded directly on the
VM103, while the Tracks have to be selected on the
device.
Press icon [AUDIO SETTING] to modify the Audio-
settings (see page 12-13).

20
FR/D
CONNEXIONS • ANSCHLÜSSE
1. Pas activé
2. Microphone bluetooth externe
3. Sorties Pré amplifiées
4. Sorties canal central, sub-w, acceptation amplificateur
5. Entrée audio/vidéo
6. Pas activé
7. Frein à main
8. Pas activé
9. Sorties vidéo 1-2
10. Entrée USB 1- USB 2
11. Connexions caméra de recul
12. Câble d’entrée d’origine
1. Nicht aktiviert
2. Externes Bluetooth-Mikrofon
3. Vorverstärkte Ausgänge
4. Ausgänge f. Zentral-Kanal, Subw., Verstärker-Konsens
5. Eingang Audio/Video
6. Nicht aktiviert
7. Handbremse
8. Nicht aktiviert
9. Video-Ausgänge 1-2
10. Eingang USB 1- USB 2
11. Verbindungen f. Rückfahrkamera
12. Original-Eingangskabel
FUSE
AM-FM
DIVERSITY
1 3 5
2 4 6
79
8
10
11 12
GPS
Table of contents
Other Phonocar Receiver manuals

Phonocar
Phonocar VM 057 User manual

Phonocar
Phonocar VM116 User manual

Phonocar
Phonocar VM 050 User manual

Phonocar
Phonocar VM 038 User manual

Phonocar
Phonocar VM111 User manual

Phonocar
Phonocar VM 044 User manual

Phonocar
Phonocar Golf VII User manual

Phonocar
Phonocar vm 032 User manual

Phonocar
Phonocar VM 037 User manual

Phonocar
Phonocar VM 094 User manual

Phonocar
Phonocar VM 035 User manual

Phonocar
Phonocar VM 099 User manual

Phonocar
Phonocar VM112D User manual

Phonocar
Phonocar VM224 User manual

Phonocar
Phonocar VM 078 User manual

Phonocar
Phonocar VM010 User manual

Phonocar
Phonocar VM115 User manual

Phonocar
Phonocar VM 017 User manual

Phonocar
Phonocar VM 039 User manual

Phonocar
Phonocar VM 030 User manual