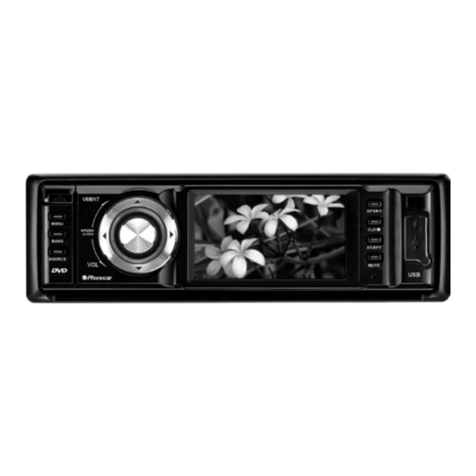
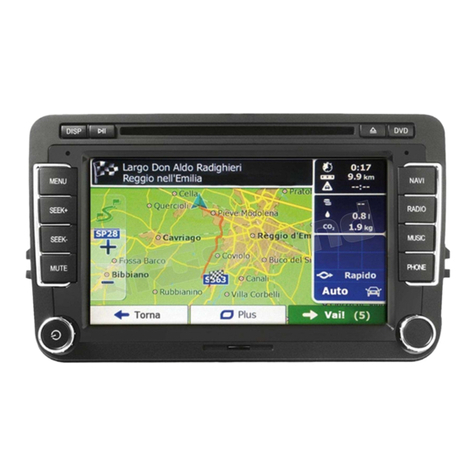
Phonocar VM 039 User manual

MANUALE ISTRUZIONI • INSTRUCTIONS MANUAL
NOTICE DE MONTAGE ET D’EMPLOI • GEBRAUCHSANWEISUNGEN
MANUAL DE INSTRUCCIONES
VM 039
6,2” TFT/LCD
DVD RECEIVER
ENGLISH
ITALIANO
FRANÇAIS
DEUTSCH
ESPAÑOL

2
IT/GB
• Per l’installazione rivolgersi al personale tecnico qualificato. • Usare solo con impianto elettrico a 12V DC con negativo a massa. • Scollegare il terminale negativo della batteria
del veicolo quando si effettuano le connessioni dell’apparecchio. • Quando si sostituisce il fusibile, utilizzarne uno con lo stesso valore di amperaggio. • Non aprire l’unità e non
tentare di ripararla, consultare il proprio rivenditore o personale tecnico qualificato. • Assicurarsi che oggetti estranei non entrino all’interno dell’apparecchio, potrebbero causare
malfunzionamenti, generare cortocircuiti elettrici o un’esposizione rischiosa ai raggi laser se presenti. • Accendere l’apparecchio solo quando la temperatura dell’abitacolo è nella
norma. • Mantenere un volume di ascolto che permetta di udire i suoni provenienti dall’esterno del veicolo (clacson, sirene, etc… • Non collegare alcun cavo in luoghi dove po-
trebbe ostacolare il funzionamento dei dispositivi di sicurezza dell’auto.
• Installation to be carried out by trained technical personnel • Make sure you have 12V DC, with negative-pole to mass • First disconnect negative-pole of the car-battery, then
effect car-radio connections • When replacing fuse, always use fuse with same Ampere-value • Never open the unit, nor try to repair yourself. Always ask your Retailer or authorized
technical staff • Make sure that no foreign objects fall into the unit, they would cause malfunctions, short-circuits or exposure to dangerous laser-rays • When switching-on, make
sure that temperate inside passenger-compartment is at a normal level • Choose a listening-Volume which will allow you to hear external noises (car-horn, sirens etc.) • When pla-
cing the cables, keep away from all car security-devices.
• Se servir du personnel technique qualifié pour l’installation. • Utiliser uniquement dans des installations électriques à 12V DC avec négatif à masse.
• Débrancher le terminal négatif de la batterie lorsqu’on fait les connexions de l’appareil. • Quand on remplace un fusible, se servir d’un autre ayant le même ampérage.
• Ne pas ouvrir l’appareil pour essayer de le réparer, contacter votre revendeur ou un personnel technique qualifié • Eviter que des corps étrangers entrent dans l’appareil, car ils
peuvent provoquer des mauvais fonctionnements, des courts circuits; éviter aussi l’exposition risquée aux rayons laser si présents. • Allumer l’appareil seulement lorsque la tempéra-
ture interne du véhicule est dans la norme • Tenir le volume à un niveau permettant d’écouter les sons en provenance de l’extérieur du véhicule (Klaxon, sirène etc.…)
• Ne brancher aucun câble dans des endroits pouvant causer les obstacles au fonctionnement des dispositifs de sécurité du véhicule.
• Die Installation muss durch technische Fachkräfte vorgenommen werden • Nur bei 12V DC verwenden, mit Negativ-Pol zur Masse • Erst den Negativ-Pol der Auto-Batterie abtren-
nen, dann die Radio-Anschlüsse herstellen • Beim Auswechseln, immer Sicherungen derselben Ampere-Stärke verwenden • Nie versuchen, das Gerät zu öffnen oder eigenhändig
zu reparieren. Immer den Händler bzw. technische Fachkräfte zu Rate ziehen • Sicherstellen, dass keinerlei Fremdkörper in das Gerät eindringen können. Diese würden Betriebs-
störungen, Kurzschlüsse oder die Entfaltung gefährlicher Laser-Strahlen verursachen • Gerät nur dann einschalten, wenn die Temperatur im Wagen-Innenraum auf normalem Niveau
ist • Lautstärke so einstellen, dass externe Geräusche (Hupe, Sirenen etc.) noch hörbar sind • Kabel fernhalten von allen Sicherheits-Geräten des Wagens.
• Para la instalación, contactar exclusivamente con empresas especializadas y personal técnicamente cualificado. • Usar solo en vehículos con alimentación de 12V DC y negativo
a masa. • Desconectar el terminal negativo de la batería del vehículo cuando se efectúen las conexiones del aparato.• Cuando se sustituya el fusible, utilizar exclusivamente fusi-
bles con el mismo amperaje. • Non abrir la unidad y no intentar repararla, consultar al revendedor o personal técnico cualificado. • Asegurarse de que no entren objetos extraños
en su interior, ya que impediría el buen funcionamiento, generar cortocircuitos eléctricos, además se corre el riesgo de una exposición muy perjudicial a los rayos laser, si están
presentes • Encender el aparato solo cuando la temperatura del habitáculo se haya normalizado. • Mantener un volumen de escucha tal que nos permita escuchar los sonidos del
ambiente circunstante. (Claxon, sirenas) • No conectar ningún cable en lugares que puedan obstaculizar el funcionamiento de los dispositivos de seguridad del coche.
Precauzioni • Warnings • Précautions • Vorsicht • Precauciones

3
IT/GB
CONNESSIONI • CONNECTIONS
INGRESSO A/V
INPUT A/V
INGRESSO ANTERIORE A/V
FRONT INPUT A/V
AUX IN R 2
AUX IN L 2
AUX IN VIDEO 2
ANTENNA GPS
GPS-ANTENNE
SLOT SD CARD
PORTA USB
USB PORT
USB
MIC
RADIO ANT
1
2
3
FUSE
4
GPS

4
IT/GB
COMANDI AL VOLANTE CONNESSIONI • STEERING-WHEEL COMMANDS CONNECTION
VERDE
GREEN
VERDE
GREEN
REVERSE
P.CONT
BRAKE
REVERSE
P.CONT
BRAKE
ROSA/PINK
ROSA/PINK
BLU-BIANCO/BLUE-WHITE
VERDE-BIANCO/GREEN-WHITE
MARRONE-NERO/BROWN-BLACK
ARANCIONE-BIANCO/ORANGE-WHITE
MARRONE-BIANCO
BROWN-WHITE
MARRONE-BIANCO / BROWN-WHITE
VERDE / GREEN
ROSA / PINK
GRIGIO / GREY
Corrispondenza colori sugli schemi
Colour-matchings per Scheme.
COMANDI AL VOLANTE CAN-BUS / CAN-BUS STEERING-WHEEL COMMANDS
Utilizzare l’interfaccia CAN BUS 4/070 o 4/073 memorizzando il prolo autoradio su VM041. Assegnare i comandi al volante secondo le istruzioni a pag. 20.
Use Interfaces CAN BUS 4/070 or 4/073 by memorizing the radio-prole VM041. Fix the various steering-wheel commands, by following the Instructions at page 20.
COMANDI AL VOLANTE CON PROTOCOLLO RESISITVO / RESISTIVE PROTOCOL STEERING-WHEEL COMMANDS
Per i collegamenti al connettore auto originale utilizzare gli schemi presenti sul manuale connessioni dell’interfaccia 4/083 o 4/085.
When connecting to the original car-connector, please refer to the connection-schemes shown in the Manual of Interface 4/083 or 4/085.
NERO/BLACK
VIOLA/PURPLE
MARRONE/BROWN
ARANCIONE-BIANCO / ORANGE-WHITE
4/070 - 4/073

5
IT/GB
CONNESSIONI • CONNECTIONS
GIALLO
YELLOW
BLU
BLUE
VERDE
GREEN
CAMERA
REVERSE
P.CONT
BRAKE
KEY GND
KEY A
KEY B
AUX-IN 1
AUX-IN 2
+Luci di retromarcia / Lights for Reverse-gear
COLLEGAMENTI PER RETROCAMERA / CONNECTIONS FOR REAR-CAMERA
SERVIZI
FUNCTIONS
ROSA/PINK
BLU-BIANCO/BLUE-WHITE
VERDE-BIANCO/GREEN-WHITE
MARRONE-NERO/BROWN-BLACK
ARANCIONE-BIANCO/ORANGE-WHITE
MARRONE-BIANCO
BROWN-WHITE
REVERSE
P.CONT
BRAKE
KEY GND
KEY A
KEY B
Attivazione retrocamera
Remote amplicatore
Freno a mano (collegamento obbligatorio)
Massa Comandi al volante
Linea A Comandi al volante
Linea B Comandi al volante
Ingressi audio
VERDE
GREEN
1
ROSA/PINK
BLU-BIANCO/BLUE-WHITE
VERDE-BIANCO/GREEN-WHITE
MARRONE-NERO/BROWN-BLACK
ARANCIONE-BIANCO/ORANGE-WHITE
MARRONE-BIANCO
BROWN-WHITE
Rear-Camera Activation
Amplifier Remote
Hand-Brake (connection absolutely necessary)
Ground for Steering-wheel Commands
Line A Steering-wheel Commands
Line B Steering-wheel Commands
Audio input

6
IT/GB
CONNESSIONI • CONNECTIONS
2
4
3
GRIGIO/GRAY
MARRONE
BROWN
NERO
BLACK
VERDE/GREEN
VERDE-NERO/GREEN-BLACK
BIANCO/WHITE
ROSSO/RED
BIANCO-NERO/WHITE-BLACK
NERO/BLACK
VIOLA/PURPLE
ARANCIO / ORANGE
VIOLA-NERO/PURPLE-BLACK
BLU/BLUE
GRIGIO-NERO/GRAY-BLACK
GIALLO/YELLOW +12V Positivo batteria
+12V Sottochiave
Massa
IIlluminazione / Dimmer
Accensione antenna elettrica
ANTERIORE DESTRO
FRONT RIGHT
MULTIZONA DESTRO / RIGHT
MULTIZONA SINISTRO / LEFT
USCITA VIDEO POSTERIORE 1
INGRESSO VIDEO / VIDEO INPUT
USCITA SUB WOOFER / SUB-WOOFER OUTPUT
ANTERIORE DESTRO / FRONT RIGHT
ANTERIORE SINISTRA / FRONT LEFT
POSTERIORE DESTRO / REAR RIGHT
POSTERIORE SINISTRA / REAR LEFT
ANTERIORE SINISTRO
FRONT LEFT
POSTERIORE DESTRO
REAR RIGHT
POSTERIORE SINISTRO
REAR LEFT
FRONT R +
FRONT R -
FRONT L +
FRONT L -
REAR R +
REAR R -
REAR L +
REAR L -
MULTIZONE R OUT
MULTIZONE L OUT
REAR VIDEO OUT
AUX VIDEO IN
SUB WOOFER
FRONT R
FRONT L
REAR R
REAR L
USCITE ALTOPARLANTI
SPEAKERS OUTPUT
ALIMENTAZIONE
POWER-SUPPLY
USCITE PRE-AMP
PRE-AMP OUTPUT
BATT
ACC
GND
ILLUMI
AMP/ANT Remote
Durante l’avviamento dell’auto il VM039 potrebbe spegnersi per poi riaccendersi. Per evitare questo inconveniente collegare lo stabilizzatore di tensione 5/146.
The VM039 could turn-out and turn-on again, when the ignition-key gets activated. You can avoid such inconvenience, by connecting the tension stabilizer 5/146.
+12V Battery-Positive
+12V Injection-Key
Ground
Illumination / Dimmer
Activation of Electric Aerial
Mute
Non gestibili dal volume
Can not be managed by volume

7
IT/GB
FUNZIONI • FUNCTIONS
1. Espulsione disco
2. Seleziona sorgenti
3. Menù principale
4. IR
5. Accensione - Volume - Silenziamento Audio
6. Reset
7. Porta per USB
8. Slot per SDHC Card
9. Ingresso A/V IN
10. Slot micro SD Card per navigazione
11. Feritoia disco
1. Eject disc
2. Enter navigation mode.
3. Menu.
4. IR
5. ON-OFF - Adjust volume - Mute
6. Reset
7. USB port
8. SDHC card slot
9. AV-IN input
10. Map Micro SD Card slot
11. Disc CD/DVD slot
1
2
34
11
5
6
8
7
9
10

8
IT/GB
FUNZIONI
TELECOMANDO
• REMOTE-CONTROL FUNCTIONS
1. HOME Menù principale
2. EJECT Espulsione disco
3. TUNER Banda radio
4. DISC Disco
5. Traccia o capitolo precedente
Ricerca automatica stazioni
6. BAND Banda radio
7. ZOOM Zoom in modalità DVD
Lista le musicali
8. Regolazioni schermo
9. EQ Equalizzatore
10. Muove cursore nei menu
11. OK Conferma
12. MENU Menu DVD
Attiva-Disattiva PBC nei VCD
13. Tastierino numerico
14. REPEAT Ripete riproduzione
15. SRC Cambio sorgente
16. POWER Accensione/Spegnimento
17. BT Bluetooth
18. MAP Navigazione
19.
/
Avvia/Interrompe riproduzione
20. Traccia o capitolo seguente
Ricerca automatica stazioni
21. Seleziona angolo di visione
Rotazione immagini - Lista le video
22. Sottotitoli DVD - Lista le immagini
23. AUDIO Lingua audio DVD
24. VOL Volume +/-
25. SETUP Impostazioni di sistema
26. Attiva/Disattiva volume
27. GOTO Salto traccia/capitolo
28. Invia/Riceve chiamata
29. Aggancia/Riuta chiamata
30. RANDOM Riproduzione casuale
31. Cancella numeri digitati
1. HOME Main Menu
2. EJECT Eject Disc
3. TUNER Radio-Band
4. DISC Disc
5. Track or Chapter before
Autom. Stations-Research
6. BAND Radio-Band
7. ZOOM Zoom for DVD-mode
List of Musical Files fmusicali
8. Screen-Setup
9. EQ Equalizer
10. Move cursor within Menus
11. OK Confirmation
12. MENU DVD-Menu
Activate-Deactiv. PBC in VCD
13. Number-Keys
14. REPEAT Repeat Reproduction
15. SRC Select Source
16. POWER ON / OFF
17. BT Bluetooth
18. MAP Navigation
19.
/
Start/Interrupt reproduction
20. Track or Chapter after
Autom. Stations-Research
21. Select Vision Angle
Rotate Picture – list Video-files
22. DVD-subtitles – list picture-files
23. AUDIO DVD-Audio-language
24. VOL Volume +/-
25. SETUP System-Setup
26. Activate/Deactivate Volume
27. GOTO Skip track/chapter
28. Start/Answer Call
29. Finish/Refuse Call
30. RANDOM Random-Reproduction
31. Cancel dial-numbers

9
IT/GB
MENÙ • MENU
All’accensione dell’autoradio compare il MENU principale.
Con le icone sullo schermo si seleziona la sorgente o la funzione
desiderata.
Passa al Menù successivo
14:20 Data e orario
Equalizzatore
Sfondo schermo precaricato
Passa al Menù precedente
Go to previous Menu
When you switch-on the car-radio, the Main Menu will appear.
With the icons on the screen, you can choose the Source and the
requested Functions.
Go to next Menu
14:20 Date and Time
Equalizer
Wallpaper

10
IT/GB
VIDEO
• PARCHEGGIO Attiva/Disattiva la visione
in movimento dei lmati.
ATTENZIONE: In alcuni paesi è severamente
vietato attivare questa funzione, la visione deve
essere vincolata al freno a mano.
SUONO
• SUBWOOFER Attiva/Disattiva uscita pre
subwoofer.
• FILTRO Cambia taglio crossover subwoofer
80/120/160 Hz.
SOUND
• SUBWOOFER Activate/Deactivate Subwoofer
Pre-Exit.
• FILTER Change subwoofer crossover-cut
80/120/160 Hz.
VIDEO
• PARKING Activate/Deactivate
DVD-reproduction while moving.
ATTENTION: In certain Countries, the activation
of this Function is severely forbidden and has to
be combined with the hand-brake.
IMPOSTAZIONI DI SISTEMA • SYSTEM SETUP
IMPOSTAZIONI GENERALI
• REGIONE Seleziona area di appartenenza.
• RADIO RANGE Seleziona stazioni.
• BLACKOUT Spegnimento automatico schermo.
• DIMMER Regola la luminosità dello schermo.
• BEEP Attiva/Disattiva suono tasti
• CALIBRAZIONE La calibrazione avviene toccando
lo schermo secondo la sequenza indicata.
• SFONDO cambia sfondo precaricato.
• RICONOSCIMENTO GESTUALE Non attivare.
• RGB SETTING Cambia colore tasti.
GENERAL SETUP
• REGION Select Area
• RADIO RANGE Select Stations.
• BLACKOUT Activate automatic screen-shut-off.
• DIMMER Set Screen-Brightness
• BEEP Activate/Deactive Key-sound
• CALIBRATION For Calibration touch the screen
per stated sequence.
• WALLPAPER change background preloaded.
• GESTUAL CONTROL Do not activate.
• RGB SETTING Change colour keys.
Premere l’icona sul pannello del menù principale per modificare: Generali, Video, Suono, Data e ora, Lingua, Bluetooth, DVD, Volume sorgenti.
Press Setup-icon on the Main-Menu-interface, to change: General, Video, Audio, Date and Time, Language, Bluetooth, DVD, Source-Volume.

11
IT/GB
IMPOSTAZIONI BLUETOOTH
• BLUETOOTH Attiva/Disattiva la funzione
bluetooth.
• AUTO CONNESSIONE Attiva/Disattiva la
connessione automatica del telefono al VM039.
• AUTO RISPOSTA Attiva/Disattiva la risposta
automatica di una chiamata dopo il terzo squillo
• ACC Imposta il codice di accoppiamento da
digitare sul telefono (codice di fabbrica 0000).
BLUETOOTH SETTINGS
• BLUETOOTH Activate/Deactivate
Bluetooth-function.
• AUTO-CONNECTION Activate/Deactivate
automatic phone-connection with the VM039.
• AUTO-REPLY Activate/Deactivate automatic
phone-answering after three times ringing.
• ACC Set coupling-code necessary for the phone
(Factory code 0000).
IMPOSTAZIONI DI SISTEMA • SYSTEM SETUP
REGOLAZIONE DATA E ORA
• Posizionarsi sulla voce da modicare ed effettuare
le modiche.
IMPOSTAZIONI LINGUA
• OSD Cambia la lingua dei menù di sistema.
• DVD AUDIO Indica la lingua principale dei DVD.
• SOTTOTITOLI DVD Seleziona la lingua.
• MENÙ DVD Seleziona lingua principale dei
menù nei DVD
LANGUAGE SETTINGS
• OSD Change Language of System-menus.
• DVD AUDIO States Main DVD-Language.
• DVD-SUBTITLES Select Language.
• DVD-MENU Select Main Language for
DVD-menus.
SETTING DATE AND TIME
• Touch the function required and change values.

12
IT/GB
IMPOSTAZIONI DI SISTEMA • SYSTEM SETUP
IMPOSTAZIONI DVD
• PASSWORD Attiva/Disattiva password per la
visione limitata dei DVD (protezione bambini).
• RATING Imposta il livello di protezione per la
visione: KID SAFE Accettabile per i bambini.
G Accettabile per spettatori in generale.
PG Suggerita visione dei bambini con
presenza adulti.
PG-13 Inadatto a bambini inferiori ai 13 anni.
PG-R Raccomandato ai genitori per restringere
la visione ai bambini al di sotto dei 17
anni.
R Raccomandata presenza adulti per bambini
sotto i 17 anni.
NC-17 Inadatto a bambini al di sotto dei 17 anni.
ADULT Accettabile per soli adulti.
• DRC Attiva/Disattiva compressione audio
dinamica dei DVD.
• RESET Riporta il sistema alle impostazioni di
fabbrica.
DVD SETTINGS
• PASSWORD Activate/Deactivate password for
DVD-restriction (Youth protection).
• RATING Set protection-level for DVD-Youth-
REGOLAZIONE VOLUME
E’ possibile regolare un diverso volume per ogni sor-
gente, in modo da evitare sbalzi di livello. Seleziona-
re la sorgente ed effettuare la regolazione voluta.
SOURCES VOLUME
Every single Source has its own Volume-Set-
ting. This will exclude the disturbing impact of
intensity-differences when switching from one
Source to another.
RADIO
FUNZIONI RADIO
Torna al menù principale.
LOCAL/DISTANCE Stazioni vicine/lontane.
STEREO/MONO Tipo diffusione audio.
FM/AM Banda.
•••• Passa ad altre funzioni.
Ricerca stazioni. Premere per automatica
o tenere premuto per manuale / Indietro-Avanti.
Premere per ricerca e memorizzazione
stazioni più forti.
Cambia banda radio AM/FM.
12:35 Orologio.
P6 Stazione radio attuale.
103.60 Attuale frequenza radio.
AF Ricerca stazione alternativa.
TA Annunci informazioni sul trafco.
RADIO-FUNCTIONS
Back to Main Menu.
LOCAL/DISTANCE Stations Local/Distance.
STEREO/MONO Type of Audio-diffusion.
FM/AM Band.
•••• Switch to other functions.
Ricerca stazioni. Premere per automatica
o tenere premuto per manuale / Indietro-Avanti.
protection. KID SAFE Acceptable for Children
G Acceptable for the general Public
PG For Children under the direct supervision
of an Adult.
PG-13 Inadequate for Children aged less than 13.
PG-R For Parents forbidding Children aged less
than 17.
R Children aged less than 17, should watch
under the direct supervision of an Adult.
NC-17 Inadequate for Children aged less than 17.
ADULT For Adults only.
• DRC Activate/Deactivate DVD dynamic audio
compression.
• RESET Resume Factory System-setup.

13
IT/GB
FUNZIONI RADIO / RADIO FUNCTIONS
RDS Opzioni / Options.
FUNZIONI RADIO
• RDS Attiva/Disattiva la funzione RDS.
• CT Attiva/Disattiva il controllo dell’orologio tramite
RDS.
• TA Attiva/Disattiva le informazioni sul trafco.
• PTY Mostra la lista dei programmi RDS.
• VOL Regolazione volume.
• EON abilita la radio all’utilizzo completo delle informa-
zioni RDS. Quando la funzione è attiva viene costante-
mente controllata la lista delle frequenzealternative (AF)
di tutta la banda. EON mantiene anche una traccia delle
stazioni che trasmettono le informazioni sul trafco (TP).
RADIO-FUNCTIONS
• RDS Activate/Deactivate RDS-function.
• CT Activate/Deactivate clock-control through
• RDS (when Area offers RDS-function)
• TA Activate/Deactivate Traffic-Information.
• PTY Shop List of RDS-programs.
• VOL Set Volume.
• EON puts radio in a condition to use full RDS
Information. When activated, the function constantly
checks the alternative Frequencies (AF) on the
whole band. EON also keeps record of those sta-
tions broadcasting Traffic-Information (TP).
Premere per ricerca e memorizzazione
stazioni più forti.
Change radio-band AM/FM.
12:35 Clock
P6 Current radio-station.
103.60 Current radio-frequency.
AF Research alternative Station.
TA Traffic-Information Announcements.
FUNZIONI RADIO
Memorizza stazione radio.
Imposta ricezione radio LOCAL/DISTANCE,
Imposta frequenza radio manuale.
Equalizzatore.
RADIO-FUNCTIONS
Memorize radio-station.
Set radio-reception LOCAL/DISTANCE,
Set manual radio-frequency.
Equalizer.

14
IT/GB
EQUALIZZATORE • EQUALIZER
EQUALIZZATORE - LOUDNESS
• Premere l’icona per modicare le
impostazioni di fabbrica. Tramite le icone è
possibile selezionare 8 diverse modalità di
equalizzazione preimpostate: USER-FLAT-POP
ROCK-CLASSIC-JAZZ-TECHNO-OPTIMAL.
L’icona riporta in OPTIMAL.
• LOUD Attiva/Disattiva esaltazione basse
frequenze.
FADER - BILANCIAMENTO - SUB WOOFER
Premere per accedere alle regolazioni.
Utilizzare le frecce presenti sullo schermo per le
regolazioni del FADER, del BILANCIAMENTO e del
SUB W.
FADER - BALANCE - SUBWOOFER
Press to enter Setup-functions.
Use arrows appearing on the screen, to set
FADER, BALANCE and Subwoofer.
EQUALIZER - LOUDNESS
• Press icon To modify the factory settings.
By means of the icones it is possible to choose
8 different predetermined equalization-modes:
USER-FLAT-POP-ROCK-CLASSIC-JAZZ
TECHNO-OPTIMAL.
The icone returns to OPTIMAL.
• LOUD Activate/Deactivate boosting of Low
Frequencies.
RIPRODUZIONE • PLAYBACK
FUNZIONI DVD
Con l’inserimento di un DVD appare il menu titoli
del lmato. Avviare la riproduzione confermando
con il tasto OK del telecomando o premendo sullo
schermo nel punto indicato dal DVD.
EQ Equalizzatore
Traccia/capitolo precedente o successivo.
Avvia o mette in pausa la riproduzione.
•••• Passa al menù esteso.
Seleziona traccia o capitolo da riprodurre.
Torna al menù principale.
DVD-FUNCTIONS
When DVD is introduced, the Titles-menu will
appear. Start Reproduction, by pressing OK on the
remote-control or press the spot shown by the
DVD on the screen.
EQ Equalizer
Track/Chapter before or after.
Start / Pause reproduction.
•••• Move to extended Menu.
Select Track or Chapter for reproduction.
Back to Main Menu.

15
IT/GB
RIPRODUZIONE • PLAYBACK DVD-CD-USB-SD CARD
REGOLAZIONI SCHERMO
Muoversi con i tasti direzionali del telecomando
per posizionarsi sulla impostazione da regolare.
SCREEN-SETTINGS
Use Direction-Keys of remote-control, to move to
the requested Setup-options.
FUNZIONI DVD
MENÙ Torna al menù scene DVD.
A-B Ripetizione dal punto A al punto B.
AUDIO Cambia la lingua audio del DVD.
LANGUAGE Cambia la lingua dei sottotitoli.
REPEAT Imposta ripetizione
titolo/traccia/capitolo/cartella.
PIC Modica le regolazioni dello schermo.
Torna al menu precedente.
DVD-FUNCTIONS
MENU Back to Menu before.
A-B Repeat from A to B.
AUDIO Change DVD-Audio-Language.
LANGUAGE Change Subtitles-Language.
REPEAT Set Repetition of Title/Track
Chapter/Folder.
PIC Change Screen-Settings.
Back to Menu before.
FUNZIONI USB/SDCARD
All’inserimento del supporto USB/SD verrà visua-
lizzato il contenuto sullo schermo.
Se sono presenti brani musicali la riproduzione
partirà automaticamente.
Selezionare la lettera iniziale corrispondente al
titolo del brano. Selezionare il tipo di le da ripro-
durre tramite l’icona relativa.
MUSICA VIDEO
IMMAGINI TUTTI I FILE
USB/SD-FUNCTIONS
When introducing the USB/SD-support, the con-
tents will be visualized on the screen.
In the presence of musical files, reproduction will
start automatically.
Select Reproduction-File by clicking the related
files-icon.
MUSIC VIDEO
PICTURES ALL FILES

16
IT/GB
RIPRODUZIONE • PLAYBACK DVD-CD-USB-SD CARD
RIPRODUZIONE MUSICA
•••• Estende il menù
LIST Torna all’elenco le.
Traccia successsiva/precedente.
MUSIC-REPRODUCTION
•••• Extend Menu
LIST Back to Files-List
Track after/before
RIPRODUZIONE MUSICA
REPEAT Ripete traccia/cartella/disco.
SHUFFLE Riproduzione casuale.
Avvia/Interrompe la riproduzione.
GOTO Inserisce il numero traccia da riprodurre.
EQ Equalizzatore.
Ricompatta menù.
MUSIC-REPRODUCTION
REPEAT Repeat Track//Folder/CD.
SHUFFLE Random-Reproduction.
Start/Interrupt Reproduction.
GOTO Introduce Track-number for Reproduction.
EQ Equalizer.
Recompact Menu.
FUNZIONI VIDEO
Con l’inserimento di un USB appare il menu titoli
del lmato. Avviare la riproduzione confermando
con il tasto OK del telecomando o premendo sullo
schermo nel punto indicato dal USB.
EQ Equalizzatore
Traccia/capitolo precedente o successivo.
Avvia o mette in pausa la riproduzione.
•••• Passa al menù esteso.
Seleziona traccia o capitolo da riprodurre.
Torna al menù principale.
VIDEO-FUNCTIONS
When USB is introduced, the Titles-menu will
appear. Start Reproduction, by pressing OK on the
remote-control or press the spot shown by the
USB on the screen.
EQ Equalizer
Track/Chapter before or after.
Start / Pause reproduction.
•••• Move to extended Menu.
Select Track or Chapter for reproduction.
Back to Main Menu.

17
IT/GB
RIPRODUZIONE • PLAYBACK DVD-CD-USB-SD CARD
FUNZIONI VIDEO
REPEAT Imposta ripetizione
titolo/traccia/capitolo/cartella.
PIC Modica le regolazioni dello schermo.
Torna al menu precedente.
VIDEO-FUNCTIONS
REPEAT Set Repetition of Title/Track
Chapter/Folder.
PIC Change Screen-Settings.
Back to Menu before.
RIPRODUZIONE IMMAGINI
Selezionare il le desiderato per visualizzare
l’immagine. Per far comparire il menù premere la
parte inferiore dello schermo.
•••• Passa al secondo menù.
EQ Equalizzatore
Immagine precedente o successiva.
Avvia o mette in pausa la riproduzione.
Seleziona immagine da riprodurre.
PICTURE-PLAYBACK
Select the requested file to visualize related
Picture. To get the Menu on the screen, touch
the bottom border of the screen.
•••• To procede to the second menu.
EQ Equalizer
Previous/next
picture .
To Start / Interrupt Reproduction.
To digit number of pictures to be
reproduced.
RIPRODUZIONE IMMAGINI
Torna al primo menù.
Torna all’elenco le.
Riporta alle impostazioni originali.
Per ruotare immagine.
Ingradisce l’immagine (zoom).
Modica le regolazioni dello schermo.
PICTURE-PLAYBACK
To return to the first menu.
Menu les.
Revert.
To rotate the picture.
To enlarge the Picture (zoom).
Change Screen-Settings.

18
IT/GB
IMPOSTAZIONI BLUETOOTH • BLUETOOTH-SETTINGS
PHONE-BOOK SYNCHRONIZATION
Press to enter the setting options and select
SYNC.
The phone-book of your telephone will automati-
cally be downloaded into the car-radio’s memory.
The time required for this operation depends on
the number of contacts contained in the phone-
book.
SINCRONIZZAZIONE RUBRICA
Premere per accedere alle impostazioni e
selezionare SINC.
Automaticamente la rubrica del telefono verrà
scaricata nella memoria dell’autoradio. Il tempo
per l’operazione varia in base al numero dei
contatti.
ACCOPPIAMENTO TELEFONO
E’ possibile accoppiare no a 5 telefoni.
Ricerca dal telefono:
• Attivare la funzione bluetooth sul telefono e
ricercare nuovi dispositivi.
• Selezionare VM039 nella lista dispositivi,
inserire la password 0000 quando richiesta.
Ad accoppiamento avvenuto comparirà il nome
del telefono. Attivare nelle impostazioni blueto-
oth del telefono la connessione automatica del
dispositivo VM039.
Ricerca dal VM039:
Premere l’icona e selezionare il telefono da
accoppiare una volta terminata la ricerca.
Digitare il codice PIN 0000 sul telefono.
Ad accoppiamento avvenuto comparirà il nome
del telefono. Attivare nelle impostazioni
bluetooth del telefono la connessione automatica
del dispositivo VM039.
PHONE-PAIRING
Possibility of coupling up to 5 mobile-phones.
Research through mobile-phone:
• Activate Bluetooth-function on the mobile-phone
and search for new devices
• Select VM039 from the List of Devices and digit
Password 0000 on request.
When pairing has taken place, phone-name will
appear. Starting from the Bluetooth-Settings of the
mobile-phone, activate the automatic connection
of VM039.
Research through VM039:
Press icon and select mobile-phone to be
coupled.
Digit PIN-code 0000 on the mobile-phone.
When pairing has taken place, phone-name will
appear. Starting from the Bluetooth-Settings of the
mobile-phone, activate the automatic connection
of VM039.

19
IT/GB
FUNZIONI BLUETOOTH • BLUETOOTH-FUNCTIONS
BLUETOOTH MUSIC PLAY
If the connected phone supports the A2DP-
Profile, you can listen to music.
If the device supports AVRCP, the musical tracks
can be handled on the touch-screen directly.
/ Previous/next Track.
Start/interrupt reproduction.
EQ Equalizer.
EFFETTUARE UNA CHIAMATA
• Selezionare Bluetooth dal menù principale.
• Premere una delle icone presenti sullo schermo
per chiamare da uno degli elenchi.
chiamate perse chiamate ricevute
chiamate effettuate rubrica telefonica
(deve essere stata sincronizzata in precedenza).
chiamata dal tastierino numerico.
Premere l’icona per inviare la chiamata.
Diversamente digitare il numero da chiamare di-
rettamente sul tastierino presente sullo schermo.
RICEVERE UNA CHIAMATA
All’arrivo di una chiamata lo schermo passa in
modalità bluetooth visualizzando il numero del
chiamante e il nominativo se la rubrica è sincro-
nizzata.
Premere per rispondere o per riutare la
chiamata.
ANSWERING A PHONE-CALL
When phone-call arrives, screen switches to
Bluetooth-mode and visualizes the caller’s phone-
number and name, if phone-list has previously been
synchronized.
Press to answer or reject the Call.
STARTING A PHONE-CALL
• Select Bluetooth from the Main Menu.
• Press one of the icons available on the screen, to
choose requested Phone-List.
Calls lost Calls answered
Calls started Phone-Book
(Previously synchronized)
Phone-calls from number-keys.
Press icon to start a phone-call.
As an alternative, digit phone-number directly on
the number-keys available on the screen.
RIPRODUZIONE MUSICA BLUETOOTH
Se il telefono connesso supporta il prolo A2DP
è possibile ascoltare i brani musicali.
Se il dispositivo supporta AVRCP sarà possibile
controllare i brani musicali direttamente dal touch
screen.
/ Brano precedente/successivo.
Avvia/interrompe la riproduzione.
EQ Equalizzatore.

20
IT/GB
NAVIGAZIONE - INGRESSI AV - RETROCAMERA • NAVIGATION - AV INPUTS - REAR-CAMERA
REAR-CAMERA
You can connect a rear-camera on the specific
CAMERA-input (on the back). The VM039 offers the
possibility of automatically visualizing the rear-cam-
era, if you connect the camera to the reverse-gear-
lights (See connection-schemes page 5); in such
case, the screen will show the rear-camera-pictures
each time you put the reverse-gear.
The Rear-Camera can be visualized promptly, at any
time, by pressing the CAMERA-icon from the Main
Menu.
NAVIGAZIONE
Codice mappe: EUROPA NV987 - ITALIA NV977
Il VM039 è compatibile con la navigazione iGo 8
e iGo Primo.
Inserire la SD card nello slot GPS.
Avviare il programma di navigazione tramite l’ico-
na (Navigation) presente nel menù principale.
Seguire il manuale d’uso della navigazione iGo
incluso nella sd card.
NAVIGATION
Suitable Maps: EUROPE NV987 - ITALY NV977
VM039 is compatible with navigation-types iGo 8
and iGo Primo.
Introduce SD-card into the GPS-port.
Start navigation-program by using the Navigation-
icon available on the Main Menu.
Now follow the iGo-Navigations-Manual supplied
with the SD-card.
INGRESSI AV IN
E’ possibile visualizzare la riproduzione di due
sorgenti esterne collegate agli ingressi AV IN 1
(frontale) e AV 2 (posteriore).
Premere l’icona corrispondente sul menù princi-
pale per scegliere la sorgente AV IN 1 o AV IN 2.
REAR ZONE
Per riprodurre sorgenti DVD/AV sull’uscita poste-
riore. Non compatibile con USB.
INPUTS for AV IN
You can reproduce from two external sources con-
nected to the Inputs AV IN 1 (front) and AV 2 (rear).
From the Main Menu, choose between source AV
IN 1 and AV IN 2, and press related icon.
REAR ZONE
Playback DVD/AV source. Not compatible with
USB.
RETROCAMERA
E’ possibile collegare una retrocamera all’ingres-
so specico CAMERA (posteriore).
Il VM039 visualizza automaticamente l’immagi-
ne della telecamera collegandosi con la luce di
retromarcia (Vedi collegamenti pag. 5).
Per visualizzare in qualunque momento l’immagi-
ne della telecamera premere l’icona “CAMERA”
nel menù principale.
Table of contents
Other Phonocar Receiver manuals

Phonocar
Phonocar VM010 User manual

Phonocar
Phonocar VM 044 User manual

Phonocar
Phonocar VM 037 User manual

Phonocar
Phonocar VM 035 User manual

Phonocar
Phonocar VM 099 User manual

Phonocar
Phonocar VM115 User manual

Phonocar
Phonocar VM 057 User manual

Phonocar
Phonocar VM112D User manual

Phonocar
Phonocar VM 038 User manual

Phonocar
Phonocar VM 017 User manual

Phonocar
Phonocar VM224 User manual

Phonocar
Phonocar VM116 User manual

Phonocar
Phonocar VM 030 User manual

Phonocar
Phonocar VM111 User manual

Phonocar
Phonocar VM 094 User manual

Phonocar
Phonocar VM 078 User manual

Phonocar
Phonocar vm 032 User manual

Phonocar
Phonocar VM 050 User manual

Phonocar
Phonocar VM103 User manual

Phonocar
Phonocar Golf VII User manual