Model 541 Operating Instructions
841
Holt
Road
#1
•Webster, NY 14580 Tel: 585-872-9350 •Fax: 585-872-2638 [email protected] •http://www.piecal.com/Practical Instrument Electronics, Inc. Copyright 2003. All rights reserved. 541-9002 6/25/04 3-8
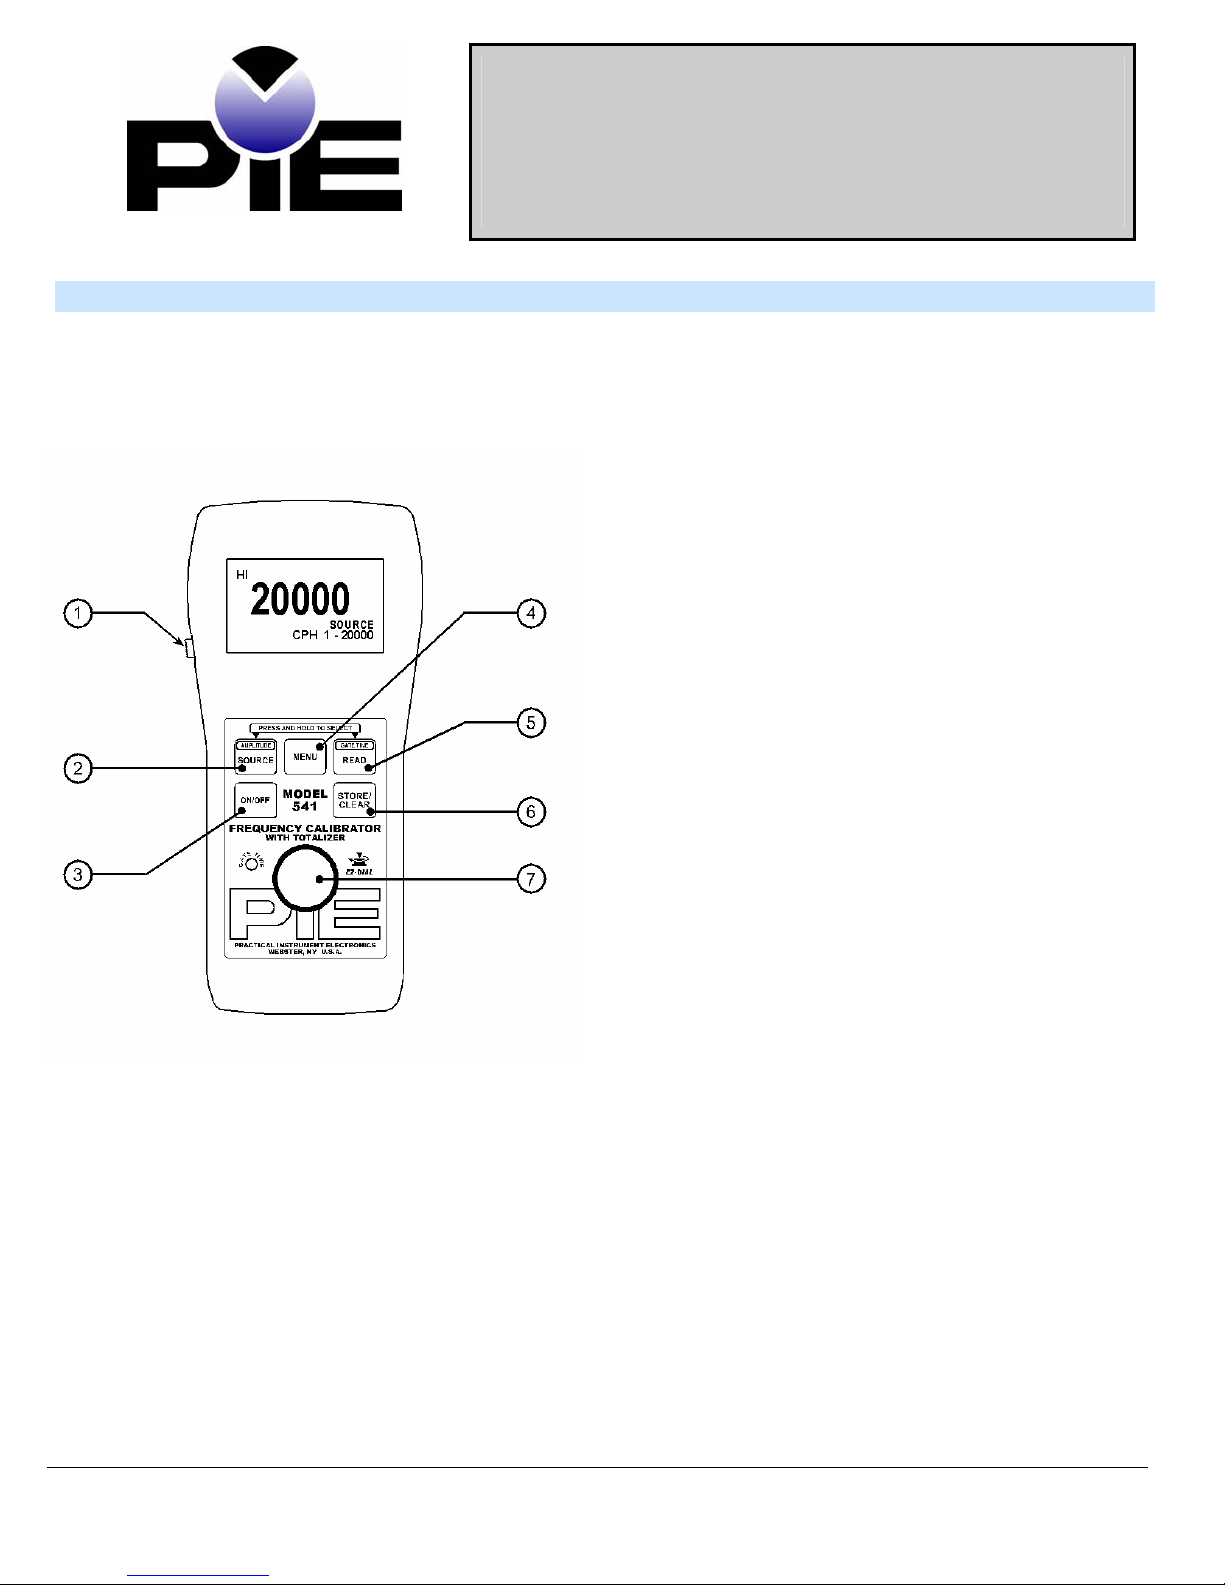
C. EZ-DialKnob
Source mode - Adjust the output up and down with the EZ-Dialknob. The increment is the far right digit
(XXXX1). Press while turning to adjust 100X faster (XX1XX)
Read mode – Trigger level adjustment. Adjust knob until LED Blinks and Reading is displayed.
D. EZ-CheckSwitch
The EZ-Check™ switch has three positions -- high, set, and low. Its position is shown at the left edge of the
LCD display with “HI” and “LO” indicators. Use of the EZ-Checkswitch depends on mode:
Source Modes:
Slide the EZ-Checkswitch to the HI and LO positions to recall the settings stored in those
positions. While in the HI and LO positions, dial the EZ-Dialknob to change the display. Press
STORE/CLEAR to save new settings in the HI and LO positions. The display will flash “STORED” to
confirm.
Hint: For faster calibrations, the position of the switch can be felt. This feature allows continuous monitoring
of the device being calibrated without looking back at the Model 541 display. This is also useful in poor
lighting or under difficult operating conditions.
Read Modes:
In read modes, with the EZ-Checkswitch in the middle position, the Model 541 calibrator records
the maximum and minimum readings observed in each mode. Slide the EZ-Checkswitch to the HI
and LO positions to display the readings. Press STORE/CLEAR to clear the readings. The display will
flash “CLEARED” to confirm.
E. TOTALIZE Pushbutton
The EZ-StepSwitch pushbutton is a feature for read and source modes.
Push the EZ-Step™ like a stop watch to run or stop Totalizing.
F. FREQUENCY OUTPUT (SOURCE MODE)
Press the SOURCE button to select the Frequency output mode, the word Source will appear on the LCD
Display. Press the SOURCE button to select the desired frequency range. Press and hold the
Source/Amplitude button to enter the Amplitude adjustment screen. Then turn the EZ-Dialknob to select
the desired Level (amplitude) this will be indicated on the LCD. Levels are indicated in Vp and Vpp with
respect to the black lead (-). Then press the SOURCE/AMPLITUDE or STORE/CLEAR button to save
selections and to exit.
You are able to setup three desired set points for quick calibration. Use the EZ-Checkslide switch. Slide
the EZ-Checkswitch to the HI and dial the EZ-Dialto the desired set point. Press the STORE/CLEAR
button to save settings. Do the same in the LO positions. For the mid range just dial it to the set point. It
will stay at that point unless you move the EZ-Dial. This is so you may test linearity in the mid range
while maintaining the 0% and 100% end points.
Connect the Model 541 to the output of the equipment or sensor to being calibrated then slide the EZ-Check
switch to the HI, MIDDLE and LO positions to recall the settings stored in those positions.
If you need to change set points, while in the HI and LO positions, dial the EZ-Dialknob to change the
display. Press STORE/CLEAR to save new settings in the HI and LO positions. The display will flash
“STORED” to confirm.