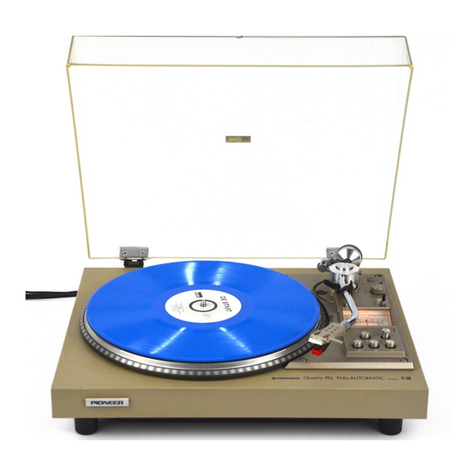
Pioneer PL-520 User manual

The
home
of
the
turntable
TH¢
VINYL
ENGIne
For
more
turntable
manuals
and
setup
information
please
visit
www.vinylengine.com

DIRECT-DRIVE
2-motor
FULL-AUTOMATIC
TURNTABLE
L=520
3§
MPIONEER
OPERATING
INSTRUCTIONS
CONTENTS
PL-520
Features
...
1
Line
Voltage
Selector
Switch
2
Attaching
the
Cartridge
.............
2
Assembly
Procedure
...........++5+
3
Adjusting
the
Tonearm
............
4
Dust
Cover
..........eeeeeeeeeeee
5
Stereo
Amplifier
Connections
........
5
Panel
Facilities
................04.
6
Operation
8
Adjusting
Stylus
Descent
Position
....
10
General
Precautions
.............--
10
Troubleshooting
..............-2...
11
Specifications
.................65.
12
This
turntable
is
available
in
two
models:
one
with
a
Pioneer
phono
cartridge,
and
the
other
without
a
phono
cartridge.
The
perform-
ance
and
functions
are
the
same.
These
OPERATING
INSTRUC-
TIONS
are
based
on
the
former
PL-520.
PL-520
FEATURES
Brushless
DC
Servomotor
with
Hall
Elements
The
PL-520
incorporates
a
high-precision
phonomotor
combin-
ing
control
circuitry
composed
of
semiconductors
with
Hall
elements
in
the
brushless
DC
motor.
The
speed
of
the
platter
is
smooth
since
the
Hall
elements
guarantee
accurate
position
detection
and
the
motor's
winding
current
is
controlled
by
transis-
tors.
Another
feature
is
the
high
inertia
platter.
Altogether,
these
attractive
features
make
for
a
signal-to-noise
ratio
of
more
than
73dB
(DIN-B)
and
a
wow
and
flutter
of
less
than
0.03%
(WRMS).
Two-motor,
Full-automatic
Turntable
with
Precision
Geared
Motor
Mechanisms
The
lead-in
and
return
of
the
tonearm
are
performed
by
a
special
precision
geared
motor
mechanism
which
does
not
affect
the
speed
of
the
platter
at
all.
Furthermore,
a
speed
detection-type
auto-return
mechanism
controls
the
tonearm
for
accurate
and
stable
operation
every
time
it
is
returned
to
the
arm
rest.
Switches
and
Controls
are
Located
at
the
Front
for
Easy
Operation
The
two-speed
fine-adjustment
knobs
for
adjusting
the
speed
of
the
platter,
the
push-button
speed
selector
switch,
the
size
selector
for
selecting
the
size
of
the
records,
the
stop
button,
repeat
button
and
start
button
are
all
located
on
the
front
panel.
This
means
that
you
don’t
have
to
lift
the
dust
cover
every
time
you
want
to
make
an
adjustment.
[t
also
means
that
it
is
much
easier
to
use
this
turntable
on
a
shelf
or
audio
rack,
High-sensitivity
Tonearm
with
Excellent
Trackability
The
newly
developed,
high-sensitivity
S-shaped
tonearm
comes
with
built-in
lateral
balance
and
anti-skating
mechanisms
and
it
displays
excellent
tracking
performance
with
a
light
tracking
force
cartridge.
There
is
a
separate
tracking
force
weight
in
front
so
that
you
can
easily
change
the
tracking
force
even
if
you
have
mounted
your
turntable
in
an
audio
rack.
Wide
Selection
of
Accessory
Mechanisms
There
is
a
plentiful
variety
of
accessory
mechanisms
including
an
independent
arm-elevation
mechanism,
a
headshell
stand
for
conveniently
storing
a
spare
cartridge.
a
free
stop-hinged
dust
cover
which
allows
easy
attachment
and
removal,
and
large-sized
insulator
feet.

LINE
VOLTAGE
SELECTOR
SWITCH
This
turntable
is
equipped
with
a
line
voltage
selector
switch
which
allows
this
turntable
to
be
used
in
locations
where
the
power
voltage
is
110V,
120V,
220V
or
240V.
Before
your
turntable
is
shipped
from
the
factory,
the
switch
is
set
to
the
power
requirements
of
the
turntable’s
destination,
although
you
should
check
that
it
is
set
properly
before
plugging
the
power
cord
into
the
outlet.
If
the
voltage
is
not
properly
set
or
if
you
move
to
an
area
where
the
voltage
requirements
differ,
adjust
the
selector
switch
as
follows:
1.
Disconnect
the
power
cord.
2.
Provide
yourself
with
a
medium-sized
screw-
driver.
Insert
the
tip
of
the
screwdriver
into
the
groove
of
the
selector
switch
and
turn
it
to
the
voltage
indication
corresponding
to
the
power
voltage
of
your
residence.
You
can
tell
when
it
clicks
into
place.
Line
voltage
selector
switch.
Fig.
1
ATTACHING
THE
CARTRIDGE
You
can
attach
any
cartridge
to
this
turntable
as
long
as
it
weighs
between
4g
and
10g.
Follow
the
procedure
outlined
below
for
attaching
the
car-
tridge.
1.Take
out
the
headshell,
cartridge
mounting
screws,
nuts,
washers
and
small-sized
screwdriver
from
the
accessory
box.
The
screws
come
in
three
different
lengths
so
choose
the
screws
according
to
the
height
of
the
cartridge
you
intend
to
attach.
2.
The
terminals
on
the
accessory
headshell
are
aligned
as
shown
in
Fig.
2.
Check
the
location
and
polarity
of
each
of
the
cartridge’s
terminal
pins
and
then
connect
the
lead
wires,
taking
care
not
to
get
the
polarities
mixed
up.
Right
channel
(red|
Right
channel
ground
(green).
Left
channel
(white):
Left
channel
ground
(blue)
Headshell-
Fig.
3
NOTE:
Do
not
solder
when
you
connect
the
lead
wires
to
the
cartridge.
If
the
lead
wire
lugs
are
loose,
use
a
pair
of
tweezers
or
a
similar
device
to
push
in
the
end
lightly.
3.
Attach
the
cartridge
lightly
to
the
headshell
using
the
screws,
nuts
and
washers
(Fig.
3).
4,
Adjust
the
position
of
the
cartridge
so
that
the
stylus
and
the
connector
section
of
the
headshell
are
49mm
apart
and
tighten
up
the
screws.
Make
sure
that
the
cartridge
does
not
tilt
to
one
side
when
you
attach
it
(see
Fig.
4).
aoe
dame
Fig.
4
ATTACHING
HEADSHELLS
NOT
MADE
BY
PIONEER
You
can
attach
headshells
made
by
other
com-
panies
as
long
as
the
coupling
portion
has the
same
dimensions
as
the
headshell
supplied
with
your
PL-520.
However,
you
should
check
whether
the
terminals
on
the
other
headshell
are
aligned
in
the
same
way.
When
attaching,
make
sure
that
you
do
not
neglect
to
carry
out
the
four
steps
described
above.

ASSEMBLY
PROCEDURE
Dust
cover
Attach
after
you
have
adjusted
the
tonearm
Platter
mat
Platter:
Headshell
stand/EP
adaptor
stand:
Line
voltage
selector
switch:
Center
shaft
Strobe
light
Speed
selector
switch:
45rpm
Fine
adjustment
knob:
33-1/3epm
Fine
adjustment
knab-
Record
size
selector:
CUT
button:
REPEAT
button
START
button:
Arm
elevation
lever:
INSTALLATION
PRECAUTIONS
PIONEER
p—Counterweight
Slide
it
onto
the
counter-
weight
shaft
at
the
rear
of
the
tonearm.
If
it
does
not
slide
smoothly
onto
the
shaft,
loosen
the
screw
on
the
outside
with
the
acces-
sory
screwdriver
and
adjust
as
shown
in
the
figure.
Power
cord
re
>
Sa
la
Output
cords
YS
oN
B
lead
Headshell
(with
the
cartridge
al-
ready
attached)
Align
the
guide
pin
with
the
groove
as
shown
in
the
figure
and
secure
by
turning
the
locking
collar.
Locking
collar
groove
When
installing
your
PL-520,
make
sure
that
you
avoid
the
following
conditions:
Conditions
to
be
avoided
Possible
problems
caused
{1)
Exposure
to
direct
sunlight,
high
temperatures
or
high
humid-
ity.
(2)
Unstable
surfaces.
(3)
Dirty
or
dusty
locations.
(4)
Exposure
to
heavy
vibrations,
such
as
on
the
top
of
speakers,
etc.
{5)
Proximity
to
power
transformer
of
the
amplifier.
(6)
Locations
where
alcohol,
insecticides,
or
inflammable
sub-
stances
are
frequently
used.
(1)
Can
cause
rust
or
interfere
with
insulation.
(2)
Will
interfere
with
normal
operation
of
turntable
(stylus
will
jump,
etc.)
{3)
Can
cause
scratches,
{4)
Can
cause
howl.
(5)
Can
cause
hum,
(6)
Can
corrode
dust
cover
or
outside
of
cabinet.

ADJUSTING
THE
TONEARM
Tracking-force
weight
Tracking-force
bar.
Arm
clamp.
Headshell
Locking
collar
RELEASING
THE
AUTO
MECHANISM
Before
adjusting
the
tonearm,
release
the
auto
mechanism
as
follows:
1.
Plug
the
power
cord
into
an
AC
outlet.
2.
Set
the
size
selector
to
MANUAL.
3.
Push
the
START
button.
4.
About
10
seconds
after
the
platter
has
started
to
rotate,
the
arm
elevator
will
descend.
Then,
disconnect
the
power
cord
from
the
AC
outlet.
Do
NOT
press
the
CUT
button.
This
operation
releases
the
auto
mechanism
and
the
tonearm
can
now
be
operated
as
you
wish.
LEVEL
BALANCE
ADJUSTMENT
1.
Slide
the
tracking-force
weight
down
to
the
base
of
the
tracking-force
bar
(Fig.
6).
NOTE:
If
the
weight
does
not
slide
along
smoothly,
loosen
the
screw
on
the
outside
with
the
accessory
screwdriver
so
that
it
can
be
shifted
smoothly.
2.Turn
the
anti-skating
knob
counterclockwise
and
set
to
‘0’
(Fig.
6).
Index
line
Turn
anti-skating
knob
to
‘0’
and
align
with
the
index
line
Tracking-force
weight
bo)
Fig.
6
3.
Remove
the
cartridge
stylus
cover.
4,
Release
the
arm
clamp
and
move
the
tonearm
to
the
space
between
the
arm
rest
and
the
platter,
taking
care
not
to
damage
the
stylus.
5.
Support
the
headshell’s
finger
lift
with
one
hand
and
attain
the
level
balance
by
moving
the
counterweight
either
forward
or
backward.
Level
balance
means
that
the
tonearm
is
parallel
Arm
elevator
Arm
rest
Fig.
5
to
the
record
on
the
platter,
and
that
the
tone-
arm
pipe,
therefore,
should
not
tilt
toward
the
counterweight
side
or
the
headshell
side
(See
Fig.
7).
6.
Return
the
tonearm
to
the
arm
rest
and
fasten
the
arm
clamp.
7.
Attach
the
stylus
cover
to
protect
the
stylus.
NOTE:
If
the
level
balance
of
the
tonearm
is
not
properly
at-
tained,
the
stylus
will
be
lowered
onto
the
record
at
an
angle,
This
will
cause
distortion
when
you
play
a
record
and
it
may
damage
the
record
and
stylus,
Make
sure
that
you
have
attained
the
level
balance
properly
by
referring
to
Fig.
7.
Counterweight
end
is
too
heavy.
—
Move
the
counter-
weight
in
the
direction
of
the
arrow.
>
=
|
e
Headshell
end
is
too
heavy.
—
Move
the
counterweight
in
the
direction
of
the
arrow.
:
Fig.
7
TRACKING
FORCE
ADJUSTMENT
The
tracking-force
scale
ring
on
the
tracking-force
bar
has
0.5g
steps.
Slide
the
tracking-force
weight
along
the
bar
and
when
the
end
of
the
weight
is
aligned
with
one
of
the
lines
indicated
in
Fig.
8,
then
a
tracking
force
equivalent
to
the
value
indicated
will
be
applied
to
the
cartridge.

Fig.
8
The
cartridge
that
comes
with
the
PL-520
has
a
tracking
force
of
1.5
grams.
Slide
the
tracking-force
weight
along
the
bar
so
that
the
end
of
the
weight
is
aligned
with
the
1.5g
line.
ANTI-SKATING
ADJUSTMENT
Turn
the
anti-skating
knob
on
the
tonearm
shaft
clockwise
and
adjust
one
of
the
numbers
indicated
on
the
knob
to
the
index
line
so
that
the
corre-
sponding
tracking
force
is
applied.
NOTE:
When
turning
the
anti-skating
knob,
always
clamp
the
tonearm
to
the
arm
rest
first,
Se
ed)
This
figure
shows
the
anti-skating
adjustment
when
the
tracking
force
is
about
1.59.
.
Fig.
9
DUST
COVER
Attach
the
dust
cover
by
inserting-the
hinges
into
the
fittings
on
the
rear
panel
of
the
cabinet.
When
attaching
the
dust
cover,
hold
the
lower
part
of
the
dust
cover
from
behind
the
turntable
as
shown
in
Fig.
10,
and
it
will
slide
smoothly
into
place.
To
remove
the
dust
cover,
first
open
it
all
the
way,
hold
it
firmly
at
the
bottom
as
shown
in
the
figure,
and
lift
it
straight
up.
PIONCER
STEREO
AMPLIFIER
CONNECTIONS
The
PL-520’s
phono
cables
and
ground
lead
are
attached
to
the
rear
panel
of
the
turntable.
The
phono
cable
with
the
white
plug
is
for
the
left
channel
and
the
one
with
the
red
plug
is
for
the
right
channel.
The
thin
wire
with
the
Y-shaped
connector
at
the
end
is
the
ground
lead.
This
should
be
firmly
connected
to
the
ground
terminal
on
the
amplifier
(Fig.
11).
The
way
is
which
the
phono
cables
are
attached
will
depend
on
the
type
of
cartridge
used.
Read
the
instructions
in
the
booklet
that
comes
with
the
cartridge
as
well
as
the
operating
instructions
of
the
amplifier
and
connect
the
phono
cables
pro-
perly.
Finally,
plug
the
power
cord
into
the
power
outlet.
If
this
is
carried
out
after
the
tonearm
has
been
adjusted,
the
platter
will
start
to
rotate.
Push
the
CUT
button
and
stop
the
platter.
The
auto-play
mechanism
is
now
set
to
stand-by.
Ground
lead
White
(Left
channel)
Red
(Right
channel)
Fig.
11
With
the
PL-520
(the
model
with
the
accessory
cartridge),
plug
the
phono
cables
into
the
PHONO
or
PHONO
MAG
jacks
of
the
stereo
amplifier.

PANEL
FACILITIES
HEADSHELL
STAND/EP
ADAPTOR
STAND
This
stand
will
accommodate
a
spare
cartridge.
Align
the
guide
pin
with
the
guide
groove
of
the
stand’s
opening,
and
then
insert.
You
can
also
use
this
stand
to
store
an
EP
adaptor.
STROBE
LIGHT:
This
light
comes
on
when
the
platter
starts
to
rotate
and
it
lights
stroboscopically.
(Refer
to
‘How
to
finely
adjust
the
platter
speed’
on
page
8).
PIONEER
ARM
REST
The
arm
rest
supports
the
tonearm
when
it is
not
being
used.
Set
the
tonearm
on
its
rest
when
it
is
not
playing
records,
Clamp
it
into
position
if
you
don’t
have
any
immediate
plans
to
play
records
(see
Figure).
Releasing
the
arm
clamp
Securing
the
arm
clamp
ARM
ELEVATION
LEVER
RECT
DRIVE
G@proneen
rue
airomame.wones
FL-$10
SPEED
SELECTOR
SWITCH
Push
this
switch
to
set
the
platter
to
45rpm
and
release
for
33-1/3rpm.
45rpm
FINE
ADJUSTMENT
KNOB~
When
the
platter
speed
is
set
to
45rpm,
turn
this
knob
and
adjust
the
speed
accurately,
while
looking
at
the
strip
of
strobe
calibration
dots
on
the
platter
edge.
The
speed
increases
if
the
switch
is
turned
in
the
+
direc-
tion,
and
it
decreases
when
turned
in
the
—
direction.
(Refer
to
‘How
to
finely
adjust
the
platter
speed’).
33-1/3rpm
FINE
ADJUSTMENT
KNOB
When
the
platter
speed
is
set
to
33-1/3rpm,
turn
this
knob
and
adjust
the
speed
accurately,
while
looking
at
the
strip
of
strobe
calibration
dots
on
the
platter
edge.
The
speed
increases
if
the
switch
is
turned
in
the
+
direction,
and
it
decreases
when
turned
in
the
—
direction.
(Refer
to
‘How
to
finely
adjust
the
platter
speed’).
RECORD
SIZE
SELECTOR
This
selector
selects
the
size
of
the
record
for
automatic
play
and
also
selects
manual
play.
2
DS
a
For
the
automatic
play
of
17cm
(7-inch)
LP
and
EP
records.
25/10
oes
x,
For
the
automatic
play
of
25cm
(10-inch)
LP
records.
BO
TZ
os
ease.
For
the
automatic
play
of
30cm
(12-inch)
LP
records.
MANUAL
.
.
.
For
the
manual
play
of
records.
NOTE:
The
tonearm
will
not
be
actuated
when
the
record
size
selector
is
at
the
MANUAL
position
for
automatic
play,
even
if
the
START
button
and
the
REPEAT
button
are
pushed,
CUT
BUTTON
Push
this
button
to
stop
the
record
play.
When
pushed,
the
tonearm
will
rise
and
return
to
the
arm
rest.
The
power
to
the
turntable
will
then
be
switched
off
and
a
few
seconds
later,
the
platter
will
stop
rotating.
NOTE:
If
the
REPEAT
button
is
pushed,
the
tonearm
will
return
to
the
arm
rest
and
then
move
across
again
to
the
record.
This
lever
controls
the
ascent
and
descent
of
the
tonearm.
s
i
The
tonearm
rises.
DOWN
.....
The
tonearm
descends
gently.
Set
to
this
position
for
auto
play,
auto
repeat
and
other
automatic
operations.
NOTE:
When
the
arm
elevation
lever
is
set
to
the
UP
position
for
automatic
play,
the
tonearm
will
move
over
as
far
as
the
lead-in
groove
on
the
record
but
it
will
not
descend
and
the
record
will
therefore
not
be
played.
J
UP
position
DOWN
position
|
i
START
BUTTON
The
power
to
the
turntable
is
turned
on
and
the
platter
starts
to
rotate
when
this
button
is
depressed.
kn
REPEAT
BUTTON
Push
this
button
when
you
want
to
listen
to
the
same
record
again.
Press
the
button
once
more
to
release.
NOTE:
All
you
have
to
do
for
repeat
play
is
to
press
the
REPEAT
button.
There
is
no
need
to
push
the
START
button
again.

OPERATION
HOW
TO
FINELY
ADJUST
THE
PLATTER
SPEED
Finely
adjust
the
platter
speed
as
follows:
1.
Set the
record
size
selector
to
the
MANUAL
position.
2.
Set
the
speed
selector
switch
to
33.
3.
Push
the
START
button
and
observe
the
appro-
priate
strip
of
strobe
calibration
dots
on
the
platter
edge
(Fig.
12).
4.
If
the
strobe
dots
appear
to
flow
to
the
right
(which
means
that
the
platter
is
rotating
more
slowly
than
the
rated
speed),
turn
the
33-1/3rpm
fine
adjustment
knob
in
the
+
direction
and
set
so
that
the
strobe
dots
no
longer
appear
to
move.
If
the
strobe
dots
appear
to
flow
to
the
left
(which
means
that
the
platter
is
rotating
more
quickly
than
the
rated
speed),
turn
the
33-1/3
rpm
fine
adjustment
knob
in
the
—
direction
and
set
so
that
the
strobe
dots
no
longer
appear
to
move.
5.
Set the
speed
selector
switch
to
45,
and
proceed
to
adjust
in
exactly
the
same
way
with
the
45rpm
fine
adjustment
knob,
while
observing
the
appropriate
strip
of
strobe
calibration
dots
on
the
platter
edge
(Fig.
12).
33-1/3rpm
(80H)
srpm
(S0H2)
=
Ss
({50Hz)
aS
45rpm
(60Hz)
33-1/3rpm
(6OHz)
i}
Fig.
12
AUTOMATIC
PLAY
1.
First,
place
the
record
on
the
platter.
2.
Set
the
speed
selector
switch
to
the
speed
at.
which
the
record
is
to
be
played.
3.
Set
the
arm
elevation
lever
to
the
DOWN
posi-
tion.
4.
Set the
record
size
selector
in
accordance
with
the
size
of
the
record
on
the
platter.
5.
Remove
the
stylus
cover
and
release
the
arm
clamp.
6.
Press
the
START
button
slowly
(until
you
hear
the
sound
of
the
start
mechanism
being
actu-
ated).
The
strobe
light
comes
on
and
the
platter
rotates.
When
the
platter
rotates,
the
tonearm
moves,
the
stylus
tip
settles
down
gently
into
the
lead-
in
groove
of
the
record,
and
play
begins.
7.
Adjust
the
volume
and
tone
controls
on
the
amplifier
to
the
preferred
levels,
and
then
sit:
back
and
enjoy
your
record.
8.
After
the
record
has
been
played,
the
auto-
return
mechanism
is
actuated
and
the
tonearm
returns
to
the
arm
rest.
At
the
same
time,
the
power
to
the
turntable
is
turned
off,
and
the
platter
comes
to
rest
a
few
seconds
later.
9.
Secure
the
tonearm
to
the
arm
rest
with
the
clamp
and
attach
the
stylus
cover
to
protect
the
stylus.
MANUAL
PLAY
1.
Place
the
record
on
the
platter.
2.
Set the
speed
selector
switch
to
the
speed
at
which
the
record
is
to
be
played.
3.
Set
the
arm
elevation
lever
to
the
UP
position.
4.
Set
the
record
size
selector
to
the
MANUAL
position.
5.
Remove
the
stylus
cover
and
release
the
arm
clamp.
6.
Press
the
START
button
slowly
(until
you
hear
the
sound
of
the
start
mechanism
being
actu-
ated).
The
strobe
light
comes
on
and
the
platter
rotates.
7.
Hold
the
headshell
by
the
finger
lift
and
move
the
stylus
across
the
record
to
the
track
you
want
played.
8.
Set the
arm
elevation
lever
to
the
DOWN
posi-
tion.
The
stylus
will
descend
slowly
to
the
record
and
play
will
begin.
9.
Adjust
the
volume
and
tone
controls
on
the
amplifier
to
the
preferred
levels,
and
then
sit
back
and
enjoy
your
record.

1
1
0.
After
the
record
has
been
played,
the
auto
return
mechanism
is
actuated
and
the
tonearm
returns
to
the
arm
rest.
At
the
same
time,
the
power
to
the
turntable
is
turned
off,
and
the
platter
comes
to
rest
a
few
seconds
later.
1,
Secure
the
tonearm
to
the
arm
rest
with
the
clamp
and
attach
the
stylus
cover
to
protect
the
stylus.
REPEAT
PLAY
1
2,
8.
.
Place
the
record
on
the
platter.
Set
the
speed
selector
switch
to
the
speed
at
which
the
record
is
to
be
played.
.
Set
the
arm
elevation
lever
to
the
DOWN
posi-
tion.
Set
the
record
size
selector
in
accordance
with
the
size
of
the
record
on
the
platter.
Remove
the
stylus
cover
and
release
the
arm
clamp.
Press
the
REPEAT
button.
The
strobe
light
comes
on
and
the
platter
rotates.
When
the
platter
rotates,
the
tonearm
moves,
the
stylus
tip
settles
down
gently
into
the
lead-in
groove
of
the
record,
and
play
begins.
.
Adjust
the
volume
and
tone
controls
on
the
amplifier
to
the
preferred
levels,
and
then
sit
back
and
enjoy
your
record.
After
the
record
has
been
played,
the
auto-
return
mechanism
is
actuated,
and
the
tonearm
returns
to
the
arm
rest.
A
few
seconds
later
the
tonearm
moves
over
to
the
record
again,
and
play
begins.
The
turntable
will
remain
in
the
repeat
mode
until
the
REPEAT
button
is
released,
which
releases
the
turntable
from
the
repeat
mode.
STOPPING
THE
TURNTABLE
DURING
PLAY
Press
the
CUT
button
gently
(until
you
hear
the
sound
of
the
return
mechanism
being
actuated).
The
stylus
will
rise
slowly
from
the
surface
of
the
record
and
the
tonearm
will
return
to
the
arm
rest.
The
power
to
the
turntable
is
then
turned
off
and
the
platter
comes
to
rest
a
few
seconds
later.
NOTE:
If
you
push
the
CUT
button
during
repeat
play,
the
tone-
arm
will
return
to
the
arm
rest
and
back
again
to
the
record
for
repeat
play.
INTERRUPTING
RECORD
PLAY
Set
the
arm
elevation
lever
to
the
UP
position.
The
arm
elevation
mechanism
is
independent
of
the
auto
mechanism
and
so
the
tonearm
will
ascend
and
descend
irrespective
of
whether
the
turntable
is
set
to
auto
play
or
to
manual
play.
This
is
a
convenient
function
since
it
allows
you
to
choose
just
the
tracks
you
want
to
hear
from
an
LP.
RELEASING
REPEAT-PLAY
MECHANISM
The
repeat
mechanism
only
is
released
when
you
push
the
REPEAT
button
during
repeat
play
and
then
take
your
finger
off
the
button.
The
turntable
is
then
set
to
the
normal
auto
play
mode.
OPERATION
PRECAUTIONS
Always
set
the
record
size
selector
before
you
push
the
START
and
REPEAT
buttons
when
you
want
to
set
the
turntable
to
the
auto
play
or
repeat
play
modes.
This
is
because
the
stylus
will
not
descend
where
you
want
it
to
descend
if
you
change
the
setting
of
the
record
size
selector
while
the
tonearm
is
moving.
You
may
also
damage
the
stylus
and
the
record.
Always
clean
the
stylus
both
before
and
after
playing
a
record
with
a
soft
brush
and
try
to
make
it
a
rule
to
clean
the
records
with
a
good
quality
cleaner.
When
changing
over
the
headshell,
clamp
the
tonearm
to
the
arm
rest
so
that
the
tonearm
shaft
is
not
strained
in
any
way.
Be
careful
not
to
make
the
turntable
vibrate
while
a
record
is
playing
since
this
can
result
in
damage
to
the
stylus
and
record.
Do
not
force
the
tonearm
closer
than
40mm
to
the
center
shaft
or
away
from
the
arm
rest.
If
this
distance
is
exceeded,
you
may
damage
the
internal
mechanisms
and
render
automatic
ope-
ration
ineffective.
Place
only
one
record
at
a
time
on
the
platter.
If
two
or
more
records
are
stacked
on
the
platter,
the
stylus
will
not
make
proper
contact
with
the
grooves,
and
this
will
impair
the
quality
of
reproduction.
Do
not
disconnect
the
power
cord
while
the
stylus
is
still
in
a
record
groove
as
this
may
result
in
damage
to
the
stylus
and
record.

ADJUSTING
STYLUS
DESCENT
POSITION
If
the
stylus
does
not
descend
onto
the
lead-in
groove
on
the
record
during
automatic
play,
adjust
as
follows:
1.
Place
a
30cm
(12-inch)
LP
record
on
the
platter.
2.Go
through
the
operation
for
automatic
play
once
(refer
to
page
8),
and
check
the
level
and
direction
of
the
stylus’
deviation
from
the
norm.
8.
Return
the
tonearm
to
the
arm
rest,
and
then
turn
and
adjust
the
stylus
descent-position
adjusting
screw
using
the
accessory
screwdriver
(See
Figs.
13
&
14).
@
When
the
stylus
descends
outside
the
lead-in
groove,
turn
the
adjusting
screw
clockwise.
@
When
the
stylus
descends
inside
the
lead-in
groove,
turn
the
adjusting
screw
counter-
clockwise.
e
Each
half-turn
of
the
adjusting
screw
moves
the
starting
point
about
6mm.
NOTE:
Be
very careful
not
to
damage
the
record
and
the
stylus
*
when
you
are
adjusting
the
position
of
the
stylus
descent.
Stylus
descent-position
adjusting
screw
The
stylus
descent-position
adjusting
screw
is
visible
when
the
tonearm
returns
to
the
arm
rest,
Fig.
13
Turn
adjusting
screw
counterclockwise.
Turn
adjusting
screw
clockwise.
Stylus
descends
too
far
inside
lead-in
groove.
Fig.
14
Stylus
descends
too
far
outside
lead-in
groove,
10
GENERAL
PRECAUTIONS
CABINET
When
the
dust
cover
or
the
cabinet
is
dirty
or
dusty,
wipe
them
clean
with
a
polishing
cloth
or
soft
cloth.
Do
not
use
furniture
wax
or
bring
the
turntable
into
contact
with
benzine,
insecticides
or
any
other
inflammable
material
since
they
will
corrode
the
outside
of
the
turntable.
MOTOR
WORKS
PROPERLY
AFTER
PLATTER
IS
MOUNTED
If
the
motor
is
run
with
the
platter
removed,
the
motor
will
not
operate
normally
and
may
seem
to
have
broken
down.
If,
however,
the
platter
is
mounted,
the
motor
will
rotate
properly.
LUBRICATION
There
is
no
need
to
lubricate
the
PL-520
since
it
employs
oil-less
bearings
in
the
rotating
parts.
If
the
turntable
is
brought
into
the
warm
from
previously
cold
surroundings,
or
if
the
room
temperature
rises
suddenly,
moisture
will
form
on
the
operating
sections
and
the
turn-
table
will
not
be
able
to
display
its
perform-
ance
to
the
full.
If
confronted
with
a
situation
like
this,
leave
the
turntable
in
its
new
environment
for
about
an
hour
or
try
and
increase
the
room
temperature
gradually
before
operation.

es
PIONEER
TROUBLESHOOTING
Sometimes,
an
operational
fault
can
be
mistaken
for
a
malfunction
or
failure.
Check
the
following
points
and
see
if
the
symptoms
of
the
trouble
are
outlined
below
before
you
get
in
touch
with
the
serviceman.
If
you
cannot
locate
the
symptoms,
contact
your
nearest
Pioneer
Service
Center,
Service
Station
or
authorized
Pioneer
dealer.
Possible
trouble
Power
cord
is
unplugged.
1,
Phono
cables
are
not
connected
properly.
Symptom
Romedy
Platter
does
not
rotate,
Plug
cord
securely
into wall
outlet.
1.
Connect
cables
securely
to
the
PHONO
termi-
nals
on
the
amplifier
(see
page
5).
No
sound
Headshell
is
not
properly
attached.
2.
Firmly
secure
tonearm
locking
collar
(see
page
3.
|.
Cartridge
lead
wires
are
loose.
3.
Attach
lead
wires
inside
headshell
properly
{see
page
2),
|.
Amplifier
is
not
being
operated
properly.
4,
Read
the
operating
instructions
that
come
with
(Function
switch,
tape
monitor
switch,
speaker
amplifier.
switches,
atc.
not
set
correctly).
Musical
tempo
is
off.
.
Platter
speed
is
not
set
properly.
.
Refer
to
‘Panel
Facilities’
and
their
uses
on
page
6.
|.
Strobe
dots
appear
to
move.
2.
Refer
to
‘How
to
finely
adjust
the
platter
speed’
on
page
8,
Strobe
dot
movement
Speed
fine
adjustment
knob
not
set
properly
in
Refer
to
‘How
to
finely
adjust
the
platter
speed’
cannot
be
stopped.
accordance
with
the
platter
speed.
‘on
page
8.
.
Connect
properly
to
the
amplifier’s
ground
terminal
(see
page
5).
Excessive
noise.
1.
Ground
lead
is
not
connected.
2.
Refer
to
tracking
force
adjustments
on
poge
4,
2.
Tracking
force
is
not
correct.
3.
Dust
or
dirt
has
collected
on
the
stylus
tip.
3.
Clean
the
stylus
tip
with
a
soft
brush,
4.
Oust
or
dirt
has
collected
on
the
record.
4,
Clean
the
record
with
a
goad
quality
cleaner,
Sound
Is
distorted.
.
Dust
or
dirt
has
collected
on
the
stylus
tip.
.
Clean
the
stylus
tip
with
a
soft
brush.
1
2,
Refer
to
tracking
force
adjustment
on
page
4.
3.
Replace
with
new
stylus.
4.
Set
tone
controls
to
lower
position.
|.
Tracking
force
is
not
correct.
.
Stylus
is
worn,
.
Amplifier’s
tone
controls
set
too
high.
Set
to
DOWN
position.
2.
Refer
to
tracking
force
adjustment
on
page
4.
Tonearm
does
not
.
Arm
elevation
lever
is
set
to
UP
position.
Bescon
wich
puto
play,
..
Tracking
force
is
not
correct.
1,
Release
arm
clamp.
.
Arm
clamp
is
still
fastened.
Tonearm
does
not
move
with
auto
play.
2.
Set
selector
in
accordance
with
size
of
record
on
platter.
2.
Record
size
selector
is
set
to
MANUAL
posi-
tion,
Intermittent
sound.
.
Tracking
force
is
not
correct.
1,
Refer
to
tracking
force
adjustment
on
page
4.
2.
Replace
with
new
stylus.
3.
Replace
record.
.
Stylus
is
worn.
3.
Record
is
scratched
or
warped.
See
stylus
descent-position
adjustment
on
page
10.
Stylus
does
not
descend
to
correct
Pasition
with
auto-play.
If
you
detect
any
trouble
when
playing
records,
the
fault
may
not
Ile
with
the
turntable
but
with
another
hi-fi
component.
Be
sure
to
check
the
amplifier,
speaker
systems,
and
any
other
electrical
equipment
which
you
are
using
in
the
vicinity
of
the
turntable.
a4

SEI
FONE
ELS
SPECIFICATIONS
Motor
and
Turntable
Drive
System:
Motor:
Turntable
Platter:
Inertial
Mass:
Speeds:
Speeds
Control
Range:
Wow
and
Flutter:
Signal-to-Noise
Ratio:
Tonearm
Type:
Effective
Arm
Length:
Overhang:
Tracking
Error:
Usable
Cartridge
Weight:
Other
Features
Direct-drive
turntable
DC
servomotor
(8
pole
24
slot)
330mm
diam.
aluminum
alloy
die-cast
200kg-cm?
(including
platter
mat)
33-1/3
and
45rpm
22%
Less than
0.03%
(WRMS)
More
than
73dB
(DIN-B)
(with
Pioneer
cartridge
model
PC-135)
Static-balance
type,
S-shaped
pipe
arm
221mm
155mm
0.525
deg./in,
0.21
deg./cm
4g
(min.)
to
10g
(max.)
Warren
motor
for
automatic
functions
(auto
lead-in,
auto
return,
auto
cut,
auto
repeat),
Anti:
Cueing
device,
Strobe
light,
-skating
force
control,
Lateral
balancer,
Detachable
dust
cover,
Fine
speed
adjusters,
Insulator
feet,
Plug-in
type
headshell
Miscellaneous
Power
Requirements:
Power
Consumption:
Dimensions:
Weight;
Accessories
EP
adaptor
...
Screwdriver
. .
Cartridge
mounting
screws
.
Cartridge
mounting
nuts
.
Cartridge
mounting
washers
Operating
instructions
...
.
AC
110V/120V/220V/240V~
(switchable),
50/60Hz
8w
460(W)
x
395(D)
x
171(H)mm
18-1/8(W)
x
15-9/16(D)
x
6-3/4(H)
in
8.5kg/18
Ib
1202
SNNA-=
Accessory
Cartridge
Specifications
Type:
Stylus:
Output
Voltage:
Tracking
Force:
Frequency
Response:
NOTES:
©
Specifications
and
design
Moving
magnet
type
0.5mil
diamond
(PN-400)
2.5mV
(1kHz,
50mm/s
Peak
Velocity,
LAT)
1.0g
to
1.8g
(proper
1.5g)
10
to
40,000Hz
subject
to
possible
modification
with-
out
notice,
due
to
improvements.
@
The
PL-520
(with
the
accessory
cartridge)
does
not
come
with
cartridge
mounting
screws,
nuts
or
washers.
STYLUS
REPLACEMENT
The
life
expectancy
of
the
accessory
cartridge
stylus
tip
is
800
—
1000
hours.
For
the
sake
of
maximum
sound
quality
reproduction,
we
recommend
replacement
within
the
minimum
time
limit.
The
stylus
tip
is
replaced
by
grasping
the
stylus
holder
and
pulling
it
away
from
the
body
of
the
cartridge.
The
new
stylus
tip
is
then
inserted
by
pushing
it
into
the
receptacle.
The
correct
replacement
tip
is
the
PN-400.
This
may
obtained
from
your
Pioneer
dealer.
Pioneer
cannot
guarantee
performance
or
reliability
if
another
type
of
stylus
is
employed.
PN-400
Fig.
15
PIONEER
ELECTRONIC
CORPORATION
34-1.
Meguro
1-Chome.
Meguro-ku,
Tokyo
153,
Jagan
U.S.
PIONEER
ELECTRONICS
CORPORATION
&5
Oxford
Drive,
Moonachie,
New
Jersey
07074.
U.S.A.
RIONEER
ELECTRONIC
(EUROPE)
N.V.
Luithagen-Haven
9,
2030
Antwerp,
Belgium
PIONEER
ELECTRONICS
AUSTRALIA
PTY.
LTD.
178-184
Boundary
Road,
Braeside.
Victoria
3195,
Australia
<77KO3FOBO2>
<PRB-084-0)
Printed
in
Japan
Other manuals for PL-520
1
Table of contents
Other Pioneer Turntable manuals

Pioneer
Pioneer PL-71 User manual

Pioneer
Pioneer PL-200 User manual

Pioneer
Pioneer PL-44F User manual

Pioneer
Pioneer PL-51 User manual
Pioneer
Pioneer PL-12D User manual

Pioneer
Pioneer PLX-1000 User manual

Pioneer
Pioneer PL-88F User manual

Pioneer
Pioneer PL-55DX User manual
Pioneer
Pioneer PL-55 User manual

Pioneer
Pioneer PL-516 KCT User manual

Pioneer
Pioneer LD-1100 User manual

Pioneer
Pioneer PL-450 User manual

Pioneer
Pioneer pl-510 KLT User manual

Pioneer
Pioneer PL-510 User manual

Pioneer
Pioneer P-15D User manual

Pioneer
Pioneer PL-55DX User manual

Pioneer
Pioneer PL-X420 User manual

Pioneer
Pioneer PL-L70 User manual

Pioneer
Pioneer pl-x50 User manual

Pioneer
Pioneer PL-470 User manual