manuals.online logo
Brands
  1. Home
  2. •
  3. Brands
  4. •
  5. Planet
  6. •
  7. Extender
  8. •
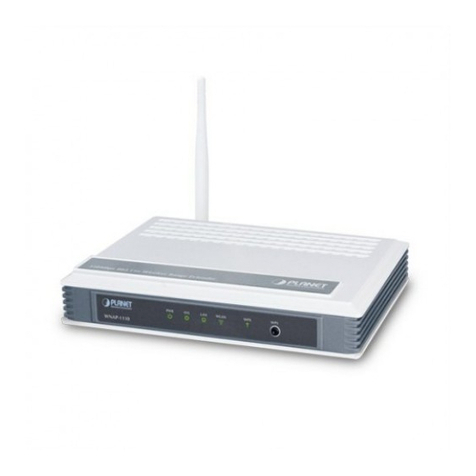
  9. Planet WAP-7500 Operator's manual

Planet WAP-7500 Operator's manual

- 1 -
- 2 -
- 3 -
- 4 -
- 5 -
- 6 -
- 7 -
- 8 -
1. Product Package
WAP-7500 x 1
Mounting Kit x 1
PoE Injector & Power cord x 1
Grounding Wire with screw x 1
Water Proof RJ-45 Connector Kit x 1
Quick Installation Guide (QIG) x 1
Product CD x 1
Note
1. If any of them are not included or
damaged, please contact your local
vendor for support.
2. Product CD contains Management
Tool, Quick Installation Guide and User
Manual.
3. System Installation
3.1 Mounting Kit
Wall/Pole Mounting Bracket
1 T-Form Bracket x 1
2 Articulation Pole x 1
3 Pole Mount Bar x 1
Fasteners
4 M8×80 Screw x 2, M8×90 Screw x 1
5 M8 Washer x 3
6 M8 Spring Washer x 3
7 M8 Nut x 1
8 M5×16 Screw x 4
9 M5 Washer x 4
10 Wood Screw (for Wall Mount) x 4
11 Wall/Gyprock Plug (for Wall Mount) x 4
3.5 Connect Up
Before installing the Ethernet cable with a waterproof RJ-45
connector, it is recommended that the Cat-5 RJ-45 coaxial
cable be used for the bridge to power injector connections.
1. To connect to the hole labeled PoE+Data, open the black
cover in advance by using a coin or a slotted screwdriver
and then screw in the body of the gland and tighten.
2. Slide the sealing nut to the RJ-45 cable from its middle
breach and then insert the sealing into the cable.
Slide the Sealing Nut from its Breach
3.3 Assemble the Mounting Bracket
1. Place the main bracket into the seating and use a
spanner to fasten the bracket to the WAP-7500 with
M5×16 screws and M5 washers provided in the
hardware packets.
2. Assemble the main bracket by placing articulation pole 
to the T-form bracket via a M8×90 screw through
the insertion axe and x with the M8 washer , spring
washer and M8 nut .
2. Installation Precautions
1. Users MUST use a proper and well-installed surge arrestor
and grounding kit with WAP-7500; otherwise, a random
lightening could easily cause fatal damage to WAP-7500.
EMD (Lightning) DAMAGE IS NOT COVERED UNDER
WARRANTY.
2. Make sure PoE is correctly connected to the RJ-45 port
on the WAP-7500 labeled PoE+Data. DO NOT CONNECT
TO THE PORT LABELED “Warning!! No POE”, other-
wise the WAP-7500 will be severely damaged!
3. Users MUST power off the WAP-7500 rst before
connecting the external antenna to it; otherwise, damage
might be caused to the WAP-7500 itself.
3.2 Waterproof RJ-45 Connector Kit
Gland x 1
Sealing Nut x 1
Sealing x 1
3.4 Pole Mounting
1. Install the main bracket and the pole mount bar over
the top of the pole by securing the drill holes of the
pole mount bar to the main bracket ones and insert two
M8×80 screws, spring washers and washers 
through the drill holes and main bracket.
2. Fasten two M8×80 screws and washers through the
drill holes and main bracket with a spanner.
3. Adjust the antenna for appropriate tilt / vertical orienta-
tion.
3. Insert the RJ-45 connector and make sure that the
locking tab snaps home.
WAP-7500 RJ-45 Port
4. Screw the sealing on the gland and tighten.
- 9 -
- 10 -
- 11 -
- 12 - - 13 - - 14 -
3.6 Ground the Wire
The WAP-7500 is shipped with a grounding wire. The unit
must be properly grounded to protect against power surges.
The grounding point can be found on the bottom of the
unit. It is supplied with an appropriate grounding lug for
attachment to the WAP-7500.
4. Conguration
Connect a PC to the power injector’s Ethernet port using a
Cat-5 Ethernet cable.
1. Assign a static IP address to your PC which should be in
the same network segment with the WAP-7500. As the
default IP address of the WAP-7500 is 192.168.1.1, you
may choose from 192.168.1.2 to 192.168.1.254. Then
click OK.
2. Open the web browser, enter “https://192.168.1.1/”
in the address bar, and then enter.
3. The default username is “admin” and password is
“password”.
Due to browser’s security trusted sites, 192.168.1.1
might not able to be opened. You may choose to
continue to the website.
3.7 Power On
1. Plug an Ethernet cable from your PC into the power
injector RJ-45 jack (DATA IN); Plug an Ethernet cable
from the WAP-7500 into the power injector RJ-45 jack
(P+DATA OUT).
2. Connect the power module to the power injector and plug
the AC cord into an AC power receptacle.
3. After being powered on, the device will send out the
beep sound lasting about 1.5 seconds, informing you that
the WAP-7500 is powered up! Wait for about 60 seconds
the system will be initialized and start working.
Warning
1. Make sure PoE is correctly connected to
the RJ-45 port on the WAP-7500 labeled
PoE+Data. DO NOT connect to the
port labeled “Warning!! No POE”,
otherwise the WAP-7500 will be severely
damaged!
2. When install the secondary antenna,
please make sure power off the device to
prevent unexpected damage.
Note
Please refer to the User’s manual in CD-
ROM for more information about how to set
each mode after successful log-in.

Other manuals for WAP-7500

1

Other Planet Extender manuals

Planet POE-E304 User manual

Planet

Planet POE-E304 User manual

Planet LRP-104CET User manual

Planet

Planet LRP-104CET User manual

Planet WNAP-C3220 User manual

Planet

Planet WNAP-C3220 User manual

Planet IPOE-E174 User manual

Planet

Planet IPOE-E174 User manual

Planet WBT-1000 User manual

Planet

Planet WBT-1000 User manual

Planet WNAP-1110 Operator's manual

Planet

Planet WNAP-1110 Operator's manual

Planet VC-203PT User manual

Planet

Planet VC-203PT User manual

Planet WRE-1200 User manual

Planet

Planet WRE-1200 User manual

Planet VC-205PT User manual

Planet

Planet VC-205PT User manual

Planet LRP-101CE User manual

Planet

Planet LRP-101CE User manual

Planet IVC-2004PT User manual

Planet

Planet IVC-2004PT User manual

Planet WNAP-1110 User manual

Planet

Planet WNAP-1110 User manual

Planet IPOE-E174 User manual

Planet

Planet IPOE-E174 User manual

Planet WTB-1000 User manual

Planet

Planet WTB-1000 User manual

Planet IVC-234GT User manual

Planet

Planet IVC-234GT User manual

Planet IPOE-E302 User manual

Planet

Planet IPOE-E302 User manual

Planet LRE-101 User manual

Planet

Planet LRE-101 User manual

Planet IHD-200PT User manual

Planet

Planet IHD-200PT User manual

Planet LRP-101C-KIT User manual

Planet

Planet LRP-101C-KIT User manual

Planet POE-E201 User manual

Planet

Planet POE-E201 User manual

Planet IHD-410PT User manual

Planet

Planet IHD-410PT User manual

Planet IPOE-E202 User manual

Planet

Planet IPOE-E202 User manual

Planet POE-E301 User manual

Planet

Planet POE-E301 User manual

Planet PL-510W User manual

Planet

Planet PL-510W User manual

Popular Extender manuals by other brands

NETGEAR EX7300 Nighthawk X4 AC2200 quick start

NETGEAR

NETGEAR EX7300 Nighthawk X4 AC2200 quick start

TP-Link TL-WA854RE manual

TP-Link

TP-Link TL-WA854RE manual

StarTech.com ST121UTPEP instruction manual

StarTech.com

StarTech.com ST121UTPEP instruction manual

D-Link DHP-W312AV user manual

D-Link

D-Link DHP-W312AV user manual

Gefen CAT5-5000HD user manual

Gefen

Gefen CAT5-5000HD user manual

Minicom CAT5 Smart KVM Extender user guide

Minicom

Minicom CAT5 Smart KVM Extender user guide

D-Link DHP W310AVB1 Quick installation guide

D-Link

D-Link DHP W310AVB1 Quick installation guide

TRUlink 40477 user guide

TRUlink

TRUlink 40477 user guide

SmoothTalker Stealth Z1 Series Quick install guide

SmoothTalker

SmoothTalker Stealth Z1 Series Quick install guide

NETGEAR WN2000RPT - Universal WiFi Range Extender user manual

NETGEAR

NETGEAR WN2000RPT - Universal WiFi Range Extender user manual

Finest Security Systems VKM02 manual

Finest Security Systems

Finest Security Systems VKM02 manual

RGBlink MSP 318N user manual

RGBlink

RGBlink MSP 318N user manual

ATEN CE700A user manual

ATEN

ATEN CE700A user manual

Lightware VINX-110-HDMI-DEC quick start guide

Lightware

Lightware VINX-110-HDMI-DEC quick start guide

gofanco HDwireless100 user guide

gofanco

gofanco HDwireless100 user guide

ADDER AdderLink AV series Guide

ADDER

ADDER AdderLink AV series Guide

ZyXEL Communications WRE6505 v2 user guide

ZyXEL Communications

ZyXEL Communications WRE6505 v2 user guide

LEGRAND C2G60220 manual

LEGRAND

LEGRAND C2G60220 manual

manuals.online logo
manuals.online logoBrands
  • About & Mission
  • Contact us
  • Privacy Policy
  • Terms and Conditions

Copyright 2025 Manuals.Online. All Rights Reserved.