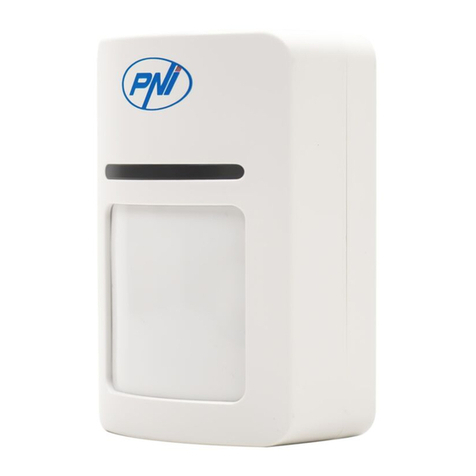
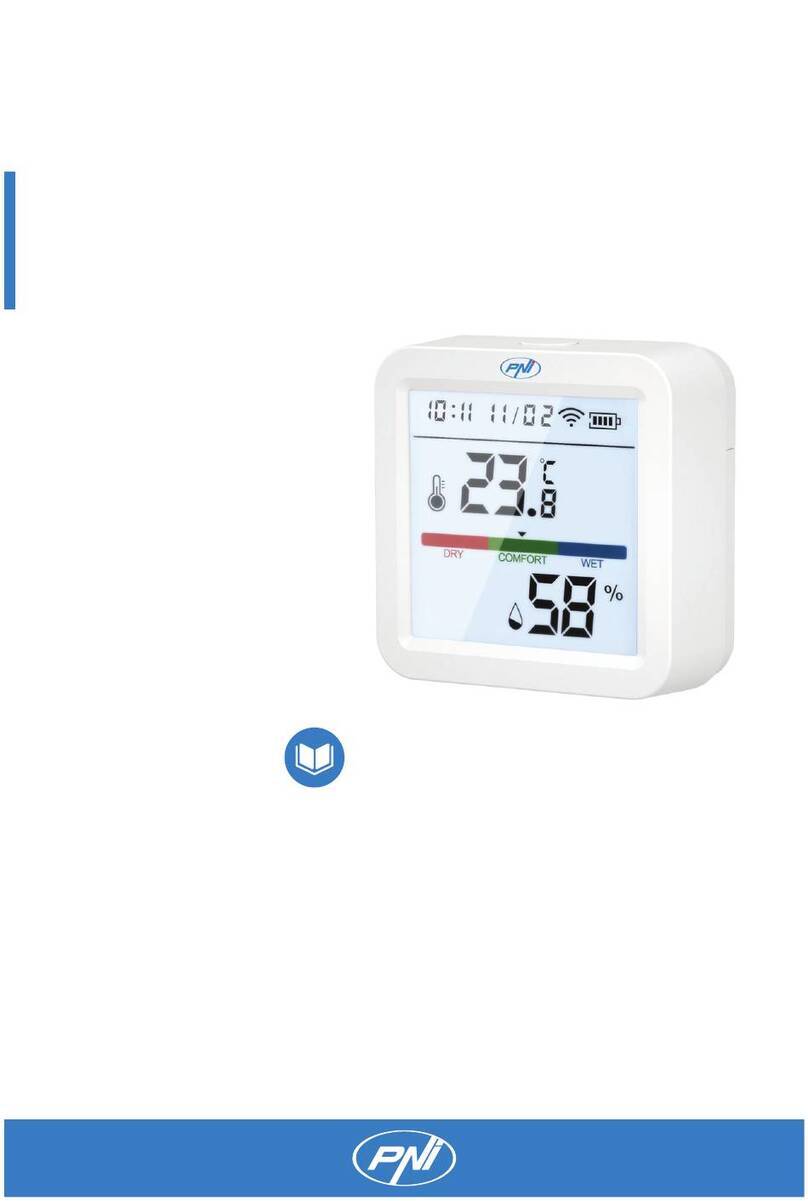
PNI A005 User manual

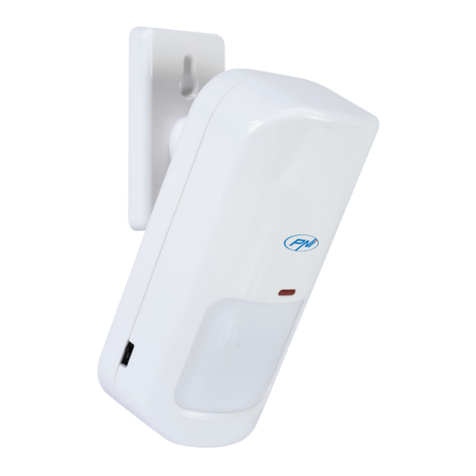
PNI A005
senzor de miscare / motion detector / mozgásérzékelő / czujnik ruchu
detector de movimiento / rilevatore di movimento
User manual / Manual de utilizare
Használati utasítás / Instrukcja obsługi /
Manual de usuario / Manuale dell’utente

2
TECHNICAL SPECIFICATIONS:
• Wireless communication frequeny: 433 MHZ
• Power: 9V battery
• Detection angle: 110°
• Detection distance: up to 8m
• Wireless communication distance: up to 100m in open space
• Working themperature: -10 ~ 50 °C
• Use: inside only
COVERAGE AREA:
Top view Side view
TEST AND ENLIST THE MOTION SENSOR IN AN ALARM SYSTEM::
• Turn on the power switch on the back of the motion sensor.
• The motion sensor is in Walk Test mode during the rst 3 minutes. During walk test mode, the LED
blinks when motion is detected and then waits 60 seconds before resuming motion detection. During
normal operation, the LED will remain on for 3 seconds when motion is detected until the motion sensor
blinks once again before resuming motion detection for next detector.
• Move away from the area that is in direct line of sight of the motion sensor (move to an adjacent room).
Wait 60 seconds until the LED stops blinking.
• Move back into the line of sight of the motion sensor, walk around 3-5 steps. This will send a signal to
the alarma system.
• If the motion sensor test is successful the LCD screen will display “xxx Sensor Alarm”. If these words
do not appear, either (A) the 20-second waiting period since the last trigger has not expired, or (B) the
motion sensor is not in communication with the main control panel.
Note1: DO NOT keep the cover open since it may aect the sensor during initialization and cause the sensor
to not work properly after)
Note2: For the enlisting to work all other detectors in the area must be OFF.
MOTION DETECTION INTERVAL:
1: jumper on pins 1 and 2: the detector will activate the motion sensor every 5 sec.
2: jumper on pins 2 and 3: the detector will activate the motion sensor every 50 sec.
3: jumper o: the detector will activate the motion sensor every 5 min.
MOUNTING INSTRUCTIONS:
• Place the motion sensor following the location recommendations (check marked locations) shown in the
picture bellow. Avoid the example locations marked with the “X” which are household areas that typically
cause false alarms, such as heat, air conditioning, fans, or direct sunlight.

EN
3
• The recommended mounting height is 2m from the ground for both coverage and pet immunity purposes.
• You can mount the detector on the wall using double adhesive tape (placed on the marked are from image
1) or by screwing it in place (image 2).
ATTENTION!
Please install and use the detector according to this manual.
Do not touch the sensor’s surface to avoid sensitivity altering.
Turn o the sensor before cleaning it with a soft cloth.
To ensure a normal function make sure the sensor is powered all the time and carry out periodic tests.

4
SPECIFICATII TEHNICE:
• Frecventa comunicare wireless cu centrala de efractie: 433 MHz
• Alimentare: baterie 9V
• Unghi detectie: 110°
• Distanta detectie: pana la 8m
• Distanta comunicare wireless: pana la 100m in camp deschis
• Temperatura mediu de utilizare: -10 ~ 50 °C
• Utilizare: la interior
RAZA DE ACOPERIRE:
Vedere de sus Vedere din lateral
TESTAREA SI PROGRAMAREA DETECTORULUI INTR-UN SISTEM DE ALARMA:
• Porniti detectorul prin mutarea comutatorului de pe spate in pozitia ON
• Senzorul de miscare va in modul de test timp de 3 min. Daca va detecta o miscare, LED-ul
detectorului va clipi, apoi va astepta 60 sec inainte de a relua detectia miscarii. In modul normal de
functionare LED-ul va ramane aprins 3 sec la detectia unei miscari apoi va relua detectia.
• Indepartati-va de senzorul de miscare sau mergeti in alta incapere, si apoi asteptati 60 sec.
• Reveniti in raza de actiune a senzorului si faceti cativa pasi in fata lui. Acest lucru va declansa senzorul
de miscare si va transmite un semnal catre unitatea de comanda.
• Daca testarea senzorului a avut efect, pe ecranul unitatii de comanda va aparea mesajul „xxx
sensor alarm“ sau veti primi o conrmare vocala. Daca acest lucru nu s-a intamplat poate una din
urmatoarele cauze: (A) nu a trecut perioada de 60 sec dintre detectiile de miscare; (B) detectorul de
miscare nu comunica cu unitatea de comanda
NOTA1: nu efectuati inrolarea sau testarea detectorului cu capacul dat jos, deoarece poate afecta
performanta senzorului de miscare.
NOTA1: pentru ca programarea sa se realizeze fara probleme toti ceilalti detectori din zona trebuie sa e
opriti.
INTERVAL DETECTIE MISCARE:
Pozitia 1: jumper pus pe pinii 1 si 2: detectorul va activa senzorul de miscare la ecare 5 sec.
Pozitia 2: jumper pus pe pinii 2 si 3: detectorul va activa senzorul de miscare la ecare 50
sec.
Pozitia 3: jumper scos: detectorul va activa senzorul de miscare la ecare 5 min.
MONTAREA DETECTORULUI:
• Plasati detectorul de miscare urmand locatiile recomandate in imaginea de mai jos. Evitati locatiile de
instalare marcate cu „X“ deoarecere acestea sunt zone ce pot cauza alarme false, cum ar instalarea

RO
5
detectorului la exterior, in locurile unde exista animale de companie, in apropierea aparatelor de aer
conditionat, in lumina directa a soarelui, in apropierea surselor de caldura si sub obiecte ce se rotesc.
• Inaltimea recomandata pentru montarea detectorului este de 2m de la podea
• Puteti monta detectorul pe perete utilizand o banda dublu adeziva (lipita in zona marcata din imaginea 1
de mai jos) sau prin prinderea in suruburi pe un suport x (imagine 2).
ATENTIE!
Va rugam sa instalati si sa utilizati detectorul conform acestui manual.
Nu atingeti suprafata senzorului pentru a evita modicarea sensibilitatii detectorului.
Treceti comutatorul de pornire pe pozitia OFF inainte de a curata senzorul cu ajutorul unei carpe moi inmuiata
in alcool, daca este necesara curatarea acestuia.
Pentru a asigura o functionare corespunzatoare, asigurati-va ca detectorul este alimentat tot timpul si efectuati
teste de functionare periodice.

6
MŰSZAKI ADATOK:
• Vezeték nélküli kommunikáció: 433 MHZ
• Teljesítmény: 9V-os akkumulátor
• Érzékelési szög: 110 °
• Érzékelési távolság: akár 8 m
• Vezeték nélküli kommunikációs távolság: akár 100 m nyílt térben
• A munka hőmérséklete: -10 ~ 50 ° C
• Használat: csak belül
LEFEDETTSÉGI TERÜLET:
Felülnézet Oldalnézet
ELLENŐRIZZE ÉS MOZGASSA A MOZGÁSÉRZÉKELŐT RIASZTÓRENDSZERBE:
• Kapcsolja be a mozgásérzékelő hátoldalán található hálózati kapcsolót.
• A mozgásérzékelő az első 3 percben séta teszt üzemmódban van. Séta teszt üzemmódban a LED
villog, amikor mozgást észlel, majd 60 másodpercig vár, mielőtt újraindítja a mozgásérzékelést. Normál
működés közben a LED 3 másodpercig bekapcsolja a mozgást, amíg a mozgásérzékelő ismét villogni
kezd, mielőtt a következő érzékelőhöz újraindítja a mozgásérzékelést.
• Mozgás a mozgásérzékelő közvetlen látóterétől távolodó helyre (menjen a szomszédos helyiségbe).
Várjon 60 másodpercig, amíg a LED nem villog.
• Menj vissza a mozgásérzékelő látómezőjébe, 3-5 lépésnyi lépésre. Ez jelzést küld a
riasztórendszernek.
• Ha a mozgásérzékelő teszt sikeres, az LCD kijelzőn megjelenik az “xxx Sensor Alarm” felirat. Ha ezek
a szavak nem jelennek meg, vagy (A) a 20 másodperces várakozási idő, mivel az utolsó indító nem járt
le, vagy (B) a mozgásérzékelő nem kommunikál a fő kezelőpanellel.
1. megjegyzés: NEM tartsa nyitva a fedelet, mert az inicializálása közben befolyásolhatja az érzékelőt, és az
érzékelő nem működik megfelelően)
2. megjegyzés: A körzet minden más érzékelőjének működőképességének kikapcsolása érdekében ki kell
kapcsolni.
MOZGÁSÉRZÉKELÉSI INTERVALLUM:
1: jumper az 1. és 2. tűkön: az érzékelő 5 másodpercenként aktiválja a mozgásérzékelőt.
2: jumper a 2. és 3. tűkön: az érzékelő 50 másodpercenként aktiválja a mozgásérzékelőt.
3: jumper o: az érzékelő 5 percenként aktiválja a mozgásérzékelőt.
SZERELÉSI ÚTMUTATÓ:
• Helyezze el a mozgásérzékelőt a helyre vonatkozó ajánlások (jelölőnégyzetek ellenőrzése) után
a képen. Kerülje el az “X” jelzéssel ellátott példákat, amelyek olyan háztartási területek, amelyek

EN
7
jellemzően téves riasztásokat okoznak, mint pl. Hő, légkondicionálás, ventilátorok vagy közvetlen
napfény.
• Az ajánlott szerelési magasság 2 méterre van a talajtól mind a lefedettség, mind a kedvtelésből tartott
állatok védelme érdekében.
• Az érzékelőt a falra szerelheti kettős ragasztószalaggal (az ábrán feltüntetett az 1. képen) vagy csavarva
a helyére (2. kép).
FIGYELEM!
Kérjük, telepítse és használja az érzékelőt ennek a kézikönyvnek megfelelően.
Ne érintse meg az érzékelő felületét, hogy elkerülje az érzékenység megváltoztatását.
Kapcsolja ki az érzékelőt, mielőtt egy puha ruhával megtisztítja.
A normál működés biztosítása érdekében győződjön meg róla, hogy az érzékelő folyamatosan működik, és
rendszeres időközönként elvégzi a tesztelést.

8
SPECYFIKACJE TECHNICZNE:
• Częstotliwość komunikacji bezprzewodowej z włamaniem: 433 MHz
• Zasilanie: bateria 9V
• Kąt detekcji: 110 °
• Odległość wykrywania: do 8m
• Odległość komunikacji bezprzewodowej: do 100 m w otwartym polu
• Średnia temperatura stosowania: -10 ~ 50 ° C
• Użyj: w środku
ZASIĘG POKRYCIA:
Widog z góry Widok z boku
TESTOWANIE I PROGRAMOWANIE DETEKTORA W SYSTEMIE ALARMOWYM:
• Włącz detektor, przesuwając tylny przełącznik w pozycję ON
• Czujnik ruchu będzie w trybie testowym przez 3 minuty. Jeśli wykryje ruch, dioda LED detektora zacznie
migać, następnie poczekaj 60 sekund przed wznowieniem wykrywania ruchu. W trybie normalnym
dioda LED będzie świecić przez 3 sekundy po wykryciu ruchu, a następnie wznowi wykrywanie.
• Usuń czujnik ruchu lub przejdź do innego pomieszczenia, a następnie poczekaj 60 sekund.
• Wróć do zasięgu czujnika i wykonaj kilka kroków przed nim. Spowoduje to uruchomienie czujnika ruchu
i wysłanie sygnału do jednostki sterującej.
• Jeśli testowanie czujnika było skuteczne, na ekranie sterownika pojawi się “ xxx sensor alarm” lub
otrzymasz potwierdzenie głosowe. Jeśli tak się nie stało, może to być jedna z następujących przyczyn:
(A) 60 sekund wykrywania ruchu nie przeszło; (B) detektor ruchu nie komunikuje się z jednostką
sterującą
UWAGA1: nie rejestruj ani nie testuj czujnika z dolną osłoną, ponieważ może to wpłynąć na jego działanie..
UWAGA1: aby zapewnić płynną pracę, wszystkie inne czujniki w tym obszarze muszą być wyłączone.
INTERWAŁ DETEKCJI RUCHU:
Pozycja 1: jumper włożony na 1 i 2piny : detektor aktywuje czujnik ruchu co 5 sekund.
Pozycja 2: jumper włożony na 2 i 3 piny : detektor aktywuje czujnik ruchu co 50 sekund.
Pozycja 3: jumper wyciągnięty: detektor aktywuje czujnik ruchu co 5 sekund.
MONTAŻ DETEKTORA:
Umieść detektor ruchu zgodnie z zalecanymi lokalizacjami na obrazku poniżej. Unikaj miejsc instalacji
oznaczonych “X”, ponieważ są to obszary, które mogą powodować fałszywe alarmy, takie jak instalacja detektor
zewnętrzny, w miejscach, w których przebywają zwierzęta domowe, w pobliżu powietrza warunkowane, w
bezpośrednim świetle słonecznym, w pobliżu źródeł ciepła i pod przedmiotami

PL
9
.
• Zalecana wysokość montażu czujnika to 2 metry od podłogi
• Detektor można zamontować na ścianie za pomocą podwójnej taśmy klejącej (przyklejonej do obszaru
zaznaczonego na rysunku 1) poniżej) lub poprzez przykręcenie do stałego wspornika (Rysunek 2).
UWAGA!
Zainstaluj i używaj detektora zgodnie z niniejszą instrukcją.
Nie dotykaj powierzchni czujnika, aby uniknąć zmiany czułości czujki.
Przestaw przełącznik zasilania w pozycję OFF przed czyszczeniem czujnika miękką ściereczką zwilżoną
alkoholem, jeśli jest czyszczony.
Aby zapewnić prawidłowe działanie, upewnij się, że wykrywacz jest zasilany przez cały czas i przeprowadzaj
okresowe testy działania.

10
ESPECIFICACIONES TÉCNICAS :
• Frecuencia de la comunicación inalámbrica con la central anti-efracción-433 MHz
• Alimentación: batería de 9V
• Ángulo de detección: 110°
• Distancia de detección: hasta 8m
• Distancia de comunicación inalámbrica : hasta 100m en espacios abiertos
• Temperatura medía de utilización: -10 ~ 50 °C
• Utilización: interior
ÁREA DE COBERTURA:
Vista desde arriba Vista desde un lateral
PRUEBA Y PROGRAMACIÓN DEL DETECTOR EN UN SISTEMA DE ALARMA :
• Inicie el detector moviendo el interruptor situado por detrás a la posición ONE
• El sensor de movimiento se mantendrá en modo de prueba durante tres minutos. En caso de que
detectara movimiento, el LED del sensor parpadeará, después esperará durante 60 seg antes de
reiniciar la detección de movimiento. En modo normal de funcionamiento el LED se mantendrá
encendido durante 3 seg en caso de detectar movimiento y luego reanudará la detección.
• Alejénse del sensor de movimiento o vaya a otra habitación y después espere durante 60 seg..
• Vuelva a entrar en el radio de acción del sensor y haga unos pasos enfrente de este.Esto hará que se
dispare el sensor de movimiento y que mande mande señal a la unidad de mando.
• Si la prueba del sensor ha sido exitosa, en la pantalla de la unidad de mando aparecerá el mensaje
„xxx sensor alarm“ o recibirá una conrmación vocal.
• Si esto no llegase a pasar, las causa puede ser una de las siguentes: (A) no han transcurrido de 60
seg. entre ambas detecciones de movimiento y (B)el detector de movimiento no se está comunicando
con la unidad de mando.
NOTA1:no efectuar el iniciamiento o la prueba del dector con la tapa bajada, porque esto puede afectar al
rendimiento del sensor de movimiento. .
NOTA1: para que la programación se realice sin problemas todos los demás detectores de la zona tienen
que estar apagados.
INTERVALO DE DETECCIÓN DEL MOVIMIENTO:
Posición 1: puente en clavija 1 y 2: el detector activará el sensor de movimiento cada 5
segundos. Posición 2:puente en clavija 2 y 3: el detector activará el sensor de movimiento
cada 50 segundos.
Pozitia 3: puente quitado:el detector activará el sensor de movimiento cada 5 minutos.

ES
11
INSTALACIÓN DEL DETECTOR:
• Coloque el detector respectando las ubicaciones recomendadas en la imagen mostrada más
abajo. Evite las ubicaciones marcadas con la „X“ porque estas son zonas que pueden provocar
falsas alarmas, deoarecere acestea sunt zone ce pot cauza alarme false,, la instalación del detector
en exteriores, en lugares dónde se encuentren animales domésticos ,cerca de aparatos de aire
acondicionado.
• La altura recomendad para el montaje del detector es a dos metro de distancia del suelo
• Puede enganchar el detector a la pared utilizando una banda adhesiva doble ( pegada en la zona indicada
en la imagén 1 mostrada más abajo) o más abajo sujetandóla en tornillo en un suporte jo ( imagen 2).
ATENCIÓN!
Os rogamos instalar y utilizar el detector siguendo las indicaciones de este manual.
No toque la supercie del sensor para evitar la modicación de la sensibilidad del detector.
Para asegurar un funcionamiento adecuado, asegurénse que el detector esté siempre alimentado y efectuen
pruebas de funcionamiento periódicas.

12
SPECIFICHE TECNICHE:
• Frequenza: 433 MHz
• Tensione di alimentazione: batteria 9V
• Angolo di rilevamento: 110°
• Distanza di rilevamento: no a 8m
• Distanza communicazione wireless: no a 100m all’aperto
• Temperatura di utilizzo: -10 ~ 50 °C
• Uso: all’interno
INTERVALLO DI COPERTURA:
Vista dall’alto Vista da lato
TEST E PROGRAMMAZIONE DEL RILEVATORE IN UN SISTEMA DI ALLARME:
• Avviare il rilevatore spostando su ON il tasto dal retro del dispositivo
• Il rilevatore si troverà nella modalità test per 3 minuti. Se rileva un movimento, il LED del rilevatore
lampeggia, quindi attendi 60 secondi prima di riprendere il rilevamento del movimento. Nella modalità
normale di funzionamento, il LED rimane acceso per 3 secondi quando viene rilevato un movimento,
quindi riprende il rilevamento.
• Spostatevi lontano dal sensore di movimento o andare in un’altra stanza, quindi attendere 60 secondi
• Tornare alla portata del sensore e fare qualche passo davanti a lui. Questo attiverà il sensore di movimento
e invierà un segnale all’unità di comando.
• Se il test è stato superato, il messaggio “xxx sensor alarm” apparirà sullo schermo dell’unità di controllo
o riceverai una conferma vocale. Se ciò non è accaduto, può essere una delle seguenti cause: (A) i 60
secondi del rilevamento del movimento non sono passati; (B) il rilevatore di movimento non comunica
con l’unità di controllo
NOTA1: non non accoppiare o testare il rilevatore con il coperchio rimosso in quanto ciò potrebbe inuire
sulle prestazioni del sensore di movimento
NOTA1: per garantire che la programmazione avvenga senza problemi, tutti gli altri rivelatori nell’area
devono essere spenti.
INTERVALLO DI RILEVAMENTO DEL MOVIMENTO:
Posizione 1: jumper sui pin 1 e 2: il rilevatore attiverà il sensore di movimento ogni 5
secondi.
Posizione 2: jumper sui pin 2 e 3: il rilevatore attiverà il sensore di movimento ogni 50 sec.
Posizione 3: jumper rimosso: il rilevatore attiverà il sensore di movimento ogni 5 minuti.
ISTRUZIONI DI MONTAGGIO:
• Posizionare il rilevatore di movimento seguendo le posizioni consigliate nell’immagine sottostante. Evitare

IT
13
luoghi di installazione contrassegnati con “X” perché sono aree che possono causare falsi allarmi, come
l’installazione del rilevatore esterno in luoghi in cui sono presenti animali domestici, vicino a condizionatori
d’aria, sotto la luce diretta del sole, vicino a fonti di calore e oggetti che si ruotano.
• L’altezza consigliata per il montaggio del rilevatore è di 2 m sopra il pavimento
• È possibile montare il rilevatore sulla parete usando un nastro doppio adesivo (incollato all’area indicata
nella gura 1 qui sotto) o avvitando su un supporto sso (gura 2).
ATTENZIONE!
Si prega di installare e utilizzare il rilevatore secondo questo manuale.
Non toccare la supercie del sensore per evitare di cambiare la sensibilità del rilevatore.
Spostare l’interruttore di alimentazione su OFF prima di pulire il sensore con un panno morbido inumidito con
alcool se è necessario pulirlo.
Per garantire un funzionamento corretto, assicurarsi che il rilevatore sia sempre acceso ed eseguire test
periodici di funzionamento.
Table of contents
Languages:
Other PNI Security Sensor manuals

PNI
PNI PG06 User manual

PNI
PNI SAFE HOUSE PG07 User manual

PNI
PNI SafeHome PT03 User manual

PNI
PNI SafeHouse HS525 User manual

PNI
PNI SafeHome PT330 User manual

PNI
PNI Safe House HS530 User manual

PNI
PNI SafeHouse HS003 User manual

PNI
PNI SafeHome PT252 User manual

PNI
PNI SAFE HOUSE DUAL GAS 250 User manual

PNI
PNI SafeHouse HS002LR User manual
Popular Security Sensor manuals by other brands

Powerfix Profi
Powerfix Profi 271367 Operation and safety notes

PCB Piezotronics
PCB Piezotronics 109C11/PCS-2AF Installation and operating manual

Optex
Optex X-ZONE manual

Radiodetection
Radiodetection RD8100 Operation manual

DSC
DSC WLS912L-900 installation instructions

DANLERS
DANLERS CEFPLL10VDC Installation notes