manuals.online logo
Brands
  1. Home
  2. •
  3. Brands
  4. •
  5. Pollard
  6. •
  7. Tools Storage
  8. •
  9. Pollard 120D User manual

Pollard 120D User manual

E
S
T
.
1
9
2
1
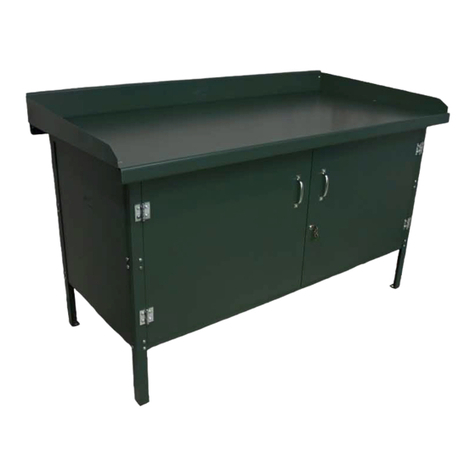
120D Enclosed Work Bench
Assembly Instructions
www.pollardbros.com
3/8” x 3/4”Hex Head
Machine Screw
3/8” Lock Washer
3/8” Hex Nut
(2) Side Plates (Left & Right) (1) Back Plate (2) Rear Uprights(Left & Right) (2) Front Uprights (1) Top Front Cross Angle
(2) Top Support Angles (2) Cabinet Doors (1) Steel Top (1) Ball Bearing Drawer
Includes:
x
x
x
4
x
4
x
4
4
4
1/4” x 5/8” Round Head
Machine Screw
1/4” Hex Nut
1/4” Lock Washer
x
60
x
60
x
60
Cylinder Lock
x
1
2” x 2” Butt Hinges
x
4
5/16” x 3/4” Flat
Head Machine Screw
5/16” Hex Nut
5/16” Lock Washer
x
6
x
6
x
6
Tools Needed:
wrench at head screwdriver
x
2
Drawer Handle
8/32” x 3/8” Flat Head
Machine Screw
8/32” Hex Nut
[2]
1
Lay rear uprights on oor about 55” apart. Insert
(5) 1/4” x 5/8” Round Head Machine Screws
through the back holes so that the screw head is
between the oor and the upright.
Align the Cabinet Back Plate (with the ½” form
facing up) between the uprights and match the
holes in the back with the protruding screws.
Bolt 1/4” Lock Washer and 1/4” Hex Nut to the
top single screws. HAND TIGHTEN ONLY. Leave
the remaining screws without nuts and washers.
2
3
Attach the top Shelf Tray with anges down
onto the four protruding screws and fasten with
(4) 1/4” Lock Washers and 1/4” Hex Nuts. Note:
top shelf will have drawer cover welded to it.
Repeat with the lower Shelf Tray. HAND
TIGHTEN ONLY.
4
Insert the Side Plates between the tray shelves
and the rear uprights, bolt through the bottom
side holes of the upright, sides, and trays using
(8) 1/4” x 5/8” Round Head Machine Screws, 1/4”
Lock Washers, and 1/4” Hex Nuts. HAND
TIGHTEN ONLY. Leave 13/32” holes in sides and
uprights open.
Determine which are the Front and which are the
Rear Uprights. The Front Uprights have four extra
holes for the hinges. Both Front and Rear Uprights
are made as left and rights.
5
Steps:
Front Upright
Rear Upright
[3]
Stand cabinet upright and make sure the frame work is square and that
the doors are in line, then tighten all bolts.
Attach front Uprights using (16) 1/4”x 5/8”
Round Head Machine Screws, 1/4“ Lock Wash-
ers, and 1/4”Hex Nuts. HAND TIGHTEN ONLY.
Bolt the top front cross angle inside of the front
uprights at the top with angle ange facing in.
Use (4) – 1/4” x 5/8” Round Head Machine
Screws, Lock Washers, and Hex Nuts. HAND
TIGHTEN ONLY.
Assemble Hinges to left and right Doors using
(4) 2” x 2” hinges, match up holes on uprights
with holes on hinges and bolt together using
(16) 1/4” x 5/8” Machine Screws, 1/4”Lock Wash-
ers, and Hex Nuts.
6
7
8
9
Cabinet Front
Attach Cylinder Locks to Cabinet Fronts.
Remove End Screw, Cam, and 1/2” Hex Nut from
Cylinder. Insert Cylinder into lock hole and
replace 1/2”Hex Nut, Cam, and End Screw
according to diagram. Attach door handles with
(4) 8/32“ x 3/8” Flat Head Machine Screws and
8/32” nuts.
Pollard Brothers Manufacturing 5504 N. Northwest Highway Chicago IL 60630
.. .
.
phone(773)763-6868 fax(773)763-4466 toll free(800) 551-5566
[4]
14 Insert Drawer slide on drawer into the drawer
slide on the drawer cover. After inserting
drawer, fully close drawer to ensure drawer
has locked. Note: To detach the drawer
depress black lever up on right and down on
left slides simultaneously as you pull the drawer
out.
Attach top support angles to Uprights and
Sides using (4) 3/8” x 3/4” Hex Head Machine
Screws, 3/8” Lock Washers, and 3/8” Hex Nuts.
Slide the formed 12 ga. Steel Top from either end
over the top support angles, (formed side with
5/16” holes to the back).
Fasten Back Plate inside the 1”form of the End
Plates and with the ¾”form facing out use (5) ¼” x
5/8” Round Head Machine Screws, 1/4” Lock Wash-
ers and 1/4” Hex Nuts, three to the top and two for
the End Plates. Tighten all bolts
Before bolting the top to the support angles, slip
in the End Plates between the Top and the angles,
match up the holes and secure Top and End Plates
to the support angles using (6) 5/16” x 3/4”Flat
Head Machine Screws, 5/16“ Lock Washers, and
Hex Nuts.
10
11
12
13
Other Pollard Tools Storage manuals

Pollard 131 User manual

Pollard

Pollard 131 User manual

Pollard 120 User manual

Pollard

Pollard 120 User manual

Pollard 163-530-34 User manual

Pollard

Pollard 163-530-34 User manual

Pollard 152 User manual

Pollard

Pollard 152 User manual

Popular Tools Storage manuals by other brands

kupper 12530 Assembly instruction

kupper

kupper 12530 Assembly instruction

VERITAS 05A01.01 owner's manual

VERITAS

VERITAS 05A01.01 owner's manual

Global Industrial Bench-In-A-Box B2334702 user manual

Global Industrial

Global Industrial Bench-In-A-Box B2334702 user manual

kincrome K8114 manual

kincrome

kincrome K8114 manual

Seville Classics UltraGuard UltraGraphite WEB484 Assembly instructions

Seville Classics

Seville Classics UltraGuard UltraGraphite WEB484 Assembly instructions

Test Equipment Depot Fieldpiece HVACR manual

Test Equipment Depot

Test Equipment Depot Fieldpiece HVACR manual

Ferm WBM1005 Original instructions

Ferm

Ferm WBM1005 Original instructions

Festool TOPROCK BT 20 manual

Festool

Festool TOPROCK BT 20 manual

BenchBUD Electric Height Adjustable Workbench instructions

BenchBUD

BenchBUD Electric Height Adjustable Workbench instructions

Sealey AP3020 instructions

Sealey

Sealey AP3020 instructions

Sealey API16 instructions

Sealey

Sealey API16 instructions

TMG TMG-WBC10 product manual

TMG

TMG TMG-WBC10 product manual

Milwaukee PACKOUT 48-22-8488 manual

Milwaukee

Milwaukee PACKOUT 48-22-8488 manual

Husky HOTC8422BB1M Use and care guide

Husky

Husky HOTC8422BB1M Use and care guide

Husky H46MWC9GBXD Use and care guide

Husky

Husky H46MWC9GBXD Use and care guide

Crivit HB-1328 Instructions for use

Crivit

Crivit HB-1328 Instructions for use

Vestil ETS Series instruction manual

Vestil

Vestil ETS Series instruction manual

Teknion interpret WWSSC Installation guides

Teknion

Teknion interpret WWSSC Installation guides

manuals.online logo
manuals.online logoBrands
  • About & Mission
  • Contact us
  • Privacy Policy
  • Terms and Conditions

Copyright 2025 Manuals.Online. All Rights Reserved.