Posey Company • 5635 Peck Road, Arcadia, CA 91006-0020 USA
Phone: 1.800.447.6739 • 1.626.443.3143 • Fax: 1.800.767.3933 • www.posey.com
MADE IN CHINA
M4059 REV B 051515© 2015 Posey Company. All rights reserved.
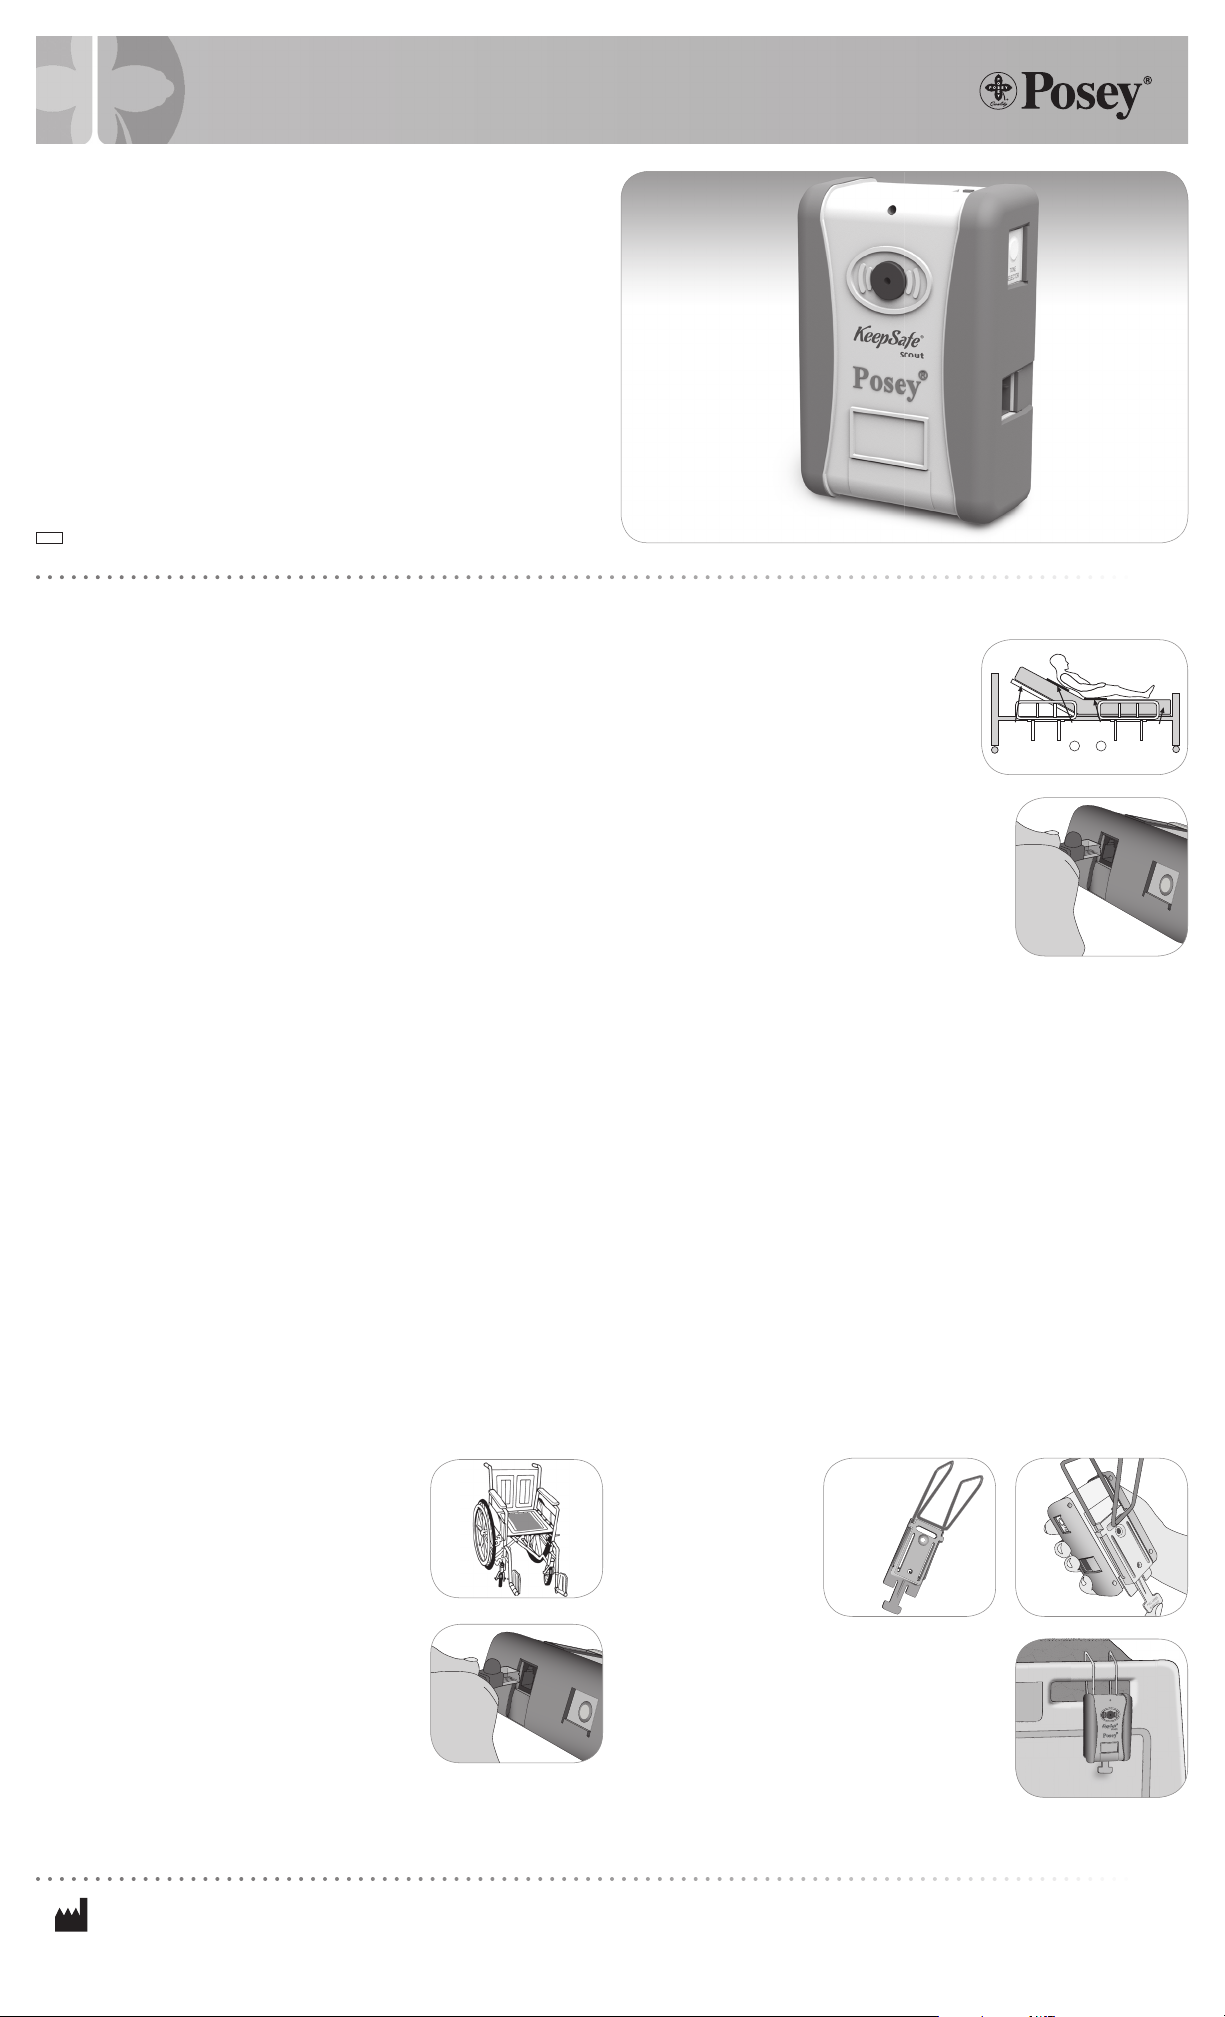
Posey®KeepSafe®Scout 8324
Application Instructions
4. Make sure indicator LED
is in clear view of staff.
5. To remove alarm, gently
push bracket release
lever in while sliding
alarm up and out.
(Fig. 8)
Wall Mount
1. Choose a location out of the patient’s reach, but
with LED in clear view of staff.
2. Use Wall Bracket (8208) (Fig. 9)
a. Screw Attachment:
– Position wall bracket with back (flat side)
against wall.
– Using bracket as a guide, mark spots to insert
anchors into wall.
Make sure it is safe to drill and there are
no pipes or electrical wires that could
be damaged.
– Drill holes where marked and insert anchors.
– Position bracket over holes. Insert and
tighten screws.
– Slide alarm onto bracket from top down to
lock in place.
– To remove alarm, gently push release lever
in while sliding alarm up and out. (Fig. 10)
Chair Mount (wheelchair and geri-chair)
Wheelchair
Follow these steps to attach alarm to a wheelchair
with the saddle bracket (8278N):
1. Choose a location on rear of chair, out of the
patient’s reach to attach the Saddle Bracket,
such as the bottom of
the wheelchair frame
at a juncture not likely
to interfere with the
wheel of the chair.
2. Wrap the saddle
strap firmly around
the wheelchair frame.
(Fig. 11)
3. Slide the alarm onto
the bracket from the
top down. The alarm
should rest on the
bottom of the “L” (Fig. 12)
4. Always confirm proper attachment before each
use. Ensure that the alarm and sensor cables
are clear of all moving parts of the chair and
cannot fall off.
Geri-chair Mount
1. Choose a location on rear of chair, out of the
patient’s reach.
2. Slide the alarm onto the wire bracket (8276) from
the top down to lock in place.
3. Attach the bracket to the back of the geri-chair
by pulling the wire away from the alarm to
create an opening wide
enough to fit over the
geri-chair Slide the
bracket onto the geri-
chair and push down to
lock in place. (Fig. 13)
4. Always confirm proper attachment before each
use. Ensure that the alarm and sensor cord are
clear of all moving parts of the geri-chair and
cannot fall off.
NOTE: If the sensor is damaged or disconnected
while in use, alarm will sound to notify caregiver.
Battery Replacement
The alarm unit will emit an audible “CHIRP”
and flashing red LED indicating a low battery.
To replace the battery:
1. Turn the alarm OFF.
2. Press down on arrow and slide the
battery door open.
3. Remove the battery from the compartment.
4. Observe polarity symbols in battery compartment
and install battery. Note: battery will only fit one
way; do not force battery if polarity is reversed.
5. Slide battery door closed.
6. Test system to verify it is working properly before
leaving patient unattended.
• Batteries can explode or leak and cause
damage to alarm or skin if installed backwards,
disassembled, fully discharged or exposed to
water, fire or high temperatures.
• ALWAYS install a new battery when hearing the
chirping sound and when the red LED is flashing.
Cleaning Instructions
• Alarm Unit – Wipe clean with disinfectant liquids
that DO NOT contain Phenol. DO NOT submerge
in liquid or sterilize with heat. Do not get liquid in
RJ-11 connector sensor port or speaker hole.
Proper Handling and Use
If the Posey KeepSafe Scout is subjected to severe
mechanical shock, such as dropping, or is
submerged in liquid, it may stop functioning as
designed. Visually inspect the unit for cracks in the
case, missing screws, missing battery door, or signs
of exposure to liquid. After each incident, you must
verify that the unit is working properly.
Storage Instructions
• This device is designed for use in normal
indoor environments.
• This device may be stored in ambient warehouse
temperatures at normal humidity levels. Avoid
excess moisture or high humidity that may
damage product materials.
Disposal
Dispose of per your facility policy or applicable
local code.
Limited Lifetime Warranty:
The Posey Company warrants to the original
purchaser, the alarm unit to be free from defects
in materials and workmanship for the life of the
unit. Warranty void if unit is opened, damaged, or
submerged. This warranty gives you specific legal
rights, and you may also have other rights, which
vary from state to state.
Fig.
12
Fig.
13
Fig.
11
Fig. 9
Screw
Holes
Release
Lever
Fig. 10
Release
Lever
Slide
Alarm
Up
Before Leaving Patient Unattended
ALWAYS follow these steps each time before
leaving patient unattended:
1. Connect a Posey sensor to the alarm unit.
Check to make sure that the sensor cable
and RJ11 are intact and undamaged.
2. Place weight on sensor pad.
3. Turn alarm unit ON and verify green
LED blinks.
4. Verify batteries are fresh. If you hear an
intermittent “CHIRP,” and red flashing LED,
the battery is low and needs to be changed.
5. Check to make sure the audible alarm is
functioning properly by applying and lifting
weight off sensor in several spots to activate
the alarm.
6. DO NOT use the Posey KeepSafe Scout if the
audible alarm does not sound.
7. Check to make sure sensor cable is out of the
way and does not pose a tripping hazard. If
cable must cross footpath, use duct tape or
similar product to secure cable to floor and
reduce hazard.
Fig. 8