Precision matthews PM 25MV-BD User manual

1
PM 25MV v9 2020-10 Copyright © 2020 Quality Machine Tools, LLC
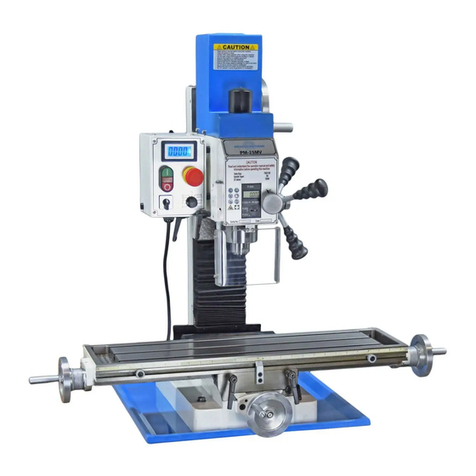
Model PM 25MV-BD Milling Machine
1 HP (750W) brushless dc motor, 110 Vac single phase power
Quiet belt drive, no gears
Variable spindle speed from 50 to 2500 rpm
Table size 27-1/2” x 7”
Quill DRO for precise downfeed measurement
Square column design, heavy cast iron construction
Options: welded steel stand/cabinet, 3-axis DRO
Weight 275 lb
PM 25MV-BD with optional stand/cabinet
PM 25MV-BD with optional 3-axis DRO

2
PM 25MV v9 2020-10 Copyright © 2020 Quality Machine Tools, LLC
PM 25MV-BD
FAQ
120 Vac power connected?
E-Stop button out? (pop it out
by twisting rmly to the right.)
Fuse good?
The CHIP GUARD switch may
be open. Close the guard.
The table won’t go
back to the column
The X-axis (table) lock handles
could be the problem. Swing
them up to clear.
R8 collets won’t go
into the spindle
The collet locating screw
could be in too far. Back it
out a little.
My mill doesn’t run
This manual contains essential safety advice on the proper setup, operation, maintenance, and ser-
vice of the PM 25MV-BD milling machine. Failure to read, understand and follow the manual may
result in property damage or serious personal injury.
There are many alternative ways to install and use a mill. As the owner of the mill you are solely
responsible for its proper installation and safe use. Consider the material contained in this manual
to be advisory only. Quality Machine Tools, LLC cannot be held liable for injury or property damage
during installation or use, or from negligence, improper training, machine modications or misuse.
This manual describes PM 25MV-BD machines as shipped from February 2016. There
may be detail dierences between your specic machine and the information given here
(with little or no impact on functionality). Please email us if you have questions about any
aspect of the manual or your machine (see our website www.precisionmatthews.com for
support addresses). Your feedback is welcomed!
Copyright © 2020 Quality Machine Tools, LLC
This material was originated by Precision Matthews. No portion of the manual may be repro-
duced or distributed in any form without the written approval of Quality Machine Tools, LLC.
The drawbar doesn’t
seem to be long enough
Install the drawbar UNDER the
drawbar cap, as in the photo
(unscrew cap, insert drawbar
into spindle, replace cap)
Drawbar
Cap

3
PM 25MV v9 2020-10 Copyright © 2020 Quality Machine Tools, LLC
Section 1 INSTALLATION
THESE ARE THE MAIN POINTS TO WATCH OUT FOR!
But read the following pages for more information
• Handling the mill is at least a two-man job.
• Lower the center of gravity by hand-cranking the headstock down until the spindle nose
is just clear of the table.
• Lifting gear – sling, hoist or forklift – must be rated for at least 500 lb.
• Working location of the mill must allow: Full left-right travel of the table, and; Access to
the top of the column (for Z-axis leadscrew maintenance).
• Power requirement is 110V, 60Hz, 1φ, 20A circuit protection (spindle motor 14A full load).
• Extension cord not recommended; if no alternative, use 12 AWG not longer than 20 ft.
• Before connecting power for the rst time be sure that:
1. The machine is on a rm footing, adequately secured to bench or stand.
2. No chuck or collet is installed.
3. There are no clamps or locks on moving parts.
4. The speed control knob is set for the lowest speed.
1. Prepare the working location, bench or optional
stand.
Highly recommended!
Bolt the bench or stand rmly to the oor. Check
working clearances, Section 2.
2. Remove the packing case from the pallet, Figure 1-1.
Unbolt the machine from the pallet. Install the largest
of the four handles on the headstock handwheel (top
of column on right). Install the three smaller handles
on the X-axis and Y-axis handwheels.
3. Release the Y and Z axis locks. Check that the mill’s
center of gravity is as far down and back as possible
by cranking both Y and Z handwheels.
4. Tape cloth padding to the underside of the tilt collar.
5. Run a sling under the padding, taking care not to
damage the Z-axis locking handle and the cooling
ns on the electrical box, Figure 1-2.
6. Hook the sling to the hoist. Slowly lift the mill, con-
trolling any tendency for it to swing as it clears the
pallet.
7. Roll the mill into position over the tray, then lower it
into place, Figure 1-3.
8. Secure the mill to the bench or stand. If this is a stand
Setting up the mill
The PM 25MV-BD is shipped in two packing cases, one for the machine and tray (and optional 3-axis DRO), one
for the stand, if ordered. The following procedure makes use of an engine hoist, minimum weight rating 500 lb.
Figure 1-1 Mill ready for lifting

4
PM 25MV v9 2020-10 Copyright © 2020 Quality Machine Tools, LLC
Figure 1-2 Sling position Figure 1-3 Lowering the mill into position
Assembly and cleanup
Unnished metal surfaces may be protected in shipping
by thick grease and/or paper. Carefully remove these us-
ing a plastic paint scraper, disposable rags and a light-oil
such as WD-40. Coat bright machined surfaces with a
rust preventative such as Rustlick.
Level the mill using the table surface for reference, shim-
ming under the tray if necessary. Oil the ways and lead-
screws (Z-axis screw excepted, inaccessible).
Initial checks
Read Section 3 if unsure about any item in the fol-
lowing
1. Check that no chuck or collet is installed; there are
no clamps or locks on moving parts, and; the speed
control knob is at its lowest setting, fully ccw.
2. Remove the blue motor cover. Make sure the belt is
set for low speed (belt running on the larger spindle
pulley.) If not, re-position the belt, Figure 3-2. Re-
place the motor cover.
3. Connect 110 Vac power.
4. Be sure the E-Stop (Emergency) button has not
been pushed in (it should pop out when twisted rmly
clockwise).
5. Press the Power button. The power lamp and the
tach display should light.
6. Check the emergency function by pressing the E-
Stop button. The power lamp should go out, de-en-
ergizing the contactor circuit, disabling all electrics.
If this doesn’t happen, the E-stop function is de-
fective, and needs attention.
7. Restore power by twisting the E-Stop button rmly
to the right; this will cause it to pop out.
8. Check that the chip guard switch disconnects power
when the guard is swung out.
DO NOT LEAVE THE MACHINE UNATTENDED
DURING THIS PROCEDURE
Test run procedure
installation, use the four bolts M12 bolts supplied (the
bolt locations are threaded.) Use lock + plain wash-
ers in all locations.
1. Turn the speed control knob all the way down and
to the left, Select Forward (F) spindle direction. The
tachometer should display a speed between 50 and
100 rpm.
2. Rotate the speed control knob to the right for a
speed of about 200 rpm. Run the spindle at that
speed for about 1 minute, then progressively in-
crease the speed to the max (about 1250 rpm).
3. Press the E stop button to check it’s operation. Ro-
tate E stop to the right to reset.
The machine should now be ready for normal oper-
ations.
5
PM 25MV v9 2020-10 Copyright © 2020 Quality Machine Tools, LLC
Section 2 FEATURES & SPECIFICATIONS
MODEL PM 25MV-BD Milling Machine
General information
The PM 25MV-BD is a robust “square column” mill with R8 spindle and continuously-variable spindle speed up to
2500 rpm. It is designed for day-in, day-out use in the model shop. With a weight of 275 lbs it can handle far more
than the typical small machine. For precise control of cutter depth there is a worm-driven quill downfeed with gradu-
ated dial and DRO, completely independent of headstock up/down position.
The reversible spindle runs in high-quality tapered-roller bearings enclosed in a 2.4” diameter quill with coarse
(“drilling”) and ne (“milling”) downfeed options.. It is powered by a 1 HP (750 W) brushless dc motor. Spindle speed
is continuously variable from 50 to 1250 rpm, low range, and 100 to 2500 rpm, high range. This is a “gearless”
design with two-step pulleys on motor and spindle coupled by a long-life ribbed belt. The headstock can be tilted
90o clockwise and counter-clockwise from the vertical. Precision ground dovetailed ways for table and headstock
ensure smooth, precise motion in all three axes: X = left/right motion of table, 20-1/2 in. Y = front/back motion of
table, 7 in. Z = headstock up/down, 13 in. Note: Installation of a DRO with external scales may limit these numbers.
Special accessory supplied: Spindle lock C-wrench
Working clearances – space requirements for full motion of the table

6
PM 25MV v9 2020-10 Copyright © 2020 Quality Machine Tools, LLC
PM25MV-BD SPECIFICATIONS
T-slot dimensions
Dimensions
Approximate weight:
Machine only 275 lb net, 320 lb shipping
Welded steel stand 50 lb net, 54 lb shipping
Size, including stand W 39 in. x D 20-1/2 in. x H 68-1/2 in.
Stand footprint W 13-1/2 in. x D 16-1/2 in.
Tray W 19-3/4 in. x D 20-1/2 in.
Electrical
Power requirement 120V, 60 Hz, single phase
Spindle motor Brushless dc, 750W (1 HP)
Full load current 14A
Headstock
Vertical travel* 13 in.
Left-right tilt 90 degrees clockwise/counter-clockwise
Spindle
Speeds (rpm) Low range 50 to 1250, High range 100 to 2500
Internal taper R8
Quill travel 2 in.
Quill diameter 2.36 in.
Spindle nose to table 2 in. min, 12 in. max
Spindle centerline to front face of column 6 in. to pleated cover (uncovered, 7 in.)
Drawbar Standard 7/16 - 20 thread
Table
Size W 27-1/2 in. x D 7-1/8 in.
Surface height over mounting surface Approx 7 in.
Surface height over floor, if on stand Approx 38-1/2 in.
Maximum load 200 lb, table centered, less if overhanging
Leadscrews Acme, inch pitch, 10 tpi
Left-right travel (X-axis)* 20-1/2 in.
Front-back travel (Y-axis)* 7 in.
T-slots (3) 12 mm wide, 63 mm (2-1/2 in.) centerlines
* DRO installation may limit these numbers

7
PM 25MV v9 2020-10 Copyright © 2020 Quality Machine Tools, LLC
Everyday precautions
• This machine is designed for milling and drilling operations by experienced
users familiar with metal-working hazards.
• Untrained or unsupervised operators risk serious injury.
• Wear ANSI-approved full-face or eye protection at all times when using the
machine (everyday eyeglasses are not reliable protection against ying particles).
• Wear proper apparel and non-slip footwear – be sure to prevent hair, clothing
or jewelry from becoming entangled in moving parts. Gloves – including tight-t-
ting disposables – can be hazardous!
• Be sure the work area is properly lit.
• Never leave chuck keys, wrenches or other loose tools on the machine.
• Be sure the workpiece and machine ways are secure before commencing mill-
ing or drilling – hold-downs and/or vise fully tightened, X-Y-Z axes locked, cutting
tool secured.
• Use moderation: light cuts, low spindle speeds and slow table motion give
better, safer results than “hogging”.
• Don’t try to stop a moving spindle by hand – allow it to stop on its own.
• Disconnect 110V power from the mill before maintenance operations such as
oiling or adjustments.
• Maintain the machine with care – check lubrication and adjustments daily
before use.
• Clean the machine routinely – remove chips by brush or vacuum, not com-
pressed air (which can force debris into the ways).
No list of precautions can cover everything.
You cannot be too careful!

8
PM 25MV v9 2020-10 Copyright © 2020 Quality Machine Tools, LLC
MOTOR CONTROLS
Before doing anything, check the installation in-
structions in Section 1
Connect the mill to a 110Vac outlet.
Press and release the green Power ON button to en-
ergize the control circuit; the tachometer should light.
This is a self-latching circuit – when the ON button is re-
leased, a contactor in the electrical box maintains power
until released by the red OFF button (also a momentary
switch).
• The round orange E-stop button, right, is in series
with the OFF button. Like the OFF button it de-en-
ergizes the control circuit completely, but it should
be used only for its intended purpose – emergency
disconnect. Once the E-stop button is pushed in, it
stays in until twisted rmly clockwise to release.
• Also in series with the Power and E-stop buttons is
a microswitch actuated by the acrylic Chip Guard in
front of the spindle. The motor will not run if the chip
guard is open.
• The spindle motor is controlled by a three position
switch, Forward/Stop/Reverse, and a continuously-
variable speed control knob.
F= Forward (cw, looking down, used for most milling
and drilling
O= Stop
R= Reverse (ccw, looking down)
Figure 3-1 Spindle motor controls
Also shown, arrowed, is the quill locking lever
Figure 3-2 Belt adjustment
SPINDLE SPEEDS
The PM 25MV-BD is a belt-driven machine with two
speed ranges, (L) 50-1250 rpm and (H)100-2500 rpm.
To select a speed range, disconnect power, then remove
the blue motor cover (4 screws). Loosen the socket head
screws on each side of the motor, then swing the motor
forward to free the belt, Figure 3-2. Make sure that the
ribbed belt is properly engaged with the selected pair
of grooved pulleys, then re-tighten. Before powering up,
rotate the spindle by hand to check tracking and tight-
ness of the belt. Do not over-tighten – aim for ± ¼” slack
between the motor and spindle pulleys.
Excessive cutter noise, chatter, poor nish and
tool wear are often the result of too high a feed
rate, and/or too high a spindle speed. If unsure,
go slow!
Section 3 USING THE MILL

9
PM 25MV v9 2020-10 Copyright © 2020 Quality Machine Tools, LLC
Two tools are required to install or remove R8 tooling:
an 8 mm wrench for the square drawbar nut, and the
supplied C-wrench which engages in ats at the bottom
end of the spindle.
Install tooling
Install the R-8 device, then hand-thread the drawbar
into it until the shoulder on the drawbar bottoms on the
splined spindle, diagram above (on the machine this is
concealed by the drawbar cap, Figure 3-2). Lock the
spindle with the special C-wrench, page 5, while at the
same fully tightening the drawbar with an 8 mm wrench.
[Do NOT try to lock the spindle using the ats on the
drawbar cap; this is screwed onto the spindle to secure
the return spring cup.]
Figure 3-2 Two-step belt drive
Figure 3-3 Collet set screw
Remove tooling
Protect the table, vise or workpiece under the spindle
with rags or scrap wood. Why? Because they can easily
be damaged by falling tools and drill chucks. The cutting
tool itself can also be damaged in the same way.
Lock the spindle with the C-wrench, loosen the drawbar
one half turn or less, just enough to unseat the taper,
then tap the top of the drawbar with a brass or dead-
blow hammer to. Unscrew the drawbar with one hand
while supporting the R-8 device with the other hand.
R8 tooling is located in the spindle bore by a set screw. If
it is dicult or impossible to insert the R8 device, chances
are the set screw is in too far. Rotate the spindle by hand
to expose the screw, Figure 3-3, then back it out a fraction
of a turn using a 2.5 mm hex wrench.
Hand rotate the spindle again to check that the screw
clears the inside surface of the quill.
INSTALLING AND REMOVING TOOLING
The spindle and drawbar are designed for R-8 taper
collets, drill chucks and other arbors with the standard
7/16”-20 internal thread.
Replace the drawbar cap to
protect bearings and splines.

10
PM 25MV v9 2020-10 Copyright © 2020 Quality Machine Tools, LLC
MOVING THE TABLE
Conventionally, left-right movement of the table is said
to be along the X-axis (also called “longitudinal travel”
or “traversing”). Front-back movement is on the Y-axis,
sometimes called “cross travel”.
Each axis has a leadscrew with handwheel and gradu-
ated dial with 0.001” divisions, 0.1” per revolution. If the
Figure 3-4 X-axis locks Figure 3-5 Y-axis locks
RAISING & LOWERING THE HEADSTOCK
The Z-axis crank, Figure 3-6 inset, is at the top right of
the column. If the mill has a 3-axis DRO the headstock
position is displayed at all times. If not, the headstock
can be positioned approximately by reference to a 12”
scale on the column. For more precise positioning the
crank hub has a graduated dial with 0.001” divisions (be
aware of backlash in the bevel gears controlling the Z-
axis leadscrew, and also in the leadscrew nut).
When the headstock is at the desired height, lock it in
place.
All milling operations should be
done with the quill as fully retracted
into the headstock and locked.
Figure 3-6 Z-axis locks
In operations calling for precise depth
control, such as milling, both quill and
headstock must be locked to maintain
a precise depth of cut.
mill is not equipped with digital readouts (DROs), the
table can be accurately positioned by counting whole
turns and divisions, keeping leadscrew backlash in
mind. This means that table motion must always be in
the same direction up to the point of reference, then on
to the desired location, see “Positioning by Counting X-Y
Divisions”, two pages on.

11
PM 25MV v9 2020-10 Copyright © 2020 Quality Machine Tools, LLC
QUILL DOWNFEED
The quill is controlled in two dierent ways, coarse and
ne.
In the drilling mode, coarse feed, the mill operates like a
standard drill press with a 3-lever hub; lever action low-
ers or raises the quill in the usual way by rack and pin-
ion. Return action is assisted by a compression spring
within the quill and spindle assembly.
For milling operations the lever hub is not rotated by le-
ver action. Instead it is locked to a worm wheel, which
is turned by the ne control knob. This allows the quill
to be driven precisely to any desired position. The ne
control knob, because it drives through a worm, cannot
be back-driven by return-spring action on the quill (in
other words, it stays where it’s put). For milling opera-
tions the quill should be locked by the lever on the left of
the headstock, Figure 3-1.
Coarse feed (Figure 3-7)
For drilling operations, loosen knob (4), allowing the le-
ver hub to rotate independently of sleeve (3).
Fine feed (Figure 3-7)
For milling operations calling for precise, repeatable
control of tool depth, tighten knob (4) to engage hub (1)
with the internal taper on sleeve (3). Tighten the Z-axis
locks, Figure 3-6.
Rotate the ne control knob (2) to raise or lower the quill.
Lower the quill by rotating the ne control knob clock-
wise, positioning it precisely either by counting divisions
on the graduated dial, or by reference to the digital read-
out (DRO), Figure 3-1. Use the locking lever left of the
headstock to hold the quill rmly in position.
Figure 3-7 Quill downfeed controls
The lever hub (1) is connected at all times to the quill pinion, which
engages a rack on the back side of the quill. The ne control knob
(2) drives sleeve (3) through a worm gear. If clamp knob (4) is
unscrewed, both (2) and (3) rotate freely, doing nothing to the quill.
Fine feed is engaged by tightening knob (4) to clamp (3) and (1)
together.
If you are counting downfeed divisions be
aware of backlash in the worm drive.
The quill DRO – which has no backlash issues – oers a
much less laborious way of setting tool height, but note
that the quill is spring-loaded. This calls for care when
releasing the quill locking lever. If the ne control knob
has been allowed to disengage (backed o counter
clockwise), the quill may jump up by 0.01” or more. To
avoid this, make sure the ne control has been turned
clockwise to apply downward pressure on the quill be-
fore the locking lever is released.
QUILL DRO
The quill DRO is in metric mode when switched on.
Press the mm/in button to display inches.
Replace the battery by removing the small molded cov-
er on the face of the DRO unit (align the dots). Check
the type number and voltage of the installed battery. Re-
place with an equivalent silver oxide cell available from
local retailers.
Switch o the DRO when not in use!

12
PM 25MV v9 2020-10 Copyright © 2020 Quality Machine Tools, LLC
For all spindle positioning operations, with
or without DROs, avoid using the quill lock.
POSITIONING BY COUNTING X / Y DIVISIONS
Why? On practically all vertical mills, including the heavi-
er knee mills, locking the quill may oset the spindle by a
few thousandths of an inch. If the edge of the workpiece
has been “found” in the quill-locked condition, this will af-
fect placement of holes drilled thereafter. Instead, lower
the quill with the ne downfeed control. This is worm
driven, so it stays where it’s put without locking.
Figure 3-8 Workpiece positioning example
TAPPING OPERATIONS
When threading a drilled hole it is essential to align the
threading tap properly in the bore. The mill is often used
for this purpose, ideally with a dedicated (non-slip) tap
holder or, for production work, an auto-reverse tapping
attachment. A drill chuck can be used instead for sizes
up to (say) M6 or 1/4”, beyond which the chuck may
not grip tightly enough to avoid slippage. Tapping can be
done under power, or by hand turning the chuck.
In this illustration a hole is to be drilled exactly 0.25” on
the Y-axis relative to the front edge of a workpiece in a
For either method, it is essential to use a tapping uid.
Any cutting oil is better than none, but most users nd
Castrol’s Moly Dee the most reliable for threading in
steel.
If power tapping bear in mind that the spindle does not
stop instantaneously, so be careful tapping blind holes.
Be sure the quill locking lever is free, and start trial work
with the lowest spindle speed.
TILTING THE HEADSTOCK
In routine operations the user relies on squareness of the
spindle relative to both axes of the table. Front-to-back
squareness is set at the factory, and is not adjustable
by everyday methods. In the other plane the headstock
can be set to any angle up to 90 degrees either side
of the normal vertical position. Because re-establishing
true vertical (tramming) on any mill is a time consum-
ing process, most machinists look rst for other ways of
handling a project instead of tilting the head.
The headstock is secured by three nuts spaced 120 de-
grees apart, one underneath and one either side, Figure
3-9. The headstock is top-heavy, and may swing sud-
denly to either side unless a helper is on hand to restrain
it. Testing for moveability as you go, carefully loosen the
nuts by degrees. Be especially careful if the head has
vise, or otherwise clamped to the table, Figure 3-8.
1. Install an edge-nder in collet or chuck (a tip diam-
eter of 0.2” is assumed).
2. Lock the X-axis (optional).
3. If the reference edge is already to the back the spin-
dle centerline, do nothing; if not, rotate the Y-axis
handwheel clockwise to send the workpiece back-
wards (toward the column).
4. Engage the ne downfeed, Figure 3-7.
5. With the spindle running, lower the quill as neces-
sary using the ne downfeed control, then bring the
table forward (counter-clockwise), stopping at the
point where the edge-nder just makes contact (the
tip jumps out of line). Stop the spindle.
6. While holding the Y-axis handwheel to prevent rota-
tion, zero the Y dial.
7. Raise the quill, then rotate the handwheel one exact
full turn counter-clockwise (0.1”) to bring the refer-
ence edge to the spindle centerline.
8. Rotate the handwheel 2-1/2 turns counter-clockwise
to bring 50 on the dial opposite the datum; the spin-
dle is now 0.25” to the back of the reference edge.

13
PM 25MV v9 2020-10 Copyright © 2020 Quality Machine Tools, LLC
not been moved before – the paint seal may let go with-
out warning. (First-time tilting may also call for unusual
eort on the wrench.)
Set the headstock to the desired angle by reference to
the tilt scale on the headstock base casting, then re-
tighten the nuts. The tilt scale is typically good to within
± 1/4o. A more accurate means of angle measurement
will be needed if the project calls for greater precision.
Figure 3-9 Headstock nuts
TRAMMING THE HEADSTOCK
As shipped, the mill is set to zero tilt, squared accurately
enough for initial out of the box test drillings, etc. For
more demanding project work thereafter, the spindle
needs to be set at precisely 90 degrees relative to the
table, in other words trammed. “Out of tram” may show
up as an oset of a few thousandths between entry and
exit of a deep hole, or as a scalloped eect when sur-
facing a workpiece with a large-radius y cutter, greatly
exaggerated in Figure 3-11.
Tramming is done by ne-tuning the headstock tilt angle.
Tram is typically checked by attaching a dial indicator to
some form of “sweepable” holder installed in the spindle,
the aim being to adjust tilt for the same reading on either
side of the X axis. The longer the radius arm, the greater
the sensitivity.
Figure 3-12 shows a typical shop-made holder; it has a
threaded arbor allowing the choice of two radius arms, 6
and 10 inches measured from spindle centerline to indi-
cator tip. A collet is used to hold the arbor, in this exam-
ple 5/8” diameter. The dimensions are arbitrary, but note
that the indicator must be rmly attached, and the arm
rock-solid relative to the indicator spring force (which
can be considerable on plunger-type indicators).
A suggested procedure for establishing tram:
1. Disconnect power.
2. Install the dial indicator.
Figure 3-11 Head tilt can aect surface atness
REMOVING THE HEADSTOCK
If you wish to remove the headstock be aware that it
may — depending on the date of manufacture — be se-
Figure 3-10 Safety groove in headstock base casting
cured to the base casting by set screws in addition to the
nuts shown in Figure 3-9. The set screws, if installed,
are in a threaded hole on the 3-spoke handle side (right
hand) of the headstock casting. The screws are installed
in line, with the inner screw seated in a “safety groove”
in the base casting, Figure 3-10. The outer screw locks
the inner screw.

14
PM 25MV v9 2020-10 Copyright © 2020 Quality Machine Tools, LLC
3. If the headstock has been tilted, reset it to the ap-
proximate zero degree position on the tilt scale, then
tighten the three nuts enough to avoid unexpected
headstock movement.
4. Remove the vise, if installed, and clean the table sur-
face. If there are noticeable grooves or dings, atten
the surface with a diamond lap or ne-grit stone.
5. Set a 1-2-3 block (or other precision-ground block)
on the table under the indicator probe.
6. Switch on the DRO.
7. Using the ne downfeed lower the spindle to give an
indicator reading of about half-scale.
8. Note the dial indicator and DRO readings, then back
o the ne downfeed at least a couple of turns to
avoid collision when sweeping.
9. Reposition the 1-2-3 block to the opposite location
on the table.
10. Swing the indicator holder to the new location, then
lower the spindle – ne downfeed again – to give the
same dial indicator reading as in step (8).
If the headstock is perfectly trammed – highly unlikely
at the rst shot – the DRO reading should be as in step
(8). If not, loosen the nuts just enough to allow the head-
stock to be tapped a fraction of a degree in the direc-
tion called for, then re-tighten the nuts. The “tap” can be
anything from a gentle slap of the hand to a rap with a
dead-blow mallet.
Repeat steps (7) through (10) until satised with the
tram, tightening the nuts as you go. This will likely call
for several iterations. There is no “right” tram; the ac-
ceptable dierence in side-to-side readings depends on
project specs. As a starting point, aim for ± 0.001” with a
sweep radius of 5 or 6 inches.
Tramming calls for patience! Expect to tighten
and re-check at least three times (simply tight-
ening the bolts can itself aect the tram).
A similar procedure may be used to check tram in the
Y-axis, front to back. The dierence here is that there is
that Y-axis tram is established in manufacture, and can
be adjusted only by these shop methods:
1. Shimming between the dovetailed Z-axis saddle
casting and the headstock itself. It is more likely
that the headstock is nodding forward rather than
leaning backward, so start with (say) a 2 mil shim in
line with the underside (central) headstock nut. This
is a temporary x that will need to be checked if the
headstock is tilted again.
2. Shimming between the underside of the column and
the main base casting. This is a long-term x. It is a
two-person procedure, requiring an engine hoist or
some other means of un-weighting the headstock
(see Section 1, Installation).
Figure 3-12 Shop-made indicator holder

15
PM 25MV v9 2020-10 Copyright © 2020 Quality Machine Tools, LLC
VISE KEYS
Most precision vises come with key slots on the under-
side machined exactly parallel to the xed jaw. Key slots,
Figure 3-14, can be a great time saver. Properly installed
they allow the vise to be removed and replaced routine-
ly, accurately enough for general machining without the
need for indicating every time.
Most 4” vises have either 14 mm or 16 mm slots, calling
for shop-made T-shape adapter keys as Figure 3-15. It
is well worth the eort to make these precisely. Aim for
a snug t in both vise and table, but not so tight that it
takes more than reasonable eort to lift the vise clear.
Case hardening is recommended, with nal tting using
a ne stone or diamond stone.
Figure 3-13 Indicating the vise
The tip of a standard dial indicator, arrowed, rides along the side face
of a ground reference bar (or the front face of the back jaw).
INSTALLING & INDICATING A VISE
For routine milling operations the workpiece is held in a
precision vise. For the PM 25MV-BD a 4” vise is most
suitable. “Indicating” means checking the alignment of
the xed (back) vise jaw relative to the axis of table mo-
tion.
Install the T-bolts and align the vise by eye. With one of
the clamp nuts snug, but not tight, tighten the other one
just short of fully-tight (but tight enough so the vise won’t
budge without a denite tap from a dead-blow mallet).
A typical setup for indicating is shown in Figure 3-13.
There is no spindle lock, but you need to make sure
that the spindle does not rotate throughout the pro-
cedure. Set the indicator tip against the upper edge of a
precision reference bar or, if not available, use the front
face of the xed jaw of the vise instead (check for dings,
hone if necessary). Adjust the Y-axis to pre-load the indi-
cator to mid range at the tightly-clamped side of the vise,
then lock the Y-axis.
Note the indicator reading, then watch the indicator as
you traverse the table slowly toward the loosely clamped
side. (Also watch for any sign of spindle rotation.)
Ideally, there should be no discrepancy between the in-
dicator readings at the two ends — unlikely at the rst at-
tempt. Return the table to the starting point, then repeat
the process, tapping the vise in as you go. Repeat the
process as often as necessary for the desired accuracy,
progressively tightening the “looser” nut. Now fully tight-
en both nuts, and re-check again (tightening a nut can
itself introduce signicant error). An established routine
Figure 3-15 Shop-made vise key
Dimensions in millimeters
Figure 3-14 Vise keys installed on X-axis
On most vises the keys can also be installed on the long axis.
like this – tight to loose – can save a lot of time.
Most users aim for an end-to-end dierence of not more
than ±0.001” over the width of the vise jaw.

16
PM 25MV v9 2020-10 Copyright © 2020 Quality Machine Tools, LLC
Section 4 MAINTENANCE
Unplug the 120V power cord before
any maintenance operation!
RECOMMENDED LUBRICANTS
Ball oilers (X and Y leadscrews): ISO 68 oil, such as
Mobil Vactra No. 2, or equivalent
X, Y and Z axis ways (dovetails): ISO 68 oil, Mobil
Vactra No. 2, or equivalent
Visible gears such as quill rack and pinion, Z-axis
bevel gears: light general purpose grease, NLGI No. 2,
or equivalent
X and Y leadscrews: ISO 68 oil, Vactra No. 2, or
equivalent
Z leadscrew: ISO 68 oil or NLGI No. 2 grease
GENERAL OILING
Assuming a clean environment – no abrasive particles or
machining debris – lack of proper lubrication is the main
cause of premature wear. Rotating parts are easy to lu-
bricate, sliding parts are not. Gibs are tightened for the
best compromise between rigidity and slideability, which
Remove all machining debris and foreign
objects before lubricating ANYTHING! If need
be, any oil is better than no oil – but use the
recommended lubricants when you can.
Ball oilers
Use a pump-type oil can with tip large enough to more
than span the oiler’s spring-loaded steel ball. Oil pres-
sure will displace the ball, allowing oil to ow, provided
the oil can tip is rmly pressed onto the brass seating.
Before oiling check that the ball is not stuck – press it
lightly with a probe.
means practically zero gap between the ways. Take time
to understand exactly which are the bearing surfaces on
the various dovetail surfaces; this is not obvious – some
of the interfaces look like bearing surfaces, but are sim-
ply narrow gaps.
Every few hours of operation: 1. Apply the recommend-
ed way-oil with a dedicated short-bristle brush such as
the type used for applying ux; 2. Use a similar brush to
apply oil or grease to the leadscrews; 3. Apply oil to the
ball oilers, see below.
Quill rack and pinion
Lower and lock the quill. Using a sti ux brush, clean
the visible portions of the rack and pinion. Raise and
lower the quill to expose the remainder of the working
surfaces, locking and cleaning at each setting.
Sindle bearings
See Servicing Quill and Spindle, two pages on.
GIB ADJUSTMENT
Gibs on the X, Y and Z axes control the t of the mating
dovetailed surfaces. They are gently-tapered lengths of
ground cast iron located by opposing screws at each
end. Adjusting them is a trial and error process that
takes time and patience. Aim for the best compromise
of rigidity and reasonably free table movement. Too tight
means accelerated wear on the ways and leadscrews.
Too free means workpiece instability, inaccuracies and
chatter.
Both screw heads must be tight against the gib ends.
If you loosen one, tighten the other. Remove the way
covers for access to the back of the Y gib and bottom of
the Z gib.
Figure 4-1 Gib adjustment, X and Y axes
The back adjustment screw for the Y axis gib is under the solid rubber
way cover behind the table. The left adjustment screw for the X axis is
in a similar location on the left side of the saddle casting.

17
PM 25MV v9 2020-10 Copyright © 2020 Quality Machine Tools, LLC
LEADSCREW BACKLASH CORRECTION
When alternating between clockwise and counter clock-
wise rotation of the X or Y leadscrews, the handwheel
moves freely a few degrees but the table stays put. This
is backlash, a feature of all leadscrews other than the
precision type found on CNC machines. The acceptable
amount of lost motion depends on the user, but 0.005”
is generally a good compromise. Smaller numbers are
possible, but overdoing it can lead to premature wear of
leadscrew and nut.
Excessive backlash can be corrected by compressing
the leadscrew split nut. For the X-axis this is done by
tightening the socket head screw in Figure 4-3. A long-
handled 4 mm hex wrench is required, ideally one with
an extra-thick shank to minimize exing. The corre-
sponding adjustment for the Y-axis is dicult because
the split nut and leadscrew are concealed by castings,
Figure 4-4. Access to the adjusting screw is possible
Figure 4-2 Z-axis gib adjustment, upper screw
The lower screw is under the pleated way cover.
Figure 4-3 X-axis backlash adjustment
Figure 4-4 Y-axis backlash adjustment
Both options are two-man procedures
DOWNFEED RETURN SPRING
The quill should automatically retract when the coarse
downfeed levers are released following a drilling opera-
tion. If it does not, check for binding in the quill lock. The
return spring, Figure 4-5, is held by a spring cup which
is locked to the spindle by a special C-clip beneath the
drawbar cap, Figure 3-2. Spring force is not adjustable.
only if the entire machine is unbolted from the bench or
stand, then: 1. Lifted by sling and engine hoist (see In-
stallation, Section 1), or; 2. Tilted backward by pivoting
on the back edge of the base casting.
Figure 4-5 Quill return spring

18
PM 25MV v9 2020-10 Copyright © 2020 Quality Machine Tools, LLC
SERVICING QUILL & SPINDLE
In the normal use the quill assembly needs only oiling
on its sliding surface. The spindle runs on pre-lubricated
roller bearings and needs little attention, see Spindle
Bearings, above. If the bearings need to be serviced or
replaced, remove the quill/spindle assembly as follows:
1. Remove any installed R8 device from the spindle.
2. Lock the spindle with the C-wrench, then unscrew
the drawbar cap (17 mm ats) from the spindle.
3. Remove the drawbar.
4. IMPORTANT: Use wood blocks or other means to
prevent unexpected downward movement of the
quill assembly.
5. Press down on the return spring cup while removing
the C-Clip, Figure 4-6.
6. Remove the return spring, Figure 4-5.
7. Using a 2.5 mm hex key remove the two button head
screws securing the DRO scale and stand-o block
to the quill assembly.
8. Remove the wood blocks (4), then remove the quill
assembly from the headstock.
Figure 4-6 Remove drawbar cap for access to the C-Clip
Figure 4-7 Complete DRO scale and quill assembly
For illustration only: for servicing operations the scale should
be detached from the quill and should remain in the DRO
case.
SPINDLE BEARINGS
The spindle runs on grease-lubricated tapered roller
bearings. These should be serviced every 500 hours of
running time. Thoroughly clean each bearing assembly
then repack with a grease such as Kluber Isoex (auto
shop wheel bearing grease can be used in low-load, low
rpm operations).
Do not over-pack the roller bearings!
Bearing manufacturers recommend that the free volume
between inner and outer should be no more than 30%
lled with grease. (If smothered with grease, bearings
are subject to overheating.)
Especially during the rst 10 hours of running time
check that the spindle runs smoothly, without ex-
cessive heat build up (the spindle will run warm
when used at high speeds over long periods, but
should not be uncomfortably hot). Overheating can
be due to excessive grease, see above, or an over-
tight spanner nut at the upper end of the spindle.
Call Precision Matthews for guidance.

19
PM 25MV v9 2020-10 Copyright © 2020 Quality Machine Tools, LLC
Section 5 PARTS
Model PM25MV-BD ELECTRICAL SCHEMATIC Fig 1

20
PM 25MV v9 2020-10 Copyright © 2020 Quality Machine Tools, LLC
HEAD COMPONENTS Fig 2
There may be detail
dierences between this
representative drawing and
the machine as supplied
Table of contents
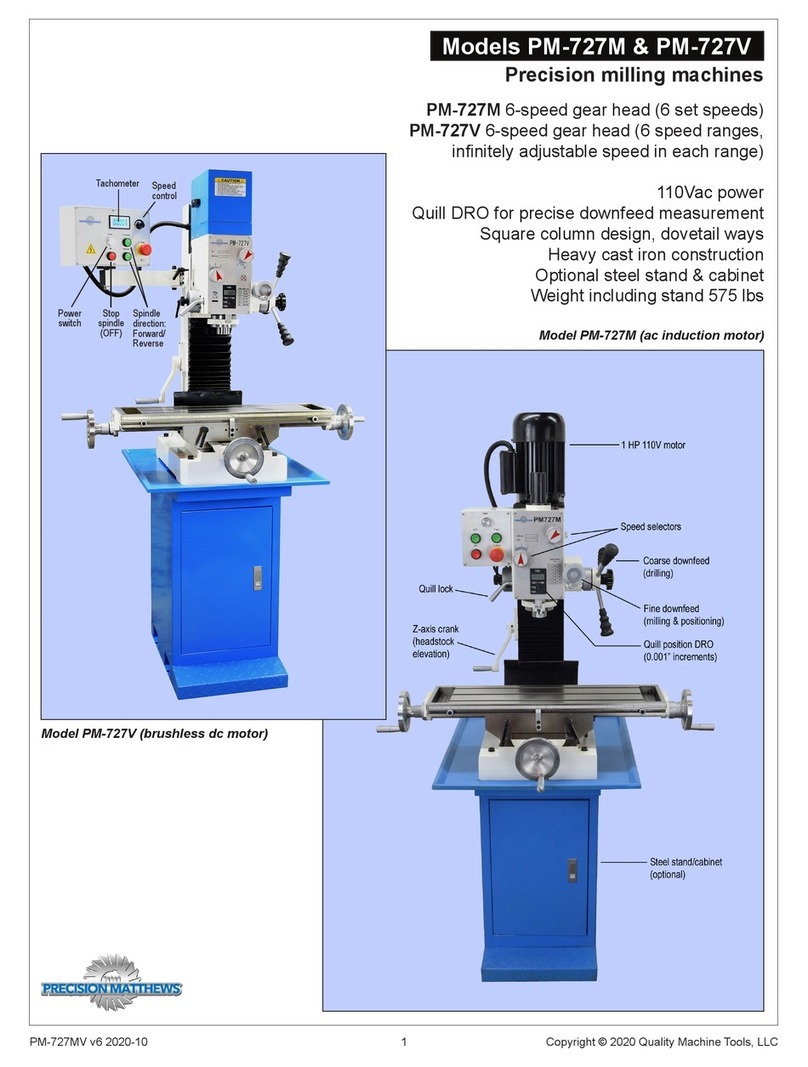
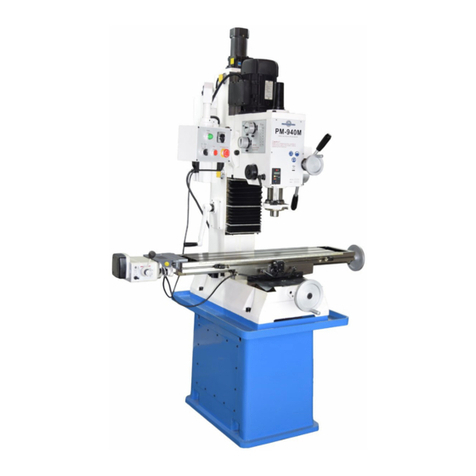
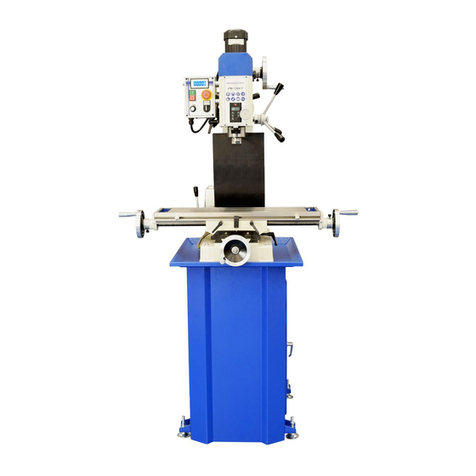
Other Precision matthews Power Tools manuals

Precision matthews
Precision matthews PM-932M User manual

Precision matthews
Precision matthews PM-727M User manual

Precision matthews
Precision matthews PM-739M User manual

Precision matthews
Precision matthews PM-25MV User manual

Precision matthews
Precision matthews PM-833TV User manual

Precision matthews
Precision matthews PM-30MV User manual

Precision matthews
Precision matthews PM-940M User manual

Precision matthews
Precision matthews PM 728V-T User manual

Precision matthews
Precision matthews PM-835S User manual

Precision matthews
Precision matthews PM-727M User manual