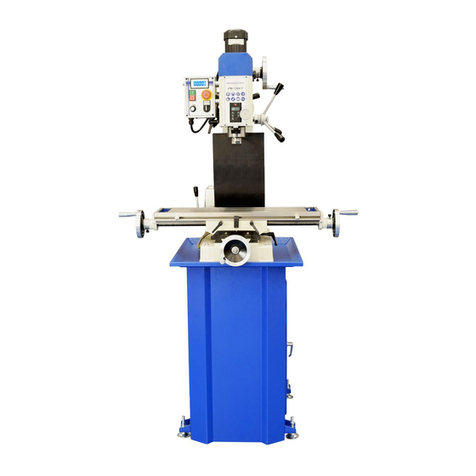
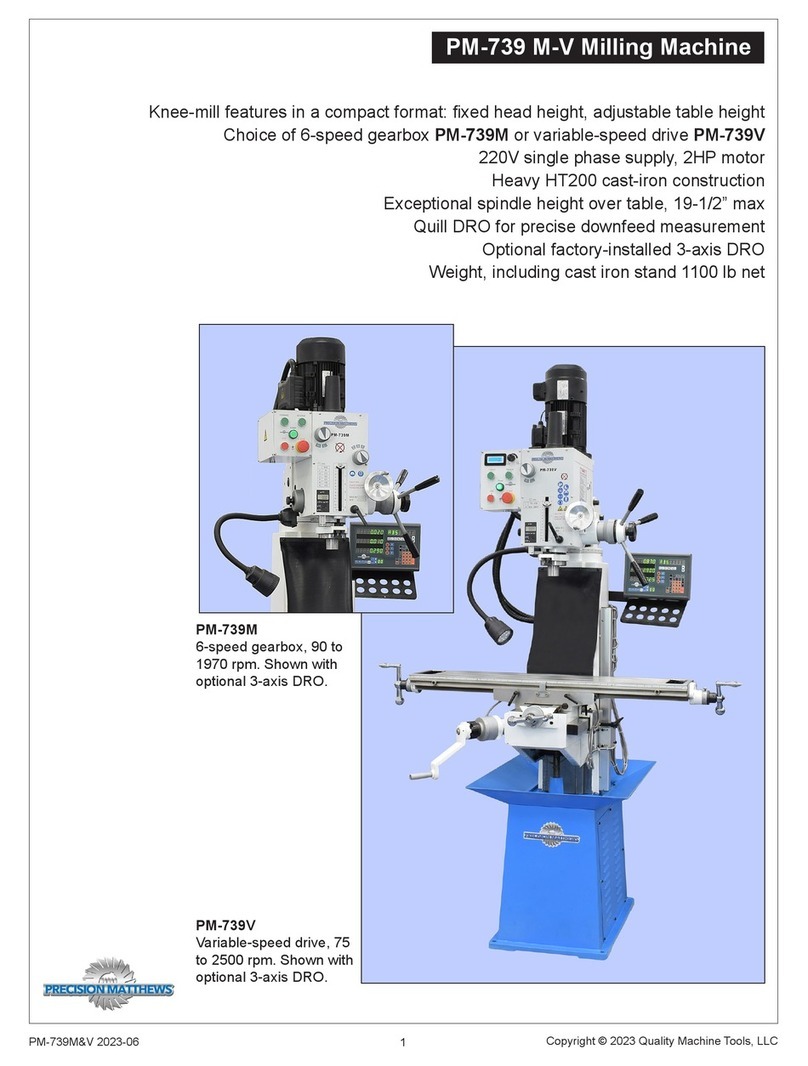
Precision matthews PM-833TV User manual

1
PM-833TV 4-13-21V1.indd Copyright © 2021 Quality Machine Tools, LLC
Model PM-833TV
VFD: Innitely variable spindle speed, 50 to 3200 rpm
Single-range belt drive, no gears
8-1/4 x 33 inch table
One-shot lubrication
220 Vac single-phase motor
± 90 degree tiltable headstock
Ground inch-pitch X & Y axis leadscrews
Weight (including stand) 880 lbs
Heavy duty precision milling machine
The PM-833TV is manufactured in Taiwan
PM-833TV variable speed precision milling machine

2
PM-833TV 4-13-21V1.indd Copyright © 2021 Quality Machine Tools, LLC
PM-833TV
FAQ
R8 collets won’t go
into the spindle
The collet locating screw could be
in too far. See the end of Section 4,
Maintenance, for special instruc-
tions on this.
This means that R8 devices are
not properly clamped. There are
two options:
1. Insert a 1/2" or 12 mm (clear-
ance) ID collar under the cap to
ll the gap.
2. Shorten the drawbar, see the
end of Section 4, Maintenance.
The drawbar cap doesn't
seat on the spindle
Motor switch turned ON,
but motor doesn't run
220 Vac power connected?
E-Stop button pressed in?
(Release it by turning clock-
wise)
Fuses good?

3
PM-833TV 4-13-21V1.indd Copyright © 2021 Quality Machine Tools, LLC
This manual contains essential safety advice on the proper setup, operation, maintenance, and service
of the PM-833TV mill. Failure to read, understand and follow the manual may result in property damage
or serious personal injury.
There are many alternative ways to install and use a milling machine. As the owner of the machine you
are solely responsible for its proper installation and safe use. Consider the material contained in this man-
ual to be advisory only. Quality Machine Tools, LLC cannot be held liable for injury or property damage
during installation or use, or from negligence, improper training, machine modications or misuse.
This manual describes PM-833TV machines as shipped from early 2020. There may be detail dierences between your specic ma-
chine and the information given here (with little or no impact on functionality). Please email us if you have questions about any aspect
of the manual or your machine (see our website www.precisionmatthews.com for support addresses). Your feedback is welcomed!
Section 1 FEATURES & SPECIFICATIONS
MODEL PM-833TV MILLING MACHINE
General information
The PM-833TV is a top-quality “dovetail column” mill designed for regular use in demanding industrial applications. A Variable
Frequency Drive (VFD) provides innitely variable spindle speeds from 50 to 3200 rpm. The spindle runs in high-quality ta-
pered-roller bearings in a precision-ground quill with coarse and ne downfeed options. Unlike most other bench-style mills, the
PM-833TV comes with a one-shot lubrication system, a great time saver in situations where continuous duty is a requirement.
All sliding surfaces are hand-scraped for precise t, good oil retention and ultra-smooth operation.
Variable-speed motor options are available to power the table (X-axis), and to raise/lower the headstock (Z-axis).
PM-833TV oor plan
Copyright © 2021 Quality Machine Tools, LLC
This material was originated by Precision Matthews. No portion
of the manual may be reproduced or distributed in any form
without the written approval of Quality Machine Tools, LLC.

4
PM-833TV 4-13-21V1.indd Copyright © 2021 Quality Machine Tools, LLC
PM-833TV SPECIFICATIONS
Dimensions
Weight, including stand 880 lb net,1030 lb shipping
Floor space required W 72 in. x D 35 in
Headroom required Normal operations 75 in. (max height 86 in)
Stand footprint W 17-3/4 in. x D 29-3/4 in.
Tray W 24-1/2 in. x D 30 in.
Electrical
Power requirement 220 Vac, 60 Hz, 1Ø
Full load current 9A, spindle motor only
Motors
Main (spindle) Cap-start induction: 2 HP (1.5 kW), 1720 rpm
X-axis power traverse (option) Gear motor: 110 Vac 1A
Z-axis power elevation (option) Gear motor: 110 Vac 1A
Headstock
Vertical travel* 17-1/2 in.
Left-right tilt 90 degrees clockwise/counter-clockwise
Spindle
Speeds (rpm) 50 to 3200
Internal taper R8
Top end 6 splines, 28 mm OD
Quill travel 4 in.
Quill diameter 3 in.
Spindle nose to table 19-1/2 in. max
Spindle centerline to column 11-3/4 in.
Drawbar 7/16 - 20
Table
Size W 33 in. x D 8-1/4 in.
Surface height over oor, on stand Approx 39-3/4 in.
Maximum load 400 lb, table-centered, less if overhanging
Acme, inch pitch, 10 tpi
Left-right table traverse (X-axis)* 22 in.
Front-back cross travel (Y-axis)* 10-3/4 in.
T-slots (3) 16 mm wide (5/8 in. nominal), pitch 2.22 in.
* DRO installation may limit these numbers. Ceiling height may limit the max
elevation of the headstock, also max distance from spindle nose to table
(overall height of mill at 14" elevation of headstock is approximately 86".
T-slot dimensions

5
PM-833TV 4-13-21V1.indd Copyright © 2021 Quality Machine Tools, LLC
Section 2 INSTALLATION
THESE ARE THE MAIN POINTS TO WATCH OUT FOR!
But read the following pages for more information
• Handling the mill is at least a two-man job.
• Before lowering the headstock, check that the exible oil line to the head-
stock is tucked inside the column — not trapped.
• Before lifting the mill, hand-crank the headstock down as far as possible (if
not already down, as shipped). BUT, if the optional Z-axis motor is in-
stalled, do not crank it down to the point where the limit switch touches the
limit stop.
• Lifting gear – sling, hoist or forklift – must be rated for at least 1500 lb.
• Working location of the mill must allow:
1. Full left-right travel of the table.
2. Headroom for the spindle motor at max Z height.
• Power requirement is 220V, 60Hz, 1φ, 15A circuit protection (spindle motor
only, 9A full load).
• Extension cord not recommended; if no alternative, use 12 AWG not longer
than 20 ft.
• Before connecting power be sure that:
1. The machine is on a rm footing.
2. There are no clamps or locks on moving parts.
3. The drawbar is not installed in the spindle.
4. The spindle speed control is fully counter-clockwise — lowest speed
setting.
If in doubt about any of the above, refer to the following
installation instructions, and to Section 3, Using the Mill.

6
PM-833TV 4-13-21V1.indd Copyright © 2021 Quality Machine Tools, LLC
PM-833TV
SPECIAL PRECAUTIONS
BEFORE ADJUSTING HEADSTOCK ELEVATION
If the headstock is power-assisted (Z-axis motor
option installed), there will be limit stops on the
left side of the column.
To avoid damage:
When raising and lowering the headstock BY
HAND, stop BEFORE the limit switch plungers
touch either of the limit stops.
If power is connected:
When the headstock is being raised/lowered for
the rst time UNDER POWER, run the motor
at the slowest speed, testing the limit switch IN
BOTH DIRECTIONS by applying light nger
pressure to each of the switch plungers.
Headstock motion should stop instantly, re-
suming when the switch plunger is released.
Look under the Y-axis way cover (black nitrile).
The metal-shielded oil line should be concealed
within the column casting. If it protrudes like this,
it will be trapped — and damaged — when the
headstock is lowered.
Tuck it into the column!
Figure 2-1 Snagged oil line
Figure 2-2 Z-axis limit stops
Z-axis motor option, inset
(File photo, Model PM-833)
One-shot
lube
reservoir
1
2

7
PM-833TV 4-13-21V1.indd Copyright © 2021 Quality Machine Tools, LLC
UNCRATING THE MILL
The PM-833TV mill and stand are usually shipped in
separate containers. In special instances, the mill and
stand may be shipped pre-assembled Before moving
the mill, check the two Special Precautions on the pre-
ceding page: 1. Oil line protruding from the column, Fig-
ure 2-1, and; 2. (if the headstock is power-assisted) Z
axis limit stops.
INSTALLING THE MILL
Check local codes for machine tool fastening require-
ments. If none is specied, the leveling mounts supplied
can be used, Figure 2-3, or the mill stand can be perma-
nently anchored to the oor. The leveling mount screws
are installed, hex heads up, in weld nuts on the stand
wings. The screws are centered by indentations on the
upper surface of the pads.
MOVING THE MILL (using slings)
If available, use a forklift to handle the mill. An engine
hoist can be used instead, but this may require some
experimentation along the lines suggested below.
The following notes assume that the mill is pre-in-
stalled on its stand. If the mill and stand were
shipped separately, the engine hoist must have
similar reach and lifting capability to raise the mill
above the surface of the stand.
The main objective of the procedure suggested here is
to lift the mill just enough to allow the pallet to be re-
moved. Thereafter the engine hoist can be used to roll
the mill to its working location.
This is at least a two-person procedure!
Figure 2-4 Using an engine hoist (File photo, Model PM-833)
1. Set the upper arm of the hoist as far out as possible
— but not beyond the point where its lifting capacity
is less than 1500 lb.
2. Remove the lag bolts, etc., securing the mill to the
pallet.
3. Roll the hoist over the pallet to bring the lift chain
directly over the graduated tilt scale at the back of
the headstock, Figure 2-4. Depending on the style of
hoist the legs will likely now be resting on the pallet,
with the casters clear of the oor.
4. At the cylinder end of the hoist insert an 8 x 8 or sim-
ilar wood beam under the legs to raise them clear
of the pallet (lift the hoist by hand, or use a jack).
Beam size is arbitrary, but the legs must be above
the pallet.
5. At the open end of the hoist lift each of the legs in
turn to insert similar wood blocks — or piles of scrap
material as in the photo. (All support material must
clear of the pallet to allow it to be moved away when
unweighted in the following steps).
6. Check that the headstock is fully lowered, spindle
just clear of the table.
Figure 2-3 Supplied leveling mounts
The leveling screws are 1/2-12 TPI, usually unavailable in the U.S.
If extra length is needed, install booster pads under the round pads
supplied.

8
PM-833TV 4-13-21V1.indd Copyright © 2021 Quality Machine Tools, LLC
7. Run a sling "basket style" under the headstock.
Wrap a soft cloth around the sling to prevent
damage to the paintwork and the tilt scale. If head-
room is limited use the shortest sling available. It
may also be desirable to remove the motor to allow
extra room (the motor is heavy). Make certain that
the sling, when taking the load, is clear of any deli-
cate components — use spreaders if necessary.
8. Very slowly lift the mill, controlling any tendency for
it to swing as it clears the pallet.
9. Remove the pallet, then install the four leveling
mounts, Figure 2-3.
10. Lower the mill to the oor.
11. Remove the wood blocks supporting the hoist.
12. Raise the mill just clear of the oor, then roll the mill
to its working location.
FINAL ASSEMBLY & CLEANUP
Unnished metal surfaces are protected by thick grease
and/or paper. Carefully remove these using a plas-
tic paint scraper, disposable rags and a light-oil type
degreaser such as WD-40. Level the mill using the ta-
ble surface for reference. Oil the ways and leadscrews.
Check the sight glass for gearbox oil level.
Assemble the support plate for the accordion-pleated
cover, as in Figure 2-6, then attach the support plate to
the top of the column with two M6 socket head screws.
Suggestion If the mill is in a location where dust or
debris can fall from the ceiling, it is a good idea to cover
the column with a 7-1/2 x 3-1/2" plate of scrap material.
MOVING THE MILL (using lifting eyes)
The four lifting eyes provided with the mill allow other
lifting choices, Figure 2-5. They can be hooked directly
to steel cables, or used with 1" diameter steel rods, long
enough (30" plus) to allow chains to be attached at both
ends. A forklift is another option if steel rods are inserted
through the eyes.
Figure 2-5 Lifting eyes
POWER ASSIST OPTIONS
Power-feed motors are available for the table (X-axis)
and headstock (Z-axis elevation). These are stand-
alone units trademarked ALIGN. Both are powered by
110 Vac. The dc motors in these units have twin carbon
brushes that should be inspected occasionally and re-
placed if worn. The motors may be installed on the mill
as-shipped. If not, see the installation instructions at the
end of the Section 4.
POWER-UP PROCEDURE
Depending on the available 220V wall outlet, install a
6-15 or 6-20 plug on the mill power cord. Connect the
"hot" wires (black/red, black/brown, blue/brown or black/
white) to the at blades. Connect the green/yellow
ground wire to the central U-shaped prong (this wire
may be tagged PE = Protective Earth).
Before connecting 220V power be sure that:
1. The spindle motor switch, bottom left of the front
panel, is set to its midpoint, OFF, Figure 2-7
2. There are no clamps or locks on moving parts, Fig-
ures 2-8, 2-9, 2-10.
3. The drawbar has been removed.
Figure 2-6 Accordion-fold cover support
FASTENING THE MILL TO THE STAND
Lower the mill onto the chip tray using tapered drifts to
align the screw holes. Secure the mill with four 100 mm
x 10mm hex head screws and washers (supplied).
Figure 2-7 Front panel
9
PM-833TV 4-13-21V1.indd Copyright © 2021 Quality Machine Tools, LLC
Figure 2-9 X-axis stops and clamp levers
Figure 2-10 Headstock clamp levers
Figure 2-8 Y-axis clamp screws
Before connecting 110V power to the X and Z-axis
power assist units, if installed, be sure that:
1. The power switch on each of the power units is set
to OFF, example Figure 2-11.
2. The speed control on each power unit is set fully
counter-clockwise (lowest speed).
3. The direction control lever on each power unit is
centered (STOP).
4. The X and Z axes can be manually cranked without
diculty — clamp levers loosened.
If power assist units are installed, test as follows:
TABLE - X AXIS
1. Rotate the speed control knob fully counter-clock-
wise, then clockwise about 45 degrees to set a low
speed.
Figure 2-11 Table power assist
2. Switch the table power-assist motor on. Test the
power traverse function by selecting Left traverse,
followed by stop (center), then Right.
3. While running the table to the left, check that the lim-
it switch stops motion when the right-hand plunger is
pressed, arrow in Figure 2-12.
4. Test the left limit switch in the same way. If either
test fails, service attention is required.
5. Test the fast traverse function (RAPID push button
on the motor).
HEADSTOCK - Z AXIS
1. Rotate the speed control knob fully counter-clock-
wise, then clockwise about 45 degrees to set a slow
speed, Figure 2-13.
2. Switch the Z-axis power-assist motor on. Select UP
motion (arrows, Figure 2-13).
3. While running the headstock slowly up the column,
press the upper plunger of the limit switch assembly,
Figure 2-14. Headstock motion should stop immedi-
ately, resuming when the plunger is released.
4. Check for no obstructions, then test the down limit
function in the same way. If either test fails, service
attention is required.
5. Test the fast raise/lower function (RAPID push-but-
ton on the motor).
Figure 2-12 X axis power assist limit switch & stops
Clamp levers

10
PM-833TV 4-13-21V1.indd Copyright © 2021 Quality Machine Tools, LLC
TEST RUN PROCEDURE
Do not leave the machine unattended during this
procedure
1. Drawbar removed? Speed control at lowest setting
(counter-clockwise)?
2. Test the spindle motor by setting the motor switch,
Figure 2-7, to Forward and Reverse in turn. Viewed
from above, the spindle should rotate clockwise
when Forward is selected.
3. Run the spindle at 60 rpm for a few minutes, then
stop.
4. With the spindle running, check the Emergency Stop
function by pushing rmly on the orange button. This
should immediately stop the motor. (If not, service
attention is required.) Once the E-stop button is
pushed in, it stays in until twisted rmly clockwise.
5. Run the spindle at various speeds up to the maxi-
mum, about 3000 rpm. Check that the lower end of
the spindle remains cool or slightly warm to the touch.
The machine should now be ready for normal opera-
tions.
Limit
switch
Figure 2-14 Z axis limit switch & stops
Figure 2-13 Headstock power assist

11
PM-833TV 4-13-21V1.indd Copyright © 2021 Quality Machine Tools, LLC
Section 3 USING THE MILL
Everyday precautions
• This machine is intended for use by experienced users familiar with met-
al-working hazards.
• Untrained or unsupervised operators risk serious injury.
• Wear ANSI-approved full-face or eye protection at all times when using the
machine (everyday eyeglasses are not reliable protection against ying parti-
cles).
• Wear proper apparel and non-slip footwear – be sure to prevent hair, cloth-
ing or jewelry from becoming entangled in moving parts. Gloves – including
tight-tting disposables – can be hazardous!
• Be sure the work area is properly lit.
• Never leave chuck keys, wrenches or other loose tools on the machine.
• Be sure the workpiece, toolholder(s) and machine ways are secure before
commencing operations.
• Use moderation: light cuts, low spindle speeds and slow table motion give
better, safer results than “hogging”.
• Don’t try to stop a moving spindle by hand – allow it to stop on its own.
• Disconnect 220 Vac power from the mill before maintenance operations such
as oiling or adjustments.
• Maintain the machine with care – check lubrication and adjustments daily
before use.
• Clean the machine routinely – remove chips by brush or vacuum, not com-
pressed air (which can force debris into the ways).
No list of precautions can cover everything.
You can never be too careful!

12
PM-833TV 4-13-21V1.indd Copyright © 2021 Quality Machine Tools, LLC
Excessive cutter noise, chatter, poor nish
and tool wear are often the result of too
high a feed rate, and/or too high a spindle
speed. If unsure, go slow!
INSTALLING & REMOVING TOOLING
The spindle and drawbar are designed for R-8 taper
collets, drill chucks and other arbors with the standard
7/16”-20 internal thread.
To install a tool, install the R-8 device (collet or arbor) in
the spindle bore, then thread the drawbar into it by as
many turns as it takes to bottom-out the drawbar head
on top of the spindle, Figure 3-3. (Washers may be re-
quired if the device's internal thread is too short, or dam-
aged.) While holding the spindle collar stationary with
the supplied wrench, Figure 3-4, tighten the drawbar
with a 21 mm socket wrench.
To remove the R-8 device, loosen the drawbar then tap
it with a brass or dead-blow hammer to unseat the taper.
Unscrew the drawbar by turning the upper nut with one
hand while supporting the R-8 device with the other.
Keep in mind that the table, vise and work-
piece can be damaged by falling tools and
drill chucks. The cutting tool itself can also
be damaged in the same way.
Figure 3-3 Drawbar & splined spindle
Cover removed for illustration
Figure 3-1 Front panel
Quill locking
lever
Quill depth
stop
Figure 3-4 Spindle wrench
Figure 3-5 Spindle collar

13
PM-833TV 4-13-21V1.indd Copyright © 2021 Quality Machine Tools, LLC
CHANGING HEADSTOCK ELEVATION (Z-AXIS)
The headstock is raised and lowered by the hand crank,
Figure 3-8. The crank handle disengages from the lead-
screw by spring action. Press the handle in to engage.
Before moving the headstock, be sure that:
1. The exible oil line to the headstock is tucked inside
the column, Figure 2-1.
2. The clamp levers have been loosened, Figure 3-7.
QUILL DOWNFEED
The quill is controlled in two dierent ways, coarse and
ne, Figure 3-6.
In the drilling mode, coarse feed, the mill functions like
a standard drill press — lower the quill using any of the
three downfeed levers to rotate the lever hub count-
er-clockwise.
Figure 3-6 Quill downfeed controls
(File photo PM-833T) Lever hub (1) is full-time connected to the pinion
shaft controlling the quill rack. The ne control handwheel (2) drives
worm gear (4), which is free to rotate — doing nothing to the quill —
unless it is coupled to the pinion shaft by connector sleeve (3). Teeth
on the knurled sleeve, which is keyed to the pinion shaft, mesh with
inner teeth on worm gear (4).
Coarse feed
For drilling operations, slide the knurled connector
sleeve to the right. If desired, set the depth stop, Figure
3-1.
Fine feed
For milling operations calling for precise, repeatable
control of tool depth, slide the knurled connector sleeve
left to engage the ne-feed worm gear.
Rotate the ne control handwheel to raise or lower the
quill. Before switching to ne control, it is usually a good
idea to run the depth stop up to the top. Lower the quill
by turning the handwheel clockwise, positioning it pre-
cisely by counting divisions on the graduated dial.
If you are counting divisions be aware of backlash in
the worm drive. This means that the handwheel must
always be turning in the same direction throughout
the entire process, from setting a reference level to sub-
sequent cutting passes at specic depths.
Be sure to loosen the clamp levers before
moving the headstock, especially under
power
Figure 3-7 Headstock clamp levers
Bear in mind that the quill is spring-loaded. This calls for
care when releasing the quill locking lever prior to repo-
sitioning the quill downward. If the ne control knob has
been allowed to disengage (backed o counter clock-
wise), the quill will jump up by 0.01” or more. To avoid
this, make sure the ne control is rmly clockwise, lightly
loading the quill rack, before releasing the locking lever.
Figure 3-8 Headstock adjust handle

14
PM-833TV 4-13-21V1.indd Copyright © 2021 Quality Machine Tools, LLC
Figure 3-9 Headstock power assist
Figure 3-10 Z-axis limit stops (File photo PM-833T)
Z-axis power assist (option)
The power assist unit, Figure 3-9, allows the headstock
to be raised and lowered in the usual way, plus it pro-
vides the ability to downfeed under power. This feature
can be used to reduce workload in many routine opera-
tions including drilling, honing and hole boring.
A separate manual is provided for the power assist unit,
manufactured by the ALIGN company (Taiwan).
To raise or lower the headstock under power:
• Check and adjust the limit stops as desired, Figure
3-10.
• Set the speed adjust knob, starting with a low speed,
counter clockwise.
• Switch on the power unit. The LED in the "RAPID"
push-button should light.
• Set the direction lever UP or DOWN.
• Adjust the speed as desired.
• For highest speed motion, press the RAPID push-but-
ton.
If the unit draws 3 Amps or more for 10 seconds, the
overload circuit breaker will pop out, cutting power. Cor-
rect the cause of the problem, then press in the circuit
breaker to restore power.
Positioning the headstock
A micrometer collar graduated in 0.001" divisions, 0.1"
per revolution, allows the headstock elevation to be ac-
curately set when adjusted by hand.
If the mill is not equipped with a Z-axis digital readout
(DRO), the headstock can be accurately positioned by
counting whole turns and divisions, keeping leadscrew
backlash in mind. This means that headstock motion
must always be in the same direction when approach-
ing the point of reference, then onward by a specied
amount to the desired location.
One-shot
lube
reservoir
Limit
stops

15
PM-833TV 4-13-21V1.indd Copyright © 2021 Quality Machine Tools, LLC
Be sure to loosen the X-axis clamp
levers and Y-axis screws before moving
the table, especially under power
Figure 3-12 Y-axis clamp screws
Figure 3-13 Limit switch & stops for power assist
Adjustable L and R stop blocks, together with the limit switch assem-
bly, prevent over-travel when the table is power driven.
MOVING THE TABLE
Left-right movement of the table is said to be the X-ax-
is (a.k.a. “longitudinal” or “traverse”). Front-back move-
ment is the Y-axis, sometimes called “cross travel”.
Each axis has a micrometer collar with 0.001” divisions,
0.1” per revolution, Figure 3-11. If the mill is not equipped
with digital readouts (DROs), the table can be accurately
positioned by counting whole turns and divisions, keep-
ing leadscrew backlash in mind. This means that ta-
ble motion must always be in the same direction when
approaching the point of reference, then onward by a
specied amount to the desired location, see “X & Y axis
positioning by counting divisions”, following.
The right-hand handle on the table leadscrew disengag-
es by spring action. Push the handle in to engage.
Figure 3-14 X-axis power assist
X-AXIS POWER ASSIST
A separate manual is provided for the power assist unit,
manufactured by the ALIGN company (Taiwan), Figure
3-14.
If a power assist unit is installed on the X-axis, the han-
dle at the right-hand end of the table is disengaged from
Figure 3-11 X-axis leadscrew handle
the leadscrew by spring action.
To run the table under power:
• Check and adjust the limit stops as desired, Figure
3-13.
• Set the speed adjust knob as desired — start with a
low speed, counter clockwise.
• Switch on the power unit. The LED in the "RAPID"
push-button should light.
• Set the direction lever LEFT or RIGHT.
• Adjust the speed as desired.
• For highest speed motion, press the RAPID push-but-
ton.
If the unit draws 3 Amps or more for 10 seconds, the
overload circuit breaker will pop out, cutting power. Cor-
rect the cause of the problem, then press in the circuit
breaker to restore power.

16
PM-833TV 4-13-21V1.indd Copyright © 2021 Quality Machine Tools, LLC
X & Y-AXIS POSITIONING BY COUNTING
DIVISIONS
For all spindle positioning operations, with or
without DROs, avoid using the quill lock. Retract
the quill fully, then adjust the headstock elevation
instead.
Why? On practically all vertical mills, including the heavi-
er knee mills, locking the quill may oset the spindle by a
few thousandths of an inch. If the edge of the workpiece
has been “found” in the quill-locked condition, this will af-
fect placement of holes drilled thereafter. Instead, lower
the quill with the ne downfeed control. This is worm
driven, so it stays where it’s put without locking.
Note: This does not apply to operations calling for pre-
cise depth control, such as milling. For such operations
the quill must be locked to maintain a given depth of cut.
Figure 3-15 is an example of Y-axis positioning by count-
ing dial divisions. A hole is to be drilled 0.25” back from
the front edge of a workpiece in a vise, or otherwise
clamped to the table.
1. Install an edge-nder in collet or chuck (a tip diame-
ter of 0.2” is assumed).
2. Lock the X-axis by tightening the clamp levers (op-
tional).
3. If the reference edge is already to the back of the
spindle centerline, do nothing; if not, rotate the Y-axis
handwheel clockwise to send the workpiece back-
wards (toward the column).
4. Engage the ne downfeed.
5. With the spindle running, lower the quill as necessary
using the ne downfeed handwheel; bring the table
slowly forward (counter-clockwise), stopping at the
point where the edge-nder just makes contact with
the workpiece — the tip will jump out of line. Stop the
spindle.
6. While holding the Y-axis handwheel to prevent any
movement, zero the dial.
7. Raise the quill, then rotate the handwheel exactly
one full turn counter-clockwise (0.1”) to bring the
reference edge forward to the spindle centerline.
Figure 3-15 Spindle positioning example
8. Rotate the handwheel counter-clockwise an addi-
tional 2-1/2 turns to bring 50 on the dial opposite the
datum; the spindle is now 0.25” behind the reference
edge, ready for drilling.

17
PM-833TV 4-13-21V1.indd Copyright © 2021 Quality Machine Tools, LLC
TILTING THE HEADSTOCK
In routine operations, the user relies on squareness of
the spindle relative to both axes of the table. Front-to-
back squareness set at the factory, and is not adjustable
(by everyday methods), but in the other plane the head-
stock can be set to any angle up to 90 degrees either
side of the normal vertical position. [Because re-estab-
lishing true vertical – tramming — on any mill is a time
consuming process, most machinists look rst for other
ways of handling the project instead of tilting the head.]
The headstock is secured by three nuts spaced 120 de-
grees apart, one underneath and one either side, Fig-
ure 3-16. The headstock is top-heavy, and may swing
suddenly to either side unless a helper is on hand to
restrain it. Using a 19 mm wrench, testing for movabil-
ity as you go, carefully loosen the nuts by degrees. Be
especially careful if the head has not been moved be-
fore, because the paint seal may let go without warning.
(First-time tilting may also call for unusual eort on the
wrench.)
Set the headstock to the desired angle by reference to
the tilt scale, then re-tighten the nuts. Bear in mind that
this is good only to approximately ± 0.25o, so a more
accurate means of angle measurement will be needed if
the project calls for precise tilting.
Figure 3-17 Headstock tilted 45ocounter clockwise
The knurled connector sleeve, arrowed, tends to slide down-
ward, possibly meshing with the ne downfeed gear, Figure
3-4. This will disable the quill levers (coarse downfeed). If this
is undesirable, tape the sleeve temporarily to the lever hub.
Figure 3-16 One of three headstock attachment nuts
Remove the bottom cover for access. The other two nuts are in pock-
ets on the sides of the headstock casting..

18
PM-833TV 4-13-21V1.indd Copyright © 2021 Quality Machine Tools, LLC
TRAMMING THE HEADSTOCK
“Tram”, short for trammel, means accurate alignment —
in this case adjusting the headstock tilt to bring the spin-
dle to a known angle — usually 90 degrees — relative
to the table.
As shipped, the mill is set to zero tilt, squared accurate-
ly enough for initial “out of the box” test drillings, etc.
For more demanding project work thereafter, the spindle
needs to be set at precisely 90 degrees, in other words
trammed. “Out of tram” may show up as an oset of a
few thousandths between entry and exit of a deep hole,
or as a scalloped eect when surfacing a workpiece with
a large-radius y cutter, exaggerated in Figure 3-18.
Tramming is the process of ne-tuning the headstock
tilt angle. Tram is typically checked by attaching a dial
indicator to some form of “sweepable” holder installed in
the spindle. The aim is to adjust tilt for the same reading
on either side of the X axis. The longer the radius arm,
the greater the sensitivity.
Figure 3-19 shows a typical shop-made holder; it has a
threaded arbor allowing the choice of two radius arms. A
collet is used to hold the arbor. Dimensions of the holder
are arbitrary, but note that the indicator must be rmly
attached, and the arm rock-solid relative to the indica-
tor spring force (which can be a factor with plunger-type
indicators).
A suggested procedure for re-establishing tram:
1. Disconnect power.
2. Set the headstock to the approximate zero degree
position on the tilt scale, then tighten the three nuts
enough to avoid unexpected headstock movement.
3. Remove the vise and clean the table surface.
4. Set a 1-2-3 block (or other precision-ground block)
on the table under the indicator probe.
5. Lower the spindle using ne downfeed to give an
Figure 3-18 Head tilt aects surface atness
This is the eect, much exaggerated, of the head tilted minutely out
of square when milling a surface with a large diameter cutter. The
scalloping eect would be at right angles (dashed red line) if instead
the table is moved along the Y axis, with the head tilted forward or
back.
approximate half-scale indicator reading.
6. Record the exact readings on both the dial indicator
and the downfeed micrometer collar.
7. Back o the ne downfeed at least a couple of turns
to avoid collision when sweeping.
8. Reposition the 1-2-3 block to the opposite location
on the table.
9. Swing the indicator holder to the new location, then
lower the spindle – ne downfeed again – to give the
same dial indicator and micrometer collar readings
as in step (6).
If the headstock is perfectly trammed – highly unlikely at
the rst shot – the readings should be as in step (6). If
not, loosen the nuts just enough to allow the headstock
to be tapped a fraction of a degree in the direction called
for, then re-tighten the nuts. (The “tap” can be anything
from a gentle hand-slap to a rap with a soft-face dead-
blow mallet).
Repeat steps (5) through (10) until satised with the
tram, tightening the nuts as you go. This will likely call
for several iterations. There is no “right” tram; the ac-
ceptable dierence in side-to-side readings depends on
project specs. As a starting point, aim for ± 0.001” on a
radius of 5 or 6 inches.
A similar procedure may be used to check tram in the
Y-axis, front to back. The dierence here is that Y-axis
tram is established in manufacture, and can be adjust-
ed only by shimming the column-to-base interface. This
is a two-person procedure, requiring an engine hoist
or some other means of un-weighting the column and
headstock (see Section 2, Installation).
Tramming calls for patience on any mill! Expect
to tighten and re-check at least three times (sim-
ply tightening the bolts can aect the tram).
Figure 3-19 Sweeping holder for dial indicator
This example shows a rectangular section aluminum bar with thread-
ed holes allowing the choice of two sweep diameters, measured from
spindle centerline to indicator tip. The smaller sweep can be used for
front-to-back tramming, also left-to-right as here. For more sensitive
left-to-right tramming, use the larger sweep.

19
PM-833TV 4-13-21V1.indd Copyright © 2021 Quality Machine Tools, LLC
INSTALLING & INDICATING A VISE
For routine milling operations, the workpiece is usually
held in a precision vise. For the PM-833TV, a 4” vise is
highly suitable. “Indicating” means checking the align-
ment of the xed (back) vise jaw relative to the axis of
table motion.
Install the T-bolts and align the vise by eye. With one of
the clamp nuts snug, but not tight, tighten the other one
just short of fully-tight (but tight enough so the vise won’t
budge without a denite tap from a dead-blow mallet).
A typical setup for indicating is shown in Figure 3-20.
There is no spindle lock, but you need to make sure
that the spindle does not rotate throughout the pro-
cedure. Set the indicator tip against the upper edge of a
precision reference bar or, if not available, use the front
face of the xed jaw of the vise instead (check for dings,
hone if necessary). Adjust the Y-axis to pre-load the indi-
cator to mid range at the tightly-clamped side of the vise,
then lock the Y-axis.
Note the indicator reading, then watch the indicator as
you traverse the table slowly toward the loosely clamped
side. Ideally, there should be no discrepancy between
the indicator readings at the two ends — unlikely at the
rst attempt. Return the table to the starting point, then
repeat the process, tapping the vise in as you go. Re-
peat the process as often as necessary for the desired
accuracy, progressively tightening the “looser” nut. Now
fully tighten both nuts, and re-check again (tightening a
nut can itself introduce signicant error). An established
routine like this – tight to loose – can save a lot of time.
There is no “right” setup for a vise, but as a starting point
aim for an indicator dierence of no more than ± 0.001”
over the width of the jaw.
Figure 3-20 Indicating the vise
The tip of a standard dial indicator, arrowed, rides on
the face of a at (ground) reference bar.
VISE KEYS
Most precision vises come with key slots on the under-
side, machined exactly parallel to the xed jaw. Key
slots, Figure 3-21, can be a great time saver. Proper-
ly installed, they allow the vise to be removed and re-
placed routinely, accurately enough for general machin-
ing without the need for indicating every time.
Most 4” vises have either 14 mm or 16 mm slots, calling
for shop-made T-shape adapter keys as Figure 3-22. It
is well worth the eort to make these precisely.
Aim for a snug t in both vise and table, but not so tight
that it takes more than reasonable eort to lift the vise
clear. The objective is allow the vise to be removed and
replaced routinely, accurately enough for general ma-
chining without the need for indicating every time.
Case hardening of the keys is recommended, with nal
tting using a ne stone or diamond hone.
Figure 3-21 Keys installed on X-axis of vise
On most vises the keys can also be installed on the long axis
Figure 3-22 Shop-made vise key
Dimensions in
millimeters

20
PM-833TV 4-13-21V1.indd Copyright © 2021 Quality Machine Tools, LLC
Section 4 MAINTENANCE
Disconnect 220V power before any
maintenance operation!
RECOMMENDED LUBRICANTS
One-shot lube system: ISO 68 oil, such as Mobil Vac-
tra No. 2, or equivalent
X, Y and Z axis ways (dovetails): ISO 68 oil, Mobil
Vactra No. 2, or equivalent
Visible gears such as quill rack and pinion, Z-axis
bevel gears: light general purpose grease, NLGI No. 2,
or equivalent
X and Y leadscrews: ISO 68 oil, Vactra No. 2 or equiv-
alent
Z leadscrew: ISO 68 oil or NLGI No. 2 grease
GENERAL OILING
Assuming a clean environment – no abrasive particles
or machining debris – lack of proper lubrication is the
main cause of premature wear.
Before starting a work session, and every few hours
thereafter:
1. Check the level of oil in the gearbox.
2. Lubricate all ball oilers.
3. Apply the recommended oil or grease to the lead-
screws.
4. Operate the one-shot lube system (don't overdo —
one pump stroke will usually be enough).
5. To distribute the oil evenly run the headstock up/
down full travel, and the table full travel in X and Y
axes.
Quill rack and pinion
Lower and lock the quill. Using a sti ux brush, clean
the visible portions of the rack and pinion. Raise and
lower the quill to expose the remainder of the working
surfaces, locking and cleaning at each setting.
Remove all machining debris and foreign ob-
jects before lubricating ANYTHING! If need
be, any oil is better than no oil – but use the
recommended lubricants when you can.
Figure 4-1 One-shot lube reservoir
Operate the lever once before each work session, less
frequently if there are visible signs of oil accumulating.
QUILL RACK & PINION
Lower and lock the quill, Figure 4-2. Using a sti ux
brush, clean the visible portions of the rack and pinion.
Raise and lower the quill to expose the remainder of the
working surfaces, locking and cleaning at each setting.
Apply grease to the gear teeth.
Figure 4-2 Quill rack
Table of contents
Other Precision matthews Power Tools manuals

Precision matthews
Precision matthews PM 728V-T User manual

Precision matthews
Precision matthews PM-25MV User manual

Precision matthews
Precision matthews PM-940M User manual

Precision matthews
Precision matthews PM-932M User manual

Precision matthews
Precision matthews PM-30MV User manual

Precision matthews
Precision matthews PM-727M User manual

Precision matthews
Precision matthews PM-727M User manual

Precision matthews
Precision matthews PM-835S User manual

Precision matthews
Precision matthews PM-739M User manual

Precision matthews
Precision matthews PM-932M User manual