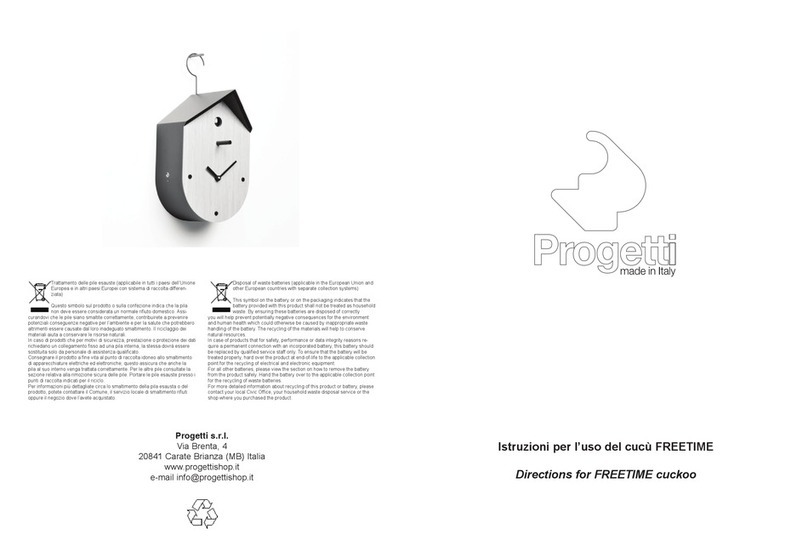
Leggere attentamente le istruzioni prima di installare il vostro Cucù.
Il vostro orologio a cucù è uno strumento delicato atto alla misurazione del tempo e va trattato con estrema
cura e delicatezza. Il movimento del cucù è dell’azienda tedesca Engstler produttrice di cucù classici e nota
per la qualità dei suoi prodotti.
Ogni orologio viene testato per almeno 24H e controllato in ogni suo aspetto prima di essere imballato e
spedito. Tutti gli orologi che lasciano il nostro magazzino sono integri e perfettamente funzionanti.
Non toccare mai l’uccellino con le mani ne quando è dentro e, soprattutto, quando è fuori perché questo
compromette il meccanismo che controlla il movimento dell’uccellino. Non applicare o spruzzare qualsiasi
prodotto sull’orologio perché questo pregiudica la scorrevolezza dell’uccellino sulla sua guida. Non tenere il
cucù in ambienti polverosi. Onde evitare che l’orologi non suoni più a mezzogiorno non far ruotare le
lancette troppo velocemente ma con lentezza e delicatezza. Questo incoveniente si verifica anche quando
le lancette vengono urtate e spostate dal loro asse. Questo pregiudica anche la rotazione delle stesse che
si bloccheranno.
Progetti non risponde di malfunzionamenti causati dall’errata installazione o da un utilizzo non
corretto dell’orologio.
Messa in funzione del Cucù
Posizionare le lancette sulle ore 12.
Inserire due batterie mezza torcia facendo attenzione alla polarità.
Appendere l’orologio alla parete o appogiarlo su un piano.
Regolare l’ora girando le lancette dei minuti in senso orario. E’ importante fermarsi ogni volta che la
lancetta dei minuti passa sulle ore 12 ed attendere che il cucù canti e batta i colpi dell’ora.
In caso l’orologio batta i colpi non corrispondenti all’ora (es. batte 2 colpi e le lancette segnano le nove), per
rimetterlo in fase è sufficiente portare la lancetta delle ore sulle due. Prestare molta attenzione a non
toccare la lancette dei minuti altrimenti il cucù non canterà più al minuto 0.
L’intensità del suono è regolabile con l’interrutore che si trova sul retro dell’orologio.
Un sensore sensibile alla luce ferma automaticamente la suoneria in assenza di luce.
Le batterie devono essere cambiate quando l’uccellino farà fatica ad uscire.
Non lasciare le batterie esaurite all’interno del movimento perchè la possibile perdita di acido potrebbe
danneggiare irreparabilmente il movimento dell’orologio.
A volte può capitare, a causa di un colpo preso durante il trasporto, che l’uccellino si incastri nella sua
sede. Per sbloccarlo, dopo avere tolto le batterie e messo le lancette su mezzogiorno, estrarre con
delicatezza l’uccellino utilizzando delle pinzette. Rimettere le batterie e il cucù funzionerà perfettamente.
Se le lancette non vengono fatte girare con la dovuta attenzione o si manomette in qualche modo il
funzionamento dell’orologio, può capitare che l’uccellino non canti esattamente allo scoccare dell’ora. Per
risolvere il problema si possono eseguire le seguenti operazioni che però, se non fatte correttamente,
pregiudicheranno il meccanismo in modo irreversibile.
Togliere le batterie. Girare le lancette fino a quando segneranno le ore 12:00. Quindi far girare la lancetta
dei minuti lentamente fino a quando non si sentirà un click, arrestandosi immediatamente non appena udito
il click. Le lancette sono inserite a pressione. Per toglierle la lancetta dei minuti deve essere gentilmente
tirata verso l’alto, perpendicolarmente al quadrante, PRESTANDO ATTENZIONE A NON MUOVERLA DAL
PUNTO NEL QUALE SI È UDITO IL CLICK. Una volta estratta, va inserita posizionandola sulle 12:00.
Provare a far girare lentamente la lancetta dei minuti e ora, si dovrebbe sentire il click alle ore 1:00. Se
dovesse sentire il click in una posizione diversa ripetere l’operazione fino a quando non lo si sentirà
esattamente alle 1:00 o 2:00 ecc. L’obbiettivo è quello di fare in modo che il click si senta quando la
lancetta passa a mezzogiorno. Prestare attenzione alla lancetta delle ore che se, durante le operazioni
sopradescritte, viene estratta anche di poco dalla sua sede, non girerà più quando si farà girare la lancette
dei minuti. Per ovviare al problema pressare con la dovuta forza la lancetta delle ore nella sua sede.
Please read the instructions carefully before installing your cuckoo.
Your cuckoo clock is a delicate instrument suitable for measurement of time and should be treated with
extreme care and delicacy. Cuckoo clock movement is made by the German company Engstler
manufacturer of classic cuckoo and well known for the quality of its products. Each clock is tested at least
24H and controlled in every aspect before being packed and shipped. All clocks that leave our warehouse
are undamaged and fully functional.
Never touch the bird when it is inside and, especially, when it’s outside because this compromises the
mechanism that controls the motion of the bird. Do not apply or spray any product on the clock because this
will affect the bird’s movement. Do not hold the cuckoo in dusty locations. To avoid that the clocks do not
sounds at noon do not turn the hands too quickly but slowly and gently. This inconvenience also occurs
when the hands are impacted and moved by their axis. This also affects the rotation of the hands that will
lock.
Progetti shall not be liable for malfunctions caused by incorrect installation or incorrect use of the
clock.
Cuckoo-clock operating instructions
Turn the minute hand clockwise till it points to 12 o’clock.
Insert two C cell batteries as inticated in battery holder. Pay attention to + and -.
Hang the clock on the wall or placed on a top.
Turn the minute hand clockwise, round and round till the clock tells the correct time. Important: let the
cuckoo strikes every full hour.
If the time is not corresponding with the number of Cuckoo strikes please proceed as follows: if the Cuckoo
strikes twice turn the hour hand to two. If the Cuckoo strikes nine times turn the hour hand to nine. Be very
careful do not to touch the minute hand, otherwise the cuckoo will not sing to minute 0.
At the back side of the clock you will find a switch for the sound: “high”, “low” and “off”.
The Cuckoo strike is switched off automatically during the night controlled by a light sensor.
Batteries must be replaced if the bird does not come out or if the clock is slow. Do not leave exhausted
batteries within the movement because the possible loss of fluid may cause irreparable damage to the clock
movement.
Sometimes, due to a shock taken during the transport, the bird stuck into his slide. To unlock it, after
removing the batteries and put the hands at noon, gently pull the bird using a tweezers. Put the batteries
and the cuckoo will work perfectly.
If the hands are not rotated with due care, it may happen that the bird don’t sing exactly on the hour. To
resolve this problem you can do the following, but if not done properly, could compromise irreversibly the
mechanism.
Remove the batteries. Turn the hands forward until will mark the hours 12:00. Then rotate the minute hand
slowly until you feel a click, stopping immediately after hearing the click. The hands are pressed. To remove
the minute hand should be gently pulled upward, perpendicular to the dial, BEING CAREFUL NOT TO MOVE
IT FROM WHERE YOU HEARD THE CLICK. Once extracted, it should be inserted into place on 12. Try to
slowly turn the minute hand and now, you should hear the click at 1:00. If you hear the click in a different
location repeat until you feel exactly at 1:00 or 2:00 etc.. The goal is to make sure that the click is heard when
the minute hand moves on 12. Pay attention to the hour hand that if, during the operations described above,
is pulled out even slightly from its seat, will not run over when you turn the minute hand. To work around this
problem, press the hour hand with due force into place.
