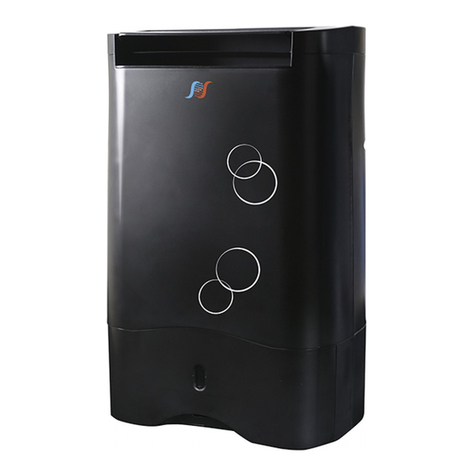
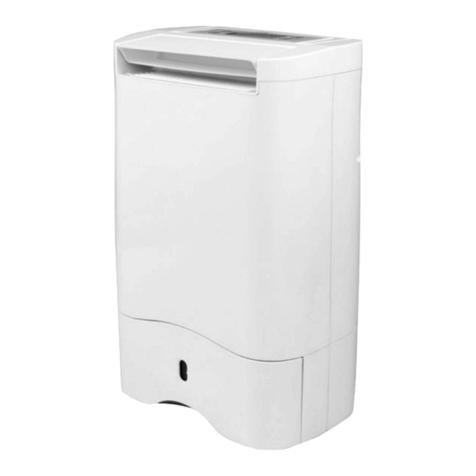
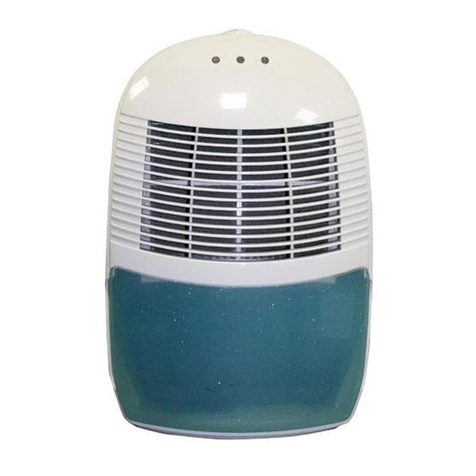
Puredry PD 20L Face Lift User manual

• USER’S MANUAL
• ΕΓΧΕΙΡΙΔΙΟ ΧΡΗΣΗΣ
ENGLISH | ΕΛΛΗΝΙΚΑ
DEHUMIDIFIER PD 20L Face Lift

LANGUAGES
ENGLISH .............................................................................................................. 3
ΕΛΛΗΝΙΚΑ .......................................................................................................... 19

3
TABLE OF CONTENTS
1. SAFETY & WARNING INSTRUCTIONS ............................................................................ 4
2. ELECTRICAL INFORMATION .......................................................................................... 5
3. SOCIABLE REMARKS - ENVIRONMENTAL PROTECTION .............................................. 5
4. STEPS BEFORE USE ......................................................................................................... 6
6.GETTING TO KNOW YOUR DEHUMIDIFIER ...................................................................
9
7. CONTROL PANEL • FUNCTIONS ..................................................................................
10
9.WATER TANK & DRAIN HOSE .......................................................................................
14
11.MAINTENANCE & CLEANING....................................................................................... 16
10. STORAGE .......................................................................................................................
15
12. FREQUENTLY ASKED QUESTIONS & TROUBLESHOOTING ....................................... 17
Dear Consumer,
Congratulations on your choice! Puredry's PD20L
Design Face lift dehumidifier is distinguished among
its class, by its excellent performance, quite
operation and double air inlets, which guarantee
efficiency regarding humidity issues.
Please refer to this manual, to obtain full eiffciency of
the dehumidiifer, through the guidelines included in
the following pages and make savings via clever use of
this device.
5. PRODUCT FEATURES...................................................................................................... 8
8. OPERATIONS................................................................................................................. 11
EN

!
1. SAFETY & WARNING INSTRUCTIONS
l No children under the age of 8 should be permitted to operate this electric device. Be certain,
that children, handicapped people, or people with the lack of knowledge and experience,
must be supervised, depending the situation, by persons responsible for their well-being
and do not undertake procedures such as the cleaning or the maintenance of this device.
l It is important that adequate supervision is provided and no minors are left unattended
with this device.
l This dehumidiifer is for domestic and small oiffce use only. Do not use this device for
commercial, industrial or marine use, and in areas with wet surfaces such as restrooms or
shower roo.s.
l This device should always be kept in an upright position to avoid any dama.e.
l All house exits (windows doors etc) where the dehumidiifer is operating, should be s.utif
l If water leakage appears within the unit, turn the unit off and disconnect the power.cord.
l Before moving, unplug the device and manage to keep it in a vertical position in order to
safely be transferred from one area to ano.her.
l Be sure to empty the water whenever the water tank is full or when the device will not be
used for a prolonged.time.
l Always empty the water tank before storing the .nit.
l When unit has been switched off and instantly switched on, keep in mind that, for
operational reasons, there is a 3 minute delay in order to regain normal oper.tion.
l If the unit is misplaced or tipped, unplug the power cord immediately. Make sure the unit
is completely dry before resuming oper.tion.
l Disconnect the device, if abnormal sounds, odors or smoke .ccur.
l If the supply cord is damaged, it must be replaced by the manufacturer, its service agent or
similarly qualiifed persons to avoid a hazard. Never attempt to dismantle, repair or modify
the .evice.
l Do not attempt to repair, dismantle or modify this appliance. Contact your authorized
service technician for repair or maintenance of this .evice.
l Do not operate or stop the unit by switching the power supply on.or o..
l Do not insert any objects in the unit’s air inlet and exhaust as this may cause damage to
the .evice.
l Do not place heavy objects on the power cord. Make sure that the cord is not comp.essed.
l Do not place cord under any obstacles (carpets rugs or runners etc). Cord should be
arranged away from areas where accidental tripping may.occur.
l Casters should be able to move comfortably over any obstacle. Be extra cautious while
moving over carpets, since any extra force may cause the tipping of the unit, or the spilling
of any water collected in the .ucket.
l Do not sit or climb on the .evice.
l Do not place the unit in direct sunlight or near other heating s.urces.
l Do not use the unit near heat sources, chemicals, radiators, lfammable materials.or .re.
l Do not remove the water tank while the device is.in use.
l Do not use the device without the iflter. Dirt and lint may clog the unit thus reducing
per.ormance.
l Do not drink or use the collected water of the unit for any.purpose.
l Do not use the unit with wet hands.
4EN
• Upon first use, and for proper calibration, please allow unit to operate
continuously for 24 hours.
2. ELECTRICAL INFORMATION
The nameplate, with all the electrical and technical data of this appliance, is located on the
rear panel.
l The appliance should be installed in accordance with national wiring regulations.
l Be sure the device is grounded properly. Proper grounding is important as it minimizes
the chance of electric shock or fire. The power cord is equipped with a grounding
plug for protection against electric shock hazards.
l The device must be used in a properly grounded wall socket. If the specific socket you
intend to use is not adequately grounded or protected by a time delay fuse or circuit breaker,
have a qualiifed electrician install the proper receptacle.
l Ensure the wall socket is still accessible after the installation of the dehumidifier.
l Do not use extension cords or adapter plugs with this device.
l To avoid personal injury, always disconnect the power supply of the device, before
maintenance.
l The unit’s circuit board (PCB) has an included safety fuse for overcurrent protection. You
may ifnd the speciifcations of the fuse, marked on the circuit board, for example: T 3.15A/250V
(or 350V), etc.
Power off the dehumidiifer before removing the plug.
.. SOCIABLE REMARKS
ENVIRONMENTAL PROTECTION
Disposal of equipment no longer used:
Please follow the instructions below, when using this dehumidiifer in European countries.
l This appliance requires special treatment for disposal. In the European Union, electronic
equipment must not be treated as domestic waste, but must be disposed of professionally
in accordance with Directive 2002/96/EC of the European Parliament and Council of 27th
January 2003 concerning old electrical and electronic equipment.
The disposal of this unit should follow all legal requirements and should not be disposed
as unsorted municipal waste.
The hazardous substances can leak into the ground water supply thus entering the food
chain, endangering your health and the environment.
l Fluorinated Greenhouse Gasses are contained in hermetically sealed equipment. For
speciifc information regarding the type the amount and the CO2 equivalent in tons, please
refer to the relevant labels of the unit.
l There are several alternative solutions for disposal:
A) Your local municipality has established free collection systems for electronic
waste.
B) Your local retailer upon purchase of a new product.
C) The manufacturer may accept the old appliance for disposal.
D) Old appliances sometimes contain valuable resources for scrap metal dealer..
5
EN

6EN
Drain hose
For warranty purposes, please note the
SN (seerial number). The SN is labeled
on side of the device.
Please refer to the electronic warranty
instructions, in the last page (English
section) of this manual.
4. STEPS BEFORE USE
User's manual
Dehumidifier
with compressor
Carton box

Installation tips
2) Place the unit in an area
where the temperature
levels will not fall bellow 5ºC
(41ºF) There is a possibility
the coils will collect frost at
temperatures that are
under 5ºC (41ºF), which may
result in low performance.
3) Ensure the filter isclean.
1) Do not block or restrict the
airlfow around the unit. Make
sure the air inlet exhaust grills
are not obstructed. Allow 20cm
of clearance around the unit
and 40cm above
4)) Place the unit vertical operating position and allow
2 hours before initial use in order to avoid
malfunctions.
5)) Before the initial operation, please check if the
water level switch, located within the water bucket
area, is in the right position.
7
EN

5. PRODUCT FEATURES
Model Name PD 20L Design Face Lift
Dehumidifying Capacity (L/24hours) *22
Power Supply (V/Hz) 220~240 / 50
Power Consumption (W) **30/240/265
Noise Level (dB(A)) (Lo/Mi/Hi) 37/39
Air Output m3/h 160
Water Tank (L) 4,5
Dimensions (WxDxH) (mm) 320*250*545
Net Weight / Gross Weight (kg) 15/17
Length of Drain Hose (m) 2
Length of Power Cord (m) 1.94
Type ***Compressor
Operational Temperature range (ºC) 3-40
*Choosing the correct dehumidifier should be based on the following:
Consumption values may vary depending on the relative humidity in the room of
operation.
**30W Consumption during the fan operation.
The fan only operation is a function that cannot be manually selected. It is automatical-
ly selected when the moisture content in the room is lower than that set by the MODE
button.
When Low Fan Speed is set, the consumption can reach a maximum of 240W, regard-
less of the mode (MODE) that has been selected.
When the Medium or High Fan Speed is set, the consumption may reach a maximum
of 265W.
The deviation rate of the above values is +/- 5%.
EN
8
•The size of the room
•The room temperature
•The relative humidity
•Room insulation

6.GETTING TO KNOW YOUR DEHUMIDIFIER
Air filter
Power cord
Air outlet
Handle (both sides)
Air intake
grill
Removable
water tank
Control panel
Casters
This unit has preinstalled
casters, positioned on
the bottom four corners
of the unit and also
includes four spare
casters
Drain hose
outlet
9EN

7.CONTROL PANEM • INDICATORS
ΟΘΟΝΗ ΕΝΔΕΙΞΕΩΝ LED
When the user set the room humidity level, the led display
shows the users choice. When the user set the timer, the diplay
show the hours. When the user press and hold the HUM SET
button for 5 second, the display indicate the room
temperature.
TEMPERATURE INDICATOR
:KHQWKHXVHUSUHVVWKH+806(7EXWWRQIRUVHFRQGVWKH/('
GLVSOD\VKRZVWKHURRPWHPSHUDWXUHDQGWKHLQGLFDWRUWXUQVRQ
WATER TANK INDICATOR
HUMIDITY INDICATOR
When the user set the humidity level, this indicator turns on. This
indicator is also on when the product shoes the room humidity
level.
LOW FAN SPEED INDICATOR
When the user set the low fan speed this indicator turn on.
When the product's speed change this indicator turns off
When the water tank is full, this indicator will turn on to remind
the user that the water tank is full and it must be empty
When the user set the high fan speed this indicator turn on.
When the product's speed change this indicator turns off.
(1
HIGH FAN SPEED INDICATOR

As the product operates, press and hold the SPEED button for 4 seconds to activate
the control panel lock. In this function no button can be pressed. To recover, press
and hold the SPEED button again for 4 seconds.
The sunny day function has an auto humidity level selection on 60% and can be
selected from the mode button.
The rainy day function has an auto humidity level selection on 40% and can be
selected from the mode button.
8.CONTROL PANEL • FUNCTIONS
ON/OFF
Press the “Power” button to activate ot deactivate the dehumidifier. The power button
and the sceen will turn on. The pre adjustment is on sunny day mode and on the high
fan speed.
11
EN
LED COLOR INDICATOR
The front panel led display color depends on the humidity level of the room.
If the humidity level is below 60% the LED color turns blue.
If the humidity level is between 60-80% the LED color turns blue.
If the humidity level is above 80% the LED color turns red.
•
•
•
AUTO DRYER MODE
In this mode the humidity level is 20% and the user cannot change it. The compressor
works to dry the clothes. You can choose the fan speed you want. For silent mode you
can choose the low fan speed and for faster results you can choose fan speed.
RAINY DAY AUTO FUNCTION
SUNNY DAY AUTO FUNCTION
CONTROL PANEL LOCK

IONIZER / UV LAMP
By pressing the PURIFY button, the ionizer and uv lamp function turn on. Negative
ions released through the air absorbing dusts, bacterias, unpleasant smells, therefore
the uv lamp ''kills'' the virusesand bacterias. This combination ensures healthy and
fresh air
Press the FAN SPEED button to choose the fan speed. Every time you press the button
the selections changes bewtween HIGH FAN and LOW FAN. If you press and hold the
FAN SPEED button for 4 seconds the control panel lock will activated. In this situation
no buttons are working. To recover press and hold the SPEED button for another 4
seconds.
FAN SPEED / CHILDREN LOCK BUTTON
HUMIDITY SET BUTTON
Press the HUM SET button to choose the humidity levels from 20%RH (Relative
Humidity) to 80%RH (Relative Humidity) with step 5% each time you press the button.
Press and hold for 5 seconds and the indicator will show the rooms temperature.
TIMER BUTTON
Press the timer button to activate the auto power on or auto power off of the
product. The timer indicator and the screen will light up. The user can choose from 1
to 24 hours. When the adjustment is ''00'' means that the timer is not activated.
By pressing the MODE button, the user can choose bewtween three
auto functions. (sunny day, rainy day, auto dryer)
MODE SELECTION
12 EN

Rainy day: auto relative humidity setting on 40%.
SMART SAVE ENERGY FUNCTION
When you turn on the product, you must activate the smart save emergy
function. In order to do that, you have to choose the dryer for 5-10
seconds until the compressor activates. Then choose MODE and then
choose the relative humidity level that you wish. When the dehumidifier
reaches the relative humidity below the wanted one from 2-5% the
compressor stops, and after 2-3 minutes the product stops completely. After
30 minutes, the fan will operate and the product will count the relative
humidity level for 5 minutes. If the relative humidity level are above the
wanted ones for 2-4%, the compressor will start again operating. If not it will
be on stand by mode for another 30 minutes. In this way, the product will
decrease the relative humidity level immidiately but in the same time with
the lower possible power consumption.
When you turn on the product and the compressor does not start operating, the
dehumidifier will operate as an air cleaner combining the ioinizer, uv lamp and carbon
filter with a very low power consumption of 30W.
E. Saving
Sunny day: auto relative humidity setting on 60%.
13
EN
The humidity adjustment is now on 60%.
The humidity adustment is now on 40%.
Dryer: Continuous mode
The relative humidity adjustment is now on 20% and the user cannot change it.
The compressor operates continuously in order to dry the clothes. You can select any
fan speed that you wish, for silent mode choose the low fan speed and for
maximum efford choose high fan speed

9.WATER TANK & DRAIN HORSE
There are two ways to remove collected water.
1.Using the water bucket
2. Continuous drainage with the drain horse connection which is concluded.
1. Using the water bucket
When the water tank is full, the alarm will beep and the water full indicator
will appear .
•Slowly remove the bucket. Grip the handle with caution, and carefully pull outwards so
the water does not overflow. Do not place the tank on a floor that its not straight or
levelness . Doing so the tank will fall and the water will be spilled on the floor.
•After you empty the water put the tank back. Please ensure that you put the tank in
correctly. Please note if after you put out the tank, water spilled out and clean it up with
a soft cloth.
•When the water tank is in correct position, the dehumidifier will start operating
again automatically.
ATTENTION! Clean the water tank bucker with clean water.
DO NOT use chemicals or hot water.
•When you remove the water tank, be carefull as may
some water drops may fall from the dehumidifiers
pipe.
•Be sure to gently place the tank into the dehumidifier.
•Do not drink or use the collected water from the
product
•Wipe any excess water on, or in, the unit when
removing the tank.
14 EN

Attention: Water hose should never be bend or twisted!
2. Continuous drainage
Water automatically can be emptied into a floor drain by attaching the unit with a
water hose.
•Remove the water tank and attach the drain hose to a suitable drainage facility.
Make sure the hose is attached securely to avoid any leaks and place it as deep
as possible to ensure the right drainage.
•Make sure that the product is placed on a flat surface in an upright position.
•Place the end of the hose into the drain and make sure that the water flows naturally.
For correct drainage, make sure the hose stays below the level of the drain hose
outlet.
When the continuous drainage feature is not being
used, remove the drain hose from the drain hose outlet.
10.PRODUCT STORAGE
When unit is inactive for an extended period of time please make sure you follow the
instructions below, for an appropriate storage of your appliance:
Turn unit off allowing one day before storage.
•Remove the drain hose (if attached).
•Clean all the dittached parts of the dehumidifier, such as water tank and air filter.
15
EN
•

NOTE: Do not clean the carbon filter with water.
Only ahake it with hands or use a vacumm cleaner.
11.MAINTENANCE & CLEANING
Before performing any maintenance or cleaning of the dehumidifier, make sure that
it is unplugged.
l Cleaning the filter:
Use water and mild detergent to clean the dehumidifier.
•Do not use abrasive cleaning agents or solvents, use a brush or vacuum
attachments for cleaning
•Do not use a dishwasher to clean the filter.
•Do not apply any water directly on or into the device while cleaning, as it may
cause rust, insulation deterioration or electrical shock.
•Allow the iflter to completely dry before re-installing.
The air filter should be checked and cleaned every 5 days.
When you disarm the air filter do not toucn any other part
of the inside of the product, as you may cause damage.
16 ΕΝ

17
12. FREQUENTLY ASKED QUESTIONS &
TROUBLESHOOTING
For about the first month of use, the dehumidifier operates
intensively. This will gradually decrease within time, since the
dehumidifier will have been calibrated in its working
environment. Condensed households may sometime be
significantly expensive to heat. The use of a dehumidifier may
lower energy cost.
For optimal results, it is suggested that the dehumidifier is
placed in a central area. Doors within the household should
be open in order for the dehumidiifer to enhance its
operation.
Can the filter be
replaced by another
HEPA type filter?
It can be placed but the performance will drop at least 20%.
You can replace the carbon filter when the air consists of
unpleasant smells.
Which is the
appropriate
room humidity
level?
The ideal humidity level is between 50%-60%. This humidity
level ensures healthy and clean air for you and your family,
blocking allergy particulates and helps to maintain the house
and every household device safe from damaged that high
humuduty may cause.
Why does
condensation
persist on windows
even with
dehumidifier’s use?
When the desired humidity level is reached, there is a
possibility of partial humidity formation on windows. This
occurs due to the temperature variation between the window
and the external weather conditions.
Operating the dehumidiifer should significantly reduce
condensation formation on window.
Can i wash the
carbon filter?
You can not wash the carbon filter. That is because the
carbon will lost it's nature restraint to chemicals,
unpleasant smells, and smoke from cigarette.
EN
Are dehumidifiers
costly?
Where should the
dehumidifier be
placed ideally?

18 EN
How much time
is needed to dry
my clothes?
The exact time needed to dry clothes depend on many factors,
the room's temperature, the humidity level, the moisture of
the clothes etc., so there is no standard time since of these
variable factors mentioned above.
Why does the
dehumidifier continue
its operation even
though the desired
humidity level has
been reached?
When the dehumidiifer reaches its set point it will continue
operating until humidity level reaches the desired setting with
a tolerance of 2-5%, then the compressor will stop operating
and soon after the fan will stop operating also.
The dehumidifier is
not a chilling
device. What could
be the cause of
cold air being
extracted?
The dehumidifier operates by intaking condensed air
removing any moisture and sending it back in the area it
operates. If you are standing near the dehumidiifer while
operating you may feel that the air coming out of the fan is
cooler due to the diffusion reality, it is at the same room-
temperature but with less humidity.
Why the
dehumidifier does
not stop in ''Dryer''
function?
When the dehumidifier is on "Dryer" function, the compressor
does not stop in oder to dry the clothes completely.
The unit does not start
l Make sure the dehumidifier’s plug is placed completely into the socket.
l Check the house fuse/circuit breaker box.
l Check whether the power cord is damaged.
l Check the water bucket, if it is full, empty it
l Check if the dehumidifier has reached its preset level.
l Make sure the water bucket is positioned properly.
l Room temperature is lower or higher than the advised operational range.
lCheck whether the humidity level has been set in high level.
Dehumidifier does not dry the air as efficient
l Make sure that the dehumidifier has been operating enough time to remove the
moisture.
l Make sure there are no curtains, blinds or furniture blocking the front or back of the
dehumidifier.
l l The humidity selector may not be set low enough.

19
l All house exits (windows doors etc) where the dehumidifier is operating, should be shuted.
l Room temperature is below the advised operational range.
l There is a kerosene heater or something giving off water vapor in the room.
l The room that the device is placed is bigger than suggested.
l The humidity level is too high.
The unit makes a loud noise when operating
l The air iflter is clogged.
l The device is tilted instead of being in an upright position.
l The floor surface is not flat.
Frost build up on coils
l This is normal. This unit is supplied with an Auto defrost feature.
Drain hose water leakage
l Check the correct installation of the drain hose.
l Check for any blockage or damage of the drain hose.
Understanding Error and Protection codes
Error Codes:
CL- When the room temperature is below <5°C, the code CL appears. At this state the
compressor does not work, but the other functions works normally.
LO- When the relative humidity is below 20* RH, the code LO appears. At this state
the compressor does not work, but the other functions works normally.
HI- When the relative humidity is above 95% RH, the code HU appears. At this state
both the compressor and the other functions works normally
NOTE: All the pictures in the manual are for explanatory purposes only. The actual
shape of the unit you purchased may be slightly dierent, but the operations and
functions are the same.
In the event of any of the above-mentioned malfunctions, turn
off the unit, and check for any obstructions. Restart the unit, if
the malfunction persists, turn off the unit and unplug.
Contact the manufacturer or a qualiifed technician for service
EN
CH- When the room temperature is above >38°C, the code CH appears. At this state the
compressor does not work, but the other functions works normally.
E1- This error code appear when the temperature has been damaged. Turn off the
product and contact the technical department of the company immidiately.
E2- This error code appear when the humidity sensor has been damaged. Turn off the
product and contact the technical department of the company immidiately.

Activate your Warranty
l Fill all the elds as shown below
þ
Once the warranty submission has been completed a confirmation message will
be sent to your email
l Visit our web site and activate your warranty via the below link .
https://www.puredryhellas.com/egguiseis
Table of contents
Languages:
Other Puredry Dehumidifier manuals

Puredry
Puredry PDD 8519 FAMOUS User manual

Puredry
Puredry PD 170L User manual

Puredry
Puredry PD 625 User manual

Puredry
Puredry PDDW 12100 Famous User manual

Puredry
Puredry PD 210L User manual

Puredry
Puredry Mini-D User manual

Puredry
Puredry PDD 10L Famous User manual

Puredry
Puredry PD 2419 Sofia User manual

Puredry
Puredry PD 2419 Sophia User manual

Puredry
Puredry PDD 200M User manual
Popular Dehumidifier manuals by other brands

Trotec
Trotec DH 145 S operating manual

Black & Decker
Black & Decker BXEH60003GB manual

Woods
Woods WLD1 operating instructions

GE
GE ADER30 owner's manual

SMC Networks
SMC Networks IDF Series Quick reference guide

Mondial Designs Limited
Mondial Designs Limited AIR COMFORT DM-01 Instruction and Technical Service Manual