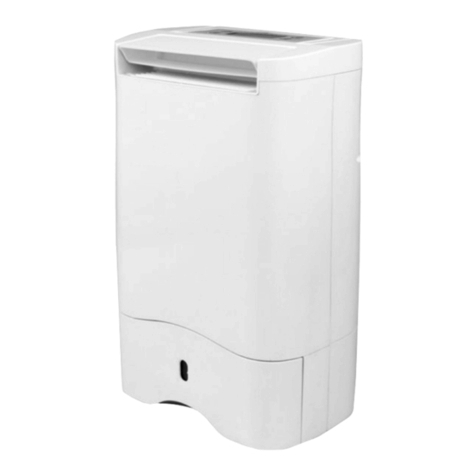
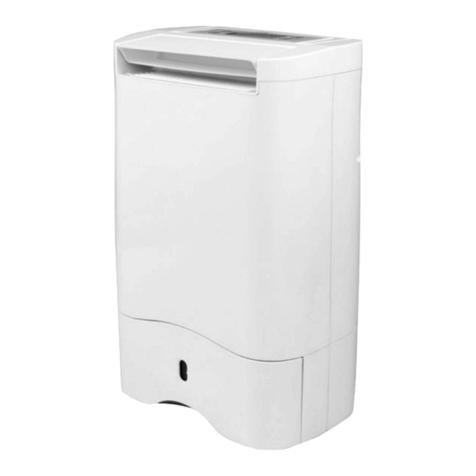
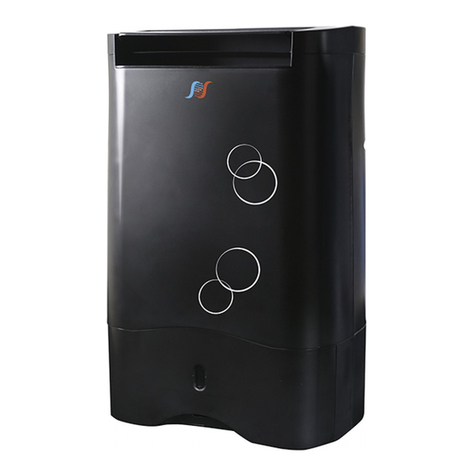
Puredry PDDW 12100 Famous User manual

1
USER’S MANUAL
ΕΓΦΕΙΡΙΔΙΟ ΦΡΗΗ
DEHUMIDIFIERS PDDW 12100 & 12200 FAMOUS SERIES
ENGLISH | ΕΛΛΗΝΙΚΑ

2
1. SAFETY & WARNING INSTRUCTIONS .............................................................. 3
2. ELECTRICAL INFORMATION ............................................................................ 4
3. SOCIABLE REMARKS ENVIROMENTAL PROTECTION....................................... 5
4. STEPS BEFORE USE ......................................................................................... 6
5. PRODUCT FEATURES ...................................................................................... 8
6. GETTING TO KNOW YOUR DEHUMIFIER......................................................... 9
7. LCD CONTROL PANEL –FUNCTIONS..............................................................11
8. WIFI SET UP ...................................................................................................16
9. WATER TANK & DRAIN HOSE.........................................................................18
10. MAINTENANCE & CLEANING ......................................................................19
11. STORAGE.....................................................................................................20
12. FREQUENTLY ASKED QUESTIONS & TROUBLE ............................................21
13. WARRANTY TERMS.....................................................................................23
Dear Consumer,
Congratulations on your choice!
What distinguishes, dehumidifier Puredry PDDW 10100/10200, is the
unique design and the upgraded Japanese Zeolite Regeneration
technology, that guarantee efficiency in facing humidity problems.
Please refer to this manual, to obtain full efficiency of the dehumidifier,
through the guidelines included in the following pages and make saving
via clever use of this device.

3
No children under the age of 8 should be permitted to operate this electric
device. Be certain, that children, handicapped people, or people with lack
of knowledge and experience, must be supervised, depending the
situation, by persons responsible for their well-being and do not
undertake procedures such as the cleaning or the maintenance of this
device.
It is important that adequate supervision is provided and no minors are
left unattended with this device.
This dehumidifier is for domestic and small office use only. Do not use this
device for commercial, industrial or marine use, and in areas with wet
surfaces such as restrooms or shower rooms.
This device should always be kept in an upright position to avoid any
damage.
All house exits (windows doors etc.) where the dehumidifier is operating
should be shut.
If water leakage appears within the unit, turn the unit off and disconnect
the power cord.
Before moving, unplug the device and manage to keep it in a vertical
position.
Be sure to empty the water whenever the water tank is full or when the
device will not be used for a prolonged time.
Always empty the water tank before storing the unit.
When the unit has been switched off and instantly switched on, keep in
mind that, for operational reasons, there is a 3 minute delay in order to
regain normal operation.
If the unit is misplaced or tipped, unplug the power cord immediately.
Make sure the unit is completely dry before resuming operation.
Disconnect the device, if abnormal sounds, odors or smoke occur.
If the supply cord is damaged, it must be replaced by the manufacturer, its
service agent or similarly qualified persons to avoid a hazard. Never
attempt to dismantle, re-pair or modify the device.
Do not attempt to repair, dismantle or modify this appliance. Contact your
authorized service technician for repair or maintenance of this device.
Do not operate or stop the unit by switching the power supply on or off.
Do not insert any objects in the unit's air inlet and exhaust as this may
cause da mage to the device.
4
Do not place heavy objects on the power cord. Make sure that the cord is
not compressed.
Do not place cord under any obstacles (carpets rugs or runners etc.). Cord
should be arranged away from areas where accidental tripping may occur.
Do not sit or climb on the device.
Do not place the unit in direct sunlight or near other heating sources.
Do not use the unit near heat sources, chemicals, radiators, flammable
materials or fire.
Do not use the device without the filter. Dirt and lint may clog the unit thus
reducing performance.
Do not drink or use the collected water from of the unit for any purpose.
Do not use the unit with wet hands.
The nameplate, with all the electrical and technical data of this appliance,
is located on the back panel.
The appliance should be installed in accordance with national wiring
regulations.
Be sure the device is grounded properly. Proper grounding is important as
it minimizes the chance of electric shock or fire. The power cord is
equipped with a grounding plug for protection against electric shock
hazards.
The device must be used in a properly grounded wall socket. If the specific
socket you intend to use is not adequately grounded or protected by a
time delay fuse or circuit breaker, have a qualified electrician install the
proper receptacle.
Ensure the wall socket is still accessible after the installation of the
dehumidifier.
Do not use extension cords or adapter plugs with this device.
To connect or disconnect the power, grip the plug and pull it out from
power socket, never pull or tug on the cord.
Power off the dehumidifier before removing the plug. Never
unplug the unit before the fan has stopped blowing.

5
Disposal of equipment no longer used.
Please follow the instructions below, when using this dehumidifier in European
countries.
This appliance requires special treatment for disposal. In the European
Union, electronic equipment must not be treated as domestic waste, but
must be disposed of professionally in accordance with Directive 2002/96/EC
of the European Parliament and Council of 27th January 2003 concerning old
electrical and electronic equipment. The disposal of this unit should follow all
legal requirements and should not be disposed as unsorted municipal waste.
The hazardous substances can leak into the ground water supply thus
entering the food chain, endangering your health and the environment.
There are several alternative solutions for disposal:
A) Your local municipality has established free collection systems for
electronic waste.
B) Your local retailer upon purchase of a new product.
C) The manufacturer may accept the old appliance for disposal.
D) Old appliances sometimes contain valuable resources for scrap metal
dealers.

6
Please refer to the electronic warranty
instructions, in the last
page (English section) of this manual.
For warranty purposes, please note
the SN (serial number). Please find
it on the back side of the device.
User's manual
Drain hose

7
1) Do not block or restrict the airflow
around the unit. Make sure the air
inlet exhaust grills are not
obstructed. Allow 20 cm of
clearance around the unit.
2) Ensure the air filter clean
3) When using the HEPA-CARBON filter,
you have to set the fan speed to HIGH.
Also note that the efficiency of the
dehumidifier will be reduced by 30%
4) The HEPA-CARBON filter is compliant
with the international standards so that it
Retains 99,997% of all particles with size
From 0,1μm or larger. Stops mold spores,
dust, dead cells from pets mites etc…
5) Before the initial operation,
please check, if water level switch,
located within the water bucket
area, is in the right position.

8
Model Name
PDDW 12100/12200 FAMOUS
Dehumidifying Capacity (L/24 Hours)
*12
Power Supply (V/ Hz)
220 –240 / 50
Power Consumption (W)
** 30 / 430 / 740
Noise Level (dB(A))(L/M/H)
33 / 35 / 38
Air Output m3/ h
150
Water Tank (L)
4
Dimensions (W x D x H) (mm)
317 x 213 x 499
Net Weight / Gross Weight (kg)
6,8 / 7,8
Length of Drain Hose (m)
2
Length of Power Cord (m)
1,94
Type
*** Desiccant
Operation Temperature range (oC)
1 - 40
* Choosing the correct dehumidifier should be based on the following factors:
The size of the room
The room temperature
The relative humidity
Room insulation
Dehumidification capacity varies depending on the percentages of humidity
prevailing in the room. The yield of 10 liters per hour refers to conditions of
22°C and 80% relative humidity.
** 30W Consumption during the fan operation
The fan only operation is a function that cannot be manually selected. It is
automatically selected when the moisture content in the rooms is lower than
set by the MODE button.
When Low Fan or Medium Speed is set, the consumption can reach a maximum
of 420W, regard-less of the mode (MODE) that has been selected.
When the High Fan Speed is set, the consumption may reach a maximum of
740W. The deviation rate of the above values is +/- 5%
*** The Zeolite Regeneration dehumidifier is the new Japanese compressor
dehumidification technology, for efficient operation at very low temperatures. It
has an absorbent dehumidifying wheel made of zeolite, which thanks to its
drying properties, absorbs moisture from the room air. Using an electric
resistor, the zeolite heats up, eliminating atmospheric moisture in the special
water collection container

9

10

11
Press “Power” button to turn the dehumidifier on or off
While operating press the “Mode” button to select the fan speed. Sleep mode,
Medium or High fan speeds are available. The corresponding led indicator will
activate, confirming your selection
After turning the dehumidifier OFF, the fan continues to operate for
a small period of time, so as to protect the inner components.
During this operation DO NOT unplug the device. Please wait for the
fan to stop operating.
In the event of a power failure the unit has an Auto Restart function.
Once the power is restored after a power failure, the appliance will
automatically restart to operate at the selected settings prior to the
power failure

12
The use of LOW speed is recommended for lower noise and
consumption levels or for areas with less condensation (420W)
The use of HIGH speed should be preferred to achieve faster
dehumidification
Sleep mode also runs with low speed and it also dims the LCD light
to L2 or lower
Press periodically to select between each function. The selected one will blink
for 5 seconds, choose with or this buttons.
When Continuous mode (drying clothes) is selevted, choose Fan High
Speed for maximum results!
Continue Alternative use of this function
Place the dehumidifier in a small room together with the clothes rack. Close the
doors and windows of the room and ensure the immediate drying of the
clothes. Well-groomed clothes will speed up the drying process. Ensure a
distance of 30-50cm of the device from wet clothes. You can also use this
feature in situations where you need to quickly dehumidify, such as flooded
areas or closed rooms for a long time.
AUTO (Humidity level 50%)
The dehumidifier will stop working as soon as it reaches humidity levels 3-4%
below 50% and will start again when the humidity in the room increases by 3-4%
above 50%. Use this function to reduce the dehumidifier operating time and
achieve maximum energy savings.

13
HUMIDITY SELECTION
Press the button one time and the humidity select digits will blink, after
that with the buttons and choose the humidity levels that you wish.
After setting the desired humidity and after 5 seconds, the digits stop flashing
and will show the humidity of the room.
Press the buttons two times, the appears, and the timer indicator
blinks, next press the , buttons to choose the price that you want.
After that or if no button is pressed for 5 seconds the will show if there is an
active timer (and will disappear if there is not) and the digits will show the
room’s temperature. You can see the time that is left (which will blink for 5
seconds) by pressing the button twice when is the indicator.
Press the 3 times and the indicator will blink, then press or
to change the screen lighting dimmer.
After adjustment or inaction for 5 seconds, the indicator stays on the
lighting is between L0-L5 ( and disappears when the adjustment is H ), and the
digits turn to show room’s temperature.

14
In SLEEP mode function only the L0, L1 and L2 are allowed. The adjust will affect
the LOW or HIGH mode, if the prior setting between L0-L2.
Temperature indicator and width operation
The product can operate between 1-40OC and the digits shows the room
temperature. When the temperature is above 43oC the indicator “HI” will appear
and if it is below 1oC the indicator “LOW” will appear then the product will stop
operating and will start again when the temperature is between 40oC and 3oC.
During the “HI” and “LOW” only the power button can be activated.
Swing
You can choose the movement of the louver between 0 and 150 degree, by
pressing the . Pressing the button again, the louver will stop in the wanted
position.
Ionizer
Press the buttons and simultaneously to activate or deactivate the
ionizer and the IONS indicator will appear or disappear. By activating the
ionizer, positively and negative ions are released to purify the air and remove
unpleasant and unhealthy particles.
3 Levels Humidity LED Light
Besides the humidity digital display in the LCD, there is a 3-level LED light
through the tank window for easier monitoring the indoor humidity. Green light

15
represents humidity under 50%, blue light 50-65% and red light above 65%. You
can turn off or retrieve the light by pressing the for 5 seconds.
Alarm
If the unit malfunctions then an alarm will activate and the unit will
automatically shut down.
Internal Overheating Protection
Malfunctions may occur during operation of the appliance if an object enters
the air intake or exhaust point. Do not obstruct or block the air inlet or outlet, as
it may cause malfunction or damage due to overheating. In this case the
dehumidifier will turn off automatically. Clean the air intake filter frequently and
make sure it is always clean. Cleaning the filter or air intake filters is vital to the
proper operation of the dehumidifier and is the root cause of problems that
may arise in the future.
Tipping Protection
To prevent overheating, the appliance is equipped with a switch to detect
reversing or falling of the dehumidifier, so that its operation is stopped
automatically if it falls down.
E-saving state
Energy saving function (Smart Saving Energy function)
When the appliance drops the humidity levels to the desired level, then the
"E.saving" indicator lights up, the dehumidification function stops and the fan
continues to work for the next 2 minutes. Then there will be a 30 minute
shutdown. After 30 minutes, the fan will turn on for 2 minutes, measuring the
humidity of the room (during this process the humidity indicator will show the
value "Fn"). If the relative humidity levels have risen above 5% of the selected
relative humidity value, the appliance will start operating normally. If it has not
increased more than 5% then the device will stop operating for another 30
minutes. "Fn" will be displayed on the display during the relative humidity
measurement. These thirty minutes of shutdown are intended to homogenize
the humidity in the room (evaporation effect), the most accurate measurement
of room humidity and therefore the most economical operation of the device.

16
Water Full
When the water tank is full, the indicator will light up and the appliance will
stop operating. The water level control switch switches off the dehumidifier in
case the water tank is filled, removed or not replaced properly. Prior to
mounting, make sure that the float is in the correct position and that it is
reciprocating.
Child lock indicator
Press and hold Swing for 5 seconds to activate or deactivate the Child Lock
function. When you lock it all the buttons are off except Power.
Preparing
1) Plug the machine to the rated power source
2) Make sure your mobile device is connected to your 2.4G Wi-Fi. Your mobile
device and the machine need to be within good signal range of your Wi-Fi
router.
Starting app
1) Download the App by searching “Tuya Smart” or “Smart Life” from mobile app
stores, and install it.
2) Open the app and register or log in your account.
Wi-Fi Pairing
1) When turn-on, the machine automatically starts a Wi-Fi pairing state for 5
minutes and the Wi-Fi icon flashes. If there has been a smart device paired with
it, it will turn into steady display.
2) You can press program selection button for 5 seconds to restart a new
pairing of your mobile device to the machine. This will also cancel original
pairing. Therefore, if yours and the original paired device will multiply control
the machine, please let the original linked device add your’s (or other’s) as family
members through Family Management in the app.
3) From the app Home Page, tap “Add Device” or press + in the top right corner.

17
4) Select your machine from the device menu. Make sure your device is in EZ
mode and follow the prompts in the app to complete the pairing. The Wi-Fi icon
will steadily display when connected.
Application view
1) Device Settings
Device name setting
2) On/Off
Power your device on or off
3) Mode
Select between low, high and sleep mode
4) Room Humidity
Displays current room Humidity
5) Temperature
Displays current room temperature
6) Schedule
Schedule the machine on/off
7) Tank LED Light
Turn on/off the tank window lighting that
responses to the room humidity level
8) Swing
Select the louver swing setting
9) Humidity Setting
Select your desired humidity setting
10) LCD Light
Select your desired the screen lighting dimmer
11) Child lock

18
Turn on/off the child lock function of the
machine. All the app operations are not
influenced by this setting
12) Timer
Set timer off of the machine
13) Ionizer
Turn on/off the ionizer
14) Link
Link to Puredry web page
There are two ways to remove collected water
1) Using the water bucket
Use water or neutral detergent to clean the appliance.
• Do not use bleach or polish. Use a soft, clean cloth or soft brush for cleaning.
• Do not use the dishwasher to clean the filter.
• Do not pour water directly into the cleaning device, as insulation may be
damaged and electric shock may occur.
• Make sure the filter is completely dry before reinserting it in the appliance.
• Do not drink the water you collect and do not use it for other activities.
• When the water tank is repositioned in the correct position, the dehumidifier
will start working again.
2) Continuous draining
By using the drain hose, the water can be drained (drained) automatically into
the floor siphon of the room or in the sink
• Use a screwdriver to drill the pre-drilled hole in the back of the appliance.
Remove the water tank. Keep the drain cover open (includes a spring-loaded
plug to prevent leaks when removing the container) and apply one end of the

19
hose to the other end of the siphon. Make sure that you have sufficiently
pressed and placed the hose correctly on the nozzle, without creating an angle
at the drain outlet, to prevent leaks.
• Make sure the dehumidifier is placed on a flat surface.
• When guiding the drain hose to the drain, make sure that the hose does not
exceed the height of the drain outlet point, is not compressed and is not folded.
Ensure the natural flow of water by calling when removing it.
Before performing any maintenance or cleaning of the dehumidifier, make sure
that it is unplugged.
1) Cleaning the filter
Use water and mild detergent to clean the dehumidifier
Do not use abrasive cleaning agents or solvents, use a brush or vacuum
attachments for cleaning
Do not use a dishwasher to clean the filter
Do not apply any water directly on or into the device while cleaning, as it
may cause rust, insulation deterioration or electrical shock
Allow the filter to completely dry re-installing

20
2) Cleaning the tank
Partially fill the tank with clean water adding a minimal amount of mild
detergent. Clean thoroughly empty and rinse.
Clean the tank every 2 weeks to prevent mold, mildew and bacteria growth
After cleaning, make sure the tank is placed back securely for the
dehumidifier to operate
When you do not intend to use the dehumidifier for a long time, please follow
the instructions below:
• Turn off the device and wait 24 hours before storing it.
• Remove the drain hose if it is installed.
• Clean all detachable parts of the dehumidifier, such as the water tank and the
filter, discard the used carbon and hepa filters.
• Cover the device to prevent insects from entering.
• Store in an upright position and in a place that ensures frequent ventilation,
low humidity level and lack of sunlight.
This manual suits for next models
1
Table of contents
Languages:
Other Puredry Dehumidifier manuals

Puredry
Puredry DESIGN SERIES PD 130LA User manual

Puredry
Puredry PD 130L User manual

Puredry
Puredry PD 2419 Sophia User manual

Puredry
Puredry PD 2419 Sofia User manual

Puredry
Puredry PDDW 10100 Famous User manual

Puredry
Puredry PDD 10L Famous User manual

Puredry
Puredry Mini-D User manual

Puredry
Puredry PD 170L User manual

Puredry
Puredry PDD 8519 FAMOUS User manual

Puredry
Puredry PD 20L Face Lift User manual