Venture TEC Rack Instruction Guide
1
2
3
Use X-Acto knife/razor blade to cut open stake
pocket (if not already exposed).
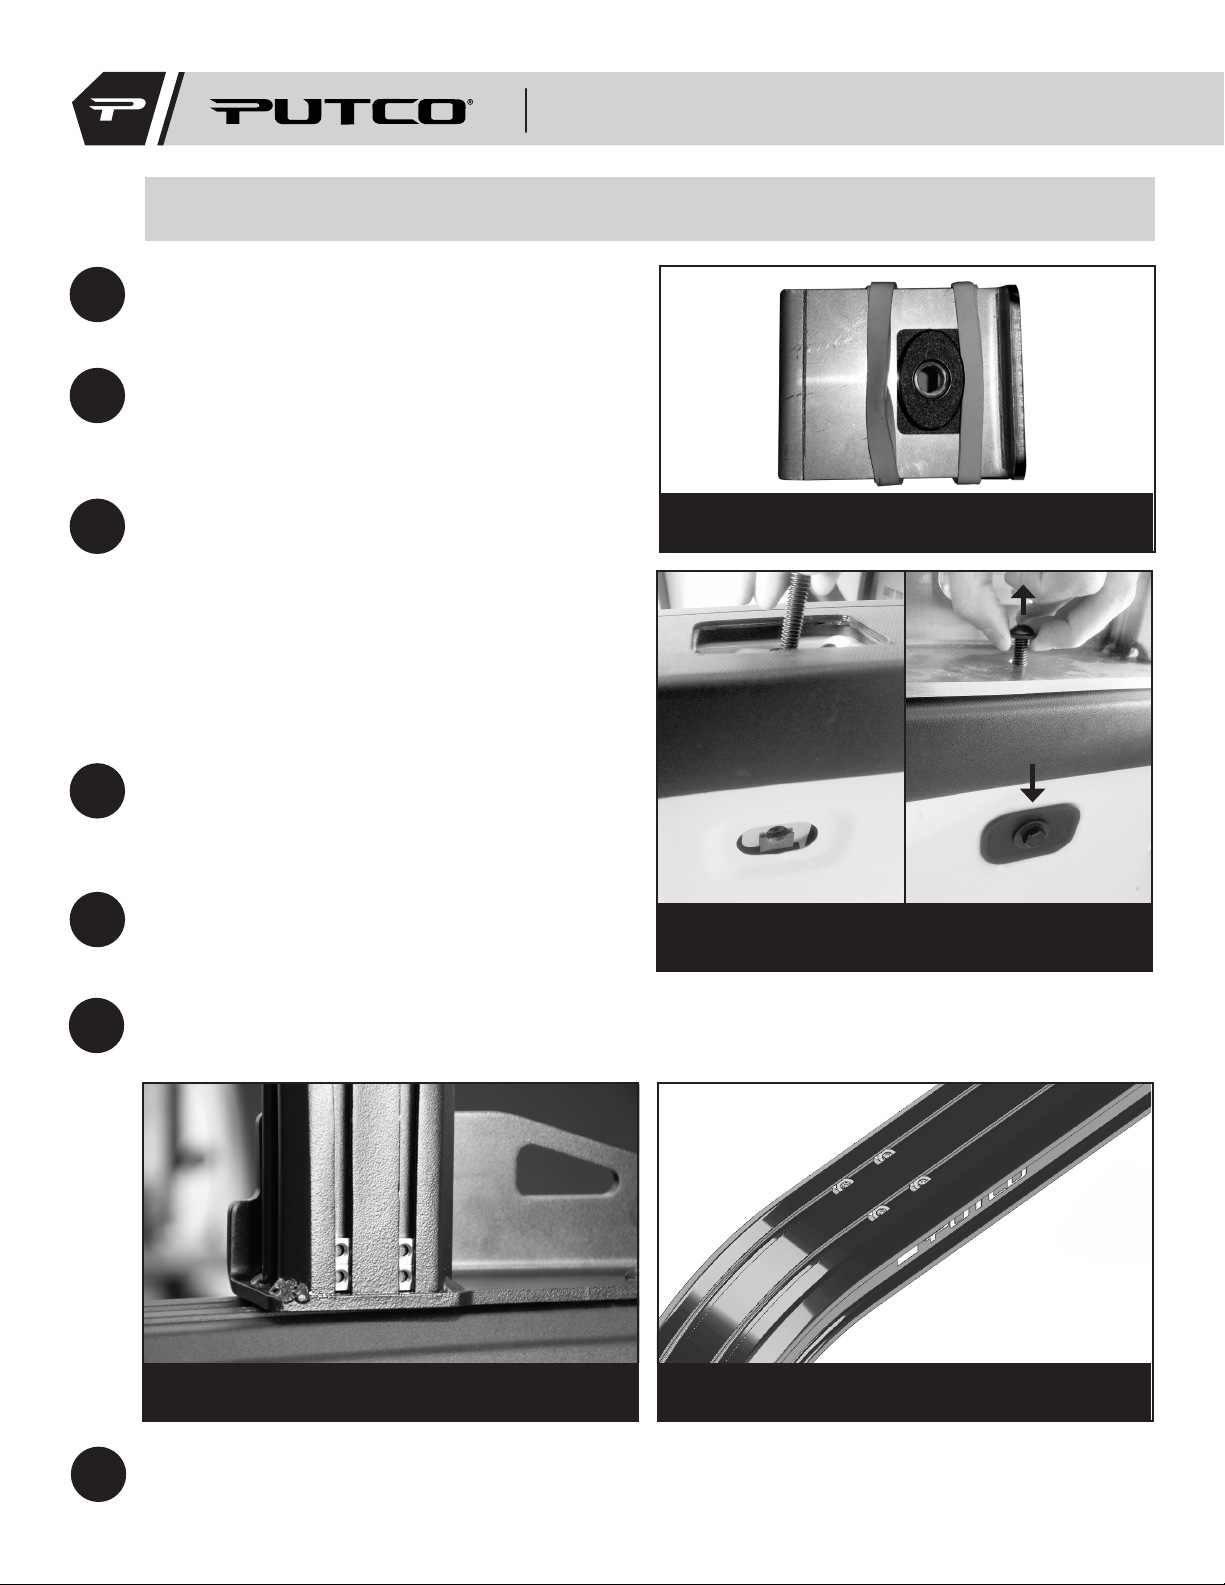
Use 2 rubber bands to hold threaded plate to
mounting bracket. Make sure threaded hole is
not obstructed (Figure 1).
Thread the 3.25” long bolt into the bracket
assembly, and lower it into the stake
pocket.NOTE:Some brackets are driver/
passenger side specific.
Make sure nut clip is facing into the bed of
the truck, and is centered in hole of bed wall
as seen in Figure 2. (Using blue loc tite is
recommended in order to ensure all bolts stay
tight long term).
3/8” bolt & washer
Figure 2 (Left): Nut clip centered in hole of bed
Figure 3 (Right): Bolt & Washer threaded into bracket
4Loosely thread 3/8” bolt with oval washer (flat
washer on Ford) through bed wall into bracket.
Temporarily remove 3.25” bolt from top of
bracket. See Figure 3.
5Repeat steps 1-4 on other stake pockets.
6Insert 8 square nuts into each channel of both racks. Slide square nuts down to the mounting
plate, so that both sides of the hoop look like Figure 4. Position remaining square nuts in top
channel near bend, as shown in Figure 5.
Figure 4: 4 square nuts slid towards the mounting
plate
Figure 5: square nuts are slid towards the corner
Figure 1: Threaded plate held to mounting bracket
by rubber bands
NOTE: Steps 1-5 may not apply to your specific vehicle. Please refer to independent
instructions sheet included with your Venture TEC Rack Mounting Kit.
7Position the front hoop over the stake pockets and thread the 3.25” bolt through the bracket in
the stake pocket. Be careful not to knock loose threaded nut plate. Leave the bolt slightly loose to
allow the rack to seek its natural position.
184XXXI


