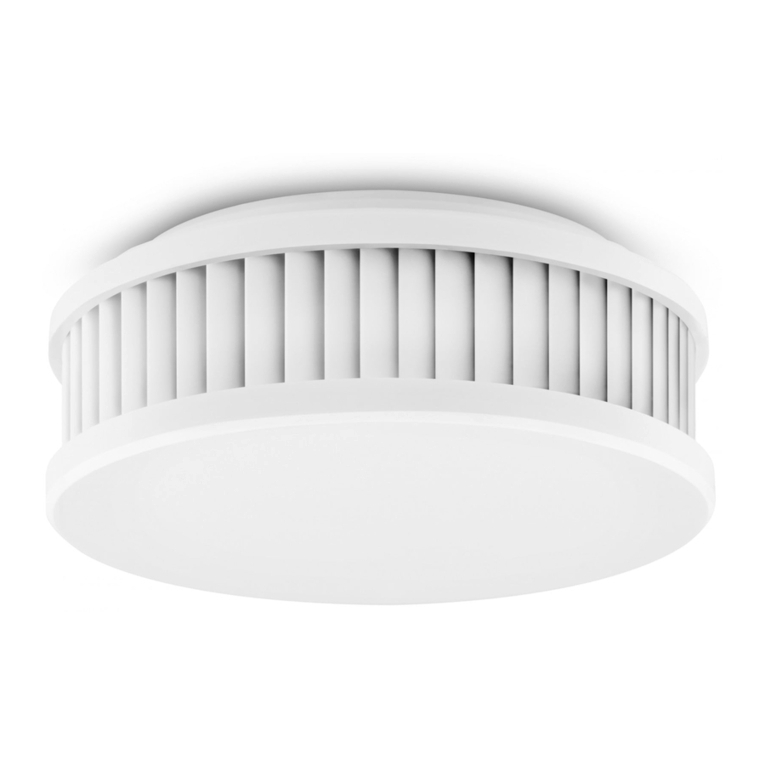
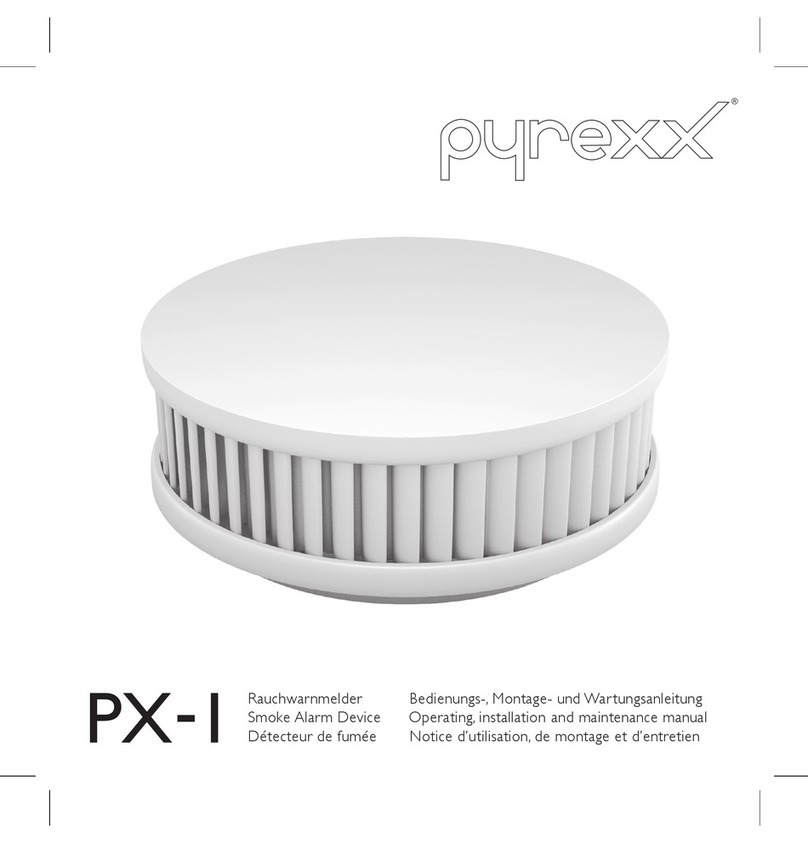
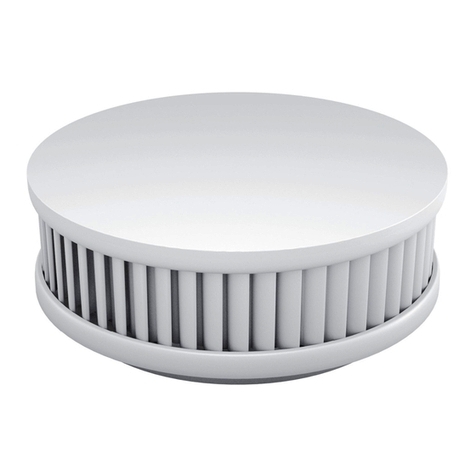
pyrexx PX-1 User manual

Rauchwarnmelder Bedienungs-, Montage- und Wartungsanleitung
Smoke Alarm Device Operating, installation and maintenance manual
Détecteur de fumée Notice d’utilisation, de montage et d’entretien
PX-1

23
Temperaturalarm
Temperature Alert
Alerte de température
Jede Sekunde erfolgt ein einfacher Ton (kurz: Piep).
Every second a simple tone is emitted (short: beep).
Une tonalité simple retentit toutes les secondes (court : bip).
1 sec
Rauchalarm
Smoke Alert
Alerte de fumées
Jede Sekunde erfolgt ein zweifacher Ton (kurz: Piep, lang: Piep).
Every second a double tone is emitted (short: beep, long: beep).
Une double tonalité retentit toutes les secondes (court : bip, long : bip).
0,5 sec
Jeder Alarm- und Hinweiston
lässt sich durch Betätigen der
Prüf-/Stopp-Taste (Abb. 1, Punkt
d) vorübergehend deaktivieren
(Rauchalarm und Temperatur-
alarm: 10 min).
Each alarm and advisory tone
can be temporarily deactivated
(Smoke Alert and Temperature
Alert: 10min) by pressing the
test/stop button (Fig. 1d).
Chaque tonalité d’alarme et
d’avertissement peut être
temporairement désactivée
(alerte de fumées et alerte
de température : 10 min) en
appuyant sur le bouton test/arrêt.
(Fig. I d)
Lautstärke
Volume
Volume
Ursache
Cause
Cause
Alarm- und Hinweistöne
Alarm and advisory tones
Tonalités d'alarme et d'avertissement
Stummschaltung der Alarm-/ Hinweistöne für
Mute of Alarm /advisory tones for
Mise en silencieux de l'alarme/Tonalités d'avertissement pour
10 min

45
Batteriestörungsmeldung
Battery failure signal
Signal de batterie faible
90 sec
Alle 90 Sekunden erfolgt ein einfacher Ton (kurz: Piep).
Every 90 seconds a simple tone is emitted (short: beep).
Une simple tonalité retentit toutes les 90 secondes (court : bip).
Verschmutzung des Geräts /
Kontaminationsmeldung
Contamination of Device Signal
Alarme de contamination
90 sec
Alle 90 Sekunden erfolgt ein zweifacher Ton (kurz: Piep, kurz: Piep).
Every 90 seconds, there is a double tone (short: beep, short: beep).
Une tonalité double retentit toutes les 90 secondes (court : bip, court : bip).
Jeder Alarm- und Hinweiston lässt sich
durch Betätigen der Prüf-/Stopp-Taste
(Abb. 1, Punkt d) vorübergehend deak-
tivieren (Batteriestörungsmeldung und
Kontaminationsmeldung: 24 Stunden).
Each alarm and advisory tone can be
temporarily deactivated (Battery failure
signal and Contamination Alert: 24 hrs)
by pressing the test/stop button (Fig. 1d).
Chaque tonalité d’alarme et d’avertissement
peut être temporairement désactivée
(signal de batterie faible et alarme de
contamination : 24 heures) en appuyant
sur le bouton test/arrêt. (Fig. I d)
24 h Wichtig: Das Gerät muss ausgetauscht
werden (siehe „Batteriestörungsmel-
dung / Kontaminationsmeldung“).
Important:The device has to be replaced
(see “Low Battery Signal /Contamination
Signal”).
Important : L’appareil doit être remplacé
(voir « Signal de batterie faible/Alarme de
contamination »).
Lautstärke
Volume
Volume
Ursache
Cause
Cause
Alarm- und Hinweistöne
Alarm and advisory tones
Tonalités d'alarme et d'avertissement
Stummschaltung der Alarm-/ Hinweistöne für
Mute of Alarm /advisory tones for
Mise en silencieux de l'alarme/Tonalités d'avertissement pour

67
Aktivierungston
Activation tone
Tonalité d'activation
Bei Aktivierung des Rauchwarnmelders erfolgt einmalig ein einfacher Ton (kurz: Piep).
By activation the smoke alarm device a simple tone is emitted (short: beep).
Lors de la mise en service du dispositif d‘alarme de fumée une tonalité simple est émise
(court : bip).
Prüfton
Test tone
Tonalité de test
Bei Betätigen der Prüf-/Stopp-Taste erfolgt einmalig ein einfacher Ton (lang: Piep).
By pressing the test/stop button a simple tone is emitted (long: beep).
En appuyant sur le bouton test/arrêt une tonalité simple est émise (long : bip).
Lautstärke
Volume
Volume
Ursache
Cause
Cause
Alarm- und Hinweistöne
Alarm and advisory tones
Tonalités d'alarme et d'avertissement

89
Gewährleistung erlischt bei Beschädigung!
Warranty void if broken!
La garantie est nulle en cas d'endommagement !
Das Gerät ausschalten
How to Deactivate the system
Désactiver l'appareil
Das Gerät nicht ins Wasser
tauchen!
Do not immerse the system in
water!
Ne pas plonger l'appareil dans
l'eau !
Batteriewechsel nicht möglich
(siehe „Allgemeine Sicherheits-
hinweise“)
No battery exchange (see
“General safety information”)
Ne pas échanger la pile (voir infor-
mations générales de sécurité)
Geschlossenes System, nur
Deckel kann gewechselt werden
Closed system, only cover is
changeable
Système fermé, seul le couvercle
est échangeable.
Auf Deckel drücken, um Signal stumm zu schalten
Push cover to turn the signal off
Appuyer sur le couvercle pour mettre le signal en
silencieux
Deckel abnehmen
Open the cover
Ouvrir le couvercle
Roten Knopf herausdrücken,
um Gerät auszuschalten
Push red button to power off
Pousser sur le bouton rouge
pour désactiver l'appareil

10 11
d
c
b
a
1
2
3

12 13
INHALT
Alarm- und Hinweistöne 2
Geschlossenes System 8
Graken 1–4 10
Standortauswahl 15
Inbetriebnahme 16
Montage 16
Klebemontage 16
Bohrmontage 17
Prüfung und Wartung 17
Batteriestörungsmeldung/
Kontaminationsmeldung 18
Mögliche Ursachen für einen
Störalarm 18
Allgemeine Sicherheits-
hinweise 19
Dekoration 20
Bestimmungsgemäße
Verwendung 21
Lebensdauer des Gerätes 21
CE-Konformität 21
Kontakt zum Service 22
Entsorgung 22
4
de
25
de
en
35
fr

15
DANKE!
Wir freuen uns, dass Sie sich für
unser Produkt entschieden haben
und danken Ihnen für IhrVertrauen!
Sie haben eine sehr gute Wahl getrof-
fen. Dieser Heimrauchwarnmelder ist
mit größter Sorgfalt entwickelt und
hergestellt worden, um dazu beizu-
tragen,dass Sie rechtzeitig auf die
Gefahr eines Brandes aufmerksam
werden.
Bitte lesen Sie diese Anleitung
vollständig durch und beachten alle
Hinweise und Abbildungen, da somit
die bestmögliche Handhabung des
Gerätes erreicht wird.
STANDORTAUSWAHL
Rauchwarnmelder sollten als
Mindestausstattung in allen Schlaf-
räumen, Kinderzimmern und Fluren,
die als Fluchtwege dienen, jeweils in
der Raummitte an der Zimmerdecke
(keine Wandmontage!) installiert
werden (Abb.4). Wählen Sie den
höchst gelegenen Montageort mit
einem Mindestabstand von 50 cm zu
umliegenden Wänden, Möbelstücken
und Lampen. Das Gerät muss waage-
recht zur Decke installiert werden.
Bei Dachschrägen darf die Neigung 25
Grad nicht übersteigen, da sonst die
Funktionalität des Gerätes erheblich
eingeschränkt werden kann.
Eine optimale Ausstattung erreichen
Sie, wenn die Geräte auch in allen
übrigen Räumen sowie in denTreppen-
häusern installiert werden (Abb. 4).
Dieses Gerät ist auch für den Einsatz
in Küchen (Brandherd Nummer eins!)
geeignet!
In Waschräumen (Bad,Toilette etc.) ist
ein Rauchwarnmelder in der Regel
wegen der geringen Brandgefahr nicht
erforderlich.
Im Falle eines Brandes erkennt dieses
Gerät frühzeitig den aufsteigenden
Was tun, wenn es brennt?
• Bewahren Sie Ruhe.
• Warnen Sie alle Mitbewohner.
• Helfen Sie Kindern, behinderten, älteren
und kranken Menschen.
• Schließen Sie alle Fenster undTüren hinter sich.
• Verlassen Sie umgehend das Haus.
• Benutzen Sie keine Aufzüge.
• Alarmieren Sie die Feuerwehr: Tel. 112.
de
de

16 17
losen Anstrichen etc. sein. Entfernen
Sie, wie in Abbildung 2 gezeigt, den
Informationsaufkleber und die Schutz-
folie vom aufgetragenen Klebewerk-
stoff und drücken den Magnetträger
für ca.10 Sekunden fest an die Monta-
geposition. Anschließend können Sie
das Gerät auf den Magnetträger (Abb.
1, Punkt b) aufsetzen. Die Endfestigkeit
der Klebeverbindung wird nach ca. 72
Stunden erreicht.
Bohrmontage:
Belassen Sie bitte auch bei der Bohr-
montage den aufgetragenen Klebe-
werkstoff am Magnetträger. Bohren
Sie an der Montagepositon ein Loch
und führen Sie den beiliegenden Dübel
in das Bohrloch ein. Nun führen Sie
die beiliegende Senkkopf-Schraube
durch die Unterseite des in Abbildung
2 dargestellten Magnetträgers, so dass
die Schraube beim Eindrehen in den
Dübel einen ebenen Abschluss in dem
Magnetträger (Abb. 1, Punkt b) ndet
Brandrauch und auch den damit
verbundenen Temperaturanstieg im
Raum. Um Sie rechtzeitig zu warnen,
ertönt dann ein lauter Alarmton.
Dieses Signal können Sie, sofern Sie
einen ernsthaften Anlass zur Flucht
ausschließen, vorübergehend (ca.10
min) deaktivieren bzw. auch vor
Auslösen des Alarmes unterdrücken,
indem Sie die Prüf-/Stopp-Taste
(Abb. 1, Punkt d) des Gerätes sanft
andrücken. Gute Belüftung der Räume
ist dann ratsam und wird der erneuten
Alarmauslösung vorbeugen.
INBETRIEBNAHME
Entfernen Sie bitte zuerst die Aktivie-
rungssicherung (wie z.B. einen Splint)
aus der Aktivierungstaste (Abb. 1,
Punkt a) und stellen sicher, dass diese
nicht ins Innere des Gerätes gelangt!
Drücken Sie dann die Aktivierungstas-
te (Abb. 1, Punkt a) des Gerätes. Diese
Taste muss nach dem Eindrücken mit
dem Gehäuse des Gerätes abschlie-
ßen! Zur Bestätigung, dass Ihr Rauch-
warnmelder nun aktiviert ist, ertönt
nach der Aktivierung ein kurzer Prüf-
ton. Dieser Prüfton wird wiederholt,
wenn Sie die Prüf-/Stopp-Taste (Abb. 1,
Punkt d) drücken und ist ein Hinweis,
dass das Gerät betriebsbereit ist.
MONTAGE
Der Rauchwarnmelder wird von
einem Magnetträger gehalten (Abb. 1,
Punkt b). Es gibt zwei im Folgenden
beschriebene Möglichkeiten, diesen
Träger an der Decke zu befestigen.
Bitte achten Sie darauf, dass der
Magnetträger nur von einer Seite
stark magnetisch anziehend wirkt!
Klebemontage:
Für eine Klebemontage des Gerätes
darf ausschließlich der dem Produkt
beiliegende Klebewerkstoff eingesetzt
werden! Der Montageort muss fest,
trocken und frei von Fett, Staub und
(Schraube durch perforierte Bohrung
stechen). Die Schraube muss gänzlich
in die dafür bestimmte Vertiefung
des Magnetträgers (Abb. 1, Punkt b)
eingedreht werden, um einen sicheren
Halt des Gerätes zu erreichen! Die
Schraube bitte nur so fest anziehen,
dass sich der Magnetträger dabei nicht
verformt/wölbt!
PRÜFUNG UND WARTUNG
Dieser Rauchwarnmelder prüft seine
Funktionsbereitschaft einmal pro
Minute selbstständig. Das Gerät regelt
zudem die Empndlichkeit seiner
Detektionsoptik in Abhängigkeit von
Umgebungseinüssen automatisch
nach.
Sofern die Energiereserve des Rauch-
warnmelders angebrochen ist oder die
Detektionsoptik so sehr verunreinigt
ist, dass eine weitere Nachregelung
nicht mehr möglich ist, meldet das
Gerät diese Zustände frühzeitig (siehe
de
de

18 19
BATTERIESTÖRUNGSMELDUNG/
KONTAMINATIONSMELDUNG
Das Gerät kann noch für max. 60 Tage
seine Warnleistung erbringen und
sollte daher unbedingt vor Ablauf
dieser verbleibenden 60Tage ersetzt
werden!
MÖGLICHE URSACHEN FÜR EINEN
STÖRALARM
• Sehr starke Koch-,Wasser- und/oder
Bratendämpfe sowie Raum-, Duft- und
Insektenspray bzw. Blüten-, Bau-,
Schleif- oder Feinstaub sind direkt in
das Gerät gelangt.
• Ein oder mehrere sehr kleine
Insekten bzw. andere Kleinstorga-
nismen haben die Insektenschutz-
Barrieren des Gerätes überwunden.
Eine regelmäßige und vorsichtige
Reinigung des Gerätes mit einem
„Alarm- und Hinweistöne“), so dass
Ihnen ausreichend Zeit gegeben ist,
den Rauchwarnmelder durch ein
neues Gerät zu ersetzen.
Bitte achten Sie unbedingt darauf, dass
die Lufteinlässe am umlaufenden Rand
des Rauchwarnmelders niemals durch
Staub, Schmutz, Farbe oder Klebeband
etc. beeinträchtigt werden!
Um sicherzustellen, dass das Gerät
betriebsbereit ist, sollten Sie
regelmäßig, mindestens einmal pro
Monat, die Prüf-/Stopp-Taste (Abb.
1, Punkt d) drücken und so einen
Probealarm auslösen. Achten Sie dabei
darauf, dass das Gerät unbeschädigt
und fest an seinem Montageort
angebracht ist, und die Raucheinlass-
lamellen (Abb. 1, Punkt c) gänzlich frei
von Fremdkörpern sind.
Wird bei dem probeweisen Alarm der
akustische Signalgeber nicht aktiviert,
muss das Gerät ersetzt werden.
Staubsauger hilft einen Täuschalarm zu
vermeiden.
• Extreme Temperaturschwankungen
oder sehr starke elektromagnetische
Strahlung wirken in der direkten
Umgebung des Rauchwarnmelders
auf das Gerät ein.
• Zigarettenrauch löst nur dann
einen Alarm aus, wenn der Rauch aus
unmittelbarer Nähe direkt oder in
sehr extremer Konzentration in den
Rauchwarnmelder gelangt.
Um einen Störalarm des Rauch-
warnmelders zu vermeiden, sollte das
Gerät vor den hier benannten Umge-
bungseinüssen geschützt werden.
Beim Kochen oder bei starker Wasser-
dampfentwicklung in der Nähe des
Rauchwarnmelders ist stets auf gute
Belüftung der Räume zu achten. Ein
Störalarm ist durch sanften Druck der
Prüf-/Stopp-Taste (Abb. 1, Punkt d)
und durch gutes Belüften der Räume
abzustellen bzw. zu verhindern.
Bitte informieren Sie ihre Nachbarn
über einen Störalarm, damit nicht
unnötig die Feuerwehr alarmiert wird!
ALLGEMEINE SICHERHEITS-
HINWEISE
Rauchwarnmelder unterstützen dabei,
Brände frühzeitig zu bemerken,
können jedoch weder ein Feuer
löschen, noch die Entstehung eines
Brandes verhindern und auch nicht
die Feuerwehr alarmieren.
Rauchwarnmelder geben, wenn
Gefahr durch Brandgase besteht,
einen lauten Alarmton ab, der Sie
auf die Gefahr aufmerksam macht.
Trotz größter Sorgfalt bei der Her-
stellung der Rauchwarnmelder besteht
die Möglichkeit, dass eine Funktions-
störung auftreten und ein Gerät daher
nicht oder nicht rechtzeitig den ggf.
entstandenen Brand melden kann!
de
de

20 21
Bei Renovierungs-, Bau- und Schleif-
arbeiten sollte der Rauchwarnmelder
durch leichten vertikalen Zug vom
Magnetträger (Abb. 1, Punkt b) gelöst
und geschützt aufbewahrt werden.
Nach Beendigung der Arbeiten denken
Sie unbedingt daran, den Rauchwarn-
melder wieder auf dem Magnetträger
(Abb. 1, Punkt b) einzurasten!
Bitte beachten Sie unbedingt:
Nur wenn sich das Gerät an seiner
vorgesehenen Montageposition
bendet, unverschmutzt, unbeschädigt
und aktiviert ist, kann es seine u.U.
lebensrettende Warnleistung
erbringen!
DEKORATION
Die Prüf-/Stopp-Taste (Abb. 1, Punkt
d) des Rauchwarnmelders ist
abnehmbar (Abb. 3) und kann zur
Anpassung des Gerätes an die Raum-
gestaltung dekoriert werden. Bitte
dekorieren Sie ausschließlich diese
Die üblichen Vorsichtsregeln im
Umgang mit Feuer, brennbaren
Materialien und technischen Geräten
sind stets zu beachten!
Dieses Gerät ist ein geschlossenes
System. Jeglicher Eingriff in das Gerät
hat neben demVerlust der gesetz-
lichen Gewährleistungspicht auch
die Folge, dass das Gerät nicht mehr
gemäß seiner Bestimmung eingesetzt
werden kann und darf! Bitte öffnen Sie
das Gerät auf keinen Fall, weil Ihnen
daraus einVerletzungsrisiko entstehen
kann!
Ein Batteriewechsel ist nicht erfor-
derlich und technisch ausgeschlossen.
Bitte schützen Sie das Gerät, insbeson-
dere bei Renovierungsarbeiten, aber
auch generell, vor Nässe, Kälte, Hitze,
Feinstaub, Fett-, Nikotin- und Lack-
dämpfen sowie Anstrichmitteln wie
beispielsweise Wandfarben, Klebstoffen
und Schmutz jeglicher Art.
abnehmbare Fläche des Gerätes und
keinesfalls andere Bereiche! Anschlie-
ßend befestigen Sie diese wieder am
Gerät.
Achtung! Die umlaufenden Rauchein-
lasslamellen (Abb. 1, Punkt c) müssen
stets frei bleiben und dürfen niemals
verdeckt werden!
Das Typschild des Gerätes bendet
sich unter diesem leicht abnehmbaren
Deckel.
BESTIMMUNGSGEMÄSSE
VERWENDUNG
Verwenden Sie das Gerät ausschließ-
lich für den Zweck, für den es gebaut
und konzipiert wurde! Jede andere
Verwendung gilt als nicht bestim-
mungsgemäß! Dieses Gerät darf nur
für folgende(n) Zweck(e) verwendet
werden:
• Feuer- bzw. Rauchdetektion in
privaten Haushalten
• Dieser Rauchwarnmelder besitzt eine
Hitzewarnfunktion. Es ist jedoch kein
Wärmemelder im Sinne der EN 54-5.
Der Einbau des Gerätes in bewohn-
baren Freizeitfahrzeugen (z.B. Wohn-
wagen) ist nicht geprüft worden.
LEBENSDAUER DES GERÄTES
Nach spätestens 12 Jahren ist die
Lebensdauer des Gerätes erreicht.
Bitte tauschen Sie das Gerät aus.
CE-KONFORMITÄT
Dieses Produkt ist nachVeror-
dung (EU) Nr. 305/2011 gemäß
EN14604:2005/AC:2008 als Bau-
produkt geprüft und zertiziert. Die
Produktion wird durch regelmäßige
und unabhängige Kontrollen auf unver-
änderte Einhaltung der gesetzlichen
und normativenVorgaben überwacht.
de
de

22 23
Bezugsnr. der Leistungserklärung:
co_1055
SERVICE
Der PX-1 wird von der
PyrexxTechnologies GmbH hergestellt.
pyrexx.com/de/support
ENTSORGUNG
Dieses Produkt darf gemäß ElektroG
nicht in den Hausmüll gelangen. Bitte
senden Sie das zu entsorgende Gerät
an den Hersteller zur weiteren
Verwertung oder geben es bei Ihrem
regionalen Entsorgungsunternehmen
ab. Bitte beachten Sie, dass durch nicht
ordnungsgemäße Entsorgung die
Umwelt geschädigt werden kann!
de
EN 14604:2005/
AC:2008
1772-CPR-9308

24 25
CONTENTS
Alarm and advisory tones 2
Closed System 8
Figure 1–4 10
Best locations for installation 29
Startup 30
Installation 30
Installation with adhesive 30
Installation with screw anchor 31
Testing and maintenance 31
Low Battery Signal /
Contamination Signal 32
Possible causes for a false alarm 32
General safety information 33
Decoration 34
Intended use 34
Service life of the device 35
CE conformity 35
Service contact 35
Disposal 35
13
en
en
de
35
fr

27
THANKYOU !
We would like to thank you for the
purchase of our product.You have
made a very good choice.This home
smoke alarm device has been devel-
oped and produced with the greatest
care and precision, so that you will be
alerted to a re on time.
Please read this manual thoroughly and
observe all instructions and gures to
ensure optimal performance of the
device.
BEST LOCATIONS FOR
INSTALLATION
Smoke alarm devices should be
installed at a minimum in all bedrooms,
children‘s rooms and hallways serving
as emergency exits.They should be
placed in the middle of the room
on the ceiling. Do not mount on the
wall! (Fig. 4). Select the highest loca-
tion possible for installation with a
minimum distance of 50 cm (20 in.) to
the nearest walls, furniture and lamps.
The device has to be installed parallel
to the ceiling. With a pitched roof, the
slope must not exceed 25 degrees;
otherwise, the functioning of the
device may be severely impaired.
To optimally protect your home, in-
stall the devices in all remaining rooms
as well as in stairwells (Fig. 4).This de-
vice is also suitable for use in kitchens,
the number one source of res!
In washrooms (bathroom, toilet etc.),
a smoke alarm device is usually not
required due to the low re hazard.
In case of re, this device quickly
recognizes smoke from re and the
increasing temperature in the room.
The loud alarm signal serves to warn
you as quickly as possible. If you have
determined there is no emergency
requiring escape, this signal can be
What to do in case of re?
• Stay calm.
• Warn everyone at the residence.
• Help children, the disabled, the elderly and
persons suffering from illness.
• Close all windows and doors behind you.
• Get out of the house immediately.
• Do not use elevators.
• Alert the fire department.
enen

28 29
Installation with screw anchor:
Please leave the adhesive on the
magnetic holder even when installing
with screw and anchor. Drill a hole
at the installation site and insert the
screw anchor supplied into the hole.
Then insert the supplied counter-
sunk screw into the bottom side of
the magnetic holder as displayed in
Fig. 2, so that the screw is ush with
the magnetic holder (Fig. 1b) when
screwed into the anchor.To do this,
push the screw through the perfo-
rated hole.To ensure that the device
is securely fastened, the screw has to
be completely screwed into the recess
of the magnetic holder (Fig. 1b). Please
tighten the screw securely, but without
deforming or bending the magnetic
holder.
TESTING AND MAINTENANCE
The smoke alarm device monitors
itself automatically once a minute for
temporarily deactivated for about 10
min or suppressed even before the
alarm goes off by gently pressing the
test/stop button (Fig. 1d). It is then
recommended to ventilate the rooms
well, which also prevents the alarm
from being set off again.
STARTUP
Please rst remove the safety lock
from the activation button (Fig. 1a)
and make sure that it does not end
up inside the device.Then press the
device‘s activation button (Fig. 1a).
Once the button has been pressed in,
it must be ush with the device hous-
ing. To conrm that the smoke alarm
device has now been activated, a short
test signal is emitted. This conrmation
signal can be repeated by pressing the
test/stop button (Fig. 1d) and serves as
an indication that the device is ready
for operation.
INSTALLATION
The smoke alarm device is kept in
place by a magnetic holder (Fig. 1b).
There are two ways described below
to fasten the holder to the ceiling.
Please keep in mind that the holder
is strongly magnetic only on one side!
Installation with adhesive:
Use exclusively the adhesive supplied
with the product for an adhesive
installation of the device.The instal-
lation location must be solid, dry and
free of grease, dust and loose paint
etc. Remove the information sticker,
as shown in Fig. 2, and the protective
sheet from the adhesive surface. Press
the magnetic holder rmly for about
10 seconds onto the location chosen
for installation. Afterwards, the device
can be mounted onto the magnetic
holder (Fig. 1b).The adhesive bond
attains its nal strength after approx
72 hours.
proper functioning.This device also
automatically regulates the sensitivity
of its optical detection with regard to
its surroundings.
If the energy supply of the smoke
alarm device is low or the optics
become so soiled that automatic
adjustment is no longer possible,
then the device emits a signal alerting
you to these conditions (see “Alarm
and advisory tones”).This gives you
enough time to replace the smoke
alarm device.
Please make sure that the air vents
covering the side of the smoke alarm
device remain free of dust, dirt, paint
or tape etc. Otherwise, the functioning
of the device may be impaired!
To ensure that the device is function-
ing properly, you should regularly press
the test/stop button (Fig. 1d) setting
off the test alarm, at least once a
month. Please check that the device is
not damaged, is mounted securely to
the installation site and that the smoke
enen

30 31
other very small organisms have gotten
past the insect barriers of the device.
Careful cleaning of the device with a
vaccum cleaner on a regualar basis may
prevent false alarm due to contamina-
tion.
• Extreme temperature uctuations or
very strong electro-magnetic radiation
in the direct vicinity of the smoke
alarm device have an impact on the
device.
• Cigarette smoke only sets off the
alarm when smoke enters the device
either directly from the immediate
vicinity or due to extremely high
concentrations.
To avoid a false alarm from the smoke
alarm device, the device should be pro-
tected against all of the environmental
effects mentioned here.
When cooking or generally when
intake ns (Fig. 1c) remain completely
free of foreign objects.
If the acoustic signal is not emitted
during alarm testing, then the device
has to be replaced.
LOW BATTERY SIGNAL/
CONTAMINATION SIGNAL
The smoke alarm device is capable of
emitting either of the two advisory
tones for a maximum of 60 days. It
is imperative to replace the device
during this period!
POSSIBLE CAUSES FOR A FALSE
ALARM
• One or more of the following sub-
stances have entered directly into the
device: heavy vapor from cooking, boil-
ing or frying; air freshener, fragrance
or insect spray; pollen; dust from
construction or sanding; ne dust.
• One or more very small insects or
heavy steam arises near the smoke
alarm device, always ventilate the
rooms well. A false alarm can be
turned off or prevented by gently
pressing the test/stop button (Fig. 1d)
and ventilating the rooms well.
Please inform your neighbors in case
of a false alarm, so that the re depart-
ment is not unnecessarily alerted.
GENERAL SAFETY INFORMATION
Smoke alarm devices help to spot res
early but can neither extinguish res,
prevent the start of res, nor alert the
re department.
Smoke alarm devices emit an alarm
when there is a hazard due to fumes
and to call your attention to this
hazard.
Despite taking the greatest care in the
production of smoke alarm devices,
there is the possibility of malfunction,
in which case the device may not be
able to quickly alert or to alert at all
to the possible start of a re. Always
observe the usual precautionary meas-
ures for dealing with re, combustible
materials and technical equipment!
This is a self-contained device. Open-
ing or modifying the device results not
only in loss of the guarantee but also
has the consequence that the device
can and must no longer be used as
intended. Please do not ever open the
device due the risk of injury!
Changing the battery is neither
required and nor even possible.
Please protect this device, especially
during renovation but also generally,
against wetness, cold, heat, ne dust,
vapors with oil, nicotine or paint as
well as paint supplies such as wall
paint, adhesives and all kinds of dirt.
During renovation, construction or
sanding, the smoke alarm device may
be removed from the magnetic holder
(Fig. 1b) by lifting it lightly upwards and
then stored safely.
enen

32 33
The identication plate of the device
is found under this easily removable
cover.
INTENDED USE
Use this device exclusively for the
purpose it was designed and built
for! Any other application is not as
intended!
This device may only be used for the
following purpose(s):
• Detection of re or smoke in private
households
• This smoke alarm device comes with
heat warning functionality. It is how-
ever not a heat detector according to
EN 54-5.
The installation and use of this device
in habitable recreation vehicles (e.g.
travel trailers) has not been tested.
After nishing the work, it is vitally
important to remember to place the
smoke alarm device back on the mag-
netic holder (Fig. 1b).
Please always observe the following:
Only when the device is located at
its intended installation site, unsoiled,
undamaged and activated is it able to
perform its potentially life-saving task
of signaling alarm.
DECORATION
The smoke alarm devices test/stop
button (Fig. 1d) is removable (Fig. 3)
and can be decorated to match the
design of the room. Please decorate
exclusively this removable surface of
the device and never any of its other
areas. Afterwards, please refasten it to
the device.
Caution! The smoke intake ns (Fig. 1c)
on the side of the device must always
be kept clear of obstruction and may
never be blocked!
SERVICE LIFE OF THE DEVICE
After 12 years at most, the end of the
service life of the device will have been
reached. Please replace the device.
CE CONFORMITY
This product has been tested
and certied according to the
Construction Products Regulation
(EU) No 305/2011 (CPR) under the
terms of EN14604:2005/C:2008 as
a building product. Production is
monitored by regular and independent
inspections of consistent compliance
with legal and regulatory requirements.
Reference number for the declaration
of performance: co_1055
SERVICE
The PX-1 is produced by
Pyrexx Technologies GmbH.
pyrexx.com/en/support
DISPOSAL
According to the EU’s Restriction of
Hazardous Substances Directive, this
product may not be disposed of in
household garbage. Please send the
device back to the manufacturer for
recycling or give it to the waste
management company responsible for
this in your area. Please keep in mind
that improper disposal can harm the
environment.
enen
EN 14604:2005/
AC:2008
1772-CPR-9308

34 35
TABLE DES MATIÈRES
Alarme et tonalités 2
Système fermé 8
Graphiques 1-4 10
Sélection de l'emplacement
de montage 37
Mise en service 38
Montage 38
Montage par collage 38
Montage par perçage 39
Contrôle et entretien 39
Signal de batterie faible/
Alarme de contamination 40
Causes possibles d'une
fausse alarme 41
Consignes générales de sécurité 42
Décoration 43
Utilisation conforme 43
Durée de vie de l'appareil 44
Conformité CE 44
Contact pour le service 44
Traitement des déchets 44
fr
fr
13
25
de
en

37
MERCI !
Nous vous félicitons d’avoir choisi
notre produit et nous vous remer-
cions de votre conance ! Vous avez
fait un très bon choix. Ce détecteur de
fumée domestique a été mis au point
et fabriqué avec le plus grand soin
an d’attirer votre attention en temps
voulu sur un risque d’incendie.
Veuillez lire cette notice dans son
intégralité et respecter toutes les
consignes et gures an d’utiliser au
mieux l’appareil.
SÉLECTION DE L’EMPLACEMENT
DE MONTAGE
Les détecteurs de fumée font
partie de l’équipement de base
devant se trouver dans toutes les
chambres à coucher, les chambres
pour enfants et les voies servant de
sortie de secours. Ils doivent être
montés systématiquement au centre
au plafond (pas de montage mural !)
(g. 4). Choisissez l’emplacement de
montage le plus haut en respectant
une distance minimum de 50 cm par
rapport aux murs, meubles et lampes
avoisinants. L’appareil doit être installé
à l’horizontale par rapport au plafond.
En cas de combles, l’inclinaison ne doit
pas dépasser 25 degrés car sinon la
fonctionnalité de l’appareil peut être
sensiblement limitée.
Vous aurez un équipement optimal
en installant les appareils également
dans toutes les autres pièces et dans
les cages d’escalier (g. 4). Cet appareil
est également adapté pour une utili-
sation dans la cuisine (principal foyer
d’incendie) !
Dans les salles de bains, toilettes,
buanderies, etc. un détecteur de fumée
n’est en général pas nécessaire en
raison du faible risque d’incendie à ces
endroits.
Que faire en cas d’incendie ?
• Conservez votre calme.
• Avertissez tous les autres habitants.
• Aidez les enfants, les personnes handicapées
et les personnes malades.
• Fermez toutes les fenêtres et les portes
derrière vous.
• Quittez immédiatement la maison.
• N’utilisez pas d’ascenseur.
• Avertissez les pompiers.
fr
fr

38 39
par l’usine avec le produit !
L’emplacement de montage doit être
solide, sec et exempt de graisses, de
poussières et de peinture s’écaillant.
Retirez l’autocollant d’information
comme illustré à la g. 2, et la feuille
de protection de la colle appliquée sur
l’aimant, et appuyez sur le support
magnétique pendant env. 10 secondes
en position de montage. Ensuite, vous
pouvez poser l’appareil sur le support
magnétique (g. 1, point b).
L’assemblage collé atteint sa résistance
nale après env. 72 heures.
Montage par perçage :
Pour le montage par perçage, laissez la
colle appliquée départ usine sur le
support magnétique. Percez un trou à
la position de montage et insérez la
cheville fournie dans le trou de
perçage. Faites alors passer la vis à
tête fraisée fournie par le bas du
support magnétique illustré à la g. 2,
de sorte qu’après vissage dans la
En cas d´incendie, cet appareil détecte
la fumée montante en temps voulu
dans la pièce ainsi que l´augmentation
de température due à l´incendie. Pour
vous avertir en temps voulu, un signal
d’avertissement retentit. Si vous
pouvez exclure une raison grave
de prendre la fuite, vous pouvez
désactiver provisoirement (env. 10
min.) ce signal, ou bloquer le
déclenchement de l’alarme en
appuyant doucement sur le bouton
test / arrêt (g. 1, point d) de l’appareil.
Il est donc conseillé de bien aérer la
pièce an d’éviter un nouveau
déclenchement de l’alarme.
MISE EN SERVICE
Veuillez retirer d’abord le blocage
d’activation (comme par ex. une
goupille) du bouton d’activation (g. 1,
point a), et assurez-vous que cette
pièce ne tombe pas à l’intérieur de
l’appareil ! Appuyez ensuite sur le
bouton d’activation (g. 1, point a) de
l’appareil. Une fois enfoncé, ce bouton
doit être aligné sur le boîtier de
l’appareil ! Pour conrmer que votre
détecteur de fumée est maintenant
activé, un bref signal acoustique de
contrôle retentit après l’activation. Ce
signal acoustique de contrôle, qui se
répète lorsque vous appuyez sur le
bouton contrôle/arrêt (g. 1, point d),
signale que l’appareil est prêt à
fonctionner.
MONTAGE
Le détecteur de fumée est xé par un
support magnétique (g. 1, point b). Il
existe deux possibilités décrites
ci-après pour xer ce support au
plafond.Veuillez noter que l’effet
d’attraction du support magnétique
n’agit fortement que d’un côté !
Montage par collage :
Pour un montage par collage de
l’appareil, n’utilisez que la colle fournie
cheville, la vis ne dépasse pas du
support magnétique (g. 1, point b)
(posez la vis dans le perçage perforé).
La vis doit être entièrement vissée
dans l’évidement du support
magnétique destiné à cet effet (g. 1,
point b), an de garantir une xation
sûre de l’appareil !Veuillez serrer la vis
uniquement de sorte que le support
magnétique ne se déforme/ne
s’incurve pas !
CONTRÔLE ET ENTRETIEN
Ce détecteur de fumée contrôle
automatiquement son état opération-
nel une fois par minute. En outre,
l’appareil régule automatiquement la
sensibilité de son bloc optique de
détection en fonction des facteurs
ambiants.
Si le détecteur de fumée ne dispose
plus de la totalité de sa réserve en
énergie, ou si l’encrassement du bloc
optique de détection ne permet plus
fr fr
Other manuals for PX-1
7
Table of contents
Languages:
Other pyrexx Smoke Alarm manuals