manuals.online logo
Brands
  1. Home
  2. •
  3. Brands
  4. •
  5. Q'STRAINT
  6. •
  7. Wheelchair
  8. •
  9. Q'STRAINT Q'POD User manual

Q'STRAINT Q'POD User manual

USE & CARE MANUAL
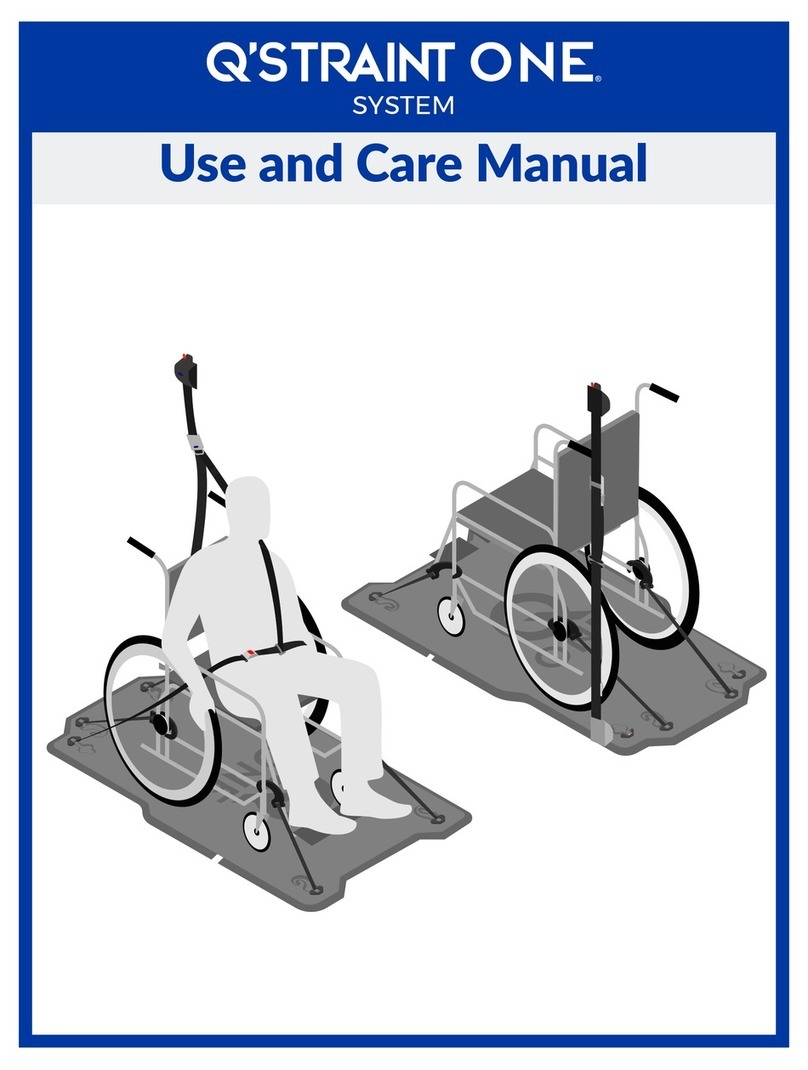
• This manual is a comprehensive step-by-step user instruction guide for the Q’Pod Wheelchair Securement System.
• Make sure to read, understand and follow all these instructions. Improper use of this product may result in personal injury.
• To address any questions related to ordering parts, operating the Q’Pod Wheelchair Securement System, troubleshooting, maintenance, service or
anything else, contact a Q’Straint® authorized dealer.
• All deviations and alterations from these instructions MUST be reported to a Q’Straint® authorized dealer.
IMPORTANT SAFEGUARDS AND WARNINGS
• All equipment and components MUST be installed and serviced by an
experienced and trained technician.
• Users MUST never attempt to repair, adjust or modify any components
of the Q’Pod Wheelchair Securement System and/or Seatbelts.
• Do NOT use the Q’Pod Wheelchair Securement System if any
components are missing, defective or if webbing is cut, frayed, burnt,
melted or abraded.
• This system MUST only be used with wheelchairs in forward facing
applications and cannot be altered or modied in any way.
• The Q’Pod Wheelchair Securement System and components comply
with all applicable requirements of safety regulations and standards
including 49 CFR Part 38 ADA, and 36 CFR Part 1192 ADA, as
applicable.
• J-Hooks must be attached to a solid wheelchair frame (no spokes or
removable components) and Rear J-Hooks at approximate 30 - 45
degree angle with the oor.
• DO NOT allow webbing to get twisted inside the retractors or come in
contact with sharp corners and edges.
• Compliant Shoulder and Pelvic Belt Restraint must go across
occupant’s shoulder and pelvis (lap), and not be worn twisted or
held away from the occupant’s body by wheelchair components. We
recommend using both a pelvic and shoulder belt together and not
individually since it will compromise the performance of the system.
• Make sure shoulder belt does not rub against the occupant’s neck.
• This system is a complete integrated system, do not alter or modify
it in any way and do not interchange or substitute any components.
Any deviation from these recommendations is the responsibility of the
installer.
• The Q’Pod Wheelchair Securement System and components have
been tested in a conguration similar to the recommendations in this
manual.
• The Q’Pod Wheelchair Securement System and its components
MUST be regularly inspected, cleaned and maintained—reference the
Maintenance and Care section in this manual.
• Regulations and standards in some countries require the installation
of a shoulder and pelvic belt to be considered a compliant wheelchair
securement system. The Q’Pod Wheelchair Securement System plus
the shoulder and pelvic belt (occupant restraint) make a complete
wheelchair securement system.
• The Q’Pod Wheelchair Securement System should not be operated
by anyone who does not have full comprehension of how the system
works or if the system is not working properly.
• The Q’Pod Wheelchair Securement System and all system components
including oor and wall anchorages MUST be replaced after any form of
a vehicle collision.
• Broken and worn components MUST be replaced.
• All damages and defects MUST be reported to Q’Straint® authorized
dealer.
• Only use Q’Straint® components with this system, unless otherwise
stated.
• Installer is responsible for making sure the installed Q’Pod Wheelchair
Securement System meets all applicable regulations and standards—
and that the system works according to the instructions in the section
of this manual called Operating Instructions.
• Keep loose articles of clothing away from retractors.
SAVE THESE INSTRUCTIONS
READ ALL INSTRUCTIONS PRIOR TO OPERATING
COMPLIANCE
The Q’Pod Wheelchair Securement System and components comply with all applicable requirements of safety regulations and standards including
49 CFR Part 38 ADA, and 36 CFR Part 1192 ADA, as applicable.
REAR
1. Attach shoulder belt pin
connector to pin on wall side lap
belt, then secure seatbelts onto
the storage pin under ip-up
seat .
2. Backup wheelchair to park zone .
3. Pull paddle handle to release
rear retractors and activate
XPress Timer.
4. Attach both rear J-hooks to rear
wheelchair frame .
5. Backup wheelchair within park
zone and against side bumper
or closest proximity.
RELEASINGSECURING IMAGES
FRONT
6. Attach front J-hook to front
wall side wheelchair frame .
For scooters, loop J-hook around
front wheel frame, and then
insert J-hook (facing out) through
O-ring G.
7. Pull down tension handle to
tension front J-hook .
Do not over tension J-hook.
8. Lock wheels or power off chair.
SEATBELTS
9. Extend shoulder belt and wall
side lap belt across occupant’s
shoulder and hip ; then buckle
them to the aisle side lap belt .
Buckled seatbelts should
be against occupant’s
hipbone .
10. Occupant and wheelchair are
secured and ready to go.
SEATBELTS
1. Detach shoulder belt pin connector
from pin on lap belt .
2. Unbuckle lap belt and place
all seatbelts in storage.
If needed, press seatbelt
release button .
FRONT
3. Pull down and turn tension
handle , then return tension
handle to the vertical position
to release front J-hook
tension .
4. Remove front J-hook from
wheelchair frame or scooter .
Place J-hook in storage ring .
5. Unlock wheels or power on
chair.
REAR
6. Pull paddle handle to release
rear retractors and activate
XPress Timer.
7. Move wheelchair forward, remove
rear J-hooks from rear wheelchair
frame and place J-hooks in
storage .
8. Occupant and wheelchair are
released and ready to go.
A
B
C
D
E
park zone
H
KF
J
FG
wheelchair scooter
L
M
N P
ex: J-hook tie-down
OPERATING INSTRUCTIONS
RELEASINGSECURING IMAGES
SEATBELTS
1. Detach shoulder belt pin connector
from pin on lap belt .
2. Unbuckle lap belt and place
all seatbelts in storage.
If needed, press seatbelt
release button .
FRONT
3. Press button , push back
tension handle and release
button to release front J-hook
tension .
4. Remove front J-hook from
wheelchair frame or
scooter . Place J-hook in
storage ring .
5. Unlock wheels or power on
chair.
REAR
6. Pull paddle handle to release
rear retractors and activate
XPress Timer.
7. Move wheelchair forward, remove
rear J-hooks from rear wheelchair
frame and place J-hooks in
storage .
8. Occupant and wheelchair are
released and ready to go.
A
B
C
D
E
park zone
JK
wheelchair scooter
ex: J-hook tie-down
REAR
1. Attach shoulder belt pin connector
to pin on wall side lap belt, then
secure seatbelts onto the storage
pin under ip-up seat .
2. Backup wheelchair to park zone .
3. Pull paddle handle to release
rear retractors and activate
XPress Timer.
4. Attach both rear J-hooks to rear
wheelchair frame .
5. Backup wheelchair within park
zone and against side bumper
or closest proximity.
release mode
FRONT
Make sure Tensioner is in
release mode .
6. Attach front J-hook to front
wall side wheelchair frame .
For scooters, loop J-hook around
front wheel frame, and then
insert J-hook (facing out) through
O-ring .
7. Press button , pull down
tension handle , release
button, and crank handle until full
tension is reached and clutch slips.
Make sure Warning Sign is
NOT visible.
8. Lock wheels or power off
chair.
SEATBELTS
9. Extend shoulder belt and wall side
lap belt across occupant’s shoulder
and hip
; then buckle them to
the aisle side lap belt .
Buckled seatbelts should be
against occupant’s
hipbone .
10. Occupant and wheelchair are
secured and ready to go.
OPERATING INSTRUCTIONS
Yellow Warning Sign indicates
Tensioner is in RELEASE MODE,
DO NOT transport occupant when visible.
www.qstraint.com
This manual contains the most current information at the time of printing. Q’Straint® reserves the right to modify systems, components and content without notice.
This manual was printed on 30% post-consumer stock using vegetable oil based inks and is 100% recyclable.
© 2016 Q’Straint®. All Rights Reserved. QPOD® is a registered trademark of Q’Straint®, Inc.
FOR TECHNICAL SUPPORT OR TO FIND YOUR NEAREST AUTHORIZED DEALER:
Q’Straint Europe
72-76 John Wilson Business Park
Whitstable, Kent, CT5 3QT
United Kingdom
Tel: +44 (0)1227 773035
Fax: +44 (0)1227 770035
Email: [email protected]
Q’Straint America
5553 Ravenswood Road, #110
Ft. Lauderdale, FL 33312
Tel: 800-987-9987
Fax: 954-986-0021
Email: [email protected]
Q’Straint Australia
Tramanco Pty Ltd.
21 Shoebury Street,
Rocklea, Australia, QLD. 4106
Tel: +61 7 3892 2311
Fax: +61 7 3892 1819
Email: [email protected]
5 YEAR WARRANTY – ON TENSIONER, PADDLE HANDLE, FRONT AND REAR RETRACTORS ONLY
WARRANTY REGISTRATION
In order to take full advantage of Q’Straint’s warranty, register your product online at: www.qstraint.com/registration
PLEASE DO NOT MAIL IN THIS REGISTRATION. Before going online, have your vehicle’s registration handy as well as the equipment’s:
Serial # __________________________________________________ Part # __________________________________________________
Q’STRAINT’S LIMITED WARRANTY: Q’Straint® warrants this product conforms to our manufacturing specications and to be free from defects in
materials and workmanship. Q’Straint® or its authorized dealer will (at its sole discretion), repair or replace the defective component(s) free of charge.
This warranty does not cover the cost of assembly or disassembly, transportation, labor, or any other incidental costs involved in the removal of a
defective part or the installation of the replacement part.
Q’Straint® or its authorized dealers reserves the right to inspect the product to verify the claimed defect has not been caused by non-Q’Straint® approved
maintenance or by foreign particles or substances. This Warranty does not apply to defects that result from accident, misuse or abuse, intentional
damage, re, ood, alteration or modication of the product, negligence, exposure, or use of the product in a manner inconsistent with its intended use.
MAINTENANCE & CARE
• Always keep belts clean and off the oor.
• All systems and components MUST be regularly inspected, tightened,
cleaned, and maintained.
• Clean webbing periodically with mild soap and water. After cleaning,
fully extend belts and position them to prevent water from entering
retractors until completely dry.
• Make sure to prevent contamination of the webbing by keeping it away
from polishes, oils or other chemicals (particularly battery acid).
• Occasionally lubricate buckles and ttings, without contaminating the
webbing.
• Clean bolt threads and reapply permanent thread locker if bolts are
adjusted.
• Frayed, contaminated or damaged webbing MUST be replaced
immediately.
• Systems or components exposed to a vehicle accident, showing signs
of missing parts, excessive damage or wear MUST be replaced.
EMERGENCY RELEASE
The following items should be inspected and serviced by an experienced and trained technician during the scheduled maintenance of the Q’Pod
Wheelchair Securement System.
First, release Occupant
Restraint (Shoulder and
Pelvic Belt). If Occupant
Restraint System does not
release occupant press
Seatbelt Release Button,
or in an emergency cut
webbings at an angle.
If retractors do not release
the webbing, pull Paddle
Handle, or in an emergency
cut the front and rear
webbings at an angle.
Seatbelt Release Button
Paddle Handle
Q5-1161-QPOD Rev B

Other Q'STRAINT Wheelchair manuals

Q'STRAINT SURE-LOK DOUBLE INERTIA OCCUPANT BELT User manual

Q'STRAINT

Q'STRAINT SURE-LOK DOUBLE INERTIA OCCUPANT BELT User manual

Q'STRAINT QRT-1 Series User manual

Q'STRAINT

Q'STRAINT QRT-1 Series User manual

Q'STRAINT INQLINE SECUREMENT User manual

Q'STRAINT

Q'STRAINT INQLINE SECUREMENT User manual

Q'STRAINT ONE User manual

Q'STRAINT

Q'STRAINT ONE User manual

Q'STRAINT QRT-1 Series User manual

Q'STRAINT

Q'STRAINT QRT-1 Series User manual

Q'STRAINT QLK-150 User manual

Q'STRAINT

Q'STRAINT QLK-150 User manual

Q'STRAINT QLK-150 User manual

Q'STRAINT

Q'STRAINT QLK-150 User manual

Q'STRAINT QLK-150 User manual

Q'STRAINT

Q'STRAINT QLK-150 User manual

Q'STRAINT QRT-1 Series User manual

Q'STRAINT

Q'STRAINT QRT-1 Series User manual

Q'STRAINT INQLINE User manual

Q'STRAINT

Q'STRAINT INQLINE User manual

Q'STRAINT QLK-150 User manual

Q'STRAINT

Q'STRAINT QLK-150 User manual

Q'STRAINT QLK-150 User manual

Q'STRAINT

Q'STRAINT QLK-150 User manual

Q'STRAINT QUANTUM User manual

Q'STRAINT

Q'STRAINT QUANTUM User manual

Popular Wheelchair manuals by other brands

R82 Wombat Living 1 user guide

R82

R82 Wombat Living 1 user guide

GRIT GRITJunior Assembly guide & user's manual

GRIT

GRIT GRITJunior Assembly guide & user's manual

Seca 952 Instruction manual and guarantee

Seca

Seca 952 Instruction manual and guarantee

Breezy Breezy 90 Directions for use

Breezy

Breezy Breezy 90 Directions for use

Anatomic SITT Zitzi Sharky Pro user manual

Anatomic SITT

Anatomic SITT Zitzi Sharky Pro user manual

Pegasus Zorg VARIA user manual

Pegasus Zorg

Pegasus Zorg VARIA user manual

alerta ALT-1100 user manual

alerta

alerta ALT-1100 user manual

Quickie Q7 Adjustable owner's manual

Quickie

Quickie Q7 Adjustable owner's manual

DNR 20/TCAL2405 user manual

DNR

DNR 20/TCAL2405 user manual

Novis BetterLiving user guide

Novis

Novis BetterLiving user guide

Breezy Ultra 4 owner's manual

Breezy

Breezy Ultra 4 owner's manual

Pronto M50 Owner's operator and maintenance manual

Pronto

Pronto M50 Owner's operator and maintenance manual

GODONNIER 134700 manual

GODONNIER

GODONNIER 134700 manual

Sunrise Medical Quickie Freestyle M11 User instruction manual & warranty

Sunrise Medical

Sunrise Medical Quickie Freestyle M11 User instruction manual & warranty

Drive SSP118FA-SF manual

Drive

Drive SSP118FA-SF manual

DJMed M2 El-Tip manual

DJMed

DJMed M2 El-Tip manual

SPEX Arm & Thigh Supports Installation & user manual

SPEX

SPEX Arm & Thigh Supports Installation & user manual

Sunrise Medical Breezy Ultra 4 Brochure & specs

Sunrise Medical

Sunrise Medical Breezy Ultra 4 Brochure & specs

manuals.online logo
manuals.online logoBrands
  • About & Mission
  • Contact us
  • Privacy Policy
  • Terms and Conditions

Copyright 2025 Manuals.Online. All Rights Reserved.