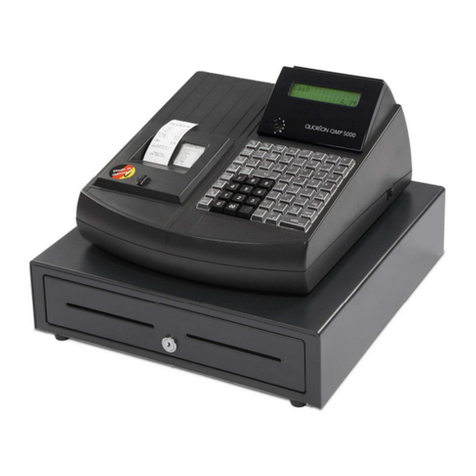
QUORION QMP 50 Series User manual

User Manual
Electronic Cash Register
QMP 50 series

2
Dear valued customer!
On behalf of our company we wish to welcome you to the QUORiON family of fine business machines. We
sincerely hope you will appreciate the many benefits of being associated with a distinguished product name
that represents both quality and commitment to customer satisfaction.
The QUORiON QMP 50 series is fully customizable and yet simple to operate. Users can easily adapt it to
any type of retail and scanning system. Moreover, our dynamic software generates a compatible
environment for a wide array of peripheral devices. It is exactly this versatility and quality that has made us
successful among our multinational customers.
It is therefore with great pride that we look forward to continuing our close collaboration with our
customers.
Your QUORiON Team

3
Table of contents
1 Safety Precautions .............................................................................................. 5
1.1 Overview........................................................................................................................................ 5
1.2 General safety precautions ............................................................................................................. 6
2 QMP 50 ............................................................................................................... 7
2.1 Intended use .................................................................................................................................. 7
2.2 The cash register and its components.............................................................................................. 8
2.3 Technical data ................................................................................................................................ 9
2.4 Interfaces and connections ........................................................................................................... 10
3 Before you start ................................................................................................ 11
3.1 Setting up..................................................................................................................................... 11
3.2 Installing a paper roll .................................................................................................................... 11
3.3 Switch ON / OFF ........................................................................................................................... 12
4 Overview........................................................................................................... 13
4.1 Naming convention ...................................................................................................................... 13
4.2 Operating modes.......................................................................................................................... 14
4.3 Names of Keys and their Function ................................................................................................. 14
5 Sign in and Register........................................................................................... 16
5.1 Sign in a Clerk/Sales Person .......................................................................................................... 16
5.2 Register a Department.................................................................................................................. 16
5.3 Register Pre-Programmed PLUs..................................................................................................... 16
5.4 Multiplication/Division ................................................................................................................. 16
5.5 Tendering in Local Currency .......................................................................................................... 17
5.6 Receipt copy................................................................................................................................. 17
5.7 No Sale / Open Drawer ................................................................................................................. 17
6 Corrections........................................................................................................ 17
6.1 Clearing of Inputs and Error Messages........................................................................................... 17
6.2 Error Correction............................................................................................................................ 17
6.3 Void ......................................................................................................................................... 18
6.4 Refund ......................................................................................................................................... 18
7 Discounts, RA and PO ........................................................................................ 19
7.1 Percentage Discount/Surcharge .................................................................................................... 19
7.2 Amount Discount/Surcharge......................................................................................................... 19
7.3 Received on Account / Paid Out .................................................................................................... 19
8 Reports20
8.1 User Reports................................................................................................................................. 20
9 Programming .................................................................................................... 21
9.1 Programming of Date and Time..................................................................................................... 21
9.2 Adjusting the screen contrast........................................................................................................ 21

4
10 Instructions for maintenance .......................................................................... 21
10.1 Cleaning ..................................................................................................................................... 21
11 Information on the Electromagnetic Compatibility and Safety ........................ 22

5
1 Safety Precautions
1.1 Overview
At specific places in this documentation you can find separated information in the form of hints. Below the
different types are explained.
»Warning«
Warning!
Indicates a potentially imminent danger that may result in death or serious injury if not
avoided. The note is marked by a red icon in the form of a warning triangle. It contains
information about the nature and source of the danger, the consequences of ignoring
and the avoiding.
»Caution«
Caution!
Indicates a possible danger that may result in minor personal injury or property damage if
not avoided. The note is marked by a red icon in the form of a warning triangle. It
contains information about the nature and source of the danger, the consequences of
ignoring and avoiding.
»Important«
Important:
This hint informs you of important conditions relating in association with certain features
of your POS System.
»Tip«
Tip:
Tips will give you useful hints on how to perform certain actions with your POS System
quickly and easily.

6
1.2 General safety precautions
To avoid personal injury and/or property damage, the following safety precautions must be followed.
Damage caused by improper handling or failure to follow these precautions are not subject to warranty. No
liability for resulting damages is assumed by QUORiON!
Warning!
Electric shock and fire hazards due to improper commissioning and handling
Risk of severe burns or death
–Only use the device with the corresponding supplied AC adapter. Do not connect
power adapters from other manufacturers.
–Never use a damaged power cable.
–Make sure your power cable meets the relevant safety standards and includes a
power-system ground terminal (PE terminal).
–Before connecting the device make sure that the voltage of your main power net
corresponds to the input voltage printed on the rating plate of your device.
–Never connect or disconnect the power plug with wet hands.
–Always connect the power cable to the device before connecting it to the wall outlet.
–Only connect the device to a socket with a grounded protective conductor.
–Only use original QUORiON components or components and peripherals approved by
QUORiON.
–Opening the device as well as maintenance and repair work has to be carried out by
qualified service technicians only.
–Do not make any modifications to the device and its components and peripherals.
–Keep away any liquids from the device and do not place any containers with liquids on
the device. Disconnect the device from the main power net before cleaning. If any
liquid spills into the equipment, unplug the power cable immediately and contact your
local dealer for advice.
Caution!
Equipment damage due to improper commissioning and handling
Internal and external damage to the POS System
–Place the device on a firm, stable, horizontal surface.
–Switch off the device before connecting or disconnecting any peripheral devices.
–Use only shielded cables for connecting any peripheral devices.
–Cables should be routed in a manner that no one can step on or trip over.
–Never attempt to stretch the cables to enable a connection. The power cable must
have adequate slack at all times during use.
–When disconnecting the power cable hold it firmly at the connector area. Do not tug
on the cable itself.

7
2 QMP 50
2.1 Intended use
Do not use the device outdoors.
Place the device on a firm, stable, horizontal surface.
Only use the device with the corresponding supplied AC adapter. Do not connect power adapters from
other manufacturers.
Before connecting the device make sure that the voltage of your main power net corresponds to the
input voltage printed on the rating plate of your device.
Make sure your power cable meets the relevant safety standards and includes a power-system ground
terminal (PE terminal).
Do not connect the device to electrical outlets close to devices that generate voltage fluctuations or
electrical noise. In particular, stay clear of devices that use large electric motors.
Only use original QUORiON components or components and peripherals approved by QUORiON.
Opening the device as well as maintenance and repair work has to be carried out by qualified service
technicians only.
Do not make any modifications to the device and its peripherals and components.
Keep the device away from high temperature, humidity, extreme changes in temperature, heating and
cooling equipment, direct sunlight, volatile materials, high levels of dust, vibration and impact.
To prevent possible harm to the environment and human health please separate this product from
other waste streams to ensure that it can be recycled in an environmentally sound manner. For more
details on available collection facilities please contact your local dealer where you purchased this
product.
Keep this manual and distribute the product only with the manual and the accessories supplied to third
parties.
Any other use than the one described is not as intended. QUORiON Data Systems does not accept
liability for any damages, functional impairments or injuries resulting from improper use.

8
2.2 The cash register and its components
Keyboard (36 keys)
Printer
ON / OFF Key
Operator display
Customer Display
Interfaces

9
2.3 Technical data
Processor
CPU
32 bit ARM 966E
Memory
Program Memory
1 MB Flash ROM
Data Memory
2 MB Flash ROM
Working Memory
96 kB SRAM (battery buffered)
Display
Operator Display
192 x 32 graphical
Customer Display
192 x 32 graphical
Keyboard
Internal
36 keys raised
Printer
Internal
58 mm thermal, without cutter
38 mm thermal, without cutter
Interfaces
Serial
2 x RS232-5V (RJ45)
Cash Drawer
1 x RJ11-9V
USB
1 x USB 2.0 Device (Type B)
Software
Application
Application software QMP
Number of PLU’s
10000
Number of Departments
100
Number of Clerks
50
Number of Sales Persons
50
Number of Customer Reports
10
Specifications
Dimension
300 x 260 x 100 mm
Weight
2 kg
Power Supply
110 … 240 V
Operating Temperature
0 … +45°C
Storage Temperature
-20 … +60°C

10
2.4 Interfaces and connections
The QMP 50 series is equipped with two RS232, one USB device and one cash drawer interfaces. The RS232
ports are used to connect peripheral devices like scanner, display, QuoriLog etc. The USB port is only
prepared for PC communication. It is not to be used with USB devices, like memory sticks, scanners,
printers etc
Important:
Use only shielded cables for connecting any peripheral devices. Switch off the cash
register before connecting or disconnecting any peripheral devices. Please note also the
maximum cable lengths of 5 meters for USB and 15 meters for RS232.
Location of the interfaces (rear view):
USB
RS 232 Port 1
RS 232 Port 2
Power Supply
Cash Drawer
(DRW 9V, 5Ω)

11
3 Before you start
3.1 Setting up
Place the cash register on a stable or even surface. Use it only within the operating temperature range (see
technical data) and protect it from splashes and high humidity.
The cash register comes with an external power supply. First, please check if the specifications printed on
the label fit your local voltage. If so, connect the power pack to. The power plug is at the rear next to the
interfaces. Now connect the power supply with the power circuit and turn on the QMP 50 series with the
main switch.
The cash register will now load the operating system and automatically launch the cash register program.
You may immediately start working with your new system.
3.2 Installing a paper roll
1. Open the printer cover.
2. Press the Easyload lever and fold the Easyloadcover up.
3. Insert the paper roll as shown below.
4. If you use a paper journal (2x 38 mm) please turn the paper of the journal a few times around the paper
winding wheel.
5. Close Easyloadcover
6. Close the printer cover

12
To remove the paper roll, follow the steps below:
1. Open the printer cover
2. Press the Easyload lever and fold the Easyloadcover up.
3. Remove the paper roll
4. Close the printer cover
Note: Do not pull out the remaining paper in the opposite direction of the paper feed!
3.3 Switch ON / OFF
To switch the cash register ON or OFF, please press and hold this button 3 seconds.

13
4 Overview
4.1 Naming convention
The following sections describe the basic operation of your POS system is described with reference to
exemplary handling instructions. The term "key" used for the operating elements stands for both buttons
within the user interface of touch-based POS systems as well as the keys on a keyboard-based cash register.
Operating element
Meaning
Single function key within the user interface/keyboard layout.
Dual function key within the user interface/keyboard layout: Additionally serves
as a system key in the operating modes X, Z and P. Note that this second function
is not always displayed within the user interface of your POS system, but can
nevertheless been used.
Individually programmed key within the user interface/keyboard layout, for
example one of the various direct selection keys for registering items.
Short additional handling instruction, for example entering a code on the
numeric keypad of the user interface.
Tip:
Key assignment and programming of the POS system sometimes vary according to the
work environment and required functions. Some keys therefore may not be found within
the keyboard layout of your POS system or are labeled differently. For questions regarding
the individual configuration of your POS system, consult the QProg documentation, the
documentation on our website www.quorion.de or your local QUORiON dealer.
PLU
0
Code
#
CASH
CR

14
4.2 Operating modes
The operating modes control the operation of your Cash Register. There are five different modes for
various functions. The selection of an operating mode can be done either by soft key on keyboard.
Soft key
Mode
Display
Function
R
–REG –
Registration
all sales operations and registrations
X
––X ––
X-Report
viewing and printing of all reports without clearing
Z
––Z ––
Z-Report
viewing and printing of all reports with clearing
M
–MGR –
Manager
all sales operations and registrations
all functions with manager authority
easy programming
P
––P ––
Programming
programming of all functions
4.3 Names of Keys and their Function
Key label
Key name
Key function
Numeric Keys
- used to enter numbers
- used to enter letters in P-mode
Receipt Feed
- advances the receipt paper
Clear
- clears incorrect entries and stops the error alarm
Error Correction
- deletes the last registration
Void
- voids a previously entered transaction
Clerk
- used to enter a preset clerk ID numeric code no.
PLU Price Entry
- used to manually change a preset PLU price
X
RXZMP
CLEAR
0
9
RECEIPT
EC
VOID
Clerk
#
New
Price

15
Key Label
Key Name
Key Function
Multiplication
- used to enter multiplications
- used to switch the operating mode of the cash register
PLU
- used to access preset PLU items
Department
- used to enter items to the respective departments
Received on Account
- used to record payments to the drawer
Paid Out
- used to record payments out from the drawer
Percent Plus
- used to add percentage values to the total
Percent Minus
- used to deduct percentage values from the total
Coupon Key
- used to deduct fixed amounts from the total
No Sale
- prints a reference number / opens the cash drawer
Sub Total
- calculates sub total
- prints out receipt copy if no receipt opened
Cash Payment
- used to tender payments in cash
Card Payment
- used to tender payments with credit cards
Shift Key
- shift department key levels
- shift PLU key levels
Foreign Currency
Exchange
- calculate amounts in foreign currency
Receipt Hold
- temporarily holds a sale to be recalled later
Receipt On/Off
- receipt printer can be switched on or off
Scroll Cursor
- used to scroll the display selection by one line
CURSOR
CASH
Card
Shift
FCE
Hold
Receipt
on/off
CURSOR
SUB
TOTAL
PLU
1
RA
+ %
- %
( - )
#
NS
PO
X
R-X-Z-M-P

16
5 Sign in and Register
5.1 Sign in a Clerk/Sales Person
To sign in a clerk or sales person you may use either a Dallas-Key (optional) or the keyboard. To sign in,
simply place your key on the respective magnetic lock. If you remove the key, you will automatically log
out. The POS system is blocked until a clerk signs in again.
Sign in a clerk via keyboard:
5.2 Register a Department
Department keys may be used either to enter free prices or to select PLUs from a list.
Register 2.00 EUR in department 3:
5.3 Register Pre-Programmed PLUs
Register PLU number 101:
5.4 Multiplication/Division
Instead of pressing the same item repeatedly, you may use the Multiplication key.
Register 5 x 3.50 EUR in department 1:
Register 3 x PLU 25:
1
3
Clerk
#
Clerk
#
Enter code
number
1
PLU
5
2
X
3
0
5
3
X
5
PLU
00
2
1
0
1

17
Register 3 x the scan code 4912345678901:
5.5 Tendering in Local Currency
Any sale will be closed by entering a payment media key.
1.00 Euro CASH payment:
1.00 Euro CARD payment, short CASH payment:
5.6 Receipt copy
You can print a copy of the last receipt via the key Subtotal after a sale. If you print a copy of a table
invoice, the endorsement message will be added automatically.
5.7 No Sale / Open Drawer
The key No sale allows you to open the cash drawer without registering a sale.
6 Corrections
6.1 Clearing of Inputs and Error Messages
To erase an incorrect entry not yet registered and to clear any error messages just press the key Clear.
6.2 Error Correction
The key Error Correct is used to clear the last item immediately.
EC
CARD
CASH
Sub
total
00
1
Select
item
CURSOR
CLEAR
Sub
total
CASH
00
1
Scan
4912345678901
X
3

18
6.3 Void
The Void function is used to clear certain items from the current receipt.
Void PLU with scan code 4912345678901:
Void 3.50 EUR from department 1: Please note that only those amounts can be voided, which were
previously entered.
6.4 Refund
A refund is used to return previously sold items.
Refund of PLU 1 and 2:
Exchange of PLU 1 and 2:
Refund of 3.50 EUR from department 1:
1
1
Refund
0
5
3
PLU
Refund
2
PLU
PLU
Refund
2
1
PLU
Refund
1
VOID
Scan
4912345678901
VOID
0
5
3

19
7 Discounts, RA and PO
7.1 Percentage Discount/Surcharge
Discounts are price deductions on single items or on the sub total of the receipt. Likewise it is also possible
to order surcharges.
Percentage discount of 10% to PLU 2:
7.2 Amount Discount/Surcharge
Similarly, it is possible to use amount rebates. The only difference is that no percentages are calculated but
rather total amounts such as coupons are subtracted/added.
Discount a pre-programmed COUPON amount from the total:
7.3 Received on Account / Paid Out
Cash can be paid out of the cash drawer for special purposes, such as petty cash, etc. This is referred to as a
Paid Out (PO). Conversely, cash can also be added to the cash drawer. This transaction is known as
Received on Account (RA).
25.00 EUR received on account:
Example: 25.00 EUR paid out:
(–)
% (–)
00
PO
5
2
00
RA
5
2
CASH
Sub
total
PLU
2
PLU
1
0
1
PLU
2

20
CUSTOMER LOGO
Daily Report
---------------------------
Total Sales
---------------------------
Total Sales
CCount 1
Quantity 2
Amount 10,00
---------------------------
Groups
---------------------------
Group 1
CCount 1
Quantity 2
Amount 10,00
---------------------------
Tax Totals
---------------------------
16% Tax 1
Gross 10,00
Taxable 8,62
Tax 1,38
---------------------------
Tendering Function
---------------------------
Cash
CCount 1
Amount 10,00
---------------------------
Drawer Totals
---------------------------
Cash in Drawer
Amount 10,00
---------------------------
X-Counter :000001-0001
---------------------------
8 Reports
The POS system offers a wide range of reports to collect and monitor your sales data. All reports can be
performed as X or Z. Both types contain the same information. The X-report can be printed as a temporary
report at any time, because the report data will not be cleared. The
Z-report is a final report –after printing the data, the report memory will be cleared.
8.1 User Reports
Please note the programming of the system keys. By default the
CR function is located on the key CASH.
Flowchart:
The following user reports are pre-programmed:
1Clerk Report
2All Clerk Report
3Daily Report
4Weekly Report
5Open Table Report
6Daily Dept/PLU
7Weekly Dept/PLU
8Monthly Report
9Time Zone Report
10 Day of the Week Report
CASH
ENTER
XZ
CODE
#
CASH
ENTER
Other manuals for QMP 50 Series
1
Table of contents
Other QUORION Cash Register manuals

QUORION
QUORION QMP 3000 User manual

QUORION
QUORION QMP 3396 User manual

QUORION
QUORION CR 20 User manual

QUORION
QUORION CR 502 Owner's manual

QUORION
QUORION CR-300 Owner's manual

QUORION
QUORION CR 1200 User manual

QUORION
QUORION QMP 18 User manual

QUORION
QUORION QMP 5000 User manual

QUORION
QUORION QMP 50 Series User manual

QUORION
QUORION CR 20 User manual