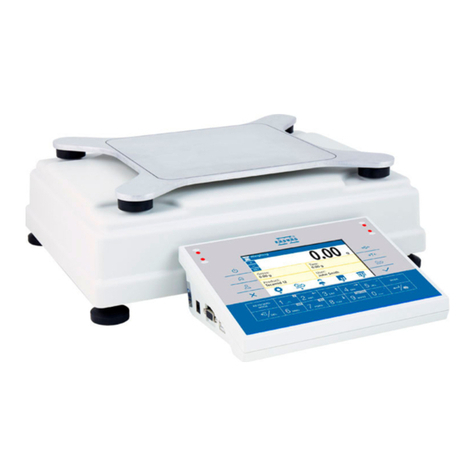
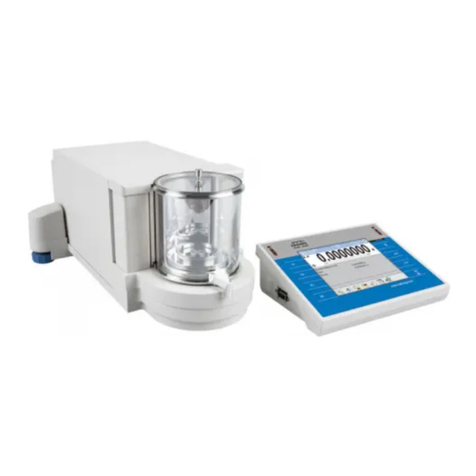
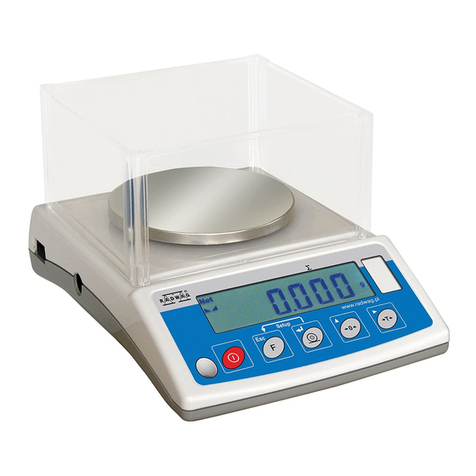
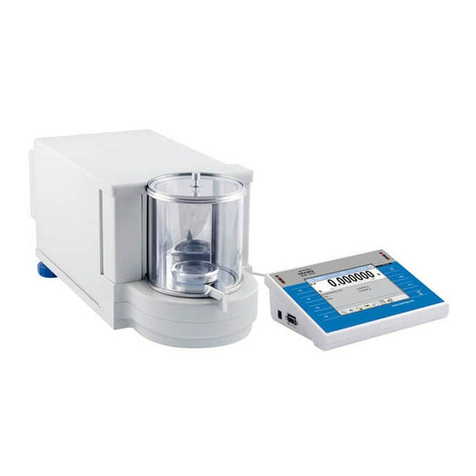
RADWAG PS 3000.R2 User manual

Manual number:
IMMU-15-01-02-15-ENG-AU
LCD RADWAG BALANCES
FOR CARAT CONTENT DETERMINATION
MANUFACTURER
OF ELECTRONIC WEIGHING INSTRUMENTS
RADWAG 26 – 600 Radom, 28 Bracka Street, POLAND
Phone +048 48 38 48 800, fax +48 48 385 00 10
Export department +0-48 48 366 80 06
www.radwag.com

- 2 -
FEBRUARY 2015

- 3 -
Table of contents
1. GENERAL INFORMATION ....................................................................7
1.1. Overall dimensions: .................................................................................... 7
1.2. Connection ports......................................................................................... 7
1.3. Intended use ............................................................................................... 7
1.4. Inappropriate use ........................................................................................ 8
1.5. Warranty ..................................................................................................... 8
1.6. Monitoring the metrological parameters of the instrument .......................... 8
1.7. Data included in this manual ....................................................................... 9
1.8. Staff competence ........................................................................................ 9
2. TRANSPORT AND STORAGE ........................................................... 10
2.1. Delivery check .......................................................................................... 10
2.2. Packaging ................................................................................................. 10
3. UNPACKING, ASSEMBLING AND START-UP .................................. 11
3.1. Place of use .............................................................................................. 11
3.2. Unpacking ................................................................................................. 11
3.3. Level setting ............................................................................................. 13
3.4. Cleaning ................................................................................................... 14
3.5. Plugging to mains ..................................................................................... 14
3.6. Connecting peripheral equipment ............................................................. 14
4. BASIC FUNCTIONS ............................................................................ 15
5. KEYBOARD ......................................................................................... 16
6. START-UP ........................................................................................... 17
6.1. Temperature stabilization period............................................................... 17
7. USER MENU ....................................................................................... 18
7.1. User menu operation ................................................................................ 18
7.2. Return to weighing .................................................................................... 21
8. LOGGING IN ....................................................................................... 22
9. WEIGHING .......................................................................................... 24
9.1. Required weighing procedures ................................................................. 24
9.2. Zeroing ..................................................................................................... 26
9.3. Tarring ...................................................................................................... 26
9.4. WEIGHING mode - settings ...................................................................... 28
9.4.1. Filter level setting ............................................................................ 28
9.4.2. Value release .................................................................................. 29
9.4.3. Autozero function ............................................................................ 30
9.4.1. Displaying the last digit ................................................................... 30
9.4.2. Balance ambient conditions ............................................................ 31
9.5. AUTOTARE .............................................................................................. 31
9.6. Printing mode ........................................................................................... 32
9.7. Temporary measuring unit ........................................................................ 34
9.8. Information ................................................................................................ 34
9.9. Non-standard information ......................................................................... 36
9.10. F buton shortcuts ...................................................................................... 37
9.11. Dual range balance (PS 200/2000.R2) ..................................................... 38
10. UNITS .................................................................................................. 40
10.1. Dostępność jednostek ważenia ................................................................ 40

- 4 -
10.2. Selecting start unit .................................................................................... 41
10.3. User’s unit ................................................................................................. 41
11. OTHER PARAMETERS ....................................................................... 42
11.1. Manu language selection .......................................................................... 42
11.2. Permissions and access levels ................................................................. 42
11.3. „Beep” sound – reaction to function button pressing ................................. 43
11.4. Backlight and adjusting display brightness ............................................... 43
11.5. Backlit turn-off time ................................................................................... 43
11.6. Auto switch-off .......................................................................................... 43
11.7. Date .......................................................................................................... 44
11.8. Time .......................................................................................................... 44
11.9. Date format ............................................................................................... 44
11.10. Time format ............................................................................................ 45
11.11. Autotest GLP .......................................................................................... 45
12. INFORMATION ON BALANCE ............................................................ 47
13. BALANCE ADJUSTMENT ................................................................... 48
13.1. Internal adjustment ................................................................................... 49
13.2. Adjustment menu settings......................................................................... 51
13.3. Manual adjustment ................................................................................... 53
13.3.1. Internal adjustment ..................................................................... 53
13.3.2. External adjustment .................................................................... 54
13.3.3. User adjustment ......................................................................... 54
13.4. Adjustment report printout......................................................................... 55
14. DETERMINING CONTENT OF A PRINTOUT ..................................... 56
14.1. Report on adjustment ............................................................................... 56
14.2. Header printout ......................................................................................... 58
14.3. Measurement result printout – GLP PRINTOUT ....................................... 60
14.4. Footer printout .......................................................................................... 62
14.5. Non-standard printouts ............................................................................. 65
14.5.1. Inserting texts ............................................................................. 65
14.6. Variables ................................................................................................... 68
15. DATABASES ........................................................................................ 69
15.1. Users ........................................................................................................ 69
15.2. Products.................................................................................................... 72
15.3. Tares ........................................................................................................ 73
15.4. Weighments .............................................................................................. 74
15.5. ALIBI ......................................................................................................... 77
16. EXPORT AND IMPORT OF DATABASES .......................................... 79
16.1. Database export ....................................................................................... 80
16.2. Database import ....................................................................................... 81
16.3. Measurement data printout ....................................................................... 81
17. WORKING MODES .............................................................................. 83
17.1. Setting working modes availability ............................................................ 84
17.2. Carat content ............................................................................................ 85
17.2.1. Supplementary settings for carat content mode ......................... 86
17.2.2. Means of operation ..................................................................... 88
17.2.3. Testing carat content of an unspecified alloy .............................. 88
17.2.4. Testing carat content of a specified alloy .................................... 92
- 5 -
17.2.5. Testing platinum class ................................................................ 96
17.2.6. Testing major metal content ....................................................... 99
17.2.7. Return to the weighing mode .................................................... 103
17.3. Counting parts of the same mass ........................................................... 104
17.3.1. PARTS COUNTING setup ........................................................ 105
17.3.2. Setting the reference mass by determining it from a sample of
specified quantity ...................................................................... 106
17.3.3. Setting the reference mass by entering its value ...................... 108
17.3.4. Return to the weighing mode .................................................... 109
17.4. Checkweighing ....................................................................................... 110
17.4.1. Declaring threshold values ....................................................... 111
17.4.2. Return to the weighing mode .................................................... 113
17.5. Dosing .................................................................................................... 113
17.5.1. Setting target mass by entering its value .................................. 114
17.5.2. Return to the weighing mode .................................................... 116
17.6. Percent weighing control with reference to standard sample mass ........ 117
17.6.1. Setting the reference mass by means of weighing ................... 118
17.6.2. Setting the reference mass by entering its value ...................... 119
17.6.3. Return to the weighing mode .................................................... 120
17.7. Animal weighing...................................................................................... 121
17.7.1. Supplementary settings for the Animal Weighing mode ........... 121
17.7.2. Running the process manually – means of operation ............... 122
17.7.3. Running the process automatically – means of operation ........ 124
17.7.4.Return to the weighing mode .................................................... 125
17.8. Density of solids...................................................................................... 126
17.8.1. Density determination ............................................................... 129
17.8.2. Return to the weighing mode .................................................... 132
17.9. Density of liquid ...................................................................................... 132
17.9.1. Density determination ............................................................... 132
17.9.2. Return to the weighing mode .................................................... 135
17.10. Statistics ............................................................................................... 136
17.10.1. Means of operation ................................................................... 137
17.10.2. Deleting statistics ..................................................................... 140
17.10.3. Return to the weighing mode .................................................... 141
17.11. Totalising .............................................................................................. 142
17.11.1. Means of operation ................................................................... 143
17.11.2. Return to the weighing mode .................................................... 145
17.12. Peak hold ............................................................................................. 146
17.12.1. Means of operation ................................................................... 146
17.12.2. Return to the weighing mode .................................................... 148
18. COMMUNICATION ............................................................................ 149
18.1. RS 232 ports settings ............................................................................. 149
18.2. WIFI port settings.................................................................................... 150
18.3. USB port ................................................................................................. 152
19. PERIPHERALS .................................................................................. 157
19.1. Computer ................................................................................................ 157
19.1.1. Port for computer connection ................................................... 157
19.1.2. Continuous transmission .......................................................... 158
19.1.3. Printouts interval for continuous transmission .......................... 159

- 6 -
19.1.4. Cooperation with E2R ............................................................... 159
19.2. Printer ..................................................................................................... 159
19.3. Barcode reader ....................................................................................... 162
19.4. Additional display .................................................................................... 163
19.5. External buttons ...................................................................................... 163
20.COOPERATION WITH PERIPHERALS (PRINTER, COMPUTER,
ETC.) ............................................................................................ 165
20.1. Cable pinout diagrams ............................................................................ 166
20.2. Transferred data format .......................................................................... 166
20.3. Format of data sent on pressing PRINT button ....................................... 167
20.3.1. Format of data sent as a response for commands generated by a
computer .................................................................................. 167
21. COMMUNICATION PROTOCOL ....................................................... 169
21.1. List of commands .................................................................................... 169
21.2. Format of a response to a command received from a computer ............. 171
21.3. Commands overview .............................................................................. 171
22. ERROR MESSAGES ......................................................................... 188
23. UNDER PAN WEIGHING ................................................................... 189
24. SUPPLEMENTARY EQUIPMENT ..................................................... 190
24.1. Anti-vibration table .................................................................................. 190
24.2. Under pan weighing rack ........................................................................ 190
24.3. Densiti determination kit.......................................................................... 190
24.4. Additional display .................................................................................... 190
24.5. Carat content determination kit ............................................................... 190

- 7 -
1. GENERAL INFORMATION
1.1. Overall dimensions:
1.2. Connection ports
1
- power port
2
- COM 2 port (e.g. additional
display, or external buttons)
3
- COM 1 port (e.g. printer)
4
- USB 2 port (e.g. computer)
5
- USB 1 port (e.g. computer
keyboard)
1.3. Intended use
The purchased balanced serves to determine the weighing value of loads in
laboratory environment. It is intended for application as a non-automatic
weighing instrument only, i.e. the material to be weighed is manually and
carefully placed in the centre of the weighing pan. Weighing result should be
read only after stable reading has been obtained – when stability marker is
visible on the display.
The balances, equipped with a special kit and a dedicated software, enable
determination of the following values:
• Carat content for gold,
• Carat content for gold alloy,

- 8 -
• Platinum class,
• Dominant metal content for an alloy.
The above values can be estimated due to method used for metal density
determination.
Owing to measurement of particular sample density, balance software allows to
distinguish between precious metals and common metals.
Standard design balances feature temperature sensor TB-1, used in course of
particular sample testing for measurement of liquid temperature.
1.4. Inappropriate use
Do not use the balance as a dynamic weighing instrument. Even if small
quantities of weighed material are added or removed from the weighing pan of
the instrument, the reading should be taken only after stabilisation of the
measurement results. Do not place any magnetic materials on the weighing
pan, as this can cause damage to the measuring system of the instrument.
Be sure to avoid impact shock and overloading the balance in excess of the
prescribed maximum measuring range (max capacity), minus any possible tare
weight that has been applied.
Never use the balance in an environment where explosion is possible. This
balance has not been adjusted for operation in explosive areas.
There must not be any modification made to the balance.
1.5. Warranty
Warranty is invalid for the following:
• non- observation of the guidelines of this user manual,
• use of the balance other than specified in this manual,
• alteration to or opening of the device,
• mechanical damage and damage caused by media, water, wear and
tear,
• inappropriate assembling or defects of electric installation,
• overloading of the measuring mechanism.
1.6. Monitoring the metrological parameters of the instrument
Metrological characteristics of the balance require periodical inspection to be
carried out by its user. Inspection frequency is dependent on ambient conditions
in which the balance is used, types of performed processes and adopted quality
management system.

- 9 -
1.7. Data included in this manual
Please read the user manual carefully before plugging the instrument to mains
and its start-up. Familiarizing the manual is necessary even for users
experienced with this type of moisture analyzers.
1.8. Staff competence
This balance should only be operated and maintained by personnel who is
trained and experienced in using this type of balances.

- 10 -
2. TRANSPORT AND STORAGE
2.1. Delivery check
Please check the packaging immediately upon delivery and check instrument’s
condition directly upon unpacking for any visible signs of external damage.
2.2. Packaging
Please retain all parts of the original packaging should the balance be
transported in the future. Only the original packaging should be used for
shipping the balance. Before packing, disconnect all attached cables and
remove any loose/movable parts (weighing pan, anti-draft shield, etc.). Please
place balance and its components in their original packaging, and protect them
against damage during transport.

- 11 -
3. UNPACKING, ASSEMBLING AND START-UP
3.1. Place of use
• Balance should be stored and used in locations free of vibrations and
shakes, free of air drafts and dust.
• Ambient air temperature of a weighing room should not exceed the
range of +10 °C ÷ +40 °C.
• Ambient relative humidity should not exceed 80%.
• The weighing room temperature shall change slowly while the balance
is in use.
• The balance should be located on a stable wall console desk or on a
stable working table, not affected by vibrations, and distant from heat
sources.
• Part of the balance is a strong magnet therefore special safety
measures must be taken when weighing magnetic objects. For such a
case it is recommended to use under pan weighing method thus
eliminating magnet influence. Under pan weighing hook is to be found
in a balance base.
• If static electricity effects balance indications that it is necessary to
ground its base. Grounding bolt is located at the back of the balance
base.
3.2. Unpacking
Cut the sealing tape. Take the balance out of the packaging. Open the box with
accessories and take the items necessary for correct balance operation. Upon
placing the balance in the desired location assembly carat determination set, to
do it follow the instruction below.
A. Remove the standard weighing pan from the balance. Next remove the
rubber mandrels positioning the pan and replace them with mandrels
without rubber absorbers that are supplied with the kit for determining
carat content
B. Assembly the kit components in the following sequence: basis of the
container for liquid (item 1), next place weighing pan basis (item 2)
onto the previously assembled mandrels, and finally place the
container for liquid (item 3). Fill the container with liquid for carrying out
measuring processes.

- 12 -
A. Install an assembly with an openwork pan onto the weighing pan base.

- 13 -
B. Install TB-2 liquid temperature sensor. Be careful not to let the sensor
probe touch either the assembly or the openwork pan.
CAUTION:
TB-2 thermometer does not come standard with kit for determining carat
content, it is an optional equipment.
3.3. Level setting
Before plugging to mains, level the balance by turning the
adjustable feet in a way that the air bubble of the level is in its
central ring. The balance should be placed firmly on all of its
feet.

- 14 -
3.4. Cleaning
1. Disassembly the weighing pan and other portable parts. Be careful
while disassembling the balance so as not to cause any damages to
the balance mechanism.
2. Glass parts should be cleaned using a dry flannel cloth (mild cleanser
may be used if it does not contain any abrasive substances) – for draft
shield disassembly instruction go to the next section of this manual.
3. Use a dry flannel cloth in order to clean disassembled parts (mild
cleanser may be used if it does not contain any abrasive substances).
CAUTION:
Cleaning the weighing pan while installed may lead to balance measuring
system damage.
3.5. Plugging to mains
Balance can be connected to mains only with a power adapter that comes
standard with the balance. Nominal power supply of the power adapter
(specified on the data plate of the power adapter) should be compatible to
the power from mains.
Plug the balance to mains – the plugging socket is located at the back of
balance housing.
The test of the display unit takes place after connecting to the power (all the
elements and pictograms are backlit for a short time). Next, the name and the
program number appears consequently, the indication will reach ZERO level
(with reading unit depending on the balance). During the process of starting the
balance, the test of the internal mass adjustment mechanism occurs (single
location and elevation of the internal mass adjustment).
If the indication is different from zero, please press button.
CAUTION:
If the balance is “verified”, automatic adjustment/calibration occurs right after it
has been switched on.
3.6. Connecting peripheral equipment
The balance must be unplugged from the mains before connecting or
disconnecting any peripheral equipment (printer, PC computer, additional
display, computer keyboard etc.), Use only peripheral equipment recommended
by the manufacturer with your balance. These have been ideally coordinated to
your instrument. On connecting a peripheral device, plug the balance to mains.

- 15 -
4. BASIC FUNCTIONS
functions related to measuring units
- weighing in grams [g],
- weighing in milligrams [mg] (balances with d≤0.001g),
- weighing in kilograms [kg] (balances with d≥0.01g,
- weighing in carats [ct],
- weighing in units from beyond SI (available only in non-verified
instruments):
[lb], [oz], [ozt], [dwt], [tlh], [tls], [tlt], [tlc], [mom], [gr], [ti], [N], [baht], [tola]
functions related to working modes
- parts counting,
- checkweighing (control +/-),
- dosing,
- percent weighing,
- density determination of solids,
- density determination of liquids,
- animal weighing,
- statistics
- totalising
- peak hold
- pipettes calibration (XA and AS balances only)
- carat content
functions related to setting a balance to ambient conditions at a
workstation
- enabling and disabling autozero system,
- setting parameter of measurement result averaging,
- value release,
- display backlight,
- beep signal,
functions related to use of communication ports (RS232, USB, WIFI)
- selecting communication port,
- selecting baud rate value,
- continuous data transmission in basic measuring unit,
- continuous data transmission in current measuring unit,
- automatic operation mode.
Balance can be used to weigh loads under the weighing platform –under pan
weighing option. Balance software enables generating a report from adjustment
process in a form of a printout containing modifiable data (see CAL. REPORT).

- 16 -
5. KEYBOARD
ON/OFF button enables switching on and off
balance’s display. If switched off
, balance
components other than the display are powered, and
balance is in a stand-by mode.
F9 button of the computer keyboard.
Direct access to data stored in a database: user,
product, tare, drying mode.
F10 button of the computer keyboard.
Functi
on button enabling quick access to settings of
an active working mode.
F11 button of the computer keyboard.
MODE button for selecting balance’s working mode.
F5 button of the computer keyboard.
UNITS button for changing measuring units.
PRINT/ENTER button for sending current display
status to a peripheral device (PRINT) or for
accepting selected value of a parameter or function
(ENTER).
ZERO button – zeroing balance indication.
TARE button – tarring balance indication.
Function button for immediate initiation of balance
adjustment/calibration.
F6 button of the computer keyboard.

- 17 -
Function button for entering the main balance menu.
F7 button of the computer keyboard.
Navigating arrows for operating balance menu or
changing parameter value.
6. START-UP
When plugged to mains, the balance displays program name and number, next
it proceeds to the weighing mode.
6.1. Temperature stabilization period
Before start of measuring processes, it is necessary to wait until the balance
reaches thermal stabilisation.
For balances that were stored in much lower temperatures before plugging to
mains (e.g. during winter period), thermal stabilisation period shall take at least
4 hours for PS balances, and 8 hours for AS and APP balances. During the
thermal stabilization, the indications on the display panel can change. Correct
operation of a balance is possible within temperature range specified in
datasheet, see point 1.
It is recommended that ambient temperature changes at place of use were
insignificant (slow to change).

- 18 -
7. USER MENU
Menu is divided into 6 basic function groups. Each group has an individual
name starting with a capital letter, P.
7.1. User menu operation
The user operates menu using buttons of an overlay keyboard:
Setup button. Entering the main menu.
Selecting group of parameter one by one downwards
or changing parameter value by one value down.
Selecting group of parameters one by one upwards or
changing parameter value by one value up.
Selecting a particular group of parame
ters for
activation. On pressing the button, the display
indicates the first parameter of a selected group
Exit to previous menu level, e.g. to the main menu.
Abandon parameter changes.
Accept / confirm introduced changes.
Deleting a character while editing text values, e.g. user
name.
Inserting a character while editing text values, e.g.
user name

- 19 -
P1 ADJUSTMENT
P1.1 INT. CALIB. | [internal adjustment]
P1.2 EXT. CALIB. | [external adjustment]
P1.3 USER CALIBRATION | [user adjustment]
P1.4 CALIBRATION TEST | [adjustment test]
P1.5 AUTO. CALIB. |NONE/TIME/TEMP/BOTH [automatic adjustment]
P1.6 AUTO. CALIB. C. |0,5, 1, 2, …, 11, 12 [time of automatic adjustment]
P2 OPERATION MODE
P2.1 ACCESSIBILITY | [settings for the accessibility of individual
modes while working with the balance]
P2.2 WEIGHING | [setting for the function weighing]
P2.3 COUNTING PCS | [settings for the function parts counting]
P2.4 CHECKWEIGHING | [settings for the function checkweighing]
P2.5 DOSING | [settings for the function dosing]
P2.6 DEVIATIONS | [settings for the function % weighing against
the mass of the standard]
P2.7 DENS. OF SOLIDS | [settings for determining density of solids]
P2.8 DENS OF LIQUIDS | [settings for determining density of liquids]
P2.9 ANIMAL WEIGHING | [settings for the function animal weighing]
P2.10 STATISTICS | [settings for the function statistics]
P2.11 TOTALISING | [settings for the function totalising]
P2.12 PEAK HOLD | [settings for the function peak hold]
P2.13 PIPETTES CALIB. | [settings for the function pipettes calibration]
P2 14 CARAT CONT. | [settings for the function carat content]
P3 COMMUNICATION
P3.1 COM 1 | [transmission parameters port COM 1]
P3.2 COM 2 | [transmission parameters port COM 2]
P3.3 WIFI | [transmission parameters port WIFI]
P4 DEVICES
P4.1 COMPUTER; PORT | COM 1/COM 2/USB/WIFI/NONE [PC
connection port]
ADDRESS | [balance address]
CONT. TRANSM. | CALIBRATION UNIT./ CURRENT UNIT/
NONE [turning on/off continuous transmission]

- 20 -
INTERVAL | 0.1 [setting intervals of continuous
transmission]
E2R SYSTEM | YES/ NO [turning on/off cooperation with E2R
system]
PRINTOUT | NSD. PRN 1/ NSD. PRN 2/ NSD. PRN 3/ NSD.
PRN 4/ STANDARD/ NONE [printout sent to a
computer]
P4.2 PRINTER |COM 1/COM 2/USB/WIFI/PENDRIVE/USB PC/NONE
[printer connection port]
PERFIX [control commands for a printer, sent at the beginning of
each printout]
SUFFIX [control commands for a printer, sent at the end of each
printout]
P4.3 BARCODE READER |COM 1/COM 2/NONE [barcode reader port]
P4.4 ADD. DISPLAY |COM 1/COM 2/NONE [additional display port]
P4.5 EXT. BUTTONS |TARE / PRINT [turning the external buttons
on/off]
P5 PRINTOUT
P5.1 CAL. REPORT | [contents of the adjustment report]
P5.2 HEADER | [contents of the header print-out]
P5.3 GLP PRNT. | [contents of the weighment result prnt.]
P5.4 FOOTER | [contents of the footer print-out]
P5.5 NSD.PRN.1 | [project of non-standard print-out 1]
P5.6 NSD.PRN. 2 | [project of non-standard print-out 2]
P5.7 NSD.PRN. 3 | [project of non-standard print-out 3]
P5.8 NSD.PRN. 4 | [project of non-standard print-out 4]
P5.9 VARIABLE 1 | [project of variable 1]
P5.10 VARIABLE 2 | [project of variable 2]
P6 OTHER
P6.1 LANGUAGE |POLISH / ENGLISH [menu language]
P6.2 ACCESS LEV. |ADMIN [access levels for
editing menu]
P6.3 KEY SOUND |YES/NO [key sound]
P6.4 BACKLIGHT |70 [display backlight level]
P6.5 BACKLIT OFF |NONE/0.5/1/2/3/5 [backlight turn-off time interval]
P6.6 AUTO OFF |NONE/1/2/3/5/10 [display turn-off time interval]
P6.7 DATE |2013.05.27 [date settings]
P6.8 TIME |8:53:00 A [time settings]
P6.9 DATE.FORM.
Table of contents
Other RADWAG Scale manuals

RADWAG
RADWAG PM 5Y User guide

RADWAG
RADWAG AS R2 PLUS User guide

RADWAG
RADWAG AS R2 User manual

RADWAG
RADWAG APP 35.R2 User manual

RADWAG
RADWAG WLC A1 User guide

RADWAG
RADWAG HRP User manual

RADWAG
RADWAG HX5.EX User manual

RADWAG
RADWAG WLC/A1/C/2 User manual

RADWAG
RADWAG HRP.R Series User manual

RADWAG
RADWAG PM C32 User guide

RADWAG
RADWAG HX7 User manual

RADWAG
RADWAG AS PLUS Series User manual

RADWAG
RADWAG ITKU-22-02-01-12-A User manual

RADWAG
RADWAG PM 4Y User guide

RADWAG
RADWAG Y/KTPS Series User manual

RADWAG
RADWAG MW-01-A User manual

RADWAG
RADWAG WPW/E User manual

RADWAG
RADWAG WTC series User manual

RADWAG
RADWAG UYA 4Y User manual

RADWAG
RADWAG WTC/4 3000 C8/EX User manual