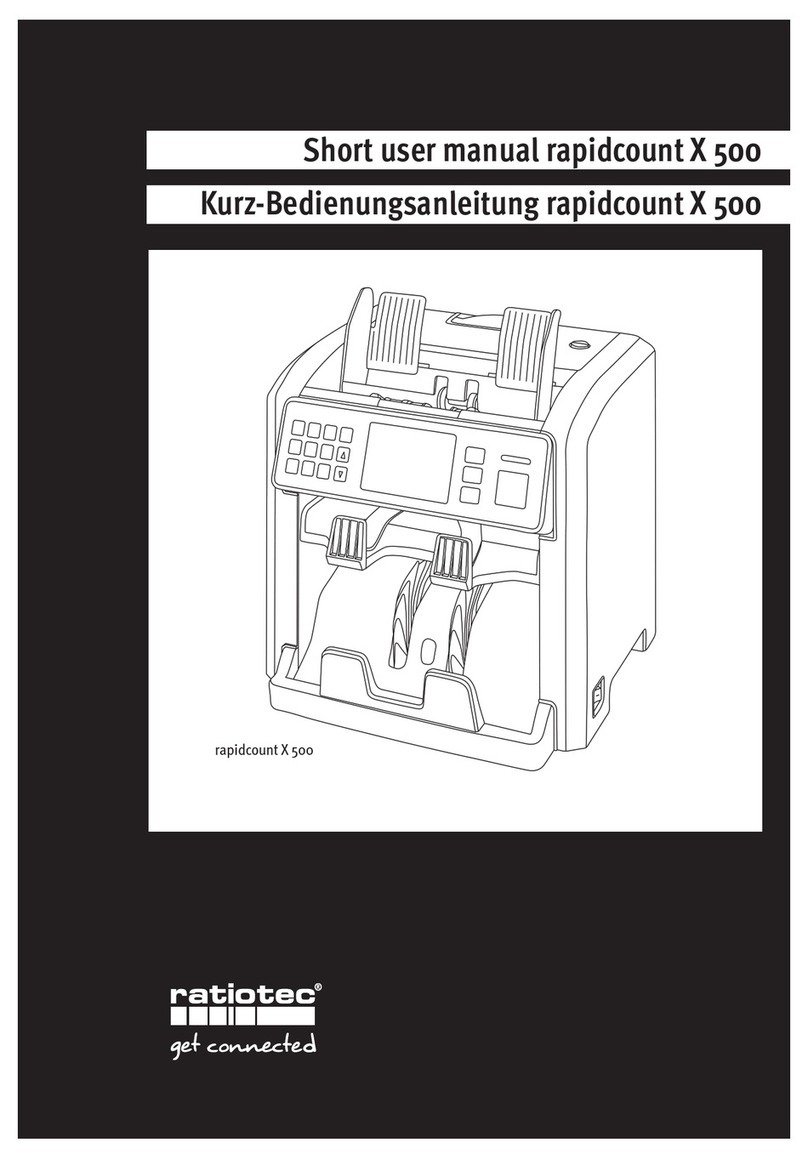
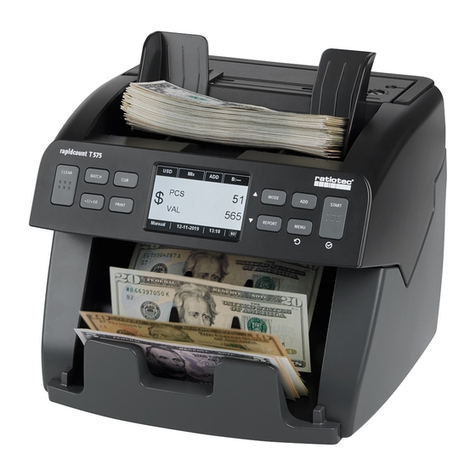
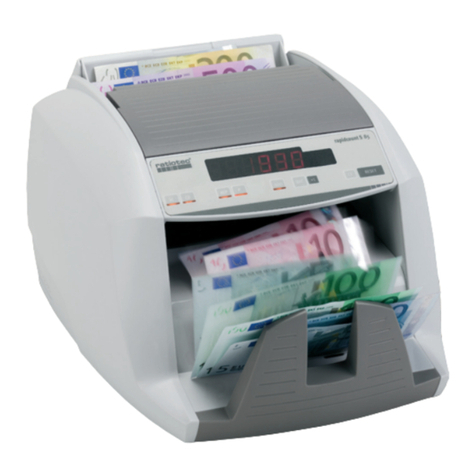
ratiotec rapidcount T 575 User manual

User manual rapidcount T
Bedienungsanleitung rapidcount T
rapidcount T

2
Bedienungsanleitung rapidcount T ........................................................
Instruction manual rapidcountT ............................................................
Istruzioni per l’uso di rapidcount T .........................................................
Manual de instrucciones rapidcount T....................................................
Mode d’emploi rapidcount T ..................................................................
Rücksendeinformation.................................................................................
Return information ......................................................................................
[DE]
[EN]
[IT]
[ES]
[FR]
[DE]
[EN]
Inhalt | Content

3
Einleitung
Rückseite
Vorderseite
. Einzugsschienen
. Bedienfeld
. Display
. Banknotenauswurf
. Banknoteneinzug
. Einzugsschraube
. Tragegri
. Zugangshebel zum Önen
der Maschine
. AN- /AUS-Schalter
. Sicherung
. Netzkabelanschluss
. Netzwerkanschluss (nicht verfügbar)
. Druckeranschluss
. Anschluss für externes Display/
Update (DB)
. USB-Anschluss für Servicezwecke
. SD-Kartenslot
[DE]
Sehr geehrte Kundin, sehr geehrter Kunde,
vielen Dank, dass Sie sich für die Banknotenzählmaschine rapidcount T von ratiotec entschieden haben.
Bitte lesen Sie die Bedienungsanleitung sorgfältig durch, um einen reibungslosen und fehlerfreien Betrieb zu
gewährleisten. Wir empfehlen Ihnen außerdem eine regelmäßige Wartung der Maschine - mindestens einmal
im Jahr. Die empfohlene Laufleistung beträgt . Banknoten pro Jahr.
.
.
.
.
.
.
.
.
.
.
. . . . .
.

4
Bedienfeld
[DE]
CLEAR: _____________ Löscht die Anzahl der gezählten Banknoten oder schaltet die Batch-Funktion aus.
BATCH: _____________ Aktivieren und Deaktivieren der Bündelfunktion. Stückgenaues Abzählen von
Banknoten (z. B. Banderolen). Die Bündelgröße kann zwischen bis mit Hilfe
des Ziernblattes neben dem Display eingestellt werden. Bei einer Batch-Zählung,
zählt die Maschine nur eine festgelegte Anzahl von Scheinen. Um die individuelle
Anzahl an Scheinen festzulegen, müssen Sie die BATCH-Taste drücken. Im Display
wird Ihnen nun die Standard-Anzahl „B:“ angezeigt. Wenn Sie die BATCH-Taste
erneut drücken, können Sie zwischen den Standard-Mengen , , , und
wählen. Sie können diese Mengen individuell einstellen, drücken oder halten Sie
dafür die +/+ Taste um die Anzahl zu erhöhen. Nach der Einstellung des passen-
den Batches, legen Sie einen Banknotenstapel in den Einzug. Die Maschine startet
den Zählvorgang. Wenn der eingestellte Batch erreicht ist, stoppt die Maschine
automatisch.
CUR: _______________ Währungsauswahl
Drücken Sie zum Ändern der Währung die CUR-Taste, um zwischen den verfügba-
ren Währungen zu wählen. Die ausgewählte Währung wird oben links im Display
angezeigt.
Multi-Mix
Auf dem Display werden „MULT“ und „Mix“ angezeigt. In diesem Modus zählt das
Gerät gemischte Währungen. Als Standard sind EUR, USD und GBP eingestellt.
Nach dem Zählvorgang werden die Stückzahl und der Gesamtwert jeder Währung
im Display angezeigt.
Auto
Der Auto-Modus ist durch Sterne gekennzeichnet. In diesem Modus wird die
aufgelegte Währung automatisch erkannt, sofern das Gerät diese unterstützt.
PRINT: _____________ Ein Ausdruck über den optional erhältlichen RTP Thermobelegdrucker ist mög-
lich. Ist ein Belegdrucker an den Druckeranschluss der Banknotenzählmaschine
angeschlossen, kann durch Halten der PRINT-Taste ein Beleg gedruckt werden.

5
[DE]
MODE: _____________ Auswahl des Zählmodus. Dient auch als Navigationstaste nach oben.
MIX gemischte Wertzählung und Prüfung
Im MIX-Modus zählt das Gerät alle Banknoten derselben Währung. Nach dem
Zählen, wird der Gesamtwert und die Anzahl der Banknoten auf dem Display
angezeigt.
SORT sortenreine Wertzählung und Prüfung
Im SORT-Modus zählt das Gerät nur Banknoten der gleichen Sorte. Die erste
eingezogene Banknote dient als Referenz. Alle abweichenden Banknoten werden
abgelehnt.
COUNT Stückzählung ohne Prüfung
Im COUNT-Modus zählt das Gerät nur die Stückzahl der Banknoten. In diesem
Modus ist die Falschgelderkennung deaktiviert.
REPORT: ____________ Zeigt die Zählergebnisse an. Dient auch als Navigationstaste nach unten.
Nach der Zählung, werden sowohl der Gesamtwert als auch die Stückzahl der ge-
zählten Banknoten im Display angezeigt. Um sich ein detaillierteres Zählergebnis
anzuzeigen zu lassen, drücken Sie die REPORT-Taste.
ADD: _______________ Aktivieren und Deaktivieren der Additionsfunktion. Nur wenn die ADD-Funktion
aktiviert ist, wird beim Entnehmen der gezählten Banknoten das Zählergebnis
gespeichert. Die Ergebnisse aus danach folgenden Zählvorgängen werden aufad-
diert. Zum Löschen der Werte drücken Sie die CLEAR-Taste
MENU: _____________ Önet das Benutzermenü. Dient auch als Zurück- oder Abbruch-Taste
START: _____________ START des Zählvorgangs. Dient auch als Bestätigungs-Taste.

6
Bedienung
Einstellungen
[DE]
Stellen Sie das Gerät auf eine stabile, ebene Oberfläche, fern von starken elektromagnetischen Feldern und
direkter Sonneneinstrahlung. Verwenden Sie aus Sicherheitsgründen nur geerdete Steckdosen. Nach Einschal-
ten der rapidcount T führt die Maschine einen Selbsttest durch. Nach erfolgreichem Test ist das Gerät
einsatzbereit.
So vermeiden Sie Fehler beim Zählen der Banknoten:
. Vermeiden Sie es, nasse, übermäßig verschmutzte oder beschädigte Banknoten zu zählen.
. Achten Sie darauf, dass sich keine Fremdkörper wie z.B. Büroklammern, Gummibänder, Klammern, Staub
o.ä. zwischen den Banknoten benden.
. Entfernen Sie Falten oder Knicke in den Banknoten, bevor Sie diese auf den Einzug legen.
Um die Banknotenzählmaschine einzurichten, drücken Sie im Hauptbildschirm die MENU-Taste, um das
Benutzermenü aufzurufen. Verwenden Sie die Navigationstasten, um den gewünschten Menüpunkt auszuwäh-
len und bestätigen Sie diesen mit der START-Taste. Verwenden Sie die MENU-Taste, um das Benutzermenü zu
verlassen.
Einstellen der Signaltonfunktion
. Wählen Sie die Option „Beep Setup“.
. Drücken Sie zur Bestätigung die START-Taste.
. Markieren Sie das gewünschte Element.
. Drücken Sie die CUR- oder PRINT-Taste, um zwischen Ein- und Ausschalten zu wechseln.
. Drücken Sie die MENU-Taste, um das Menü zu verlassen.
Einstellen des Datumsformates
. Wählen Sie die Option „Date Format“.
. Drücken Sie die Taste CUR oder PRINT, um das Datumsformat zu ändern.
. Drücken Sie die MENU-Taste, um das Menü zu verlassen.
Einstellen von Datum und Uhrzeit
. Wählen Sie die Option „Time & Date“.
. Drücken Sie zur Bestätigung die START-Taste.
. Wählen Sie mit der Taste MODE oder REPORT den gewünschten Eintrag aus.
. Ändern Sie den Wert mit der Taste CUR oder PRINT.
. Drücken Sie zur Bestätigung die START-Taste.
. Drücken Sie die MENU-Taste, um das Menü zu verlassen.
7
[DE]
Überprüfung der Versionen des Gerätes
. Wählen Sie die Option „Version“.
. Drücken Sie zur Bestätigung die START-Taste.
. Die Versionsinformationen werden auf dem Bildschirm angezeigt.
. Wechseln Sie mit der Taste REPORT zur nächsten Seite.
. Drücken Sie die MENU-Taste, um das Menü zu verlassen.
Einstellen der Automatischen Zählfunktion
. Wählen Sie die Option „Auto Start“.
. Drücken Sie die Taste CUR oder PRINT, um zwischen Auto und Manuell zu wählen.
. Drücken Sie die MENU-Taste, um das Menü zu verlassen.
Einstellen der Zählgeschwindigkeit
. Wählen Sie die Option „Speed“.
. Drücken Sie die Taste CUR oder PRINT, um die Zählgeschwindigkeit zu ändern.
. Drücken Sie die MENU-Taste, um das Menü zu verlassen.
Geschwindigkeitsraten:
Niedrig: Noten/Minute
Hoch: Noten/Minute

8
Technische Spezikationen
Technische Daten rapidcount T
Echtheitsprüfung IR | MG | MT | CIS | SD | UV
Zählgeschwindigkeit | | Banknoten pro Minute
Hopper-Kapazität Banknoten
Auswurfkapazität Banknoten
Arbeitstemperatur ~ °C
Luftfeuchtigkeit ~ %
Stromversorgung AC- V, / Hz
Leistungsaufnahme < W
Abmessung (L) * (B) * mm (H)
Gewicht , kg
Externe Schnittstelle DB-Anschluss, USB-Anschluss, Druckeranschluss,
SD-Kartenslot
[DE]

9
Fehlermeldungen
Fehlermeldung Lösung
Left# counting sensor
Right# counting sensor
Left# counting sensor
Right# counting sensor
. Entfernen Sie die Banknote aus dem Gerät oder
reinigen Sie die Sensoren.
. Wenn der Fehler weiterhin besteht, drücken
Sie eine beliebige Taste und führen Sie dann eine
Kalibration durch.
CIS fault #(**)!
CIS fault #(**)!
CIS fault #(**)!
. Entfernen Sie die Banknote aus dem Gerät oder
reinigen Sie den CIS-Sensor.
. Wenn der Fehler weiterhin besteht, drücken Sie
eine beliebige Taste und führen Sie dann eine CIS-Ka-
libration durch.
Counting sensor dust warning! . Reinigen Sie die Sensoren.
. Wenn der Fehler weiterhin besteht, drücken
Sie eine beliebige Taste und führen Sie dann eine
Kalibration durch.
Incomplete notes! Entfernen Sie alle Banknoten vom Einzug und wieder-
holen Sie den Zählvorgang.
Width error!
Length error!
Entfernen Sie die fehlerhafte Banknote und drücken
Sie die START-Taste, um den Vorgang fortzusetzen.
Cannot Judge Denomination!
Denomination not in circulation!
Denomination dierent!
Entfernen Sie die fehlerhafte Banknote und drücken
Sie die START-Taste, um den Vorgang fortzusetzen.
Stacker full! Entfernen Sie alle Banknoten aus dem Banknoten-
auswurf.
Double notes!
Chained notes!
. Entfernen Sie alle Banknoten und wiederholen Sie
den Zählvorgang.
. Wenn der Fehler weiterhin besteht, justieren Sie
den Einzug, in dem Sie Einzugsschraube gegen den
Uhrzeigersinn drehen.
Service required! Bitte nehmen Sie Kontakt mit Ihrem ratiotec-Team auf.
[DE]

10
Introduction
Rear view
Front side
. Feeder rails
. Control panel
. Display
. Banknote ejection
. Banknote stacker
. Feeder screw
. Carrying handle
. Access lever for opening
the machine
. ON/OFF switch
. Fuse
. Mains cable connection
. Network connection (not available)
. Printer connection
. Connection for external display/
update (DB)
. USB connection for service purposes
. SD card slot
Dear customer,
thank you for choosing the rapidcount T banknote counting machine from ratiotec. Please read the instruc-
tion manual carefully in order to ensure the correct, error-free use of the device. We also recommend regular
machine maintenance - at least once a year. The recommended operational performance is , banknotes
per year.
[EN]
.
.
.
.
.
.
.
.
.
. . . . .
.
.

11
[EN]
Control panel
CLEAR: _____________ Deletes the number of counted banknotes or turns o the batch function.
BATCH: _____________ Activate and deactivate the bundle function Exact counting of banknotes (e.g. bank
wrapper). The bundle size can be adjusted between and using the keys next
to the display. In a batch count, the machine only counts a specied number of no-
tes. To set the individual number of notes, you have to press the BATCH button. The
default number “B:” is now shown in the display. If you press the BATCH button
again, you can select between the default quantities , , , and . You can
adjust these quantities individually, press or hold the +/+ button to increase
the number. After setting the appropriate batch, place a stack of banknotes in the
feeder. The machine starts the counting process. When the batch set is reached,
the machine stops automatically.
CUR: _______________ Currency selection
To change the currency, press the CUR button to select between the available
currencies. The selected currency is shown at the top left of the display.
Multi-Mix
“MULT” and “Mix” are shown on the display. In this mode, the device counts
mixed currencies. EUR, USD and GBP are set as default.
After the counting process, the number of notes and the total value of each curren-
cy are shown on the display.
Auto
The auto mode is characterised by stars. In this mode, the currency fed in is
automatically recognised if the device supports it.
PRINT: _____________ A print-out is possible using the optionally available RTP thermal receipt
printer. If a receipt printer is connected to the printer connection of the banknote
counter, a receipt can be printed by holding the PRINT key.

12
MODE: _____________ Selection of the counting mode. Also serves as the navigation button up.
MIX value counting and checking of mixed banknotes
In MIX mode, the device counts all banknotes of the same currency. After counting,
the total value and the number of banknotes are shown on the display.
SORT value counting and checking of sorted banknotes
In SORT mode, the device only counts banknotes of the same type. The rst bankno-
te counted is used as the reference value. All dierent banknotes will be rejected.
COUNT Counting without checking
In COUNT mode, the device only counts the number of banknotes. In this mode
counterfeit detection is deactivated.
REPORT: ____________ Displays the counting results. Also serves as the navigation button down.
After the count, both the total value and the number of banknotes counted are
shown on the display. To display a more detailed count result, press the REPORT
button.
ADD: _______________ Activate and deactivate the addition function. The counting result is saved when
the counted banknotes are removed only if the ADD function is activated. The
results from subsequent counting processes are added. To clear the values, press
the CLEAR button
MENU: _____________ Opens the user menu. Also serves as the back or cancel button
START: _____________ START of the counting process. Also serves as the conrmation button.
[EN]

13
[EN]
Operation
Settings
Place the device on a stable, level surface away from strong electromagnetic elds and direct sunlight.
For safety reasons, only use earthed sockets. After switching on the rapidcount T , the machine carries out a
self-test. After a successful test, the device is ready for use.
How to avoid mistakes when counting banknotes:
. Avoid counting wet, excessively dirty, or damaged banknotes.
. Make sure that there are no foreign objects such as paper clips, rubber bands, staples, dust, etc. between
the banknotes.
. Remove any creases or folds in the banknotes before placing them in the feeder.
To set up the banknote counter, press the MENU button on the main screen to access the user menu. Use the
navigation buttons to select the desired menu item and conrm it with the START button. Use the MENU button
to exit the user menu.
Setting the beep function
. Select the option “Beep Setup”.
. Press the START button to conrm.
. Select the desired element.
. Press the CUR or PRINT button to toggle between switching on and o.
. Press the MENU button to exit the menu.
Setting the date format
. Select the option “Date Format”.
. Press the CUR or PRINT button to change the date format.
. Press the MENU button to exit the menu.
Setting the date and time
. Select the option “Time & Date”.
. Press the START button to conrm.
. Use the MODE or REPORT button to select the desired entry.
. Change the value with the CUR or PRINT key.
. Press the START button to conrm.
. Press the MENU button to exit the menu.

14
Checking the versions of the device
. Select the option “Version”.
. Press the START button to conrm.
. The version information is displayed on the screen.
. Use the REPORT button to go to the next page.
. Press the MENU button to exit the menu.
Setting the automatic counting function
. Select the option “Auto Start”.
. Press the CUR or PRINT button to select between Auto and Manual.
. Press the MENU button to exit the menu.
Setting the counting speed
. Select the option “Speed”.
. Press the CUR or PRINT button to change the counting speed.
. Press the MENU button to exit the menu.
[EN]
Speed rates:
Low: notes/minute
High: notes/minute

15
[EN]
Technische specications
Technsiche data rapidcount T
Counterfeit detection IR | MG | MT | CIS | SD | UV
Counting speed | | banknotes per minute
Hopper capacity banknotes
Stacker capacity banknotes
Operating temperature ~ °C
Humidity ~%
Power supply AC-V, / Hz
Power consumption < W
Dimensions (L) * (W) * mm (H)
Weight: . kg
External interfaces DB connection, USB connection, printer connection,
SD card slot

16
[EN]
Error messages
Error message Solution
Left# counting sensor
Right# counting sensor
Left# counting sensor
Right# counting sensor
. Remove the banknote from the device or clean the
sensors.
. If the error persists, press any key and then perform
a calibration.
CIS fault #(**)!
CIS fault #(**)!
CIS fault #(**)!
. Remove the banknote from the device or clean the
CIS sensor.
. If the error persists, press any key and then perform
a CIS calibration.
Counting sensor dust warning! . Clean the sensors.
. If the error persists, press any key and then perform
a calibration.
Incomplete notes! Remove all banknotes from the feeder and repeat the
counting process.
Width error!
Length error!
Remove the faulty banknote and press the START
button to continue the process.
Cannot Judge Denomination!
Denomination not in circulation!
Denomination dierent!
Remove the faulty banknote and press the START
button to continue the process.
Stacker full! Remove all banknotes from the banknote ejection.
Double notes!
Chained notes!
. Remove all banknotes and repeat the counting
process.
. If the error persists, adjust the feeder by turning the
feed screw anti-clockwise.
Service required! Please contact your ratiotec team.

17
[IT]
Introduzione
Rückseite
Vorderseite
. Guide di inserimento
. Pannello di comando
. Display
. Espulsione delle banconote
. Inserimento delle banconote
. Vite di inserimento
. Maniglia di trasporto
. Leva di accesso per l’apertura
della macchina
. Interruttore ON/OFF
. Fusibile
. Attacco per cavo di rete
. Collegamento di rete (non disponibile)
. Collegamento stampante
. Connettore per display/update esterno
(DB)
. Porta USB di servizio
. Slot scheda SD
Gentile Cliente,
grazie per aver scelto la macchina contabanconote rapidcount T di ratiotec. Leggere attentamente le is-
truzioni per l’uso per garantire un funzionamento corretto e senza errori. Raccomandiamo inoltre una regolare
manutenzione dell’apparecchio, almeno una volta all’anno. La capacità di prestazione consigliata è di .
banconote all’anno.
.
.
.
.
.
.
.
.
.
. . . . .
.
.

18
[IT]
Pannello di comando
CLEAR: _____________ Elimina il numero di banconote contate o disattiva la funzione batch.
BATCH: _____________ Attivazione e disattivazione della funzione mazzetta. Conteggio preciso del nume-
ro di banconote (ad es. in caso di mazzette). La grandezza delle mazzette può esse-
re impostata da a banconote con l’ausilio del quadrante accanto al display.
Con il conteggio batch, la macchina conta solo un numero specicato di banconote.
Per impostare il numero individuale di banconote, premere il tasto BATCH. Sul dis-
play apparirà il numero standard “B. ”. Premendo nuovamente il tasto BATCH,
è possibile selezionare le quantità standard , , , e .
È possibile impostare queste quantità individualmente, tenendo premuto il tasto
+/+ per aumentare il numero.
Dopo aver impostato il batch appropriato, posizionare una pila di banconote
nell’inserimento. La macchina inizierà il processo di conteggio. Quando viene
raggiunto il batch impostato, la macchina si arresta automaticamente.
CUR: _______________ Selezione della valuta
Per modicare la valuta, premere il tasto CUR per scegliere tra le valute disponibili.
La valuta selezionata verrà visualizzata sul display in alto a sinistra.
Multi-Mix
Sul display vengono visualizzate “MULT” e “Mix”. In questa modalità, il dispositivo
conta valute mischiate. EUR, USD e GBP sono impostate come standard.
Dopo il processo di conteggio, sul display vengono visualizzati il numero di pezzi e
il valore totale di ogni valuta.
Auto
La modalità auto è contrassegnata da stelle. In questa modalità, la valuta appli-
cata viene automaticamente riconosciuta se il dispositivo la supporta.
PRINT: _____________ È possibile stampare utilizzando la stampante termica per ricevute RTP dispo-
nibile opzionalmente. Se una stampante per ricevute è collegata al collegamento
stampante della macchina contabanconote, è possibile stampare una ricevuta
tenendo premuto il tasto PRINT.

19
[IT]
MODE: _____________ Selezione della modalità conteggio. Serve anche come tasto di navigazione verso
l’alto.
MIX Conteggio di valori mischiati e verica
Nella modalità MIX, il dispositivo conta tutte le banconote della stessa valuta.
Dopo il conteggio, sul display vengono visualizzati il valore totale e il numero di
banconote di ogni valuta.
SORT Conteggio di valori non mischiati e verica
Nella modalità SORT, il dispositivo conta tutte le banconote dello stesso tipo. La pri-
ma banconota rilevata funziona da riferimento. Tutte le banconote diverse saranno
scartate.
COUNT Conteggio pezzi senza verica
Nella modalità COUNT, il dispositivo conta solo il numero di pezzi delle banconote.
In questa modalità è disattivato il rilevamento della contraazione.
REPORT: ____________ Mostra i risultati del conteggio. Serve anche come tasto di navigazione verso il
basso.
Dopo il conteggio, sul display vengono visualizzati il valore totale e il numero di pez-
zi delle banconote contate. Per visualizzare un risultato di conteggio più dettagliato,
premere il pulsante REPORT.
ADD: _______________ Attivazione e disattivazione della funzione di addizione. Solo quando la funzione
ADD è attivata, alla rimozione delle banconote conteggiate viene salvato il risultato
del conteggio. I risultati dei processi di conteggio successivi vengono aggiunti di
volta in volta. Per cancellare i valori, premere il tasto CLEAR.
MENU: _____________ Apre il menu utente. Funziona anche come tasto indietro o annulla
START: _____________ AVVIA il processo di conteggio. Funziona anche come tasto conferma.

20
[IT]
Utilizzo
Impostazioni
Posizionare il dispositivo su una supercie piana e stabile, lontano da forti campi elettromagnetici e da luce
solare diretta. Per motivi di sicurezza, utilizzare solo prese con messa a terra. Dopo l’accensione, il rapidcount
T esegue un auto-test. Una volta concluso positivamente il test, il dispositivo è pronto all’uso.
In questo modo si evitano errori durante il conteggio delle banconote:
. Evitare di contare banconote bagnate, eccessivamente sporche o danneggiate.
. Accertarsi che non vi siano corpi estranei come ad es. graette, elastici, fermagli, polvere o simili tra le
banconote.
. Rimuovere eventuali grinze o pieghe dalle banconote prima di posizionarle nell’inserimento.
Per impostare la macchina contabanconote, premere il tasto MENU nella schermata principale per accedere al
menu utente. Utilizzare i tasti di navigazione per selezionare la voce di menu desiderata e confermarla con il
pulsante START. Utilizzare il tasto MENU per uscire dal menu utente.
Impostazione della funzione segnale acustico
. Selezionare l’opzione “Beep Setup”.
. Per confermare premere il tasto START.
. Selezionare l’elemento desiderato.
. Premere il tasto CUR o PRINT per alternare tra accensione e spegnimento.
. Premere il tasto MENU per uscire dal menu.
Impostazione del formato data
. Selezionare l’opzione “Date Format”.
. Premere il tasto CUR o PRINT per modicare il formato della data.
. Premere il tasto MENU per uscire dal menu.
Impostare data e ora
. Selezionare l’opzione “Time & Date”.
. Per confermare premere il tasto START.
. Utilizzare il tasto MODE o REPORT per selezionare la voce desiderata.
. Modicare il valore con il tasto CUR o PRINT.
. Per confermare premere il tasto START.
. Premere il tasto MENU per uscire dal menu.
Other manuals for rapidcount T 575
1
Table of contents
Languages:
Other ratiotec Banknote Counter manuals

ratiotec
ratiotec rapidcount X 400 Instruction manual

ratiotec
ratiotec Compact User manual

ratiotec
ratiotec Soldi Smart Plus Use and care manual

ratiotec
ratiotec rapidcount T 575 Use and care manual

ratiotec
ratiotec S 20 User manual

ratiotec
ratiotec Rapidcount X 500 Product information sheet

ratiotec
ratiotec Rapidcount S User manual

ratiotec
ratiotec Rapidcount V 30 User manual

ratiotec
ratiotec Rapidcount S Series Use and care manual

ratiotec
ratiotec Cash Box Product information sheet