RCA DRC96100 User manual

Read these instructions before using your new product for the first time.
Es importante leer este manual antes de usar por vez primera su equipo.
DRC96100
User manual
manual de usuario
EN
ES
Scan for more user manual details or visit
www.RCAav.com
Escanear para más detalles del manual de usuarios o vistita
www.RCAav.com

2
* SEE BOTTOM OF UNIT FOR GRAPHIC SYMBOLS *
The lightning flash with an arrowhead symbol, within the
equilateral triangle, is intended to alert the user to the
presence of uninsulated "dangerous voltage" within the
product's enclosure that may be of sufficient magnitude to
cause an electric shock.
The exclamation point within the equilateral triangle is
intended to alert the user to the presence of important
operating and maintenance (servicing) instructions in this
owner's manual.
Safety Instructions Safety Instructions
WARNING: Should any trouble occur, disconnect the AC power adapter
and refer servicing to a qualified technician.
WARNING: TO PREVENT FIRE OR SHOCK HAZARD, DO NOT REMOVE
COVER (OR BACK). NO USER-SERVICEABLE PARTS INSIDE. REFER
SERVICING TO QUALIFIED SERVICE PERSONNEL.
WARNING: TO REDUCE THE RISK OF ELECTRIC SHOCK, DO NOT EXPOSE
THIS APPLIANCE TO RAIN OR MOISTURE. DO NOT PLACE OBJECTS
FILLED WITH LIQUIDS ON OR NEAR THIS UNIT.
CAUTION: USE OF CONTROLS OR ADJUSTMENTS OR PERFORMANCE
OF PROCEDURES OTHER THAN THOSE SPECIFIED MAY RESULT IN
HAZARDOUS RADIATION EXPOSURE.
CAUTION: DANGER OF EXPLOSION IF BATTERY IS INCORRECTLY
REPLACED. REPLACE ONLY WITH THE SAME OR EQUIVALENT TYPE.
THIS CLASS B DIGITAL APPARATUS
COMPLIES WITH CANADIAN ICES-003.
This product contains a
low power laser device.
On Placement
• Do not use the unit in places that are extremely hot, cold, dusty or
humid.
• Place the unit on a flat and even surface.
• Do not restrict the air flow of the unit by placing it in a place with
poor air flow, by covering it with a cloth, or by placing it on carpeting.
• To avoid magnetizing, do not place the unit near speakers or
magnets.
• Do not use this unit in direct sunlight or leave the unit in a closed
automobile (or similar environments) where it would be exposed to
high temperatures above 104°F (40°C).
• No naked flame sources such as lighted candles should be placed on
the AC power adapter or the main unit.
• The AC/DC adaptor and apparatus should not be exposed to
splashing or dripping liquids, and no objects filled with liquids, such
as vases, should be placed on the AC/DC adaptor and apparatus.
• The apparatus should not be exposed to dripping or splashing and
that no objects filled with liquids, such as vases, should be placed
on apparatus.
On Safety
• When connecting or disconnecting the AC power adapter, grip the
plug and not the cord itself. Pulling the cord may damage it and
create a hazard.
• When you are not going to use the unit for a long period of time,
disconnect the AC power adapter.
On Condensation
• When left in a heated room where it is warm and damp, water
droplets or condensation may form inside the unit. When there is
condensation inside the unit, the unit may not function normally.
Let the unit stand for 1 to 2 hours before turning the power on, or
gradually heat the room and allow the unit to dry before use.
Ventilation Warning
• Do not block the ventilation openings or holes. If the ventilation
openings or holes are blocked by a newspaper or cloth, etc., the heat
may not be able to get out.
• Do not operate the unit in a confined space, such as a bookcase or
built-in cabinet. Allow about 4 inches (10cm) of free space all around
the unit for adequate ventilation.
Rating Plate Location
• The rating plate is located on the bottom of unit.
FCC Statements
NOTE: This equipment has been tested and found to comply with the
limits for a Class B digital device, pursuant to Part 15 of the FCC Rules.
These limits are designed to provide reasonable protection against
harmful interference in a residential installation. This equipment
generates, uses and can radiate radio frequency energy and, if not
installed and used in accordance with the instructions, may cause
harmful interference to radio communications. However, there is no
guarantee that interference will not occur in a particular installation. If
this equipment does cause harmful interference to radio or television
reception, which can be determined by turning the equipment off and
on, the user is encouraged to try to correct the interference by one or
more of the following measures:
– Reorient or relocate the receiving antenna.
– Increase the separation between the equipment and receiver.
– Connect the equipment into an outlet on a circuit different from that
to which the receiver is connected.
– Consult the dealer or an experienced radio/TV technician for help.
Warning: Changes or modifications to this unit not expressly approved
by the party responsible for compliance could void the user’s authority
to operate the equipment.
Notes on Copyright
It is forbidden by law to copy, broadcast, show, broadcast on cable, play
in public, or rent copyrighted material without permission.
This product incorporates copyright protection technology that
is protected by U.S. patents and other intellectual property rights.
Use of this copyright protection technology must be authorized by
Macrovision, and is intended for home and other limited viewing uses
only unless otherwise authorized by Macrovision. Reverse engineering or
disassembly is prohibited.
IMPORTANT SAFETY
INSTRUCTIONS
1. Read these instructions.
2. Keep these instructions.
3. Heed all warnings.
4. Follow all instructions.
5. Do not use this apparatus near water.
6. Clean only with a dry cloth.
7. Do not block the ventilation openings. Install in accordance with
the manufacturer's instructions.

3
EN
Note: Numbers identify
each title, chapter,
and track on a disc.
Most discs have these
numbers recorded on
them, but some do not.
Note on Unauthorized Discs
You may not be able to play some DVDs on this unit, particularly if
they were purchased from outside your geographic area or made for
business purposes.
Disc Formats
Disc Formats
The unit can play back
Region Management Information
Region Management Information: This unit is designed and
manufactured to respond to the Region Management Information that
is encoded on DVDs. If the region number printed on the DVD does not
correspond to the region number of this unit, it cannot play that disc.
The region number of this unit is 1.
Disc Function or Operation That is Not Available
When the symbol appears on the screen, it indicates the function or
operation attempted is not available at that time.This occurs because the
DVD manufacturer determines the specific functions of DVDs. Certain
functions may not be available on some DVDs. Be sure to read the
documentation provided with the DVD.
Icons Used on DVDs
Sample lcons
Note:
When playing back a
CD-G (Graphics) or CD
EXTRA disc, the audio
portion will be played,
but the graphic
images will not be shown.
Titles, Chapters and Tracks
• DVDsaredividedinto“titles” and “chapters”. If the disc has more
than one movie on it, each movie would be a separate “title”.
“Chapters” are sections of titles.
•Audio CDs are divided into “tracks”. A “track” is usually one song on
an Audio CD.
DVDs
[8cm/12cm disc] Compatible
Audio CDs
[8cm/12cm disc]
8. Do not install near any heat sources such as radiators, heat registers,
stoves, or other apparatus (including amplifiers) that produce heat.
9. Do not defeat the safety purpose of a polarized or grounding -
type plug. A polarized plug has two blades with one wider than the
other. A grounding type plug has two blades and a third grounding
prong. The wide blade or the third prong are provided for your
safety. If the provided plug does not fit into your outlet, consult an
electrician for replacement of the obsolete outlet.
10.Protect the power cord from being walked on or pinched
particularly at plugs, convenience receptacles, and the point where
they exit from the apparatus.
11. Only use attachments/accessories specified by the manufacturer.
12. Use only with a cart, stand, tripod, bracket, or
table specified by the manufacturer, or sold
with the apparatus. When a cart is used, use
caution when moving the cart/apparatus
combination to avoid injury from tip-over.
13. Unplug this apparatus during lightning storms or when unused for long
periods of time.
14. Refer all servicing to qualified service personnel. Servicing is required
when the apparatus has been damaged in any way, such as the AC power
cord or plug is damaged, liquid has spilled or objects have fallen into the
apparatus, the apparatus has been exposed to rain or moisture, does not
operate normally, or has been dropped.
Accessories
Language selections for subtitles
Language selections for audio
Screen aspect ratio
Multiple camera angles
Region code indicator
1
Portable Cart Warning
IMPORTANT SAFETY
INSTRUCTIONS
Chapter1
Title1 Title2
Chapter2 Chapter3 Chapter1 Chapter2
Track1 Track2 Track3 Track4 Track5
Please check and identify the supplied accessories.
AC Power Adapter................................................................................x 1
Car Power Adapter...............................................................................x 1
Unit
1. LCD screen
2. DC IN 9V - 12V jack
3. AUDIO / VIDEO OUT jack
4. / STANDBY / ON switch
5. Headphone jack
6. button
Press to stop playing a disc.
MENU button
Accesses DVD Disc Menu if DVD disc is currently playing.
Accesses Setup menu if disc is not playing.
button
Press to start or resume playback of a disc.
Pressing during playback of a disc will cause playback to be
paused.
button
Press to go back to the previous title / chapter / track.
In DVD Menu or Setup Menu, press to scroll left.
Press and hold the button to perform fast reverse playback
during CD/DVD playback.
button
Adjusts the volume.
In DVD Menu, Setup Menu or JPG Menu, press to scroll up.
button
Press to advance titles / chapters / tracks.
In DVD Menu or Setup Menu, press to scroll right.
Control Reference Guide

4
• Makesuretheunitissecurelyfastenedtopreventitfromfallingor
flying through the air in the event of an accident.
• Whentheinsideofthecigarettelightersocketisdirtywithashesor
dust, the plug section may become hot due to poor contact. Be sure
to clean the cigarette lighter socket before use.
• Afteruse,disconnectthe12Vcarpoweradapterfromboththeunit
and cigarette lighter socket.
Press and hold to perform fast forward playback during CD/DVD
playback.
button
Adjusts the volume.
In DVD Menu, Setup Menu or JPG Menu, press to scroll down.
7. CHARGING indicator
Charge the rechargeable battery before using it for the first time.
Complete charging typically takes approximately 2-3 hours. The
charging light will go out when the battery becomes fully charged.
8. Disc Door
Lift the disc door up to open it.
To DC IN 9V - 12V Jack
2
Car power adapter
To cigarette
lighter socket
1
B. Using the Car Power Adapter
The 12V car power adapter allows the unit to be used with vehicles that
have a 12V, negative ground electrical system.
Warning:
Disconnect the car power adapter when not in use. Not for use in 24V
vehicles.
Caution:
• Usetheprovided12Vcarpoweradapteronly.Usewithothercar
power adapters could damage the unit.
• The12Vcarpoweradapterincludedwiththisunitisforitsuseonly.
Do not use it with other equipment.
• Intheinterestoftrafficsafety,donotoperatethisunitorview
videos while driving a vehicle.
C. Using the Built-in Battery
The unit has a built-in, non-replaceable, rechargeable battery. Charge
the built-in battery before using it for the first time. Complete charging
typically takes approximately 2-3 hours. The charging light will go out
when the built-in battery becomes fully charged.
To recharge the built-in battery
1To AC power
outlet
2To DC IN 9V
- 12V Jack
3Slide the switch
to CHARGE
4Charging
light ON 5Recharging
is completed
when charging
light goes out
AC power
adapter
Power Supply
Warning:
• Thebuilt-inbatterycanonlyberechargedwhentheunitisin
CHARGE mode while using the AC power adapter.
• Thebuilt-inbatterycannotberechargedwhentheunitisinON
mode.
• DoNOTrechargethebuilt-inbatteryinavehicleusingthecar
power adapter.
• Batteriesshouldnotbeexposedtoexcessiveheatsuchassunshine,
fire or the like.
Note:
• Whenthebuilt-inbatterypowerislow,"BatteryLow"willdisplayon
the screen and the unit will stop playing.
• Rechargethebuilt-inbatterywhenyouarereadytouseitagain.
• Whileusingthebuilt-inbattery,theenvironmentaltemperature
should be 41°F (5°C) to 95°F (35°C).
• Togetthelongestservicelifeofthebuilt-inbattery,chargeat
indoor-temperature.
• Thebuilt-inbatteryinthisdevicemaypresentariskoffireor
chemical burn if mistreated. Do not disassemble, heat above 212oF
(100oC), or incinerate.
• Theunitshouldnotbeexposedtoexcessiveheatsuchassunshine,
fire or the like.
• Whendiscardingtheunit,environmentalproblemsmustbe
considered and local rules or laws governing the disposal of such
products must be strictly followed.
Turning on the Unit
1. Slide the / STANDBY / ON switch on the left
side of the unit to the ON position.
2. The start-up picture will appear on the screen.
3. After use, slide the / STANDBY / ON switch
to the STANDBY (power off) position.
A. Using the AC Power Adapter
The supplied AC power adapter operates on AC 100-120V.
• UsinganACadapterotherthantheonesuppliedwiththeunitmay
damage the unit.
AC power adapter
2
1
To DC IN 9V - 12V Jack
To wall outlet
Caution:
• TheACpoweradapterincludedwiththisunitisforitsuseonly.Do
not use it with other equipment.
• Whentheunitisnotgoingtobeusedforlongtime,disconnectthe
AC power adapter from the AC power outlet.
• WhentheACpoweradapterispluggedin,theapparatusisnot
completely disconnected from the main power supply, even when
the power is turned off.
Warning:
The AC power adapter is used as disconnect device and it should
remain readily operable during intended used. In order to disconnect
the apparatus from the mains completely, the AC power adapter should
be disconnected from the mains socket outlet completely.
Control Reference Guide Power Supply

5
EN
Connections
A. Connecting a TV
If your TV has audio/video inputs, you can connect the unit to your TV
using standard Audio/Video cables.
To AUDIO /
VIDEO OUT
jacks Audio / Video cable
(not included)
TV
White Red Yellow
White Red Yellow
This owner’s manual explains the basic instructions for operating
this unit. Some DVDs are produced in a manner that allows specic
or limited operation during playback. Therefore, this unit may not
respond to all operating commands. THIS IS NOT A DEFECT. Please
refer to the instructions accompanying the specic DVD in question
for more information about the options available on that DVD.
“ ”may appear on the screen during operation. A“ ” means the
desired operation is not permitted by the unit or disc.
Playing a Disc
1. Slide the / STANDBY / ON switch on the left side of the unit to
the ON position.
See Customizing the function settings before proceeding to step 2.
2. Use your fingers to hold the disc door on the front of the unit and
lift it up to open.
3. Hold the disc by its sides and carefully place it onto the spindle with
the label side facing up, pushing gently until you hear a “click”.
4. Close the disc door. It takes a short while for your unit to load the
disc. After loading, the unit will automatically bring you to the main
menu of the DVD or start playing the DVD.
5. If the unit does not automatically start playing the DVD, press the
button on the unit.
Pausing Playback (Still Mode)
Press the button. To resume normal playback, press the button
again.
Stopping Playback
Press the button at the location where you want to interrupt
playback. To resume playback at the position where the disc was
stopped, press the button.
If you press the button twice, the unit’s memory will be cleared and
pressing the button will reset the DVD to the beginning.
Playing a Disc (Basic Playback)
Caution:
Avoid listening to sound
at levels which may be
harmful to your ears.
Headphones/Earphones
(3.5mm diameter plug)
(not included)
Watching a DVD on your TV
1. Turn on the unit.
2. Turn on the TV and follow the instructions included with it to watch
video from external sources.
3. To mute the unit and listen the sound from TV only, please press
button until appear on the screen.
B. Using Headphones/Earphones
• Turn down the volume before connecting, and then adjust the level.
• When headphones/earphones are connected, no sound will be
emitted from the unit’s speaker.
Fast Forward / Fast Reverse
1. Press and hold the or button when a disc is playing. Each
time you press and hold the or button, the playback speed
changes in the following sequence:
2. Press the button twice when you reach the desired point to
resume normal playback.
Notes:
• TheDVDplayermutessoundandsubtitlesduringreverseand
forward scan of DVDs.
• Thefastplaybackspeedmaydifferdependingonthedisc.
Skip Forward / Reverse
• Pressthe button to advance titles, chapters/tracks.
• Pressthe button to go back to current or previous titles,
chapters/tracks.
This unit can play JPEG files recorded on a CD-R or CD-ROM disc (CD-RW
is not recommended).
Viewing JPEG Files
1. Use your fingers to hold the disc
door on the front of the unit and
lift it up to open.
2. Hold a JPEG file disc by its edges
and gently push it onto the
spindle with the label side facing
up until you hear a“click”.
3. Close the disc door. The JPEG
files on the disc will be displayed one by one automatically. If the
disc does not play automatically, press the button.
4. Press the MENU or button to display a folder list. Press the or
button to highlight a JPEG file to play. Press the button to start
playback.
Notes:
• Youcanpressthe button to freeze the picture. Press the button
again to resume picture slide show.
• Youcanpressthe button to quit playback.
• Youcanpressthe or button to change the picture.
• Somediscsmaynotpermitthisoperation.
Viewing JPEG Files

6
Customizing the Function Settings Customizing the Function Settings
Language Setup
1. Press the MENU button in
stop mode (when disc is not
playing).
2. Press the button to select
Language Menu.
3. Press the or button to
select the option (Player Menu,
Audio, Subtitle or Disc Menu), then press the button.
4. Press the or button to select your preferred language, then
press the button to confirm.
5. Repeat steps 3 and 4 to adjust other options. Press the button to
return to the previous menu.
6. Press the MENU button to exit the menu.
Notes:
• SomeDVDsmaynotplayintheaudiolanguageyouselected.A
prior language may be programmed on the disc.
• SomeDVDsmaybesettodisplaysubtitlesinalanguageother
than the one you selected. A prior subtitle language may be
programmed on the disc.
• SomeDVDsallowyoutochangesubtitleselectionsusingthedisc
menu only. If this is the case, press the MENU button and choose
the appropriate subtitle language from the selection on the disc
menu.
• SomeDVDsmaynotincludeyourpre-selectedlanguage.Inthis
case, the DVD player automatically displays disc menus consistent
with the disc’s initial language setting.
Video Setup
1. Press the MENU button in
stop mode (when disc is not
playing).
2. Press the / button to
select Video Menu.
3. Press the or button to
select the option (Brightness
or Contrast), then press the
button.
4. Press the / button to adjust the setting, then press the
button to confirm.
5. Repeat steps 3 and 4 to adjust other options. Press the button to
return to the previous menu.
6. Press the MENU button to exit the menu
System Setup
1. Press the MENU button on the
unit in stop mode (when disc is
not playing).
2. Press the / button to
select System Menu.
3. Press the or button to
select the option (TV Display or
Default), then press the button.
4. Press the or button to adjust the settings, then press the
button to confirm.
5. Repeat steps 3 and 4 to adjust other options. Press the button to
return to the previous menu.
6. Press the MENU button to exit the menu.
Go To Language Menu
-- Language Menu --
System
Language Video
Player Menu
Audio
Subtitle
Disc Menu
Eng
Eng
Off
Eng
TV Display
Pan Scan
• Whenwide-screenvideoisplayed,this
mode clips the right and left sides of
the image so that it can be viewed on
a conventional screen.
• Somewide-screenDVDsthatdonot
permit Pan Scan mode playback are
automatically played in letter box
mode (black bands that appear at the
top and bottom of the screen).
Letter Box
• Whenwide-screenvideoisplayedin
this mode on a conventional screen,
black bands appear at the top and
bottom of the screen.
Wide Screen
• Thisisthecorrectmodeforplaying
wide-screen videos on the unit screen
or other external wide-screens.
Notes:
• Thedisplayablepicturesizeispreset
on the DVD. Therefore the playback
picture of some DVDs may not
conform to the picture size selected.
• WhenyouplayDVDsrecordedinthe
4:3 aspect ratio, the playback picture
will always appear in the 4:3 aspect ratio regardless of the TV display
setting.
• SelectWideScreentoconformtheLCDscreenontheunit.Always
be sure that your TV display conforms to the actual TV in use if you
connect the unit to a TV.
Cut off when a wide-screen
video image is played.
Pan Scan
Letter Box
Wide Screen
Sound System
Dolby Digital
Dolby Digital is a technology developed by Dolby Laboratories.
Soundtracks encoded in Dolby Digital can reproduce from one to 5.1
discrete channels of excellent quality audio.
The unit automatically recognizes the Dolby Digital bitstream and
provides a downmix suitable for two-channel listening. An additional
Dolby Digital decoder is required for reproduction of the discrete multi-
channel soundtracks available on many DVDs.
Manufactured under license from Dolby Laboratories.
Dolby and the double-D symbol are trademarks of
Dolby Laboratories.
Default
It takes 3-5 seconds to reset the DVD settings to the factory default.
Brightness
Contrast
To
-- --
Language
00
00
System
Video
Go To Video Menu
Video Menu
TV Display
Default
Wide
No
Go To System Menu
--System Menu --
System
Language Video

7
EN
Cleaning the Disc
A defective or soiled disc inserted into the unit can cause sound to drop
out during playback.
Handle the disc by holding its inner and outer edges.
• DoNOTtouchthesurfaceoftheunlabeled
side of the disc.
• DoNOTstickpaperortapeonthesurface.
• DoNOTexposethedisctodirectsunlightor
excessive heat.
• Clean the discbeforeplayback.Wipethedisc fromthecenter
outward with a cleaning cloth.
• NEVERusesolventssuchasbenzineoralcoholtocleanthedisc.
• DoNOTuseirregular shapeddiscs(example:heart shaped,
octagonal, etc.). They may cause malfunctions.
Cleaning the Unit
• Besure to turntheunitoffanddisconnectthe AC poweradapter
before cleaning the unit.
• Wipetheunitwithadrysoftcloth.Ifthesurfacesareextremelydirty,
wipe clean with a cloth that has been dipped in a weak soap-and-
water solution and wrung out thoroughly, then wipe with a dry
cloth.
• Never use alcohol, benzine, thinner, cleaning fluid or other
chemicals. Do NOT use compressed air to remove dust.
Important Note
• Before transporting the unit, remove the disc from the disc
compartment.
Maintenance Troubleshooting Guide
No power.
• EnsuretheACpoweradapterisconnected.
• Theunitisnotturnedon.
No sound or only a very low-level sound is heard.
• The volumecontrolis locatedon thesideof theunit– pleasetry
adjusting this.
• Thesystemisinpausemode.Pressthe button to return to normal
play mode.
• Theunitisinfast-forwardorfast-reversemode.Pressthe button
to return to normal play mode.
• MakesuretheAUDIO/VIDEOoutputconnectionsarecorrect.
• TheDTSDVDcannotbedecodedtohavespeakeroutput.
• Theunitistoohot;shutofftheunitfor30minutestocoolitdown.
No picture.
• Theregionnumberofthediscdoesn'tmatchtheregionnumberof
this unit.
The picture is not clear.
• Cleanthedisc.
• Thediscisscratched.
Severe hum or noise is heard.
• The plugs and jacks are dirty. Wipe them with a cloth slightly
moistened with alcohol.
• Cleanthedisc.
The disc does not play.
• Thereisnodiscinside(“NoDisc”appearsonthescreen).
• Insertthedisccorrectlywiththeplaybacksidefacingdown.
• Cleanthedisc.
• Anon-NTSCdischasbeeninserted.Theunitanddiscregionnumber
are incompatible.
• Condensation may have formed inside the unit due to a sudden
change in temperature. Wait about an hour for it to clear and try
again.

8
Limited Warranty
AVC MULTIMEDIA (“AVC”) makes the following limited warranty. This limited warranty extends to the original consumer purchaser and is limited
to non-commercial use of the product.
One Year Parts & Labor Warranty
AVC products purchased in the United States are warranted to be free from defects in materials or workmanship for a period of one year from the
date of their original retail purchase. If the unit fails to conform to this warranty, we will service the product using new or refurbished parts and
products, at AVC’s sole discretion.
During a period of one year from the effective warranty date, AVC will provide, when needed, service labor to repair a manufacturing defect at its
designated Service Center. To obtain warranty service in the United States, you must first call our Customer Support Center at 1-800-506-5746
or 1-877-252-6873, during the hours listed in the box below.The determination of service will be made by AVC Customer Support. PLEASE DO
NOT RETURN YOUR UNIT TO AVC WITHOUT PRIOR AUTHORIZATION. New or remanufactured replacements for defective parts or products will
be used for repairs by AVC at its designated Service Center for one year from the effective warranty date. Such replacement parts or products are
warranted for an additional one year from the date of repair or replacement. The Customer will be required to ship the unit to the Service Center
indicated at the time Customer Support is contacted to make the necessary repairs. The customer is responsible for all transportation charges to
the service facility.
Packaging and Shipping Instruction
When you send the product to the AVC service facility you must use the original carton box and packing material or an equivalent as designated
by AVC.
Your Responsibility
(1) You must retain the original sale receipt to provide proof of purchase.
(2) These warranties are effective only if the product is purchased and operated in the U.S.A. or Canada.
(3) Warranties extend only to defects in material or workmanship, and do not extend to any product or parts which have been lost or discarded,
or damage to product or parts caused by misuse, accident, improper operation or maintenance, or use in violation of instructions provided
with the product, or to product which has been altered or modified without authorization of AVC, or to products or parts thereof which have
had the serial number removed or changed.
Out of Warranty
In the event your product requires repair after the limited warranty period has expired, please contact our Customer Support Center at
1-800-506-5746, 1-877-252-6873 or www.RCAav.com
Hours: Monday–Thursday: 9am–7pm, Friday: 9am–5pm, Saturday: 9am–NOON Eastern time.
Important: You are responsible for any transportation, shipping or insurance relative to the return of product to our Product Returns Center.
All warranties implied by state law, including the implied warranties of merchantability and fitness for a particular purpose, are expressly limited to
the duration of the limited warranties set forth above. With the exception of any warranties implied by state law as hereby limited, the foregoing
warranty is exclusive and in lieu of all other warranties, guarantees, agreements and similar obligations of manufacturer or seller with respect to
the repair or replacement of any parts. In no event shall AVC be liable for consequential or incidental damages.
No person, agent, distributor, dealer or company is authorized to change, modify or extend the terms of these warranties in any manner
whatsoever. The time within action must be commenced to enforce any obligation of AVC arising under the warranty or under any statute, or
law of the United States or any state thereof, is hereby limited to one year from the date of purchase. This limitation does not apply to implied
warranties arising under state law.
This warranty gives you specific legal rights and you may also have other rights, which may vary, from state to state. Some states do not allow
limitation on how long an implied warranty lasts, when an action may be brought, or the exclusion or limitation of incidental or consequential
damages, so the above provisions may not apply to you.
For more information on other products and services, please visit our web site at www.RCAav.com
Important: Also keep your “Bill of Sale” as proof of purchase.
Model no........................................................................................................................... Product name..................................................................................................................
Type of set......................................................................................................................... Serial no.............................................................................................................................
Invoice no......................................................................................................................... Date purchased...............................................................................................................
Dealer name.....................................................................................................................
FOR SERVICE AND REPAIR, PLEASE VISIT www.RCAav.com
Specifications and external appearance are subject to change without notice.
© 2013 AVC MULTIMEDIA

2
ES
Precauciones de seguridad Precauciones de seguridad
En cuanto a la ubicación
• Nohagausodelaunidadenlugaresconmuchocalor,frío,polvoo
humedad.
• Coloquelaunidadenunasuperficieplanaypareja.
• Norestrinjaelflujodeairedelaunidadponiéndolaenunlugarcon
pocaventilación,cubriéndolaconunpaño,oponiéndolasobreuna
alfombra.
• Paraevitarlaatracciónmagnética,nopongalaunidadcercadeun
parlante ni de un imán.
• Noutiliceesta unidadbajolaluzdirectadelsolnidejelaunidad
en un automóvil cerrado (o en un ambiente similar) donde pudiera
quedar expuesta a altas temperaturas de más de 104°F (40°C).
• Nopongaobjetosquetenganllamasaldescubierto,talescomo
velas, sobre esta unidad.
• NieladaptadordeCA/CCnielaparatodebenestarexpuestosa
salpicadurasdeaguanialíquidosquegoteen,nitampocosedebe
ponerningúnobjetollenodelíquido,comosonlosfloreros,sobreel
adaptador de CA/CC ni sobre el aparato.
• Nosedebeexponeresteaparatoasalpicadurasnialíquidosque
goteen,nitampocosedebeponerningúnobjetollenodelíquido,
como son los floreros, sobre el aparato.
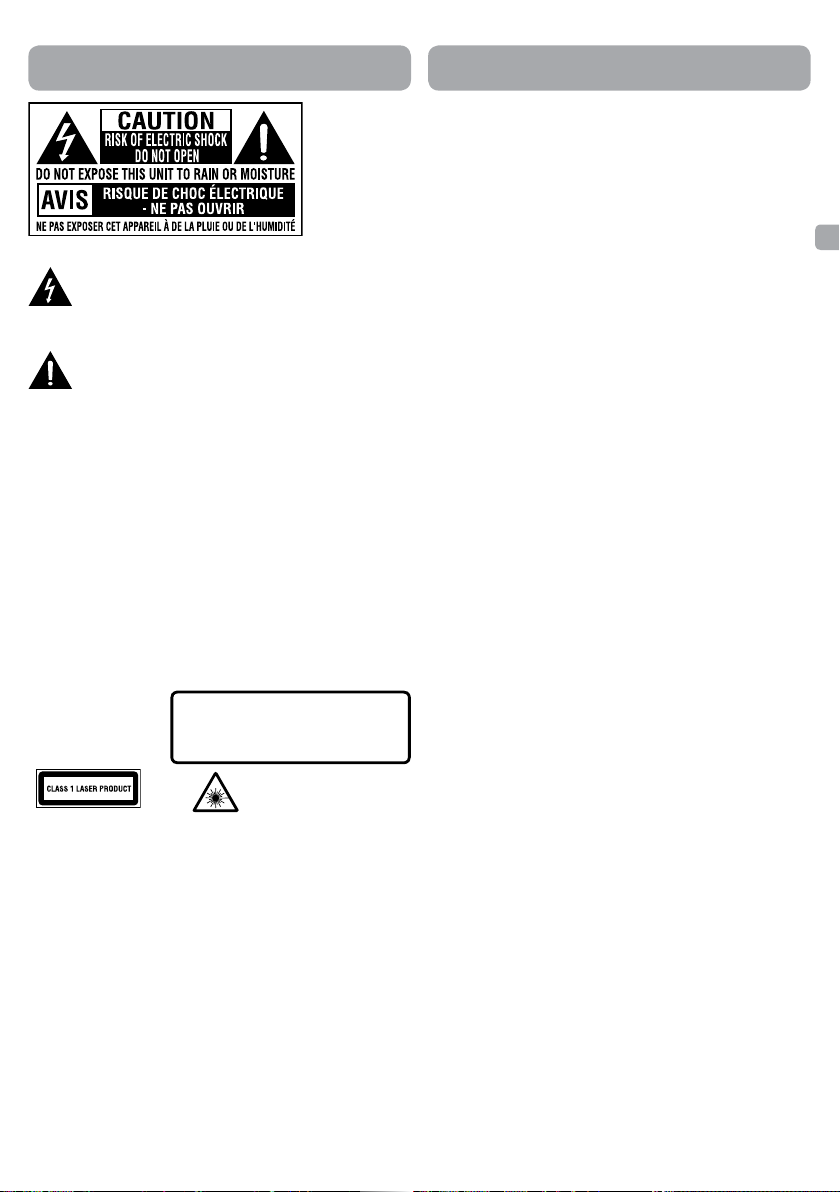
* VER PARTE TRASERA DE LA UNIDAD PARA SÍMBOLOS GRÁFICOS *
Elsímbolodeunrayodentrodeuntriánguloequiláteroestá
pensado para alertar al usuario de la presencia de “voltaje
peligroso” no aislado dentro de la carcasa del producto, el
cual puede ser de una magnitud suficiente para provocar
unadescargaeléctrica.
El signo de admiración dentro de un triángulo equilátero
está pensado para alertar al usuario de la presencia de
instrucciones importantes de manejo y mantenimiento
(reparación) en este manual de usuario.
ADVERTENCIA: Si ocurre algún problema, desconecte el adaptador de
CAyllameauntécnicocalicadoparaelmantenimiento.
ADVERTENCIA: PARA PREVENIR RIESGO DE INCENDIO O DESCARGA
ELÉCTRICA, NO RETIRE LA CUBIERTA NI LA PARTE POSTERIOR DEL
EQUIPO. NO HAY PIEZAS DE REPUESTO PARA EL USUARIO DENTRO DEL
APARATO. PARA CUALQUIER TIPO DE CONSULTA, ACUDA A PERSONAL
DE SERVICIO CALIFICADO.
ADVERTENCIA: PARA REDUCIR EL RIESGO DE SUFRIR UNA DESCARGA
ELÉCTRICA, NO EXPONGA ESTE APARATO A LA LLUVIA NI A LA
HUMEDAD. NO PONGA OBJETOS QUE CONTENGAN LÍQUIDOS SOBRE
ESTA UNIDAD NI CERCA DE ELLA.
PRECAUCIÓN: AL USAR LOS CONTROLES, HACER AJUSTES O LLEVAR A
CABO PROCEDIMIENTOS DISTINTOS A LOS QUE SE ESPECIFICAN EN EL
MANUAL, PUEDE QUEDAR EXPUESTO A RADIACION PELIGROSA.
PRECAUCIÓN: PELIGRO DE EXPLOSIÓN AL CAMBIAR LAS BATERÍAS
DE MANERA INCORRECTA. AL CAMBIAR LAS PILAS, CÁMBIELAS POR EL
MISMO TIPO DE BATERÍAS O POR UN TIPO DE BATERÍA SIMILAR.
Cumple con la
especificación
Canadiense ICES-003
clase B.
Este producto contiene
un dispositivo láser de
baja potencia.
PRECAUCIÓN
RADIACIÓN LÁSER INVISIBLE EN CASO DE
APERTURA Y DESBLOQUEO DE CIERRE.
EVITE CUALQUIER EXPOSICIÓN AL RAYO.
Acerca de la seguridad
• AlconectarodesconectareladaptadordeCA,agarrarelenchufey
noelcablemismo.Tirardelcablepuededañarloycrearriesgo.
• Cuandolaunidadnosevaausarporunperíodolargodetiempo,
desconecte el adaptador de CA de la toma de CA.
En cuanto a la condensación
• Sidejalaunidadenunlugarcalurosoyhúmedo,esposibleque
enelinteriordelreproductorlaunidadseformenpequeñasgotas
o que se forme condensación. Si existe condensación. Si existe
condensación en el interior del aparato, es posible que la unidad no
funcionedemaneranormal.Dejequelaunidadestéenreposopor
1 ó 2 horas antes de encenderla, o bien, gradualmente, entibie la
habitación y seque la unidad antes de usarla.
Advertencia sobre la ventilación
• Noobstruyalasranurasnilosoroficiosdeventilación.(esposible
quealobstruirlosconunperiódicoounpaño,etc.elcalornopueda
salir de la unidad.)
• Nohagafuncionarestaunidadenunespaciocerrado,talcomo
un estante para libros o un mueble incorporado. Deje cerca de 4
pulgadas (10 cm) de espacio libre alrededor de la unidad para que
se pueda ventilar de manera apropiada.
Localizacióndelaplacadecaracterísticasnominales
• Lalocalizacióndelaplacadecaracterísticasnominalesesenla
parte trasera de la unidad.
Renseignements FCC
NOTA: Este aparato ha sido puesto a prueba y se ha verificado que
cumple con las restricciones de los equipos digitales clase B, en
conformidadconelCapítulo15del ReglamentodelaFCC.Dichas
restriccionesestándiseñadaspara proporcionarladebida protección
contrainterferenciadañinaenlasinstalaciones residenciales.Este
equipogenera,usaypuede irradiarenergíadefrecuenciasradiales
y, de no instalarse y usarse según las instrucciones, puede causar
interferenciadañinaparalas comunicacionesderadio.Noobstante,
nohaygarantíadequeen unainstalaciónespecícanose produzca
interferencia. Si este equipo causara interferencia en la recepción de
la radio o la televisión (lo quer se puede determinar encendiendo y
apagando el equipo), le sugerimos al usuario que intente corregir dicha
interferencia, adoptando una o más de las siguientes medidas:
- Reoriente o ubique en otro lugar la antena de recepción.
- Aumente la distancia que separa al equipo del receptor.
- Conecte el equipo a un enchufe de pared que se encuentre en un
circuito diferente a donde tenga conectado el receptor.
- Pidaayudaalvendedoroauntécnicoderadiosytelevisorescon
experiencia.
Advertencia: los cambios o modificaciones que se hagan a esta unidad,
quenoesténexpresamenteaprobadosporlaparteresponsablede
hacer cumplir las reglas de funcionamiento de este aparato, pueden
anular la autoridad del usuario para operar este equipo.
Notas sobre los derechos de reproducción
Está prohibida por ley la copia, difusión, exhibición, distribución
por cable, emisión pública o alquiler de material con Copyright sin
autorización previa.
"Esteproductocuentacontecnologíaparaprotegerlosderechos
de reproducción, la cual está protegida por los derechos de ciertas
patentes americanas y por otros derechos de propiedad intelectual.
Macrovisiondebeautorizarel usodeestatecnologíaparaproteger
los derechos de reproducción, la cual está destinada únicamente al
uso en el hogar y a otro tipo de reproducción limitada, a menos que
Macrovision lo autorice de otra manera. Queda prohibido desarmar
ollevaracaboprocedimientosdeingenieríainversaenesteaparato".

3
ES
Advertencia sobre el
carro para transporte
Control remoto
Formatos de los discos
El equipo puede reproducir:
Función de disco u operación no disponible
Cuandoapareceelsímbolo en la pantalla del TV, ello indica que la
función y operación que se está intentando no está disponible en ese
momento. Esto ocurre porque el fabricante del disco DVD determina
lasfuncionesespecícas.Ciertasfuncionespuedennoestardisponibles
en algunos discos. Asegúrese de leer la documentación proporcionada
con el disco.
DVDs [discos
de 8cm/12cm] Compatible
CDs de audio
[discos de 8cm/12cm]
Información de gestión de región
Información de gestión de región: Esta Unidad está diseñada y
fabricada para responder a la Información de Gestión de Región que
está codificada en los discos DVD. Si el número de Región impreso en
el disco DVD no se corresponde con el número de Región de la Unidad,
éstanopodráreproduciresetipodediscos.
El número de región de esta unidad es 1.
Accesorios
Por favor revise e identifique los accesorios suministrados.
Adaptador de CA.....................................................................................x 1
Adaptadorparavehículo......................................................................x 1
InstruccIones de
segurIdad Importantes
1. Lea estas instrucciones.
2. Conserve estas instrucciones.
3. Preste atención a todas las advertencias.
4. Siga todas las instrucciones.
5. No use este aparato cerca del agua.
6. Limpiesoloconunpañoseco.
7. No bloquee ninguna de las aberturas de ventilación. Instale de
acuerdo a las instrucciones del fabricante.
8. No instale cerca ninguna fuentes de calor tales como radiadores,
registros de calor, estufas u otros aparatos (incluyendo amplificadores)
que producen calor.
9. No anule el propósito de seguridad del enchufe de tipo polarizado
o del enchufe con toma a tierra. Un enchufe polarizado tiene dos
cuchillas y una tercera clavija de conexión a tierra. La cuchilla más
ancha o la tercera clavija se proveen para su seguridad. Cuando el
enchufe provisto no encaje en su toma de corriente, consulte a un
electricista para reemplazar la toma de corriente obsoleta.
10.Proteja el cable de alimentación de ser pisado o perforado
específicamenteeneláreadelenchufe,latomadecorrienteyel
punto en donde salen del aparato.
11.Sólo use los anexos/accesorios especificados por el fabricante.
12.Usesóloconelcarro,soporte,trípode,omesa
especificados por el fabricante, o vendidos
con el aparato. Cuando use el carro, mueva
la combinación de carro/aparato de manera
cautelosaparaevitardañosa causa deque
se vuelque.
13.Desconecteesteaparatodurantetormentaseléctricasocuandono
sevayaausarduranteperíodosprolongados.
14.Derive todas las reparaciones del equipo a personal de reparaciones
calificado.Seprecisarárepararelaparatocuandoéstesehaya
dañadodecualquierforma,comocuandoelenchufeoelcablede
alimentacióndeCAsehayadañado,cuandosehayaderramado
unlíquidoohayacaídounobjetodentrodelaparato,cuandoel
aparato haya quedado expuesto a la lluvia o a la humedad, cuando
nofuncionenormalmenteosehayacaído.
Formatos de los discos
Nota:
Cuando se
reproduce un
disco CD-G
(Gráficos) o
CD EXTRA, la
porción de audio
se reproducirá, pero las imágenes gráficas no podrán verse.
Títulos,capítulosypistas
• LosDVDestándivididos
entítulosycapítulos.Si
el disco contiene más
deunapelícula,cada
películaseríauntítulo
distinto.Loscapítulos
sonseccionesdelostítulos.
• LosCDdeaudiosedividenenpistas;unapistaesnormalmenteuna
canción o un tema en un CD de audio.
Nota: Existennúmerosqueidenticancadatítulo,capítuloypistade
undisco.Lamayoríadediscostienenestosnúmerosgrabadosenellos,
pero algunos no los tienen.
Notas sobre discos no autorizados
NopodráreproduciralgunosdiscosDVDenestaUnidadsiéstosfueron
adquiridos fuera de su zona geográfica o si se fabricaron para fines
comerciales.
Selección de idiomas para audio
Seleccióndeidiomasparalossubtítulos
Proporcióndeltamañodelapantalla
Ángulos de cámara múltiples
Indicador del código de región
1
Capítulo1
Título1 Título2
Capítulo2 Capítulo3 Capítulo1 Capítulo2
Pista 1 Pista 2 Pista 3 Pista 4 Pista 5
1. Pantalla de LCD
2. Enchufe DC IN 9V - 12V
3. Enchufes AUDIO / VIDEO OUT
4. / STANDBY / ON [carga/apagado/encendido]
5. Enchufeparalosaudífonos
Unidad
Iconos utilizados en los DVD
Iconos de muestra

4
ES
A. Uso del adaptador de CA
Este adaptador de CA opera en CA 100-120V.
• Usar un adaptador CA distinto que el suministrado can la unidad
puededañarlamisma.
Fuentedeenergía
Precauciones:
• Utiliceúnicamenteeladaptadorparavehículosde12Vquese
suministra.Elusodeotroadaptadorparavehículospodríadañarel
aparato.
• Eladaptadorparavehículosde12Vsesuministraparasuuso
exclusivo con este aparato. No lo utilice con ningún otro equipo.
• Porrazonesdeseguridad,nomanipuleesteaparatonivisualice
ningúnDVDmientrasconduceunvehículo.
• Compruebequeelaparatoestábiensujetoparaevitarquesecaiga
en caso de accidente.
• Cuandoelinteriordelatomadelencendedorestéllenodeceniza
o polvo, la sección de la toma puede calentarse a causa del mal
contacto. Limpie la toma del encendedor antes de utilizarla.
• Despuésdesuutilización,desconecteeladaptadorparavehículos
tanto del aparato como del encendedor del coche.
Advertencias:
• Labateríaintegradasólopodrárecargarsecuandolaunidadse
encuentre en el modo mientras se usa el adaptador de CA.
• Labateríaintegradanopodrárecargarsecuandolaunidadse
encuentre en el modo encendido (ON).
• NOrecarguelabateríaenelvehículousandoeladaptadorde
corriente para el automóvil.
• Bateríasnosedebenexponerafuentesdecalorexcesivo,comola
luz del sol, fuego u otros.
C.Cómousarlabateríaintegrada
La unidad tiene una batería integrada, no reemplazable, recargable.
Carguelabateríaintegradaantesdeusarlaporprimeravez.Eltiempode
carga completa normalmente tarda aproximadamente 2-3 horas. La luz
decargaseapagarácuandolabateríaintegradaestécompletamente
cargada.
Para recargar la batería integrada
1Al enchufe de
CA de la pared
2Al enchufe
DC IN 9V
3Deslice el interruptor
a la posición 4La luz que
indica que la
pila se esta
cargando se
encendera
Adapador
de CA
5La pila se termina
de recargar cuando
la luz se apaga
Guíadereferenciaparaloscontroles Fuentedeenergía
Precauciones:
• EladaptadordeCAque seincluyeconestaunidadesparauso
exclusivo con ella. No use el adaptador con otros equipos.
• Cuandonovayaausarla unidadporunperiodoprolongado,
desconecte el adaptador de CA del enchufe de CA de la pared.
• Al estarenchufadoel adaptadordeCA,el aparatonoestá
completamentedesconectadodelaredeléctrica,auncuando el
equipoestéapagado.
Advertencia:
El adaptador de CA se usa como dispositivo de desconexión y se
debepoderaccedera él fácilmentealusarlo.Paradesconectar
completamenteelaparatodelaredeléctrica,eladaptadordeCAdebe
desconectarse completamente del enchufe de pared.
Adaptador de CA
2
1
Al enchufe DC IN 9V
Al enchufe
de la pared
Al enchufe DC IN 9V
2
L’adapteur d’auto
Al encendedor
del vehículo
1
6. Botón
Oprima para detener la reproducción de un disco.
Botón MENU
Accede al menú del disco de DVD, si el disco de DVD está en
reproducción.
Accede el menú de configuración, si el disco de DVD no está en
reproducción.
Botón
Oprima para comenzar o para reanudar la reproducción de un
disco.
Al presionar durante la reproducción de un disco, se hará una pausa.
Botón
Oprimaparairaltítulo,capítuloopistaanterior.
Al estar en l a modalidad del menú de DVD o menú de configuración,
oprima para avanzar el texto hacia la izquierda.
Oprima y mantenga apretado el botón para reproducir a alta velocidad
en sentido de retroceso, mientras el CD/DVD está en reproducción.
Botón
Ajuste el nivel del volumen.
En el menú de DVD, configuración o de archivos JPG, oprima para
avanzar el texto hacia arriba.
Botón
Avanzaatravésdelostítulos,capítulosopistasdeundisco.
En el menú de DVD o de configuración, oprima para avanzar el
texto hacia la derecha.
Oprima y mantenga apretado el botón para reproducir a alta velocidad
en sentido de avance, mientras el CD/DVD está en reproducción.
Botón
Ajuste el nivel del volumen.
En el menú de DVD, configuración o de archivos JPG, oprima para
avanzar el texto hacia la derecha.
7. Indicador CHARGING
Carguelabateríarecargableantesdeusarlaporprimeravez.El
tiempo normal de carga es de aproximadamente 2-3 horas. La luz
decargaseapagaráunavezquelabateríasecargueporcompleto.
8. Tapa del compartimiento para discos
Levante la tapa del compartimiento de discos hacia arriba para
abrirla.
B.Usodeladaptadorparavehículo
El adaptador para vehículo que viene incluido con este aparato está
diseñado para usarse en vehículos con un sistema eléctrico a tierra
negativo de 12V.
Advertencias:Desconecteeladaptadorparavehículoscuandonovaya
autilizarlo.Nolouseenvehículosequipadosconunsistemade24V.

5
ES
Reproducción de un disco (reproducción básica)
Conexiones
Encendido de la unidad
1. Deslizar el interruptor / STANDBY / ON en
el lado izquierdo de la unidad a la posición ON
(encendido).
2. El logotipo del DVD (imagen de comienzo)
aparecerá en la pantalla de la unidad.
3. Despuésdeusaresteaparato,desliceelinterruptor /
STANDBY / ON a la posición de suspensión STANDBY (apagado).
A. Enchufar la unidad a un TV
Si su televisor dispone de entradas de Audio/Vídeo, usted podrá
conectarlaunidadasuTVutilizandoelcableAudio/Vídeo.
Al enchufe
AUDIO / VIDEO
OUT
Cable audio/vídeo
(noincludío)
Fuentedeenergía
Notas:
• Cuandolabateríaintegradatengapocacarga,“BatteryLow”aparecerá
en la pantalla y se interrumpirá la reproducción en la unidad.
• Recarguelabateríaintegradacuandoestélistoparausarlanuevamente.
• Cuandouselabateríaintegrada,latemperaturadelambiente
deberá ser de 41°F (5°C) a 95°F (35°C).
• Paraobtenerlamáximavidaútildelabateríaintegrada,cárguelaa
la temperatura del interior.
• Labateríaintegradaincluidaenestedispositivopodríapresentarriesgo
deincendiooquemaduraquímicasisetratademanerainadecuada.
No desarme, exponga a calor por encima de los 212°F (100°C), o incinere.
• Launidadnodeberáexponersealcalorexcesivotalcomoeldela
luz solar, incendio o similares.
• Cuandodesechelaunidad,deberánconsiderarselosproblemas
ambientales y las reglas y leyes locales que rijan la eliminación de
tales productos deberán seguirse de manera estricta.
Reproducción de un disco
1. Deslizar el interruptor / STANDBY / ON en el lado izquierdo de
la unidad a la posición ON (encendido).
Lea la sección ADAPTANDO LA PROGRAMACIÓN DE LAS FUNCIONES
antes de proceder con el paso 2.
2. Use los dedos para sostener la tapa del compartimiento para discos
ubicada en la parte frontal de la unidad y levántela para abrirla.
3. Sostenga el disco por sus lados y colóquelo con cuidado dentro del
eje con el lado de la etiqueta hacia arriba, empujando suavemente
hasta que escuche un“clic”.
4. Cerrar la puerta del disco. El equipo tarda un momento en cargar el
disco. Una vez cargado el disco, el equipo iniciará automáticamente
su reproducción.
5. Si no se empieza a reproducir automáticamente el disco, oprima el
botón .
Para hacer una pausa en la reproducción
(modalidad sin movimiento)
Presione el botón . Para reanudar la reproducción normal, oprima
de nuevo el botón .
Para detener la reproducción
Presione el botón a la altura del disco donde usted desee interrumpir
la reproducción. Para reanudar la reproducción en el mismo punto
donde haya detenido el disco, oprima el botón .
Si oprime dos veces el botón , la memoria de la unidad se borrará y al
apretar el botón el DVD se reiniciará desde el comienzo.
Avance / Retroceso rápido
1. Presione y mantenga presionado el botón
o
mientras el
DVD está en reproducción. Cada vez que presiona el botón
o
, la velocidad de lectura rápida cambia, siguiendo la secuencia
siguiente:
2. Oprima dos veces el botón al llegar al punto deseado desde
donde desee reanudar la reproducción normal.
Notas:
• ElreproductordeDVDdesactivaelsonidoylossubtítulosdurante
la lectura de avance y retroceso de los discos de DVD.
• Lavelocidadrápidadereproducciónpuedevariardependiendodel
disco.
Saltear (hacia delante / hacia atrás)
• Presioneelbotón paraavanzaratítulos,capítulos/pistas
siguientes.
• Presioneelbotón pararetrocederatítulos,capítulos/pistas
anteriores.
Para ver un DVD en su televisor
1. Encienda la unidad.
2. Para ver imágenes de video provenientes de fuentes externas,
encienda el televisor y siga las instrucciones que se incluyen con
dicho aparato.
3. Parasilenciarlaunidadyescucharelsonidoexclusivamenteatravés
del televisor, por favor oprima el botón hasta que “ ”
aparezca en la pantalla.
B.Usodelosaudífonos/auriculares
• Bajeelvolumenantesdeconectarlos,yluegoajusteelniveldevolumen.
• Alestarconectadoslosaudífonos/auriculares,nohabrásalidade
sonidoatravésdelosparlantesdelaunidad.
Audífonos / Auriculares
(enchufe de 3,5mm de diámetro - no suministrados)
Cuidado:
Eviteescucharelsonidoaunnivelquepuedadañarsusoídos.
Este manual del propietario explica las instrucciones básicas de este
equipo reproductor de DVDs. Algunos discos de DVD son fabricados
con el n de permitir operaciones especícas o limitadas durante
la reproducción de dicho disco. Por esta razón, es posible que el
equipo para DVD no responda a todos los comandos de operación,
lo cual no signica que el equipo esté defectuoso. Revise las notas
acerca de las instrucciones de los discos. Mientras el equipo esté en
funcionamiento, es posible que en la pantalla del televisor aparezca
“ ”. “ ”signica que el equipo reproductor de DVD, o bien, el
disco no permiten llevar a cabo la operación que usted desea.
Blanco Rojo Amarillo
TV
Blanco Rojo Amarillo

6
ES
Esta unidad puede reproducir archivos de JPEG grabados en un disco
de CD-R o CD-ROM (no se recomienda usar discos de CD-RW).
Para mirar los archivos de JPEG
1. Use los dedos para sostener la
tapa del compartimiento para
discos ubicada en la parte frontal
de la unidad y levántela para
abrirla.
2. Tome el disco con el archivo de
JPEG por el borde y empuje con
cuidado sobre el eje, dejando la
parte escrita hacia arriba, hasta que oiga un “clic”.
3. Cerrar la puerta del disco. Los archivos JPEG en el disco se mostrarán de
uno en uno automáticamente. Si el disco no juega automáticamente,
oprima el botón .
4. Presione el botón MENU o para desplegar una lista de las carpetas.
Presione el botón / para seleccionar el archivo deseado. Oprima
el botón para dar inicio a la reproducción.
Notas:
• Ustedpuedeapretarelbotón . Oprima de nuevo el botón para
reanudar la exposición de dispositivas.
• Ustedpuedepresionarelbotón para detener la reproducción.
• Ustedpuedepresionarelbotón opara cambiar de imagen.
• Esposiblequealgunosdiscosnopermitanestaoperación.
Adaptando la programación de las funciones
Configuración idioma
1. Oprima el botón MENU de la
unidad al estar bajo la modalidad
de detención (Cuando el disco
no está en reproducción. )
2. Oprima el botón para
seleccionar la Menú del Idioma
(Language Menu).
3. Oprima el botón / para seleccionar la opción (Player Menu
[MenúdelReproductor],Audio[Sonido],Subtitle[Subtítulos]oDisc
Menu [Menú del Disco]), oprima el botón .
4. Oprima el botón / para seleccionar el idioma de su preferencia,
despuésoprimaelbotón para confirmar.
5. Repita los pasos 3 y 4 para modificar otras opciones. Oprima el
botón para regresar a la menú anterior.
6. Oprima el botón MENU para salir del menú.
Notas:
• AlgunosdiscosdevideodeDVDnosepuedenreproducirenun
idioma diferente al que usted ha seleccionado. Es posible programar
en el disco un idioma anterior.
• EsposiblequealgunosdiscosdevideodeDVDesténprogramados
paradesplegarsubtítulosenunidiomadiferentealqueusted
ha seleccionado. Es posible programar en el disco un idioma de
subtítuloanterior.
• AlgunosdiscosdevideodeDVDsólolepermitencambiarla
seleccióndesubtítuloutilizandoelmenúdeldisco.Deserasí,
presione el botón MENUyescojaelidiomadesubtítuloapropiado
a partir de la selección del menú del disco.
• EsposiblequealgunosdiscosdevideodeDVDnoincluyanun
idiomapreseleccionado.Deserasí,elreproductordeDVDdespliega
automáticamente los menúes siguiendo la programación de idioma
inicial del disco.
Configuración de video
1. Oprima el botón MENU de la
unidad al estar bajo la modalidad
de detención (Cuando el disco no
está en reproducción.)
2. Oprima el botón / para
seleccionar la Menú de Video
(Video Menu).
3. Oprima el botón / para
seleccionar la opción (Brightness [Brillo] o Contrast [Contraste]), y
luego oprima el botón .
4. Oprima el botón / para modificar la configuración, oprima el
botón para confirmar.
5. Repita los pasos 3 y 4 para modificar otras opciones. Oprima el
botón para regresar a la menú anterior.
6. Oprima el botón MENU para salir del menú
Configuración de equipo
1. Oprima el botón MENU de la
unidad al estar bajo la modalidad
de detención (Cuando el disco
no está en reproducción. )
2. Oprima el botón / para
seleccionar la menú de Equipo
(System Menu).
3. Oprima el botón / para seleccionar la opción (TV Display
[Pantalla de Televisión] o Default [De fábrica]), oprima el botón .
4. Oprima el botón / paramodificarlaconfiguración,después
oprima el botón para confirmar.
5. Repita los pasos 3 y 4 para modificar otras opciones. Oprima el
botón para regresar a la menú anterior.
6. Oprima el botón MENU para salir del menú.
Brightness
Contrast
To
-- --
Language
00
00
System
Video
Go To Video Menu
Video Menu
Go To Language Menu
-- Language Menu --
System
Language Video
Player Menu
Audio
Subtitle
Disc Menu
Eng
Eng
Off
Eng
TV Display
Default
Wide
No
Go To System Menu
--System Menu --
System
Language Video
Pantalla de Televisión
Pan Scan
• Alreproducirunvideoenlamodalidadde
pantalla ancha, esta modalidad recorta los
lados izquierdo y derecho de la imagen de
manera que se pueda ver en una pantalla
convencional.
• AlgunosDVDsparapantallaanchaqueno
permiten la reproducción bajo la modalidad
Pan Scan se reproducen automáticamente
bajo la modalidad de buzón (letterbox), la
cual muestra una banda negra en la parte
superior e inferior de la pantalla.
Buzón (Letter Box)
Al reproducir un material de video para pantalla
ancha bajo esta modalidad en una pantalla
convencional, aparecen bandas negras en la
parte de arriba y de abajo de la pantalla.
Pantalla ancha (Wide Screen)
Esta es la modalidad adecuada para reproducer
videos para pantalla ancha en una pantalla
ancha.
Notas:
• Eltamañodelaimagenqueapareceen
pantalla está programado en el disco
de video de DVD. Por consiguiente, es posible que la imagen de
reproducción de algunos discos de video de DVD no concuerde con
eltamañodelaimagenquehayaselecionado.
• CuandoustedreproducediscosdevideodeDVDqueestén
grabadossóloenuntamañodeimagende4:3,laimagende
reproducciónsiempreapareceráenun tamaño deimagende4:3,
sin importar la programación del Pantalla de Televisión.
• SeleccionePantallaancha(WideScreen)paraajustarlaimagen
a la pantalla de LCD de la unidad. Cuando conecte la unidad a
un televisor, asegúrese siempre de ajustar el radio de aspecto al
televisorqueestéusando.
Pantalla ancha
Buzón
Se corta al reproducir
una imagen de video
para pantalla ancha
Pan Scan
Adaptando la programación de las funciones
Para ver archivos de JPEG

7
ES
No hay corriente.
• RevisequeeladaptadordeCAestéconectado.
• Launidadnoestáencendida.
No hay sonido o está muy bajo.
• El control de volumen es situado en el lado de la unidad - trata
por favor el ajuste esto.
• Elsistemaesenpodopausa.Presioneelbotón para retornar al
modo de reproducción normal.
• Launidadestáenelmodoadelantadorápidooretrocesorápido.
Presione el botón para volver al modo normal de reproducción.
• AsegúresequelasconexionesdesalidadeAUDIO/VÍDEOson
correctas.
• EsteunidadnopuededecodificareldiscoDVDDTS.
• Launidadestámuycaliente.Apágueladuranteunos30minutos
paraqueseenfríe.
No hay imagen.
• Elnúmeroderegióndeldisconoeselmismoqueelnúmerode
región del equipo.
La imagen no es clara.
• Limpieeldisco.
• Eldiscoestárayado.
Se oye un silbido o ruido muy fuerte.
• Losenchufesmachoyhembraestánsucios.Límpielosconunpaño
levemente humedecido con alcohol.
• Limpieeldisco.
El disco no suena.
• Nohaydiscodentro del equipo.(Elindicado“NoDisc[No Disco]”
aparece en la pantalla.)
• Inserteeldiscocorrectamenteconelladosereproducciónhacia
adelante.
• Limpieeldisco.
• Elnúmeroderegióndelaunidadydeldiscosonincompatibles.
• Puedehabercondensaciónalinterior del equipo,productodeun
cambio brusco de temperatura. Espere alrededor de una hora que
está desaparezca e intente hacer funcionar el equipo nuevament.
Adaptando la programación de las funciones
Guíapararesolverproblemas
Mantenimiento
Dolby Digital
DolbyDigitales una tecnologíadesarrolladaporDolby Laboratories.
Los temas codificados con Dolby Digital pueden reproducir entre 1 a
5,1 canales discretos de excelente calidad de audio.
La unidad reconoce automáticamente la corriente de bits de Dolby
Digital y brinda una mezcla apropiada para escuchar en dos canales. Se
requiere un decodificador adicional de Dolby Digital para reproducir
temas disponibles en varios DVD en canales múltiples.
Fabricado bajo la licencia de Dolby Laboratories.
“Dolby”yelsímbolo de ladobleDsonmarcas
registradas de Dolby Laboratories.
Limpieza del disco
Si pone en el equipo un disco defectuoso o sucio, esto puede provocar
irregularidadesen el sonido durante la reproducción.
Al tomar el disco, hágalo sosteniendo so borde interior y exterior.
• NOtoquelasuperficiedelladodeldisco
que no tiene escritura.
• NOpeguepapelesnicintaadhesivaenla
superficie del disco.
• NOexpongaeldiscodirectamentealosrayosdelsoloalcalor
excesivo.
• Cadavezquevayaareproducirundisco,límpieloantesdesdeel
centrohacialosbordesconunpañoparalimpieza.
• NoutiliceNUNCAdisolventestalescomolabencinaoelalcohol
para limpiar el disco.
• Noutilicediscosdeformasirregulares(comoporejemplo:en
forma de corazón, octagonales, etc.), ya que pueden impedir que el
equipo funcione adecuadamente.
Limpieza del equipo
• Asegúresedeapagarelequipoydesconectarelcabledealimentación
de CA antes de llevar a cabo la limpieza del equipo.
• Limpieelequipoconunpañosecoysuave.Silasuperficiedeldisco
estuvieraextremadamentesucia,sumerjaunpañoenunasolución
de agua con jabón y luego estrújelo bien y limpie el disco con este
pañohúmedo.Luegosequeeldiscoconunpañoseco.
• Nuncautilicealcohol,bencina,diluyente,líquidosdelimpieza
niotrosquímicosparalimpiareldisco,nitampocouseaire
comprimido para quitarle el polvo.
Nota importante
• Cadavezquevayaamoverelequipo,retireanteslosdiscosque
haya en la bandeja para CDs.
Sistema de sonido
De fábrica – El equipo tardará 3 a 5 segundos en reiniciar el reproductor
de DVD bajo la modalidad de programación del fabricante.

8
ES
Guíapararesolverproblemas
AVC MULTIMEDIA (“AVC”)ofrecelasiguientegarantíalimitada,lacualseextiendealcomprador-consumidororiginalyestálimitadaalusono
comercial del producto.
Garantía de repuestos y reparaciones por Uno Año
Los productos AVCquesehayancompradoenlosEstados Unidos oCanadátienenunagarantíadeunoañoa partirdelafechaoriginal de
compraencasodepresentardefectosenlosmaterialesoensufabricación.Silaunidadnoseencuentraenconformidadaestagarantía,nosotros
repararemos el producto usando piezas y productos nuevos y reparados, según lo estime AVC únicamente.
Duranteunperíododeunoañoapartirdelafechaefectivadelagarantía,AVC proporcionará, cuando sea necesario, mano de obra de reparación
parareparardefectosdefabricaciónensucentrodereparacionesdesignado.ParaobtenerlosserviciosdelagarantíaenlosEstadosUnidoso
Canadá, usted deberá llamar primero a nuestro Centro de Servicio para el Cliente al 1-800-506-5746 o1-877-252-6873 durante las horas que
se indican en el recuadro más abajo. La decisión de si bien usted está facultado para recibir estos servicios la tomará la oficina de Respaldo al
Cliente de AVC. POR FAVOR NO DEVUELVA ESTA UNIDAD A AVC SIN CONTAR CON AUTORIZACIÓN PREVIA. En los centros designados para
reparacionesyporunperíododeunoañoacontardelafechadeefectividaddelagarantía,AVC utilizará piezas o productos de recambio nuevos
orefabricadosalefectuarreparacionesdeproductosopiezasdefectuosas.Dichosproductosopiezasde recambio cuentan conunagarantía
adicionaldeunoañoacontardelafechadelcambioodelareparación.Parapoderhacerlasreparacionesqueseannecesarias,elclientedeberá
enviar la unidad al centro de reparaciones que se le indique al contactarse con la oficina de respaldo al cliente. El cliente es responsable por todos
losgastosdeenvíoalcentrodereparaciones.
Instrucciones para envolver la unidad y para su envío
CuandoustedenvíeelproductoalcentrodereparacionesdeAVC, usted debe utilizar la caja de cartón y el material de embalaje original o un tipo
de embalaje equivalente, según lo establezca AVC.
Su responsabilidad
(1) Usted debe guardar la boleta de venta original como prueba de su compra.
(2) EstasgarantíassólosonefectivassielproductohasidocompradoypuestoafuncionarenEstadosUnidosoCanadá.
(3) Lasgarantíassóloseextiendenencasodematerialesodefabricacióndefectuosaynoseextiendeaproductosopiezasquesehayanperdido
otiradoalabasura,niaproductosopiezasdañadasacausadelmalusodelaunidad,deaccidentes,delfuncionamientoomantenimiento
inapropiados del equipo, así como tampoco en caso de no haber seguido las instrucciones que acompañan este producto, o de haber
modificado o alterado el producto sin la autorización de AVC, o de haber quitado o cambiado el número de serie de las piezas o del producto.
Fuera de la Garantía
Encasoquesuproductonecesiteserreparadoyqueelperíododegarantíayahayaexpirado,sírvasecontactarseconelCentrodeAyuda
al Cliente en el fono 1-800-506-5746, 1-877-252-6873 o www.RCAav.com
Hora: Lunes–Jueves: 9am–7pm, Viernes: 9am–5pm, Sábado: 9am–MEDIODÍA Tiempo del Este.
Importante:
Ustedsehaceresponsabledecualesquiergastosporrazonesdetransporte,envíoosegurorelacionadosconladevolucióndelproductoal
Centro de Devoluciones de Productos.
Todaslasgarantíasimplícitas segúnlaleydeun estado,incluidaslasgarantíasimplícitas decomercializaciónydeaptitud para unpropósito
especíco,estánlimitadasexpresamentealaduracióndelagarantíalimitadaexpuestamásarriba.Conlaexcepcióndecualesquieragarantías
implícitassegúnlaleydeunestado,queporlapresentequedanlimitadas,lagarantíaprecedentetienecarácterdeexclusivaypredominasobre
lasdemásgarantías,cauciones,acuerdosyobligacionessimilaresdelvendedorodelfabricanteconrespectoalareparaciónoalreemplazode
cualesquier partes del aparato. AVCenningúncasoseharáresponsablededañosfortuitosnidedañosresultantesdecualquierotrasituaciónque
nosealaindicadaenlagarantíalimitadadeesteaparato.
Ningunapersona,agente,distribuidor,comercianteniempresaestáautorizadaparacambiar,modicaroextenderlostérminosdeestasgarantías
enningunamanera,cualquieraqueéstafuese.EltiempodentrodelcualsedebeiniciarunaacciónparahacercumplircualquierobligacióndeAVC
quesurjaenvirtuddelagarantíaodecualquierestatutooleydeEstadosUnidosoCanadáodecualesquierdesusestados,quedaaquílimitado
aunoañoacontardelafechadeadquisicióndelproducto.Estarestricciónnoseaplicaalasgarantíasimplícitasplanteadasenvirtuddelaleyde
un estado.
Estagarantíalebrindaderechoslegalesespecícosypuedequeustedtambiéntengaotrosderechosquepuedenvariar,dependiendodelestado.
Algunosestadosnoponenlímiteencuantoaladuracióndeunagarantíaimplícita,acuándosepuedetomaracción,oalaexclusiónolimitación
delosdañosfortuitosoconsiguientes,demodoqueesposiblequelasdisposicionesanterioresnoseanaplicablesensucaso.
Paramayorinformaciónacercadeotrosproductosyservicios,sírvasecontactarnuestrapáginadeinternetenlasiguientedirección:
www.RCAav.com
Importante: Guarde su “Boleta de venta” como prueba de su compra.
N° de modelo .................................................................................................................. Nombre del producto .................................................................................................
Tipo de aparato .............................................................................................................. N° de serie ........................................................................................................................
N° de recibo ..................................................................................................................... Fecha de compra ...........................................................................................................
Nombre del comerciante ...............................................................................................................................................................................................................................................
PARA SERVICIO Y REPARACIÓN, POR FAVOR VISTITA www. RCAav.com
Estas especificaciones y la apariencia externa de este aparato están sujetas a cambio sin previo aviso.
© 2013 AVC MULTIMEDIA

ES
AVC Multimedia,
Markham, Ontario L3R 1E3
Printed in China
Impreso en China
811-261091W040
Need More Help?
Please visit online help at
¿Necesita más ayuda?
Por favor, o visite nuestra página de ayuda en internet
http://www.RCAav.com
Table of contents
Languages:
Other RCA Car Video System manuals

RCA
RCA DRC6296 - Twin 9" Mobile DVD System User manual

RCA
RCA DRC99731 User manual

RCA
RCA DRC6272 User manual

RCA
RCA DRC6296 - Twin 9" Mobile DVD System User guide

RCA
RCA DRC97983 User manual

RCA
RCA DRC97983 Instruction Manual

RCA
RCA DRC98090S-KA User manual

RCA
RCA DRC69707E User manual

RCA
RCA DRC97983 Configuration guide

RCA
RCA DRC6289 Instruction Manual