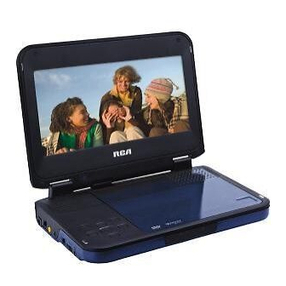
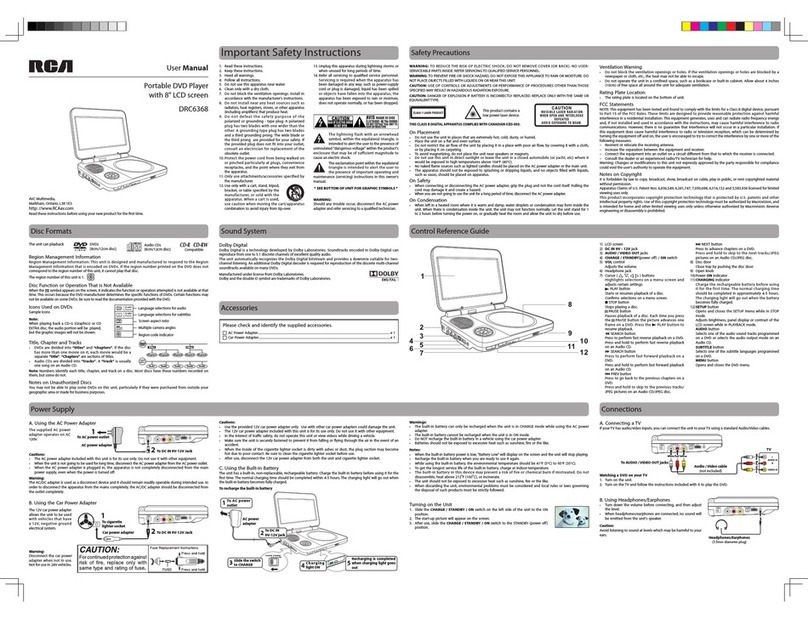
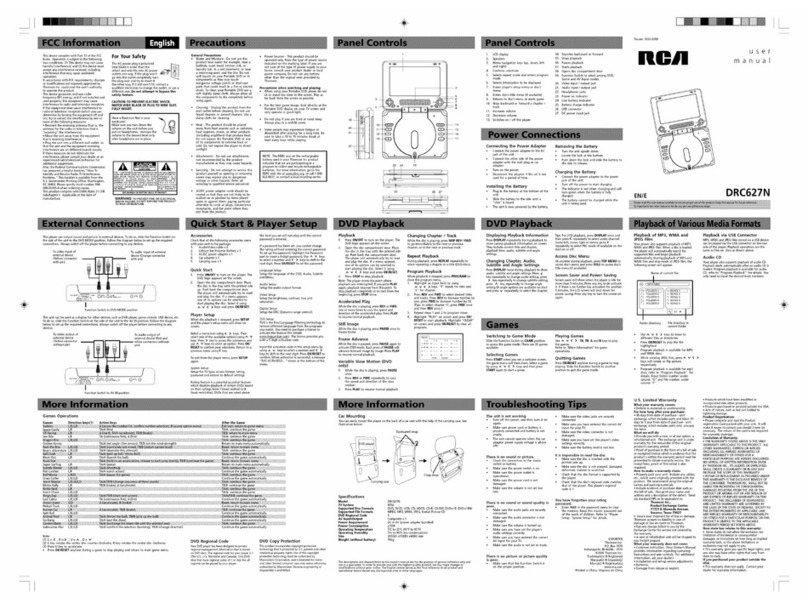
RCA DRC618N User manual

user
manual
It is important to read this instruction book prior to using your new product for the first time.
Es importante leer este manual antes de usar por vez primera su euipo
DRC 618N

!
To reduce risk of electrical shock, do not
remove cover or back (no user
serviceable parts inside). Refer servicing
to qualified personnel.
WARNING
RISK OF ELECTRIC SHOCK
DO NOT OPEN.
This symbol indicates
"dangerous voltage" inside the
product that presents a risk of
electric shock or personal injury.
This symbol indicates
important instructions
accompanying the product.
FCC INFORMATION
This equipment has been tested and found to comply with the limits for a Class
B digital device, pursuant to Part 15 of the FCC rules. These limits are designed
to provide reasonable protection against harmful interference in a residential
installation. This equipment generates, uses and can radiate radio frequency
energy and, if not installed and used in accordance with the instructions,
If this
equipment does cause harmful interference to radio or television reception,
which can be determined by turning the equipment off and on the user is
encouraged to try to correct the interference by one or more of the following
measures.
Reorient or relocate the receiving antenna
Increase the separation between the equipment and receiver.
Connect this equipment into an outlet on a circuit different from that to
which the receiver is connected.
Consult the dealer or an experienced radio/TV technician for help.
This class B digital apparatus meets all requirements of the Canadian
InterferenceCausing Equipment Regulations.
may
cause harmful interference. However, there is no guarantee that interference
will not occur in a particular installation.
Refer to the identification/rating label located on the back
panel of your product for its proper operating voltage.
Caution:To prevent electric shock, match wide blade of plug
to wide slot, fully insert.
Attention: Pour viter les chocs lectriques, introduire la
lame la plis large de la fiche dans la borne correspondante
de la prise et pousser jusq au fond.
éé
ù
Product Registration: Please fill out the product registration card(packed
separately) and return it immediately. For U.S. customers: Your RCA Consumer
Electronics product may also be registered at www.rca.com/productregistration
Registering this product allows us to contact you if necessary.
Keep your sales receipt to obtain warranty parts and service and for proof of
purchase. Attach if here and record the serial and model numbers in case you
need them. The numbers are located on the back of the player.
Model number: Serial Number:
Purchase date:
Dealer address and phone:
WARNING To reduce the risk of fire
or shock hazard, do not expose this
DVD player to rain or moisture. No
objects filled with liquids, such as
vases, shall be placed on the
apparatus.
CAUTION
THIS PRODUCT UTILIZES A LASER.
USE OF CONTROLS OR ADJUST-
MENT OR PERFORMANCE OF
PROCEDURES OTHER THAN THOSE
SPECIFIED HEREIN MAY RESULT IN
HAZARDOUS RADIATION
EXPOSURE. DO NOT OPEN COVERS
AND DO NOT REPAIR YOURSELF.
REFER SERVICING TO QUALIFIED
PERSONNEL.
CAUTION
FCC Regulations state that
unauthorized changes or modifi-
cations to this equipment may void
the user's authority to operate it.
Note:
This device is protected by U.S.
Patent numbers 4,631,603 and
4,577,216 and 4,819,098 and
4,907,093 and 6,516,132. The use
of Macrovision's copy protection
technology in the device must be
authorized by Macrovision and is
intended for home and other limited
pay-per-view uses only, unless
otherwise authorized in writing by
Macrovision. Reverse engineering
or disassembly is prohibited.
This DVD player is designed and
manufactured to respond to the
Region number of a DVD disc does
not correspond to the Region
number of this DVD player, this
DVD player cannot play the disc.
The Region number for this DVD
player is Region No 1.
Apparatus shall not be exposed to
dripping or splashing and that no
objects filled with liquids, such as
vases, shall be placed on
the apparatus.
CLASS 1
LASER
PRODUCT
EN
Important Safety Instructions For Battery Pack
Read these instructions.
Keep these instructions.
Heed all warnings.
Follow all instructions.
Do not use this apparatus near water.
Clean only with a dry cloth.
Do not defeat the safety purpose of the polarized or grounding type plug.
A polarized plug has two blades with one wider than the other. A grounding type
plug has two blades and a third grounding prong. The wide blade or the third
prong is provided for your safety. When the provided plug does not fit into your
outlet, consult an electrician for replacement of the obsolete outlet.
Protect the power cord from being walked on or pinched particularly at plugs,
convenience receptacles, and the point where they exit from the apparatus.
Only use the attachments/ accessories specified by the manufacturer.
Use only with a cart, stand, tripod, bracket, or table specified by the
manufacturer, or sold with the apparatus. When a cart is used, use caution
when moving the cart/apparatus combination to avoid injury from tip-over.
Unplug this apparatus during lightning storms or when unused for
long periods of time.
Refer all servicing to qualified service personnel. Servicing is required when
the apparatus has been damaged in any way, such as power supply cord or
plug is damaged, liquid has been spilled or objects have fallen into the
apparatus, the apparatus has been exposed to rain or moisture, does not
operate normally, or has been dropped.
Note:
This battery pack (SB11) is just for DRC618N & SDV17-X series only.use
Do not block any ventilation openings. Install in accordance with the
manufacturer's instructions.
Do not install near any heat sources such as radiators, heat registers, stoves,
or other apparatus (including amplifiers) that produce heat.
EN

EN
Table Of Contents
Table Of Contents........................
INTRODUCTION
2
3
6
6
7
8
8
9
10
11
11
11
12
13
14
15
16
17
18
19
20
21
21
22
22
2
1
4
5
6
8
15
20
Types Of Discs Playable On
This Player........................................
Marks indicated on DVDs......................
Disc structure.........................................
Using These Operating
Instructions.................................
Checking The Accessories.........
Parts And Functions...................
Connecting The Player
To Other Devices........................
Using The Battery.......................
Notes on using the remote
control unit.............................................
Replacing the battery.............................
Remote control unit
operating range.......................................
Liquid crystal display..............................
Main unit control section........................
Main unit left side....................................
Main unit right panel...............................
Main unit rear side..................................
How to stand...........................................
Main unit bottom side.............................
Remote control unit (frequently
used buttons)..........................................
Remote control unit (other
buttons)...................................................
Names of battery parts and
their functions.........................................
Connecting to a TV.................................
Connecting to a Dolby Digital/ DTS/
MPEG decoder or an amplifier
with built-in decoder.............................
Connecting to a digital amplifier
that is not Dolby Digital/ DTS/
MPEG compatible..................................
Connecting to active speaker
systems...................................................
Connecting earphone............................
Recharging the battery pack................
Notes for recharging.............................
Attaching the battery pack to
the player................................................
AC power operation...............................
Removing the battery pack
from the player.......................................
BEFORE USING
Remote Control Unit And
Main Unit Preparations...............
1
-EN
Graphics are for representation only. Your unit may differ slightly.
24
25
25
26
26
27
27
27
30
30
30
31
31
31
35
35
35
28
29
31
32
33
34
35
36
38
23
24
Turning On The Power...............
BASIC OPERATIONS
Playback Functions...................
Operation Of The
Battery Pack...............................
Troubleshooting Tips....... ...........
Handling Cautions........... .....
Handling Discs................ .....
Operation of the battery pack................
Storage....................................................
Service life and disposal........................
Advanced Functions...................
Viewing in slow motion DVDs and
video Cds................................................
Repeating DVDs, video CDs and
Cds...........................................................
Selecting angle
(multi-angle).............................................
Loading ..... ..........................................
Playing...................................................
If a menu screen appears....................
Stopping playback...............................
Pausing playback....................................
Returning to the previous chapter
or track(DVDs, video CDs and Cds)......
Moving to the next chapter or track
(DVDs, video CDs and CDs)..................
Removing the disc................................
Turning Off The Power...............
Various Language And
Subtitle Settings.........................
ADVANCED OPERATIONS
ADDITIONAL INFORMATION
Changing from AV OUT
to AV IN....................................................
Setting Parental Lock Level...................
Video Enhance........................................
Recommendations and information
concerning discs........................
Limited Warranty........................
This product incorporates copyright protection technology that is protected by method claims of certain U.S.
patents and other intellectual property rights owned by Macrovision Corporation and other rights owners. Use of this
copyright protection technology must be authorized by Macrovision Corporation, and is intended for home use only
unless otherwise authorized by Macrovision Corporation. Reverse engineering or disassembly is prohibited.

EN
74 minutes
CD
8 cm/single-sided
Playback time
(MPEG 2 format)
133 minutes (4.7GB)
242 minutes (8.5GB)
266 minutes (9.4GB)
484 minutes (17GB)
Types of playable
discs and their
marks Diameter/Playable sides Playback time
1 layer
2 layer
1 layer
2 layer
1 layer
2 layer
1 layer
2 layer
DVD-Video disc
CD
Types of Discs Playable on this Player
The discs listed on the table below can be played on this player without an adapter.
The marks shown on the table below are indicated on the disc's label, package or jacket.
Marks indicated on DVDs
DVD discs or packages include the marks shown below. These marks indicate the type of
video or audio signals recorded on the disc and the functions that can be used.
Indicates the number of audio tracks.
Indicates the number of angles.
Indicates the selectable picture aspect ratio.
Indicates the playable region number.
Meaning
Mark
2
3
16:9 LB
2
ALL
DVD video
12cm/single-
sided
12cm/double-
sided
(MPEG 2 format)
41 minutes
75 minutes
82 minutes
150 minutes
DVD video
8 cm/single-
sided
8 cm/double-
sided
CD
12 cm/single-sided
20 minutes
2
-EN
Graphics are for representation only. Your unit may differ slightly.
Introduction

EN
DVDs are divided in units called titles, which are further divided in chapters. They also
include menu screens that do not belong to any title. With movies, normally one movie
corresponds to one title. On karaoke discs, one song corresponds to one title. Some discs
are not divided in this way, however, so be careful when using the search and
programming functions.
DVDSChapter 1 Chapter 2 Chapter 1 Chapter 2
Title 1 Title 2
CD
S
Track1 Track2 Track3 Track4 Track5
Disc structure
CDs are divided in units called tracks. (Generally one track corresponds to one song. Tracks are
sometimes further divided into indexes.)
3
-EN
Graphics are for representation only. Your unit may differ slightly.
Introduction

EN Using These Operating Instructions
Be sure to read the operating instructions carefully before using the player. It can
ensure you taking maximum advantage of all functions of this player.
When this player is connected to a TV or AV amplifier, the setup screen should be displayed.
Choose the various corresponding settings according to the connected equipment.
With DVDs it is possible to use setup to change the subtitle and audio languages and select
the desired sound mode from among multiple sound tracks.
In order to take full advantage of the many functions of this player, be sure to store this
OPERATING INSTRUCTIONS in an accessible place.
4
-EN
Graphics are for representation only. Your unit may differ slightly.
Introduction

EN
Checking the Accessories
After unpacking, check that all the accessories listed below are included.
AV cable
Operating instructions (this manual)
OPERATION
INSTRUCTIONS
Accessories bag
Battery (SB11)pack
AC/DC adapter
Card-type remote control unit
Soft carrying bag
Car power cable
Short car bag
5
-EN
Graphics are for representation only. Your unit may differ slightly.
Before Using

EN
Replacing the battery
Remote Control Unit and Main Unit Preparations
Notes on using the remote control unit
Do not drop or step on the remote control unit or subject it to shocks. Doing so may
damage it.
Note that the remote control unit may not work if there are obstacles between it and
the remote sensor.
Do not expose the remote sensor to strong light. Doing so may make operation
impossible.
Use the remote control unit within the specified operating range.
1
2
3
Fit the battery holder back to its place.
Lithium battery (CR2025)
CR2025
Insert your finger nails into A and
B on the diagram below, press A
according to the direction, then pull
out the battery holder.
Remove the old battery, then insert
the new battery into the battery
holder with the + side facing
upwards.
Note:
To prevent leakage of fluid from the
lithium battery, remove the battery
when not using the remote control
unit for long periods of time (one
month or more). If the battery leaks
fluid, carefully wipe it out of the
battery case, then change to a new
lithium battery.
6
-EN
Graphics are for representation only. Your unit may differ slightly.
Before Using
A.
B.
Caution:the battery may present a risk of fire if mistreated ,do not recharge ,
disassemble, heat above 100 C ,Replace battery with same type.
Dispose of used battery properly, keep away from children and do not dispose of in fire.

EN
Remote control unit operating range
30
30
Approx.
5 meters
The remote control unit can operate within a distance of approximately 5 meters.
Note:
Most of the players operations can be done by using the remote control unit.
Some operations, however, can only be done by using the main unit buttons.
,
7
-EN
Graphics are for representation only. Your unit may differ slightly.
Before Using

EN
Liquid crystal display
The portable DVD player is equipped with a liquid crystal display.
Liquid crystal display
Speakers
Control section
Remote sensor
1
2
3
4
5Power indicator
The remote control signals are received here.
Control buttons
Off: No power connection.
Main unit control section
1 2 3 4 5
1
2
34 5
Red: The player is set to standby mode.
Blue:The player is on. Turn on the power using ON button on the main unit or the STANDBY
button on the remote control unit.
6
ON OFF
8
-EN
Parts and Functions
Graphics are for representation only. Your unit may differ slightly.
Before Using

EN
Play/pause button
Stop /off button
Previous/next buttons
Mode button
- /+ buttons
1
2
3
4
5
Press it to play. When pressing during playback mode, pause mode is set. Press again to
resume playback.
Keep pressing it for about 1.5 seconds to power on the unit.
Press it to stop playback.
Keep pressing it for about 1.5 seconds to turn off the unit (standby status).
Use it to locate at the beginning of previous/next tracks or chapters.
Keep pressing it for about 1.5 seconds during playback to switch playing speed of
backward/forward through X2, X4, X8, X20, X2.
Press it to adjust display mode.
Press it to slide the tray out
Main unit left side
1 2 3 4 5
OPEN button
6
Use +/- key to adjust after entering one mode.
BRIGHTNESS: Level 0 to 8.
COLOR: Level 0 to 8.
TFT MODE: switch screen between
16:9 and 4:3.
VIEW MODE: switch screen between
reverse and observe.
AV INPUT/OUTPUT: switch the AV
function between input and output.
Keep pressing the button about 1.5 seconds to turn off the display. and press it to resume.
obverse reverse
9
-EN
Graphics are for representation only. Your unit may differ slightly.
Before Using

EN Phone jack
Volume control
Video in/out jack
Audio in/out and optical output jack
DC in
1
2
3
4
5
For connecting stereo headphone or an amplifier.
Use it to adjust the volume of the speakers or headphone.
Input or output video signals to connected device by setting AV IN/OUT mode value.
The included AV cable is connected here.
Connect the included AC adapter here.
Main unit right panel
1
2
3
Loader status indicator LED
Tray
Open hole
Indicate loader status.
When you insert the open-stick into
this hole, the tray will slide out.
Please turn off the unit before this
operation.
1 2 3
1
2
Input or output audio signals to connected device by setting AV IN/OUT mode value.
Output optical audio signals to connected device.
The included AV cable or optical digital cable is connected here.
10
-EN
Graphics are for representation only. Your unit may differ slightly.
Before Using

EN
Main unit rear side
Open-stick Support12
You can use it to open the tray. The unit can stand with this device.
Main unit bottom side
1
2
Hole for Battery Pack
Nut for Battery Pack
Battery connector
3
1
2
3
How to stand
1
2
3
Pull out the support.
Draw out the support to a proper position .
Pull down the button to lock it.
1
2
3
1 2 2
1
1 3 2 1
1 2 3
LOCK
UNLOCK
LOCK
UNLOCK
Note:
Remember to insert back the rubber cover to 3. BATTERY CONNECTOR after
using the battery pack.
11
-EN
Graphics are for representation only. Your unit may differ slightly.
Before Using

EN Remote control unit (frequently used buttons)
STANDBY button
PREVIOUS/NEXT button
and
Scan buttons and
1
2
3
(
(
(
(
(
(
Press this button to turn on or off
the power.
Use these buttons to search for the
beginnings of tracks or chapters.
: Backward direction
: Forward direction
Use these buttons to switch playing speed
of playing forward or backward.
Use this button to play or pause
playback.
4PLAY/PAUSE button
: Forward direction
: Backward direction
Press this button to display the
DVD's menu screen.
5MENU button
6STOP button (
(
Press this button to stop playback.
7STEP/SLOW buttons( )
Press this button to slow playback at
1/2, 1/4,1/6,1/7 speed. If at pause
status, press this button to playback
step-by-step.
Press this button to display
the DVD's title.
TITLE button8
OPEN
FWD
AUDIO SUBTITLE
OSD
ANG EL
SETUP
SEARCH
STOPNEXT
STEP/SLOWPLAY/PAUSEREV
SHIFT
C
MENU TITLE
ZOOM
PREV
CLEAR
A-BREPEAT
1
2
3
4
5
6
2
7
3
8
12
-EN
Graphics are for representation only. Your unit may differ slightly.
Before Using

EN
Remote control unit (other buttons)
AUDIO button1Press this button to switch the audio
language.
Press this button to display setup screen
when at stop status.
Press this button to display Video Enhance
screen during playback.
Use these buttons to move the cursor up,
down, left and right when selecting
setting items .
Press it to enter/confirm setting item.
Press it to return back the previous item.
(Only for VCD, PBC on)
2SETUP button
3Cursor buttons
4ENTER button
5RETURN button
7Number buttons
Press these buttons to input numbers.
Pressing the SHIFT button to switch from
function to number if necessary.
6ZOOM
Zoom the picture on screen.
8REPEAT button
For DVDs, use this button to play titles
or chapters repeatedly. For CDs, use
this button to play tracks or the entire
disc repeatedly.
SHIFT button10
Press the shift button to switch number
& function. (Defaut: function)
OPEN11
Open the tray and replace/take disk.
SUBTITLE button12
Press it to switch the DVD's
subtitle language.
13 OSD button
Press this button to display the disc
information.
14 ANGLE button
Press it to switch angle.
15 SEARCH button
Locate a title/ chapter/ time and play.
16 CLEAR button
Clear the numbers inputted before.
OPEN
FWD
AUDIO SUBTITLE
OSD
ANG EL
SETUP
SEARCH
STOPNEXT
STEP/SLOWPLAY/PAUSEREV
SHIFT
C
MENU TITLE
ZOOM
PREV
CLEAR
A-BREPEAT
1
2
3
4
5
6
7
8
9
10
11
12
13
14
15
9A-B REPEAT button
Press this button during playback to set
two points and play the section between
them repeatedly.
16
13
-EN
Graphics are for representation only. Your unit may differ slightly.
Before Using

EN
Names of battery parts and their functions
Battery knob
4
DC IN connector
Battery indicator LED.
Player terminals
1
2
3
Twist to tighten/detach the battery pack.
Connect the power adapter to recharge.
Supply power to the player.
Do not short-circuit the terminals.
CAUTION:
When the battery is discharging, LED is off.
When recharging the battery, LED is red.
When the LED becomes green, means finishing recharge.
1 2 3 4
14
-EN
Graphics are for representation only. Your unit may differ slightly.
Before Using

EN
VIDEO IN AUDIO IN
RL
(included)
TV
T o video input jack
(yellow)
T o audio input jack
(white)
T o audio input jack
(red)
: Signal flow
Connecting the Player to Other Devices
Before connecting
Turn off the power of the player and the devices to be connected.
Connecting to a TV
Video / audio cable
15
-EN
Graphics are for representation only. Your unit may differ slightly.
Before Using

EN
DIGITAL IN
Optical digital cable (not included)
See page 22 for
details of connections
to TV .
Front speaker (left)
Surround
speaker
(left)
Center
speaker
Front
speaker
(right) Subwoofer
Surround
speaker (right)
: Signal flow
Main unit left panel
With this player, you can enjoy powerful Dolby Digital, DTS or MPEG sound. Output the digital
signals from the player's digital output to a decoder or amplifier with built-in decoder.
Hint:
For a compatible decoder or amplifier, 5 speakers (front left/right, center and surround
left/right) and a subwoofer are required to enjoy Dolby Digital/DTS 5.1-channel sound.
Connecting to a Dolby Digital / DTS / MPEG decoder or an
amplifier with built-in decoder
16
-EN
Graphics are for representation only. Your unit may differ slightly.
Before Using

EN
DIGITAL IN
Main unit left panel
Optical digital cable
(not included)
To digital audio
input jack
: Signal flow
See Page 22 for
details of connections
to TV .
Carefully check the player s digital output settings before connecting the player to an
amplifier equipped with a digital audio input jack which is not Dolby Digital / DTS / MPEG
compatible.
Do not play DVDs when the audio settings are not correct. Or may cause strong
noise and damage your speakers.
Notes: ,
Connecting to a digital amplifier that is not Dolby Digital /
DTS / MPEG compatible
Output the digital signals from the player's digital output to a digital amplifier that is not
Doby/DTS/MPEG compatible.
17
-EN
Graphics are for representation only. Your unit may differ slightly.
Before Using
Table of contents
Languages:
Other RCA Portable DVD Player manuals

RCA
RCA DRC99390 User manual

RCA
RCA DRC99310KB User manual

RCA
RCA DRC99310U Instruction Manual

RCA
RCA DRC99371E User manual

RCA
RCA DRC99310KP User manual

RCA
RCA DRC627N User manual

RCA
RCA DRC6307E User manual

RCA
RCA DRC6379T User manual

RCA
RCA DRC99373E User manual

RCA
RCA DRC6318E - Portable DVD Player Instruction Manual

RCA
RCA DRC6331 - Portable DVD Player User manual

RCA
RCA DRC99390 User manual

RCA
RCA DRC6368 User manual

RCA
RCA DRC99380 User manual

RCA
RCA DRC6307E Instruction Manual

RCA
RCA USER MANUAL DRC630N User manual

RCA
RCA DRC6377 User manual

RCA
RCA DRC99310U User manual

RCA
RCA DRC6318E User manual

RCA
RCA DRC99310U User manual