manuals.online logo
Brands
  1. Home
  2. •
  3. Brands
  4. •
  5. RCA
  6. •
  7. Radio
  8. •
  9. RCA RDR6350 User manual

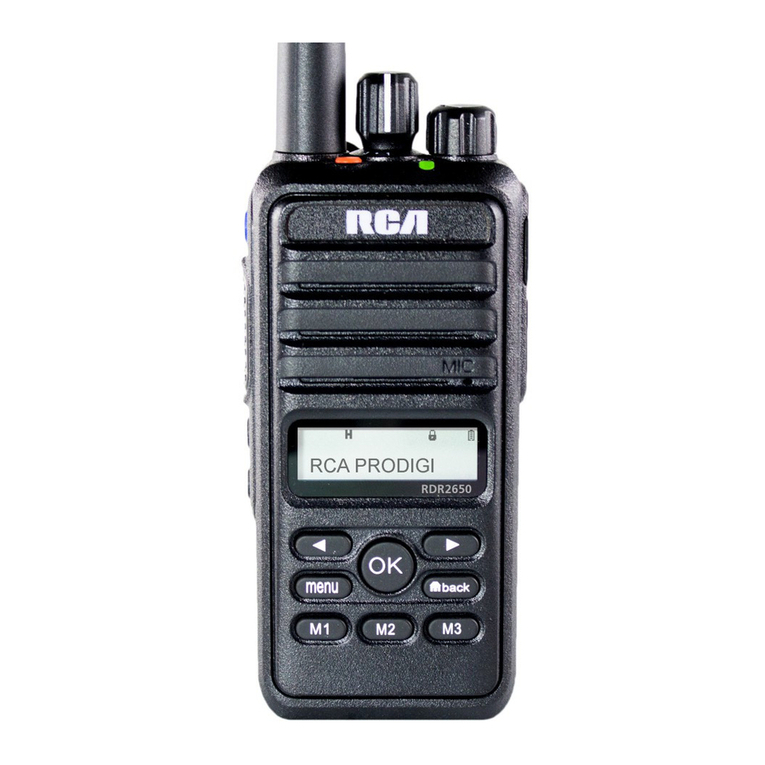
RCA RDR6350 User manual

Communications Systems
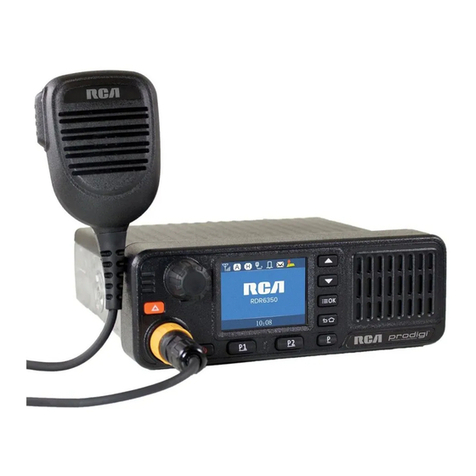
RDR6350 Mobile
Digital Radio QUICK START GUIDE
RDR6350
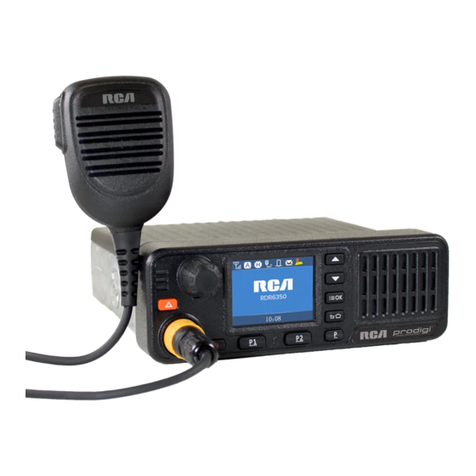
Mobile Radio
PC6350
Mobile Power Supply Cable
MB6350
Mobile Mounting Bracket
MM6350
Standard Mobile Mic
HGRMM6350
Mic Hanger
What’s Included:
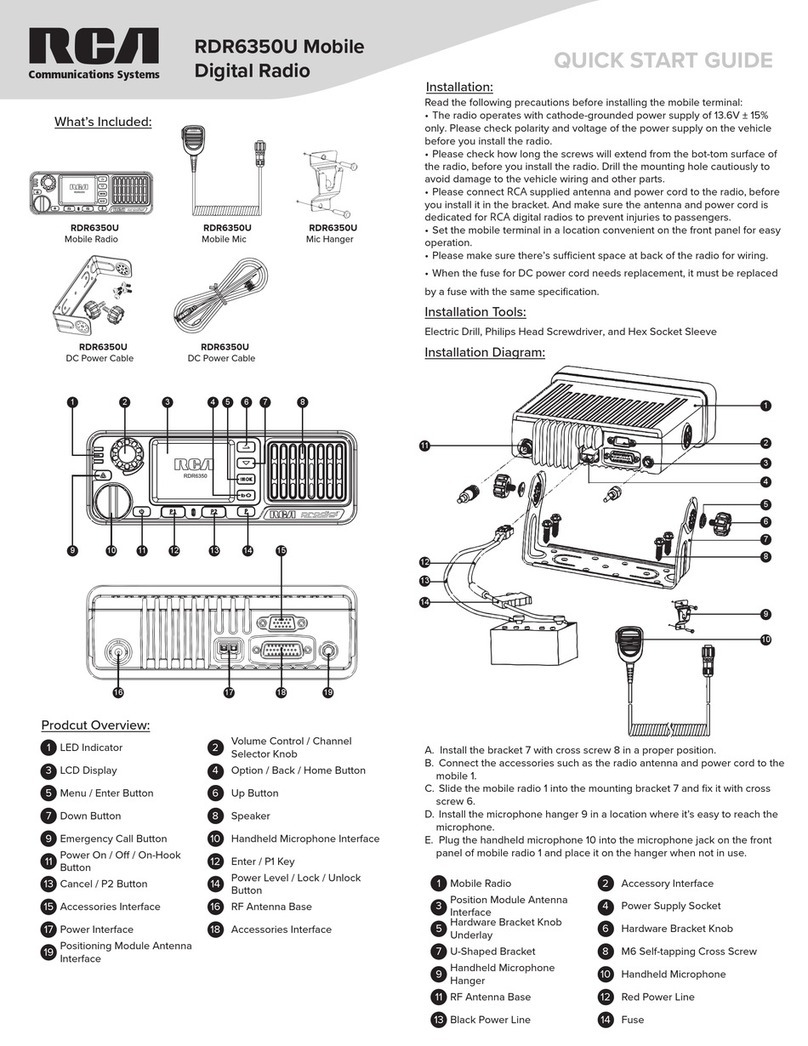
Installation Diagram:
Installation:
Installation Tools:
A. Install the bracket 7 with cross screw 8 in a proper position.
B. Connect the accessories such as the radio antenna and power cord to the
mobile 1.
C. Slide the mobile radio 1 into the mounting bracket 7 and fix it with cross
screw 6.
D. Install the microphone hanger 9 in a location where it’s easy to reach the
microphone.
E. Plug the handheld microphone 10 into the microphone jack on the front
panel of mobile radio 1 and place it on the hanger when not in use.
Read the following precautions before installing the mobile terminal:
• The radio operates with cathode-grounded power supply of 13.6V ± 15%
only. Please check polarity and voltage of the power supply on the vehicle
before you install the radio.
• Please check how long the screws will extend from the bottom surface of
the radio, before you install the radio. Drill the mounting hole cautiously to
avoid damage to the vehicle wiring and other parts.
• Please connect RCA supplied antenna and power cord to the radio, before
you install it in the bracket. And make sure the antenna and power cord is
dedicated for RCA digital radios to prevent injuries to passengers.
• Set the mobile terminal in a location convenient on the front panel for easy
operation.
• Please make sure there’s sucient space at the back of the radio for wiring.
• When the fuse for DC power cord needs replacement, it must be replaced
by a fuse with the same specification.
Electric Drill, Philips Head Screwdriver, and Hex Socket Sleeve
10
14
13
12
11
9
8
7
6
5
4
3
2
1
1Mobile Radio 2Accessory Interface
3Position Module Antenna
Interface 4Power Supply Socket
5Hardware Bracket Knob
Underlay 6Hardware Bracket Knob
7U-Shaped Bracket 8M6 Self-tapping Cross Screw
9Handheld Microphone
Hanger 10 Handheld Microphone
11 RF Antenna Base 12 Red Power Line
13 Black Power Line 14 Fuse
Complete User Manual at: RCACommunicationsSystems.com
1
9 10 11 12 13 14 15
16 17 18 19
2 3 4 5 6 7 8
Prodcut Overview:
1LED Indicator 2Volume Control / Channel
Selector Knob
3LCD Display 4Option / Back / Home Button
5Menu / Enter Button 6Up Button
7Down Button 8Speaker
9Emergency Call Button 10 Handheld Microphone Interface
11 Power On / O / On-Hook
Button 12 Enter / P1 Key
13 Cancel / P2 Button 14 Power Level / Lock / Unlock
Button
15 Accessories Interface 16 RF Antenna Base
17 Power Interface 18 Accessories Interface
19 Positioning Module Antenna
Interface
Complete User Manual at: RCACommunicationsSystems.com
LED indicator
LED Indication Radio Status
LED Glows Red Transmitting
LED Glows Green Receiving
LED Glows Green &
Flashing Slowly Standby
STATUS INDICATION IN RADIO
LCD Icon
Icon Name Icon Radio Status
RSSI
No Signal
More bars indicate better signal strength
Message Icons
New message/unread message
Inbox is full
Working Mode Icons
Indicates in trunking mode
Indicates in conventional mode
Power Level Icons
Indicates Low-Power transmission
Indicates Mid-Power transmission
Indicates High-Power transmission
Profiles Icon
Indicates the silent mode is enabled
Indicates the standard mode is enabled
Indicates the custom mode is enabled
Accessory Icon Accessory is plugged in
Handheld Mic Icon Handheld Mic is plugged in
Call Status Icon
Indicates currently talking
Indicates missed calls
Channel / Group
Selection Icon Indicates in-channel selection mode
Encryption Icon Encryption ON
Positioning Icon
Positioning feature is active and valid
positioning data is received
Positioning feature is active but no valid
positioning data is received
Basic Operations
Turning on/o radio
Short press [Power On / O / On-hook] button to tum on the radio, LCD
displays power-up LOGO, and then enter the standby screen, and then long
press [Power On/ O/ On-hook] button to shutdown.
Note: If a fault occurs and the radio does not turn o, you can press and hold
the [Power On / O/ On-hook] button for more than 1O seconds with the
forced shutdown and restart it.
Knob Switch Mode
Short press the knob, to switch the two modes between volume and channel/
group.
Radio Mode
The mobile terminal supports conventional and trunking mode, switching as
below:
1. Press [Option/ Back/ Home] button to bring up the option menu;
2. Press [Up]/ [Down] button to select ‘Radio mode’ and press [Menu / Enter]
button to enter the list of radio mode;
3. Press [Up]/ [Down] button to select ‘Conventional’ or ‘Trunking’ mode,
press [Menu / Enter] button to switch modes.
Note: In conventional mode the radio can communicate directly or via
repeater inter-communicate; in trunking mode, the mobile terminal is
connected by the base station, to realize the fuction of real-time dispatchment.
Adjust the volume
When the Volume Control / Channel Selector knob operates in volume
adjustment mode, rotate the knob clockwise to increase the call volume, or
counterclockwise to decrease volume.
Adjusting the Power Level
Press [Power Level / Lock / Unlock] button to change the transmitting power
level to ‘High/ Mid/ low’, and also the icon of the power level will be changed
in the main menu.
Lock and Unlock
Long press [Power Level / Lock / Unlock] button can activate the keylock
function, to stop unwanted operation. Deactivate the keylock by long.
Switching Channel / Group
When in the channel/ group switching mode, turn the knob to select channel/
group.
In addition you can also switch the channel/group in the menu:
1. Press [Option/ Back/ Home] button to go to the ‘Option’ menu.
2. Press [Up / Down] button to select ‘Channel Management / Group
Management’, press [Enter] to enter the channel / group folder list.
3. Press [Up]/ [Down] button to select the channel / group folder, press
[Enter] to enter the channel / group list.
4. Press [Up]/ [Down] button to select the channel/ group, press [Enter]
button to switch channel / group.
Note:
• ‘Channel Management’ and ‘Group Management’ are folders set up for
classified management of channels and groups in conventional mode and
trunking mode.
• This mobile terminal supports up to 64 channels / group folders, each folder
contains up to 100 channels / groups, to be set up via the dealer.
Call
Individual Call
Initiate the Individual Call
1. Input a individual call number you would like to call using the mircophone
with a keypad , or enter ‘Phonebook’ / ‘Call Log’ / ‘Messages’, to select the
Contact/ Messages;
2. Hold down the [PTT] button on the handheld microphone to transmit a
individual call to the selected contact or message contact.
Receive and Call Back
1. When the [PTT] button is idle, without any actions of buttons, the mobile
radio could receive call.
2. You can hold down [PTT] button to call back after the calling party finishes
talking.
Group Call
The groups are preset by the dealer, operating method in conventional and
trunking modes is the same.
Initiate Group Call
1. At standby screen, short press [Volume Control / Channel Selector]
button, then rotate to select channel / group that you want to call.
2. Press [Enter] button to confirm the selected channel / group, or wait for it
confirm automatically.
3. Hold down [PTT] button on handheld microphone to initiate group call.
Receive and Call Back
1. When [PTT] button is idle, without any actions of buttons, the
mobile radio could receive call.
2. You can hold down [PTT] button to call back after the calling
party finishes talking.
Care and Cleaning
To guarantee optimal performance as well as a long service life of
your radio, please follow the tips below.
Radio Care
Keep the radio far away from substances that can corrode the
electronic circuit.
Radio Cleaning
Clean up the dust and fine particles on the radio surface with a clean
and dry lint-free cloth or a brush regularly.
Use neutral cleanser and a non-woven fabric to clean the keys,
control knobs and microphone after long-time use. Do not use
chemical preparations such as stain removers, alcohol, sprays or oil
preparations, so as to avoid surface case damage. Make sure that
the radio is completely dry before use.
NOTE: Turn o the radio before cleaning.
Other manuals for RDR6350

2

Other RCA Radio manuals

RCA RDR4320 User manual

RCA

RCA RDR4320 User manual

RCA Radiola 17 Operating and maintenance manual

RCA

RCA Radiola 17 Operating and maintenance manual

RCA RDR6350 User manual

RCA

RCA RDR6350 User manual

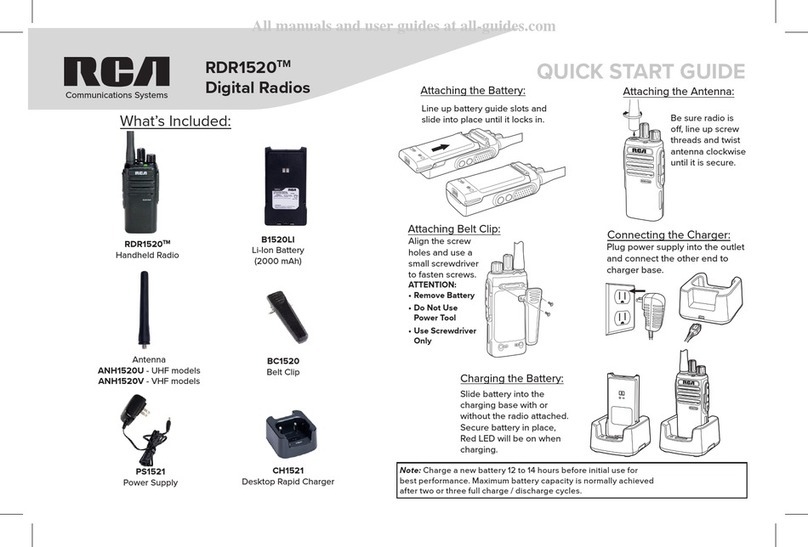
RCA Prodigi RDR1520 Series User manual

RCA

RCA Prodigi RDR1520 Series User manual

RCA RPX6500 Series User manual

RCA

RCA RPX6500 Series User manual

RCA EZDVD1 - Memory Maker And EZ201 Small Wonder 60 Minute Camcorder... User manual

RCA

RCA EZDVD1 - Memory Maker And EZ201 Small Wonder 60 Minute Camcorder... User manual

RCA RDR6350U Operating and maintenance instructions

RCA

RCA RDR6350U Operating and maintenance instructions

RCA CR-91 User manual

RCA

RCA CR-91 User manual

RCA BR200DV User manual

RCA

RCA BR200DV User manual

RCA RDR4330 User manual

RCA

RCA RDR4330 User manual

RCA RDR260 Series User manual

RCA

RCA RDR260 Series User manual

RCA Radiola 21 Operating and maintenance manual

RCA

RCA Radiola 21 Operating and maintenance manual

RCA SSB-1 User manual

RCA

RCA SSB-1 User manual

RCA RIR200 User manual

RCA

RCA RIR200 User manual

RCA Radiola 26 User manual

RCA

RCA Radiola 26 User manual

RCA RIR205 - Infinite Radio Tabletop Internet User manual

RCA

RCA RIR205 - Infinite Radio Tabletop Internet User manual

RCA Prodigi RDR1520 Series User manual

RCA

RCA Prodigi RDR1520 Series User manual

RCA RDR4320 User manual

RCA

RCA RDR4320 User manual

RCA EZDVD1 - Memory Maker And EZ201 Small Wonder 60 Minute Camcorder... User manual

RCA

RCA EZDVD1 - Memory Maker And EZ201 Small Wonder 60 Minute Camcorder... User manual

RCA 7T Manual

RCA

RCA 7T Manual

RCA BR200D-U1 User manual

RCA

RCA BR200D-U1 User manual

RCA AR-88 User manual

RCA

RCA AR-88 User manual

RCA RS2035 User manual

RCA

RCA RS2035 User manual

RCA RDR6350V User manual

RCA

RCA RDR6350V User manual

Popular Radio manuals by other brands

Ettus Research USRP E300 Embedded Series Getting started guide

Ettus Research

Ettus Research USRP E300 Embedded Series Getting started guide

DIGITECH Audio AR1756 instruction manual

DIGITECH Audio

DIGITECH Audio AR1756 instruction manual

Radio Shack TRC-502 owner's manual

Radio Shack

Radio Shack TRC-502 owner's manual

PNI Escort HP 5500 manual

PNI

PNI Escort HP 5500 manual

Sonoro SO-410 operating manual

Sonoro

Sonoro SO-410 operating manual

Grace Digital GDI-IRBM20 specification

Grace Digital

Grace Digital GDI-IRBM20 specification

Radionette RNDIB13E instruction manual

Radionette

Radionette RNDIB13E instruction manual

Radius RADIUS GM300 manual

Radius

Radius RADIUS GM300 manual

Reka 82981 user guide

Reka

Reka 82981 user guide

Chapter Audio 19 Maintenance manual

Chapter Audio

Chapter Audio 19 Maintenance manual

Makita BMR100 instruction manual

Makita

Makita BMR100 instruction manual

Audiovox Sirius SIR-HK1 Home installation guide

Audiovox

Audiovox Sirius SIR-HK1 Home installation guide

Advanced Wireless Communications AWR-D7000 user manual

Advanced Wireless Communications

Advanced Wireless Communications AWR-D7000 user manual

Ericsson ORION Maintenance manual

Ericsson

Ericsson ORION Maintenance manual

TERSUS RS460H user manual

TERSUS

TERSUS RS460H user manual

Philips AE2330 user manual

Philips

Philips AE2330 user manual

Kenwood TK-3180 Function reference

Kenwood

Kenwood TK-3180 Function reference

Sunwave CrossFire M2RU installation manual

Sunwave

Sunwave CrossFire M2RU installation manual

manuals.online logo
manuals.online logoBrands
  • About & Mission
  • Contact us
  • Privacy Policy
  • Terms and Conditions

Copyright 2025 Manuals.Online. All Rights Reserved.