T
able
of
Cont
ents
Equipment Approval
Information.......
2
Interference
Information.........................
3
Hearing AidCompatibility
(HA
C).........
4
FCC RF
Radiation
Exposure
S
tatement…
…….........................................
4
Intr
oduction................................................
6
Before You
Begin......................................
6
Telephone Jack
R
equir
ements............
6
Important
Installation
Information....
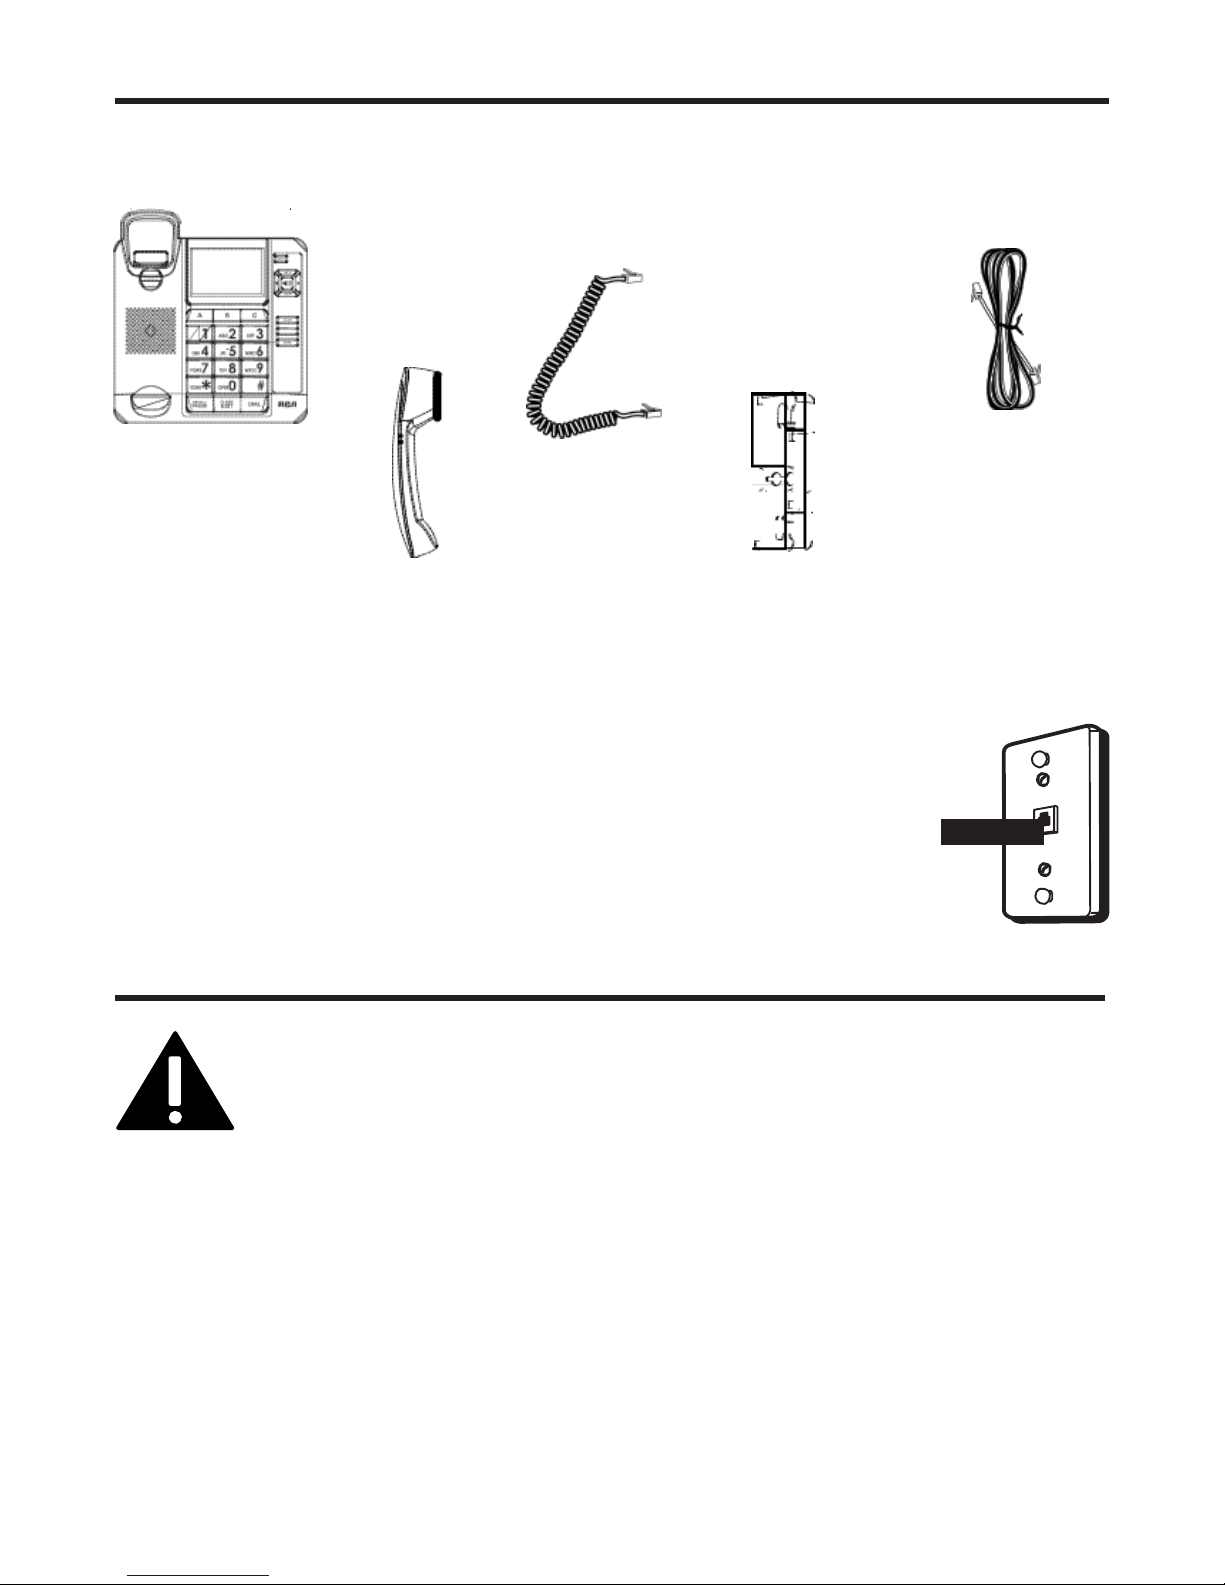
7
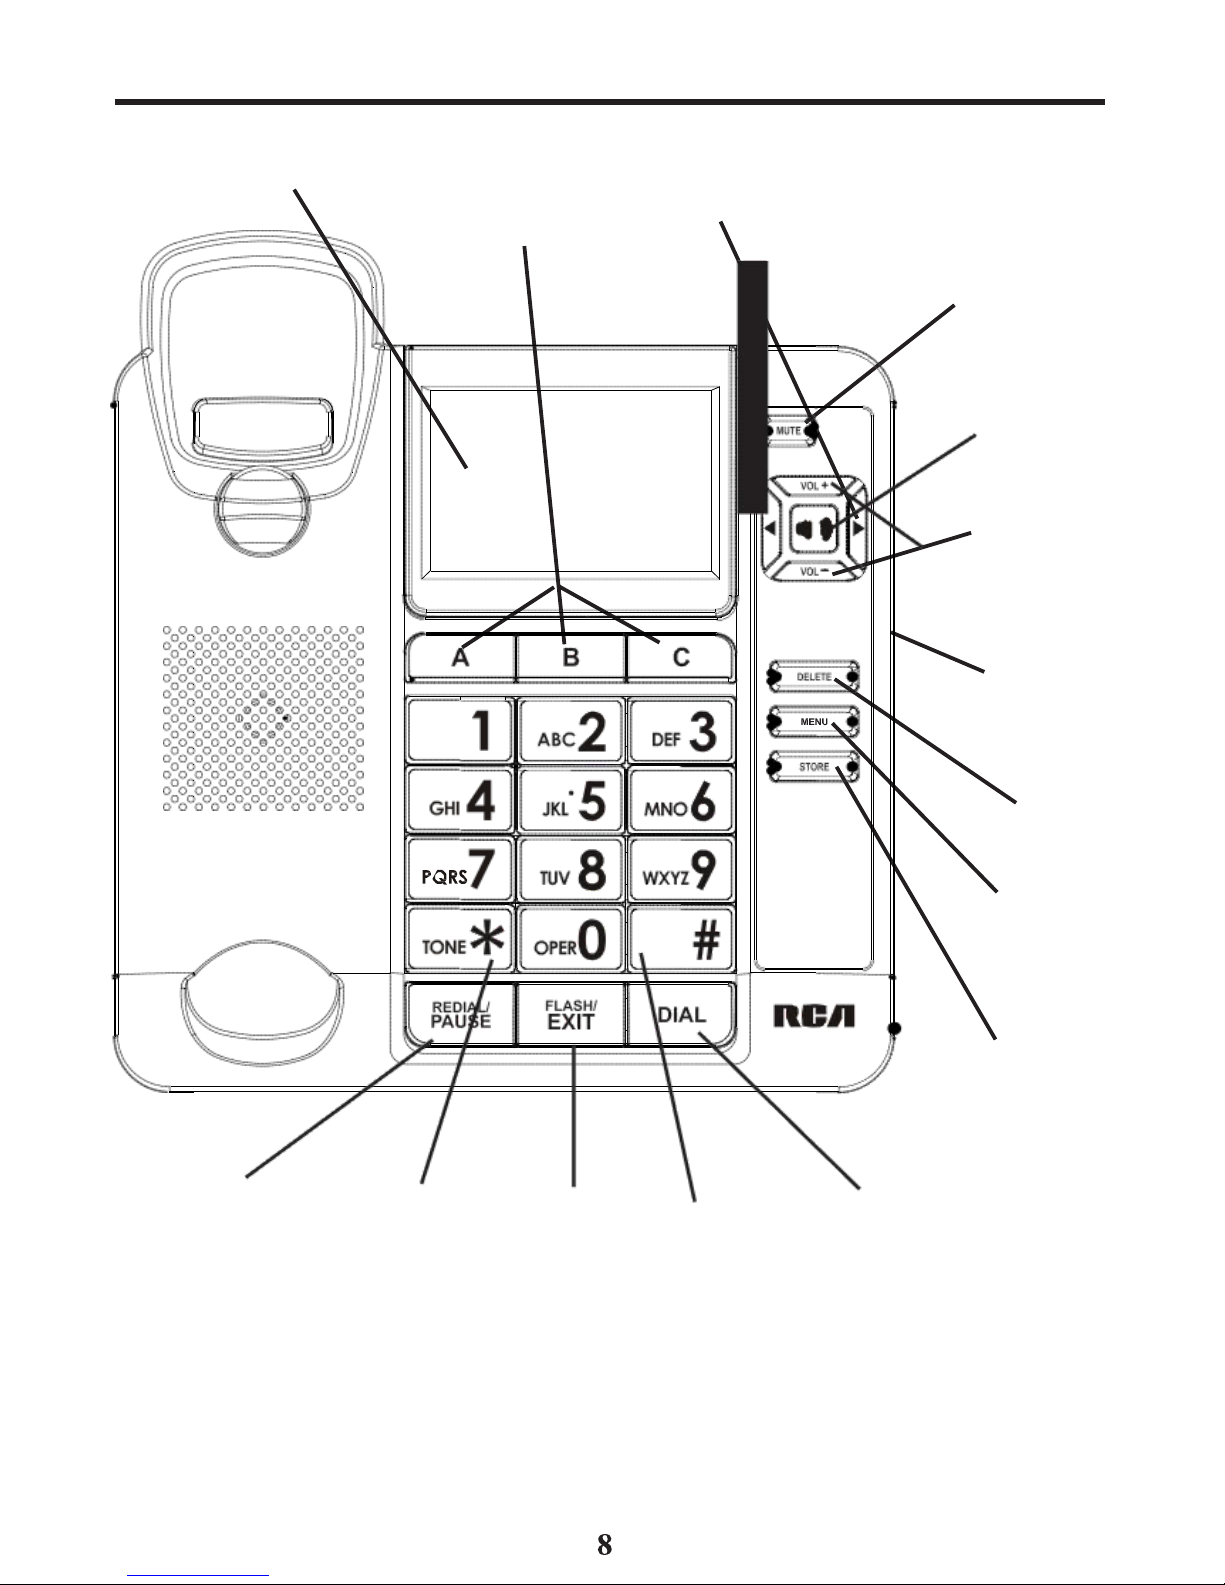
Base
Layout
................................................
8
Installing
and
Replacing
the
Batteries.......................................................
9
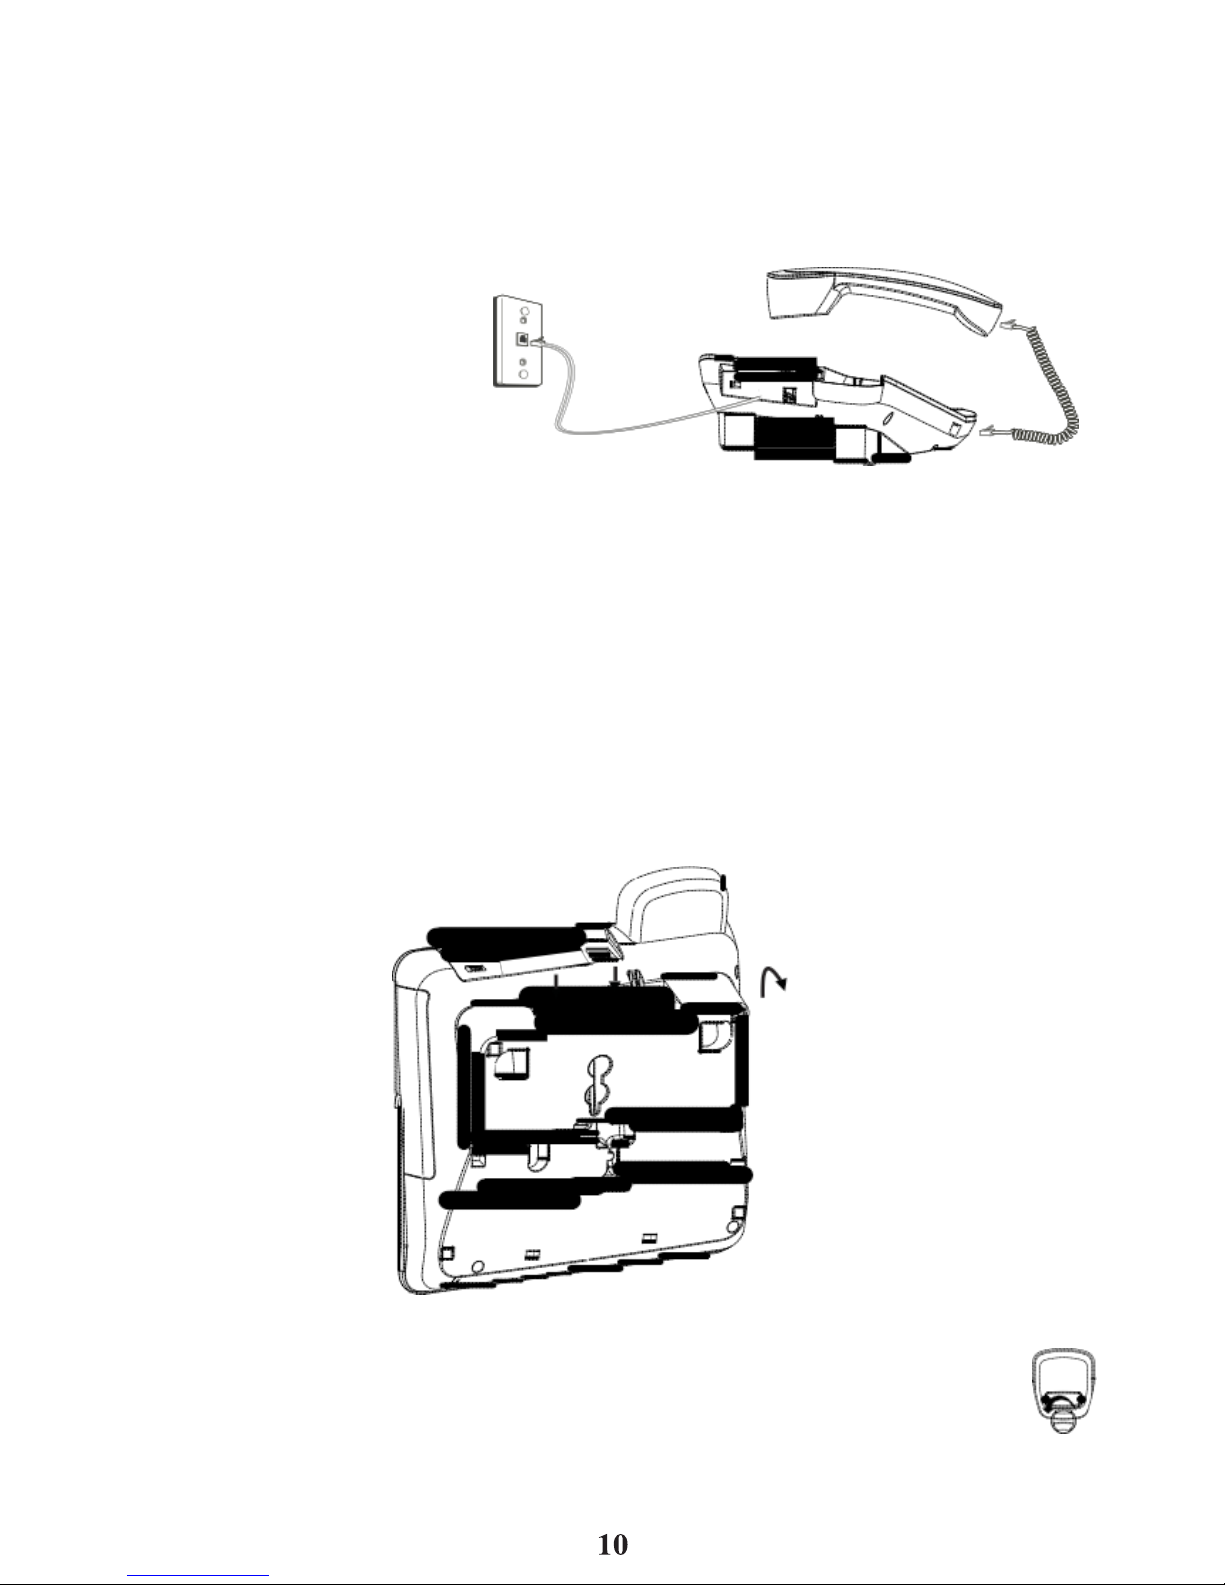
Installing
the
Phone.................................
9
Connecting
the
Handset
……................
9
Connecting
the
Telephone Line…...1
0
Wall
Mounting.........................................1
0
Attaching
the
Wall
Mounting
Pedestal.....................................................1
0
Receiving
a
Phone
Call........................1
1
Making
a
Phone
Call.............................1
1
V
olume.......................................................1
1
Adjusting
the
Handset
R
eceiv
er
V
olume.......................................................1
1
Adjusting
theSpeakerphone
V
olume.......................................................1
1
R
edial...........................................................1
1
Mute............................................................1
2
Flash............................................................1
2
T
emporary
T
one
Dialing.....................1
2
Speakerphone
Basics..........................1
2
Location....................................................1
2
Speakerphone
Use...............................1
3
Caller
ID (CID)
Featur
es........................1
3
CID
Summary
Scr
een...........................1
3
Receiving
and Storing
CID
Calls……1
4
Reviewing
CID R
ecor
ds.......................1
4
Deleting
CID R
ecor
ds...........................1
4
Dialing Back
..............................................1
4
Setting Up the Caller
ID
Menu............1
5
Display
Language..................................1
6
Contrast
.....................................................1
6
Local Area
Code……..............................1
6
Dialing
Mode............................................1
6
Memor
y......................................................1
7
S
toring
a
Name
and
Number in
Memor
y.....................................................1
7
Changing
a
S
tor
ed
Number
..............1
8
Erasing
a
S
tor
ed
Number
..................1
8
Copying Caller
ID
Memories to User
Memor
y.....................................................1
8
S
toring
a
Redial Number
to
Memor
y....................................................1
8
Dialing
a Number Stored in
Memory While On-hook
...................1
9
Dialing
a Number Stored in
Memor
y....................................................1
9
Cascade
Dialing....................................1
9
S
toring
a
Pause
in
Memor
y..............1
9
Pr
e-Dialing..............................................2
0
Caller
ID
Display
Messages.................2
0
Troubleshooting
Tips...........................2
0
General Product Car
e.........................2
1
Warranty
Assistance...........................2
1
Limited
W
arranty..................................2
2