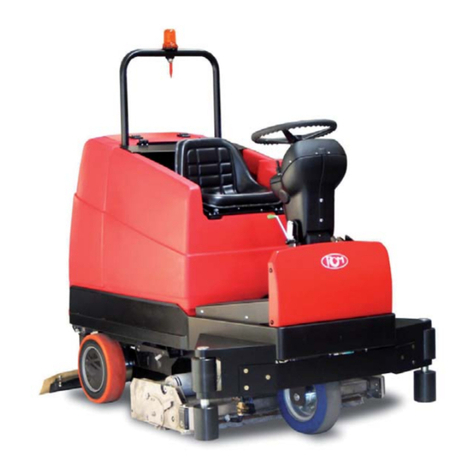
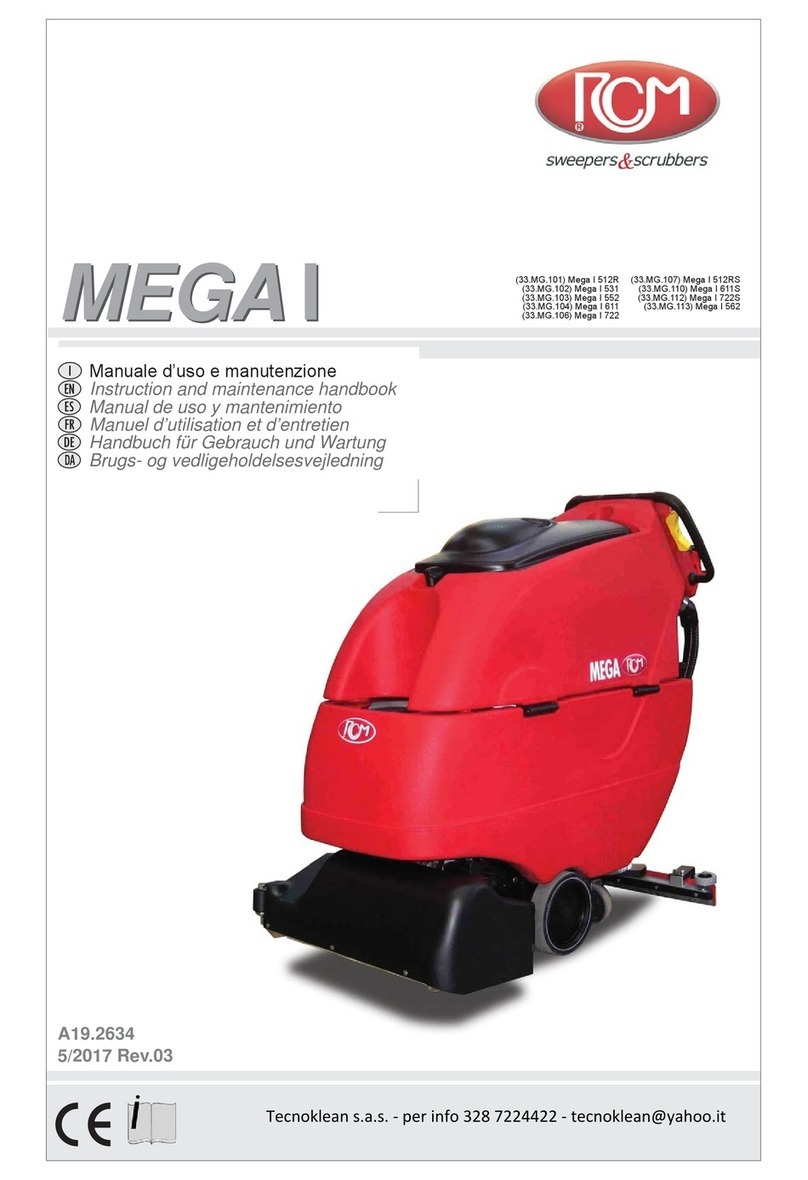
RCm KILO Manual

RCM S.p.A.
via Tiraboschi, 4 - 41043 Casinalbo - Modena - Italy
Tel. +39 059 515 311 - Fax +39 059 510 783
5/2015 Rev.00
INSTRUCTION AND MAINTENANCE HANDBOOK
EN
(33.KI.001)
KILO
KILO

2
KILO

3
INDEX PAGE
INTRODUCTION 6
• Purpose and contents of the manual 6
• Recipients 6
• Storage of the manual 6
• Declaration of conformity 6
• Identication data 6
• Other manuals of reference 7
• Spare parts and maintenance 7
• Changes and improvements 7
• Operational capabilities 7
• Conventions 7
UNPACKING/DELIVERY 7
SAFETY 7
• Symbols used 8
• General instructions 8
DESCRIPTION OF THE MACHINE 10
• Structure of the machine 10
• Steering wheel with control and commands panel 11
• Safety functions 12
• Electromagnetic brake 12
• Traction safety micro-switch 12
• Anti-rollover tubes 12
TECHNICAL FEATURES 13
ACCESSORIES AND COMPONENTS UPON REQUEST 14
WIRING DIAGRAM 15/16
PUSHING/TOWING THE MACHINE 17
USE 18
BATTERIES 18
• Check/Installation of the new batteries on a new machine 18
• Batteries installation/replacement 18
• Setting of type of batteries installed 18
PRELIMINARY OPERATIONS BEFORE STARTING THE MACHINE 19
ELECTROMAGNETIC BRAKE 19
BRUSHES 20
• Disc brushes (only for KILO versions with disc brush base) 20
• Assembly of disc brush 20
• Disassembly of disc brush 20
• Selection of type of disc brush 21
• Selection table of type of disc brushes 21
• Pad holder driving disc 22
• Assembly of pad holder driving disc 22
• Disassembly of pad holder driving disc 22
• Selection of type of pad holder driving disc 23
• Selection table of type of pads 23

4
INDEX PAGE
SQUEEGEE 24
• Assembly of squeegee 24
• Disassembly of squeegee 24
• Selection of type of squeegee rubbers 25
• Selection table of type of squeegee rubbers 25
• Installation/removal of squeegee rubbers 25
TANKS 26
• Checking recovery water tank 26
• Filling the detergent solution tank with water (or washing water) 26
• Inlet in basic version 26
• Inlet in version with lling kit 26
• Installation/Filling“5 Liter” detergent tank 27
(Version with "DETERSAVER" automatic detergent feeding system)
STARTING AND STOPPING THE MACHINE 28
• Starting the machine 28
• Stopping the machine 29
MACHINE IN OPERATION 29
• Adjustments and checks 29
EMPTYING OF TANKS 30
• Emptying of recovery water tank 30
• Emptying the detergent solution (or washing water) tank 30
•
• Emptying 5-litre detergent tank (DETERSAVER - UPON REQUEST) 31
• Detergent solution (or washing water) tank level 32
• Recovery water tank level 32
AFTER MACHINE USE 33
LONG DOWNTIME OF MACHINE 33
FIRST PERIOD OF USE 34
MAINTENANCE 34
• Planned maintenance table 34
• Check of machine operating hours 35
• Cleaning the squeegee 35
• Check of squeegee rubbers 36
• Replacement of rear squeegee rubber 36
• Replacement of front squeegee rubber 36
• Rearrangement of the squeegee 38
• Squeegee height adjustment 37
• Cleaning the disc brush 37
• Cleaning the recovery tank 38
• Cleaning the suction lter 39
• Cleaning the detergent solution (or washing water) lter 39

5
INDEX PAGE
• Cleaning the detergent solution supply nozzle to the disc brush 40
(KILO version with disc brush base)
• Opening/Closing of the batteries holder case and disconnection of the batteries connector 41
• Charging the batteries 42
• Charging the batteries, for machines without on-board battery charger (Using external battery charger) 42
• Charging the batteries, for machines with on-board battery charger (upon request) 43
• Check/Replacement of fuses 44
• Disassembly/assembly of vacuum motor 45
TROUBLESHOOTING 46
SCRAPPING 47

6
INTRODUCTION
Purpose and contents of the manual
This Manual has the purpose of providing the operator with all necessary information to be able to use the machine in
the most suitable, independent and safest way possible. It includes information on safety, technical aspect, operation,
machine stop, maintenance, spare parts and scrapping.
Before performing any operation on the machine, the operators and qualied technicians must carefully read the
instructions in this manual. If in doubt on correct interpretation of the instructions, contact the Manufacturer RCM for
any explanations.
Recipients
This manual is for both the operator and qualied maintenance technicians of the machine.
The operators must not perform operations reserved for qualied technicians. RCM is not liable for damages resulting
from failure to observe this prohibition.
Storage of the manual
This manual must be stored next to the machine, in the special bag, protected from liquids and anything else that may
jeopardise readability.
Declaration of conformity
The declaration of conformity supplied with the machine certies compliance of the machine with the provisions of
law in force.
NOTE:
The original CE declaration of conformity is in the documentation attached to the machine.
Identication data
The serial number and model of the machine are shown on the label (A) axed to the frame and can be read after
having extracted the batteries case (B) (See Maintenance chapter to open the batteries case).
The machine's year of manufacture is shown on the declaration of conformity; it is also indicated by the rst four digits
of the machine's serial number.
This information is necessary when ordering spare parts for the machine. Use the following space to note the ma-
chine's identication data.
MACHINE model | MACHINE serial number
AB

7
Other manuals of reference
Electronic battery charger manual (to be considered integral part of this manual)
Spare parts catalogue (provided with the machine)
Electromagnetic brake release instructions label
Spare parts and maintenance
Contact qualied personnel or RCM Service Centres for any requirement regarding use, maintenance and repairs.
Only original spare parts and accessories must be used.
Contact RCM for assistance or to order spare parts and accessories, and always specify model and serial number.
Changes and improvements
RCM focuses on constant improvement of its products and reserves the right to make changes and improvements
when deemed necessary, without having to modify the machines previously sold.
Any change and/or addition of accessories to the machine must be explicitly approved and implemented by RCM.
Operational capabilities
This scrubber drier is designed and manufactured to clean (wash and dry) smooth and compact oors, in civil and
industrial environments, in veried safe conditions, driven by a qualied operator.
The scrubber drier is not suitable for washing carpets and rugs.
Conventions
All references to forward, backward, front, rear, right, left indicated in this manual refer to the operator sitting in the
driving position on the operator's seat.
UNPACKING/DELIVERY
Carefully follow the instructions on the packaging to unpack the Machine.
Refer to the Pushing/towing the machine paragraph to manually push the machine.
When the machine is delivered, check that the packing and the machine were not damaged during transportation.
If the damage is evident, keep the packing and have it checked by the Courier that delivered it. Immediately call the
Courier to ll in a request for a compensation for damages.
Check that the following items have been supplied with the machine:
Technical Documentation:
• Scrubber drier instruction and maintenance manual.
• Electronic battery charger manual (if supplied).
• Scrubber drier spare parts catalogue.
• Electromagnetic brake release instructions label.
SAFETY
The following symbols are used to warn of any potentially dangerous conditions. Always read this information care-
fully and take the necessary precautions to protect people and objects.
To avoid injury, collaboration of the operator is essential. No injury prevention plan is eective without the total col-
laboration of the person directly responsible for machine operation. Most accidents that occur in a company, at the
workplace or during transfer, are caused by failure to observe the most basic safety rules.
A careful and cautious operator is the best guarantee against accidents and is indispensable to complete any preven-
tion program.

8
Symbols used
!DANGER!
Indicates a danger with risk, even deadly, for the operator.
!ATTENTION!
Indicates a potential risk of injury for people or of damage to objects.
!WARNING!
Indicates a warning or a note on key functions or on useful functions. Pay close attention to text blocks indi-
cated by this symbol.
NOTE!
Indicates a note on key functions or on useful functions.
CONSULTATION
Indicates the need to consult the Instruction and maintenance manual before performing any operation.
General instructions
Warnings and specic attention are described below to highlight potential dangers of damage to the machine and
to people.
!DANGER!
• Before performing any maintenance, repairs, parts replacement, disconnect the battery using the spe-
cial connector and remove the ignition key.
• This machine must be used only by properly trained and authorised people.
• Keep sparks, ames and incandescent materials away from batteries. Explosive gases leak during nor-
mal use of the lead batteries (WET).
• Remove all jewellery when working near electrical components.
• Do not work under the lifted machine without adequate xed safety supports.
• Do not operate this machine in environments with dusts, liquids or vapours that are harmful, danger-
ous, ammable and/or explosive. This machine is not suitable for collecting dangerous dusts.
• When charging lead batteries (WET), highly explosive hydrogen gas is produced, therefore the opera-
tion must be carried out only in well-ventilated areas that are away from open ames.
!ATTENTION!
• Before performing any maintenance/repairs, carefully read all relevant instructions.
• Before using the external battery charger, ensure that the frequency and voltage indicated on the ma-
chine's serial plate coincide with the mains voltage.
• Do not use the battery charger cable to pull or move the machine and do not use it as a handle. Do not let
the battery charger cable be crushed by a door, do not pull it over sharp surfaces or edges. Do not pass
over the battery charger cable with the machine.
• Keep the battery charger cable away from hot surfaces.
• Do not use the machine if the battery charger cable or its plug are damaged. If the machine does not
work properly, is damaged, left outdoors or has fallen in water, take it to a Service Centre.
• To reduce the risk of re, electric shock or injury, do not leave the machine connected to the electrical
mains when it is unattended. Disconnect the machine from the power socket when it is not used and
before performing maintenance.
• Do not smoke during battery charging.

9
!ATTENTION!
• Remove the ignition key to prevent unauthorised use of the machine.
• Do not leave the machine unattended without being sure that the machine cannot move independently.
• Always protect the machine from the sun, rain and other weather when in operation or stopped status. Store the
machine indoors, in a dry environment: this machine is only for dry use and should not be used or kept outdoors in
humid conditions.
• Close all doors and/or covers before using the machine, as indicated in the Operator manual.
• Do not let the machine be used as a toy. Pay careful attention when using it near children.
• Do not use the machine for purposes other than those indicated in this manual. Only use accessories recommended
by the manufacturer RCM.
• Take the appropriate precautions so that hair, jewellery, and loose clothing are not caught by the machine's moving
parts.
• Do not use the machine on sloping surfaces with an angle greater than the one stated on the identication plate so
as not to jeopardise stability and safe operation.
• Do not use the machine in especially dusty environments.
• Only use the machine in suciently-lit areas.
• If the machine is used in the presence of other people, in addition to the operator, use of the rotating light and re-
verse drive buzzer (optional) are necessary.
• Make sure people and objects are safely protected during use of this machine.
• Do not knock shelving or scaolding, especially if there is danger of falling objects.
• Do not place containers of liquid on the machine.
• The operating temperature of the machine must be between 0°C and +40°C.
• The storage temperature of the machine must be between 0°C and +40°C.
• The humidity must be between 30% and 95%.
• When using detergents to clean the oor, follow the instructions and warnings on their containers.
• Use suitable gloves and protective devices when handling oor cleaning detergents.
• Do not use the machine as a transport vehicle.
• Do not let the brushes operate with the machine stopped to avoid damaging the oor.
• In case of re, use a powder extinguisher instead of a water one.
• For no reason at all must you tamper with the protections provided for the machine; carefully follow the routine
maintenance instructions.
• Do not let any object enter the machine's openings. Do not use the machine if the openings are blocked; keep the
machine's openings free from dust, lint, hair and any other foreign body that may reduce air ow.
• Do not remove or alter the labels axed by the machine's Manufacturer.
• Release the electromagnetic brake too manually push the machine.
• Never use the machine with the electromagnetic brake deactivated.
• If the machine is pushed (due to no batteries, at batteries, faults, etc.), never exceed a speed of 4 Km/h.
• This machine is not approved for use on public roads.
• When moving the machine with temperatures below freezing point, be careful as the water in the tanks or in the
tubes may freeze and seriously damage the machine.
• Only use brushes and pads supplied with the machine and those specied in the Instruction and maintenance man-
ual. Use of other brushes or pads may compromise safety.
• If faults in operation occur, make sure they do not depend on lack of maintenance. Otherwise request intervention
by authorised personnel or by the Service Centre.
• For replacement of parts, request ORIGINAL spare parts from an authorised Dealer or Seller.
• For safety purposes as well as proper operation, planned maintenance must be carried out by authorised personnel
or by an authorised Service Centre as per the specic chapter in this manual.
• Do not wash the machine with direct or pressurised water jets or with corrosive substances.
• If lead batteries (WET) are installed in the machine, do not incline it beyond 30° compared to the horizontal surface
in order to prevent any highly corrosive liquid leaks from the batteries. If the machine needs to be inclined for main-
tenance, rst remove the batteries.
• The machine must not be abandoned at the end of its life cycle due to the presence within of toxic and harmful
materials (batteries, etc.), which are subject to standards that require disposal in special centres (see the Scrapping
chapter in the Instruction and maintenance manual).
• In conditions of use compliant with the indications of proper use, vibrations are not liable to give rise to dangerous
situations. The machine's level of vibrations is within the limits provided by law.

10
DESCRIPTION OF THE MACHINE
Structure of the machine
1. Steering wheel.
2. Ignition key. “0”o,“I”on.
3. Gear start and acceleration pedal.
4. Detergent solution (or washing water) level indicator.
5. Front, traction and steering wheel with electromagnetic
brake.
6. Rear wheels.
7. Disc brush, or pad holder disc (KILO with disc brushes
base)
8. Batteries connector.
9. Squeegee.
10. Brush(es) base.
11. Detergent solution (or washing water) tank.
12. Recovery water tank.
13. Tanks cover.
14. Tanks cover lifting grip.
15. Operator's seat.
16. Protective panel of electrical-electronic compartment.
17. Detergent solution (or washing water) lter.
18. Heel cushion.
19. Recovery water tank pipe level
20. Detergent tank (DETERSAVER - upon request) (*).
21. Detergent tank cap (DETERSAVER - upon request) (*).
(*) = Automatic “5-litre tank” detergent feeding system (DE-
TERSAVER) parts.
22. Detergent solution (or washing water) tank cap.
23. Recovery water emptying tube.
24. Washing water drain tap.
25. Batteries holder case.
26. Flashing light (upon request).
27. Slot for (recovery water), breakwater protection
wall (antisplash feature).
28. Storage container.
29. Side pins indicating brush(es) height.
30. Connector connecting the machine’s battery
charger to the electrical mains (upon request).
31. Recovery water tank.
32. Recovery water tank oat.
33. Suction inlet (with vacuum motor protection).
34. Recovery water inlet (with debris recovery tray).
35. Batteries.
31
32
33
34
27
35
8
30
1
2
3
5
6
9710
11
12
13 14
15
16
18
17
4
24
26
20
21
22
23
25
28
29
19

11
Steering wheel with control and commands panel
1. Control and commands panel
2. Emergency stop button
3. Display showing:
• 3a =“Ready”: the machine is ready or“Sit Down”(sit in the seat)
• 3b = Total operating hours
• 3c = Power status of the batteries in %
• 3d = Power status of the batteries in graphic scale
4. Adjustment buttons (+ and -) for ow of detergent solution (or washing water) (*).
5. Luminous indication for ow of detergent solution (or washing water).
6. Adjustment buttons (+ and -) for percentage of detergent depending on the ow of washing water (upon
request) (*)
7. Luminous indication for percentage of detergent (upon request).
8. Button for turbo, activation of maximum ow of detergent solution (or washing water and detergent) ; activa-
tion remains operative for 30 seconds.
9. Luminous indication of the passage of 30 seconds.
10. Adjustment button for maximum machine speed; each time it is pressed, it increases the speed (*).
11. Luminous indication for machine instantaneous speed.
12. Button for activating lowering and rotation of the disc brush.
13. Luminous indication of the disc brush activated; the luminous indicator ashes when switching from deactivat-
ed to activated and vice versa.
14. Button to activate lowering of the squeegee and recovery water suction.
15. Luminous indication of the squeegee and suction activated; the luminous indicator ashes during switch from
deactivated to activated and vice versa.
16. Button for simultaneously activating the squeegee and suction and the disc brush.
17. Luminous indication of the squeegee, suction and disc brush activated; the luminous indicator ashes during
switch from deactivated to activated and vice versa.
18. Button to activate reverse drive. The speed is halved compared to the forward drive. For the time of activation
of the reverse drive, a horn sounds. During reversing, the squeegee automatically lifts to avoid damage.
19. Luminous indication of the reverse drive activated.
20. Button to activate the buzzer.
21. Button to release the disc brush.
(*): Upon machine start-up with the key, these adjustments are placed on the values set previously.
1
2
3
3A 3B
3C 3D
4
5
6
7
8
9
10
11
12
13
14
15
16
17
18
19
2021

12
Safety functions
The machine is equipped with the safety functions de-
scribed as follows.
Electromagnetic brake
The electromagnetic brake (A) is integrated in the front
wheel's traction system and keeps the machine braked
when it is turned o and when it is on but stopped.
The key (A1) locks/releases the brake.
(see chapters: “PUSHING/TOWING THE MACHINE” and
“ELECTROMAGNETIC BRAKE”.
Traction safety micro-switch
It is installed in the driver's seat in zone (B) and does not
allow any machine operation if the driver is not seated.
Emergency stop button
It is on the control and commands panel in position (C); it
is easily accessible by the operator.
It must be pressed rmly if urgently required in order to
stop all machine functions.
Turn it clockwise too release it and restore all machine
operations.
C
A
B
DD
A1
A1
Anti-tipping tubes
These are two tubes (D) on the right and left front parts
of the frame that prevent the machine from tipping over.

13
TECHNICAL DATA
Description S02
(Disc brush base)
Voltage 24V
Cleaning width 530 mm
Drying width 600 mm
Vacuum 1168 mm H2O
Detergent solution (or washing water) tank capacity 65 L
Disc brush rpm 175 rpm
Number of disc brushes 1
Disc brush pressure 23 Kg
Washing speed 4 Km/h
Maximum speed 5 Km/h
Maximum working angle 10%
Batteries (nr.) 2 - 118Ah
Built-in battery charger √ (Upon request)
Max. washing capacity 2120 m²/h
Autonomy (hours) based upon 118 Ah batteries 2. 30’
Detersaver √ (Upon request)
> Mixing ratio 1-5%
Machine body dimensions with squeegee and brush
(length x height x width)
1340 x 1130 x 600 mm
Basic weight of the empty machine in operation
(with 118Ah batteries, with tanks empty, without operator on board) 235 Kg
Gross weight of the ready machine
(with 118Ah batteries, with full solution tank, without operator on board) 300 Kg
Drive motor 400 W
Disc brush motor 400 W
Vacuum motor 400 W (3 stages)
Manufacturing legislation EC
Sound pressure level (A) in operating position 72.4 dB (A)

14
ACCESSORIES AND COMPONENTS UPON REQUEST
• Disc brushes in materials other than standard ones (See the chapter regarding Use the diagram for selection of
type of disc brush).
• Pad holder driving disc (A) and pad (B) (See the chapter regarding Use the diagram for selection of type of pad).
• Squeegee rubbers in materials other than standard ones (See the chapter regarding Use the diagram for selection of
type of squeegee rubbers).
• Front and rear wheels in dierent materials.
• Automatic detergent feeding system (C) (DETERSAVER based upon 5-Litre tank).
• Breakwater protection wall for the recovery water tank (antisplash feature).
• Flashing light (E).
• Kit (F) for lling the tank with detergent solution (or washing water).
• Lead batteries (WET) support
• Dierent types of batteries.
• Anti-tipping tubes (G)
B A
G
E
F
C

15
WIRING DIAGRAM 1/2
Description of electrical components
7CH4Q90A: Traction board
7CFI0000: Functions board
BA: Battery
CB: Battery charger
RC: Battery charger relay
FE: Emergency stop button
EV: Water solenoid valve (brushes)
TX2: Traction board TX serial connection
RX1: Battery charger RX serial connection
RX2: Traction board RX serial connection
K1: Brush contactor
K2: Suction contactor
K3: Brush release contactor
K4: Brush contactor NA contact
K5: Suction contactor NA contact
K6: Brush release contactor NA contact
M: Drive motor
M3: Chemical (detergent) pump
M4: Water pump
M1: Brush actuator
M2: Squeegee actuator
SP: Brush motor
ASP: Vacuum motor
SWC: Start-up key switch
SWG: Water oat
SWM: Seat micro-switch
BR: Reverse drive buzzer
LAMP: Flashing
P - SPEED REFERENCE: Accelerator potentiometer
F1: 80A midi fuse (traction)
F2: 10A blade fuse (auxiliaries)
F3: 30A midi fuse (vacuum)
F4: 40A midi fuse (brush)

16
WIRING DIAGRAM 2/2

17
PUSHING/TOWING THE MACHINE
When traction cannot be used (no batteries, at batteries, faults, etc.), the electromagnetic brake must be released as
follows to push/tow the machine:
• Insert the key (A1) in the appropriate seat (A2) and completely tighten it. During this operation, gently push
the machine back and forth to facilitate releasing the electric brake and thus be able to manually move the
machine.
Never exceed a speed of 3 Km/h during pushing/towing.
• When nished, unscrew and remove the key to apply the brakes again and bring the machine back to safe con-
ditions. Store the key in a safe place and within reach in the event the machine has to be moved.
!ATTENTION!
After having moved the machine and to reactivate the electromagnetic brake (A), always remember to remove
the key (A1). Check that the electromagnetic brake is reactivated by pushing the machine and verifying the
condition of the brakes.
!ATTENTION!
Never turn the machine on with the key (A1) in released electromagnetic brake position. Release the electro-
magnetic brake only for the time required to move the machine.
AA1
A2
A1

18
USE
!ATTENTION!
Adhesive labels are applied to some points of the machine, indicating:
• DANGER
• ATTENTION
• WARNING
• CONSULTATION
During reading of this manual, the operator must carefully understand the meaning of the symbols shown on the
labels. Do not cover the labels for any reason and immediately replace them if damaged.
BATTERIES
Check/Installation of batteries on a new machine
!ATTENTION!
This machine's electrical components may become severely damaged if the batteries are not installed and
connected properly. The batteries must be installed only by qualied personnel.
The machine must also be set, according to the batteries used: WET, GEL, AGM.
Check the batteries before installing them to make sure they are not damaged.
Disconnect the batteries connector and the battery charger's plug.
Handle the batteries carefully.
Install the protective caps of the batteries' terminals.
The machine can be supplied in one of the following congurations:
• With batteries (WET or GEL or AGM) already assembled on the machine and ready for use.
• Batteries not supplied
Depending on the type of supply received, operate as follows.
a) Batteries (WET or GEL or AGM) already assembled on the machine and ready for use.
1. The machine is suitable for use.
b) Batteries not supplied
2. Purchase suitable batteries (See the Technical features paragraph).
Contact qualied dealers of batteries for selection and installation.
Batteries installation/replacement
This intervention must be performed by a specialised technician; refer to the Authorized Service Center.
Setting of type of batteries installed
This intervention must be performed by a specialised technician; refer to the Authorized Service Center.

19
PRELIMINARY OPERATIONS BEFORE STARTING THE MACHINE
!ATTENTION!
At each machine start-up, check that there are no foreign bodies between the brush base (A) and the machine,
or between the squeegee (B) and the machine, that may obstruct the brushes base and the squeegee from lift-
ing. This check is necessary if the machine has been turned o without the brush holder base and the squee-
gee being lifted; when it is turned back on the brushes base and the squeegee automatically lift.
ELECTROMAGNETIC BRAKE
BRAKING is assisted by the electric brake (1). THE electric brake is integrated in the traction system of the front in-
wheel electric motor 2 and keeps the machine braked when it is o or when it is on but stopped. The electric brake is
equipped with a key 3 to unlock and manually move the machine when it is stopped. (for example: when the battery
is missing). Also see chapter:“PUSHING/TOWING THE MACHINE”.
!ATTENTION!
The machine does not brake if the electromagnetic brake is released.
NEVER USE THE MACHINE WITH THE BRAKE RELEASED.
1
2
3
A
B

20
BRUSHES
Disc brushes (only for KILO disc brush base)
Proceed as follows for assembly/disassembly of the disc brush (A) on the machine provided with appropriate base:
!ATTENTION!
Always check there are no foreign bodies between the base (J) and the machine, which can obstruct lifting of
the base, before activating the ignition key (B).
Assembly of disc brush
1. Sit on the machine seat and rotate the ignition key (B) to “I”, then wait a few seconds until the caption (D)
“Ready”appears on the display (C).
2. Wait for the brush base (J) to lift and the luminous indication (I) to turn o.
3. Rotate the ignition key (B) to“0” and extract it.
4. Position the disc brush (A) under the base (J), centring it on the coupling hub.
5. Sit on the machine seat and rotate the ignition key (B) to “I”, then wait a few seconds until the caption (D)
“Ready”appears on the display (C).
6. Press the activation button (E) to lower and rotate the brush.
7. Press the accelerator (F) lightly and only for an instant, thereby lowering the hub that will couple the brush.
If the brush is not coupled climb down from the machine and reposition the brush on the coupling hub,
which should have remained lowered (thereby easing alignment); then repeat the operations described in the
previous points 5, 6 and 7.
8. The disc brush (A) is coupled and ready for use; if necessary, turn the machine o by rotating the ignition key
(B) to“0”and extract it.
Disassembly of disc brush
1. Sit on the machine seat and rotate the ignition key (B) to “I”, then wait a few seconds until the caption (D)
“Ready”appears on the display (C).
2. Press the brush release button (G) and wait for a few seconds until the machine has released the brush after
having activated it for an instant.
3. Rotate the ignition key (B) to“0” and extract it.
4. Slightly move the squeegee (H) and recover the disc brush.
!ATTENTION!
Use of the machine with the brush not perfectly assembled can cause injury to people and damage to equip-
ment.
Always ensure all components have been assembled before starting the machine. Carefully
inspect the machine before using it.
A J
H
F
B
A
GD
C
I
E
Table of contents
Other RCm Scrubber manuals
Popular Scrubber manuals by other brands

Black & Decker
Black & Decker S500 instruction manual

Nacecare
Nacecare TTV 678-300T Owner's instructions

R.P.S. Corporation
R.P.S. Corporation MAGNUM series Service manual

Jaga
Jaga Oxygen Exhaust Installation and operating instructions

Numatic
Numatic TT 1535S Owner's instructions

Taski
Taski swingo 455B Technical manual