manuals.online logo
Brands
  1. Home
  2. •
  3. Brands
  4. •
  5. Reece
  6. •
  7. Bathroom Fixture
  8. •
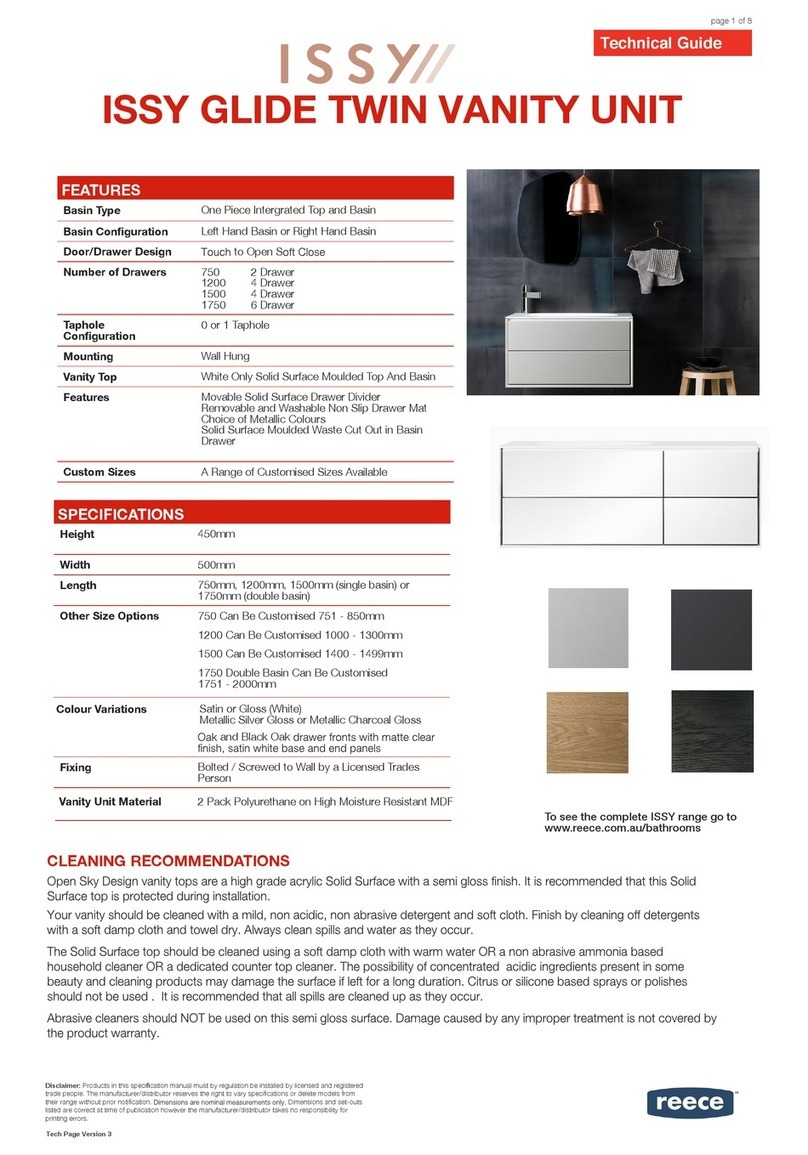
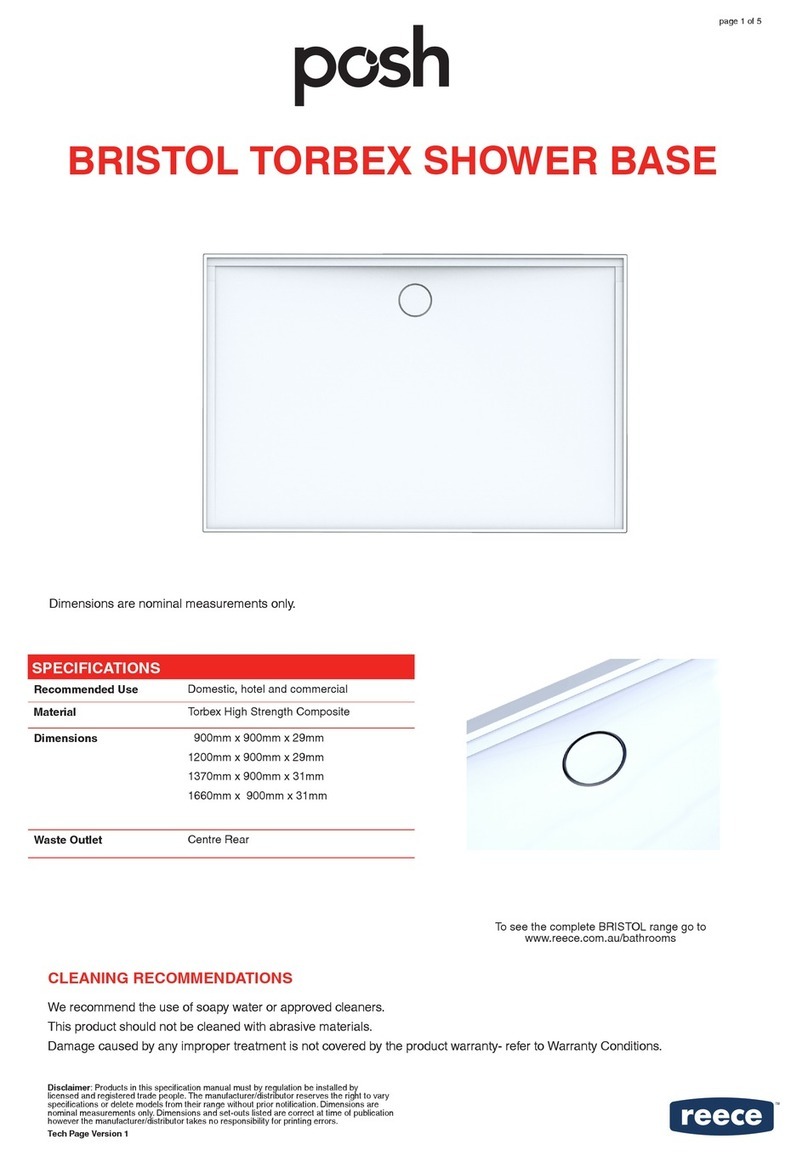
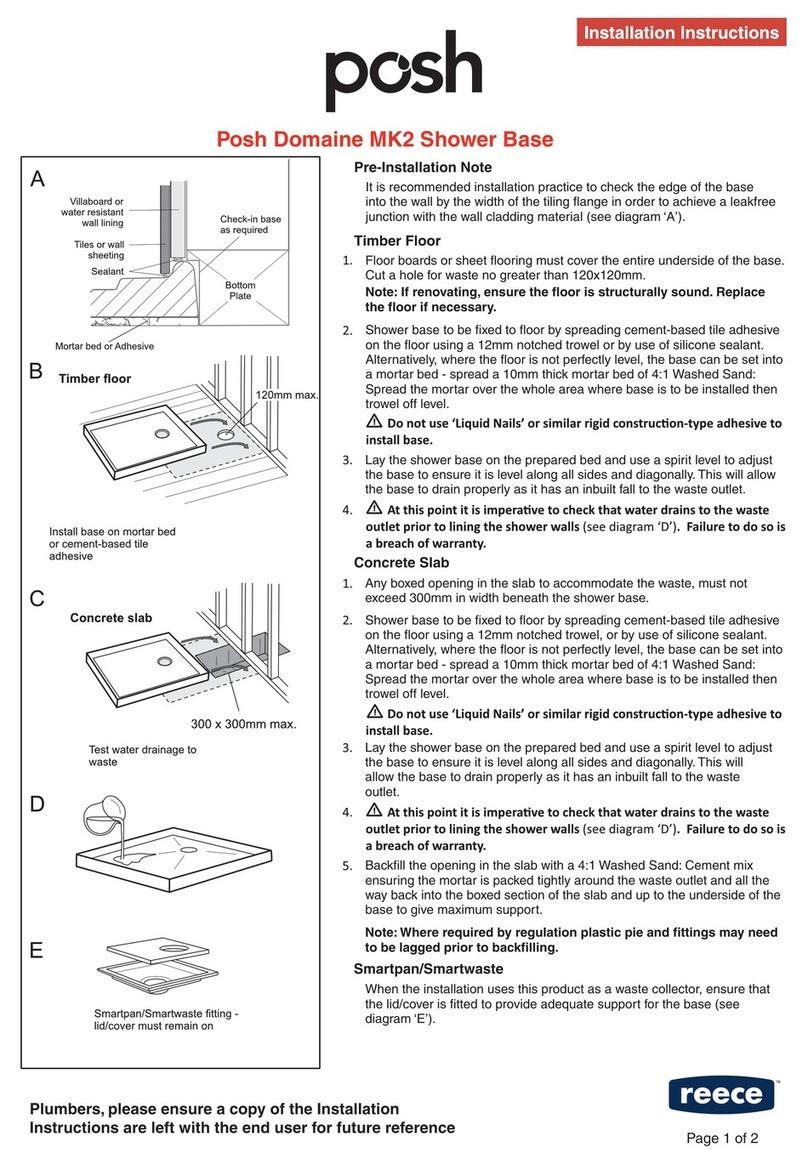
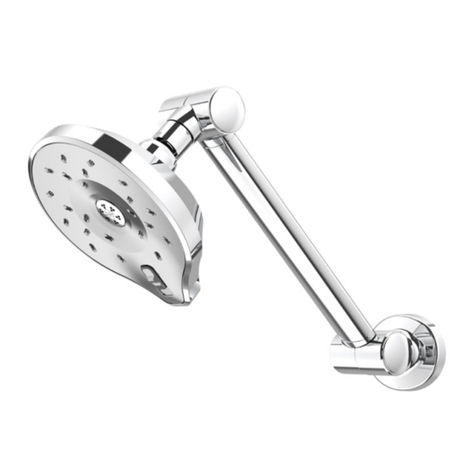
  9. Reece Laufen ILBAGNOALESSI One Drop In Basin 500 User manual

Reece Laufen ILBAGNOALESSI One Drop In Basin 500 User manual

LAUFEN
ILBAGNOALESSI One
DROP IN BASIN 500
FEATURES
Recommended use Domestic, hotel or commercial
Weight 10.6kg
Finish LAUFEN Clean Coat
CLEANING RECOMMENDATIONS
Soapy water or approved bathroom cleaners. This bathroom
product should not be cleaned with abrasive materials. Damage
caused by any improper treatment is not covered by the product
warranty. Refer to Warranty Conditions on the last page.
To see the complete LAUFEN range go to
www.reece.com.au/bathrooms
80
225
580
650
900
80-120
280
500
500
Set out may differ based on trap used.
page 1 of 4
Disclaimer: Products in this specification manual must by regulation be installed by licensed and registered
trade people. The manufacturer/distributor reserves the right to vary specifications or delete models from
their range without prior notification. Dimensions and set-outs listed are correct at time of publication
however the manufacturer/distributor takes no responsibility for printing errors.
Tech Page Version 1
SPECIFICATION
Fixing requirements Refer to diagram
Integral overflow Yes
Tap hole availability 0 or 1 taphole
Plug & waste Suits Clik Clak ceramic waste
Water storage 5.5 litres
Colour availability White
LAUFEN
ILBAGNOALESSI One
DROP IN BASIN 500
(3-1/8")
8 cm
5 cm
28 cm
50 cm
50 cm
(19-5/8")
(19-5/8")
(2")
(11")
(3-3/8")
Montageanleitung • Instructions pour le montage • Istruzioni di montaggio • Mounting instructions
Instrucciones de montaje • Montage instructie • Pokyny k instalaci • Montavimo instrukcija
Instrukcja montażu • Szerelési útmutató • Инструкция по установке • Инстрyкция 3аинсталация
Art. Nr. 81397.1
• Vorbereitung
• Préparation
• Preparazione
• Preparation
• Preparación
• Het voorbereiden
• Příprava
• Paruošimas
• Przygotowanie
• Előkészítés
• Подготовка
• Подготовка
* Diese Masse einhalten, wenn Alessi/Inda Möbel eingesetzt werden.
* Respecter ces cotes lorsque des meubles Alessi/Inda sont mis en place.
* Rispettare queste misure se si installano mobili Alessi/Inda.
* Respestar estas medidas en caso de montaje de muebles Alessi/ Inda.
* Deze maat in acht nemen in combinatie met een Alessi/Inda meubel.
* Dodržte tyto rozměry, pokud je dodáván nábytek Alessi/Inda.
* Laikykitės šių matmenų tik tuo atveju, jei montuojate ant Alessi/Inda baldų.
* Wymagane wymiary jeżeli korzystamy z mebli Alessi/Inda.
* Ezt a méretet tartani, ha Alessi/Inda bútorba építjük be.
* придерживайтесь этих размеров при установке в мебель Alessi/Inda.
* Сиазвайте тези размери ако са подходящи за доставения мебел Alessi/Inda.
• Montageschablone Art. Nr. 89197.3
in gewünschter Position mit Klebe-
Schablone herstellen.
• Fixer le gabarit de montage
art. N° 89197.3 dans la position desi-
ree au moyen d’une bande adhesive
decouper selon le gabarit.
• Fissare la dima Cod. Art. 89197.3 nella
posizione desiderata con nastro adesivo.
Praticare il foro secondo la dima.
• Fix the template Art. No. 89197.3 with adhesive tape.
Cut out the opening using the template.
• Fjar la plantilla Art. Núm. 89197.3 en la posición deseada con
cinta adhesiva. Cortar de acuerdo con la plantilla.
• Montagesjabloon artikelnr. 89197.3 op de gewenste positie met
plakband bevestigen. Uitsparing volgens sjabloon zagen.
• Připevněte šablonu č. zboží 89197.3 pomocí lepící pásky.
Pomocí šablony vyřízněte otvor.
• Prie paviršiaus, skirto praustuvo montavimui, lipnia juosta
priklijuokite šabloną, art. nr. 89197.3. Pagal šabloną išpjaukite
angą.
• Przymocuj szablon Art. Nr. 89197.3 i odrysuj jego
obrys wraz z osiami umywalki. Usuń szablon i wytnij otwór.
• A 89197.3 cikkszámú kivágási sablont a kívánt helyen
ragasztó szalaggal kell rögzíteni. A kivágást a sablon
szerint elkészíteni.
• Прикрепите лекало Арт. № 89197.3 липкой лентой.
Вырежьте отверстие по лекалу.
• Фиксирайте шаблона арт. № 89197.3 лепенка.
Изрежете като лзиолзвате шаблона.
0.1 0.2.
0.3
2DE/FR/IT/EN/ES/NL/CS/LT/PL/HU/RU/BG
Plumbers, please ensure a copy of the installation
instructions is left with the end user for future reference
INSTALLATION
Fix the template Art. No. 89197.3 with adhesive tape. Cut out the opening using the template.
page 2 of 4page 2 of 4
LAUFEN
ILBAGNOALESSI One
DROP IN BASIN 500
Art. Nr. 81397.1
Pegeanleitung für den Benutzer • Instructions d’entretien • Istruzioni per la pulizia
Cleaning instructions for the user • Instrucciones de la limpieza para el usario • Onderhoudshandleiding voor de ge-
bruiker • Pokyny čištĕni pro uživatele • Valymo ir priežiūros instrukcija • Instrukcja czyszczenia
Tisztántártasi útmutató • Инструкция по очистке • Инстрyкции 3а почистванѳ
DE Zur Reinigung der Sichtteile nur weiche,
angefeuchtete Tücher oder Lederlappen
verwenden.
FR N‘utiliser que des chiffons doux et humides
ou une peau de chamois pour nettoyage des
parties visibles.
IT Per pulire la parti visibili utilizzare esclusiva-
mente un panno o una pelle di daino umidi.
EN To clean the visible parts, only use soft,
moist pieces of cloth or leather.
ES Para la limpieza de las partes visibles utili-
zar solamente paños suaves humedecidos.
NL Voor reiniging van zichtbare delen uits-
luitend zachte vochtige doek of leren zeem
gebruiken.
CS Na čištění viditelných částí použijte pouze
jemné a vlhké kousky látky nebo kůže.
LT Matomų paviršių valymui naudokite tik
švelnų sudrėkintą audinį ar odą.
PL Do czyszczenia używać delikatnych gąbek
i ściereczek.
HU A látható felületek tisztítására csak puha,
nedves ruha vagy bőrkendő használható.
RUS Для очистки видимой
поверхности используйте только
влажную ткань или кожу.
BG За да почистите видимите части
винаги ползвайте мек влажен памучен
или кожен плт.
DE Für hartnäckige Flecken verwenden Sie
bitte ein hautfreundliches Reinigungsmittel
(z. B. Geschirrspülmittel), das Sie in hand-
warmes Wasser geben.
FR Veuillez utiliser un produit de nettoyage
qui n‘irrite pas la peau (p. ex. un produit à
vaisselle) et que vous dilurez dans l‘eau tiède
pour traiter les taches difciles à nettoyer.
IT Per rimuovere le macchie ostinate utilizza-
re detergenti delicati (es. detersivo per i piatti)
diluiti in acqua tiepida.
EN For stubborn stains, please use a
cleansing agent which does not harm your
skin (e.g. washing-up liquid), and put it into
luke-warm water.
ES Para manchas: Utilizar productos de lim-
pieza suaves con agua caliente (Por ejemplo,
lavavillas).
NL Hardnekkige vlekken: zacht (huidvri-
endelijk) schoonmaakmiddel in handwarm
water gebruiken (bijv. afwasmiddel).
CS U odolných skvrn použijte čistící roztok,
který Vám nepoškodí kůži (např. mycí teku-
tinu) a nařed’te jej ve vlažné vodě.
LT Pridžiuvusių nešvarumų valymui nau-
dokite valiklius, nekenkiančius Jūsų odai
(pvz., valymo skystį), praskiestus drungnu
vandeniu.
PL Zabrudzenia usuwać przy pomocy
wody z dodatkiem delikatnych środków
czyszczacych, nastepnie spłukujac je ciepłą
wodą.
HU Makacs szennyeződésekhez: Csak
bőrbarát tisztítószer és kézmeleg víz alkal-
mazható (pl.mosogatószer).
RUS Для удаления устойчивых пятен
используйте чистящее средство
безвредное для кожи рук (например,
жидкость для мытья посуды),
разведя его в прохладной воде.
BG За упорити петна, моля
използвайте почистващо средство,
което да не наранява кожата,
разтворено в хладка вода.
DE Alle Sichtteile sind nach einer Reinigung
oder Nässeeinwirkung trocken zu reiben.
FR Toutes les parties visibles doivent être
essuyées aprés avoir été nettoyées ou
mouillées.
IT Dopo la pulizia o il lavaggio asciugare
bene tutte le parti visibili.
EN All visible parts must be rubbed dry after
they have been cleaned or after they have
become wet.
ES Secar todas las partes visibles después
de una limpieza.
NL Alle zichtbare delen na reiniging of gebru-
ik van water, droog wrijven.
CS Všechny viditelné části musí být po
vyčištění nebo po namočení vytřeny do
sucha.
LT Visi matomi paviršiai po drėgno valymo
arba po sušlapinimo turi būti nusausinami.
PL Powierzchnie z połyskiem przetrzeć do
sucha miękką ścierką.
HU A tisztított vagy nedves látható felületeket
szárazra kell törölni.
RU Всю видимую поверхность
необходимо насухо протирать после
очистки.
BG Всички видими части трябва
да бъдат подсушени след като
са предварително почистени или
намокрени.
5DE/FR/IT/EN/ES/NL/CS/LT/PL/HU/RU/BG
To clean the visible parts, only use soft,
moist pieces of cloth or leather.
For stubborn stains, please use a
cleansing agent which does not harm
your skin (e.g. washing-up liquid), and
put it into luke-warm water.
All visible parts must be rubbed dry after
they have been cleaned or after they
have become wet.
page 3 of 4page 3 of 4
REECE PRODUCT QUALITY GUARANTEE
You have purchased a quality product from Reece Pty Ltd
ABN 84 004 097 090 (“Reece”). This product is covered by
a 15 year replacement product warranty and a 12 month
warranty over spare parts and labour.
15 YEAR WARRANTY – DOMESTIC USE
This warranty covers faults in the product construction, material
and assembly. Products which are within 15 years from the
date of purchase, found upon inspection by an authorised
Reece representative, to be defective in construction,
material or assembly, will be repaired or exchanged with an
equivalent product free of charge. Replaced items become
Reece’s property.
All replacement products will be available for collection without
charge to the customer at the nearest Reece branch to the
customer’s location, or elsewhere as agreed between the
customer and Reece.
Labour and Spare Parts
The labour for the replacement of products and spare parts
to which this warranty applies will be supplied by Reece or
relevant supplier using licensed plumbers engaged by Reece or
relevant supplier within 1 year from the date of purchase.
Spare parts which are within 1 year from the date of purchase
found upon inspection by an authorised Reece representative
to be defective in construction, material or assembly, will be
replaced free of charge.
Warranty Conditions
This warranty will apply only under all of the
following conditions:
• The item has been installed by a licensed plumber
• The item has been installed for and subjected to domestic
residential use only
• Failure is due to a fault in the manufacture of the product
• Proof of purchase (including the date of purchase)
is provided
• The installation of the product is in accordance with the
instructions provided
This warranty does not cover products purchased as an
ex-display without being fully checked and tested for sale by
the manufacturer.
This warranty does not include faults caused by:
• Unsuitable or improper use
• Incorrect installation or installation not in accordance with
the instructions provided
• Installation or part installation by the purchaser or any person
other than a LICENSED PLUMBER
• Normal wear and tear
• Inadequate or complete lack of maintenance
• Chemical, electrochemical or electrical influences
• Harsh detergents or abrasive cleaners used on
product finishes
1 YEAR WARRANTY – COMMERCIAL USE
‘Commercial’ use is all use other than for normal domestic
residential purposes, including use in non-business places as in
public buildings, schools, sports centres and in establishments
that contain private bathrooms with high frequency of use by
many individuals, such as hotels, motels, retirement villages
and hospitals.
The Commercial warranty covers this product against
manufacturing faults in the construction, material and assembly
of both the finished products and any spare parts for a period
of 1 year from the date of purchase. Products and spare
parts which are found upon inspection by an authorised
Reece representative to be defective in construction, material
or assembly will be repaired or exchanged free of charge.
Replaced items become Reece’s property. The labour for the
replacement of products and spare parts to which this warranty
applies will be supplied by Reece or relevant supplier using
licensed plumbers engaged by Reece or relevant supplier.
The Warranty Conditions and exclusions which apply to the
domestic use warranty also apply to this commercial warranty.
EXCLUSIONS
To the fullest extent permitted by law, Reece excludes all liability
for damage or injury to any person, damage to any property,
and any indirect consequential or other loss or damage.
CLAIM PROCEDURE
For all warranty queries customers are to contact the branch
where the product was purchased. These details can be found
on your purchase invoice.
Our goods come with guarantees that cannot be excluded
under the Australian Consumer Law. You are entitled
to a replacement or refund for a major failure and for
compensation for any other reasonably foreseeable loss or
damage. You are also entitled to have the goods repaired or
replaced if the goods fail to be of acceptable quality and the
failure does not amount to a major failure.
LAUFEN
ILBAGNOALESSI One
DROP IN BASIN 500
page 4 of 4
BASIN. 15YR
15
YEAR
Q
U
A
L
I
T
Y
G
U
A
R
A
N
T
E
E

Other Reece Bathroom Fixture manuals

Reece Posh Domaine MK2 User manual

Reece

Reece Posh Domaine MK2 User manual

Reece Kado Era User manual

Reece

Reece Kado Era User manual

Reece 1789900 User manual

Reece

Reece 1789900 User manual

Reece Showerama 610 Single Bowl Quick start guide

Reece

Reece Showerama 610 Single Bowl Quick start guide

Reece KADO Lux Oval User manual

Reece

Reece KADO Lux Oval User manual

Reece POSH A User manual

Reece

Reece POSH A User manual

Reece MILLI EXO TOILET ROLL HOLDER User manual

Reece

Reece MILLI EXO TOILET ROLL HOLDER User manual

Reece Omnivo Neo User manual

Reece

Reece Omnivo Neo User manual

Reece 1789884 User manual

Reece

Reece 1789884 User manual

Reece Alape User manual

Reece

Reece Alape User manual

Reece KADO Cirque User manual

Reece

Reece KADO Cirque User manual

Reece Posh Solus Installation guide

Reece

Reece Posh Solus Installation guide

Reece Posh Solus Powder Room Vanity Unit User manual

Reece

Reece Posh Solus Powder Room Vanity Unit User manual

Reece posh User manual

Reece

Reece posh User manual

Reece Posh Domaine User manual

Reece

Reece Posh Domaine User manual

Reece METHVEN SATINJET ESCAPE MKII User manual

Reece

Reece METHVEN SATINJET ESCAPE MKII User manual

Reece KADO User manual

Reece

Reece KADO User manual

Reece hideaway+ User manual

Reece

Reece hideaway+ User manual

Reece AXA Uno User manual

Reece

Reece AXA Uno User manual

Reece ISSY GLIDE TWIN 750 Quick start guide

Reece

Reece ISSY GLIDE TWIN 750 Quick start guide

Reece Lancaster 800 User manual

Reece

Reece Lancaster 800 User manual

Reece Posh Maintenance manual

Reece

Reece Posh Maintenance manual

Reece Posh Solus MK3 User manual

Reece

Reece Posh Solus MK3 User manual

Reece METHVEN AURAJET AIO User manual

Reece

Reece METHVEN AURAJET AIO User manual

Popular Bathroom Fixture manuals by other brands

Kohler Mira Sport Max J03G Installation and user guide

Kohler

Kohler Mira Sport Max J03G Installation and user guide

Moen 186117 Series installation guide

Moen

Moen 186117 Series installation guide

Hans Grohe Raindance Showerpipe 27235000 Instructions for use/assembly instructions

Hans Grohe

Hans Grohe Raindance Showerpipe 27235000 Instructions for use/assembly instructions

Signature Hardware ROUND SWIVEL BODY SPRAY 948942 Install

Signature Hardware

Signature Hardware ROUND SWIVEL BODY SPRAY 948942 Install

fine fixtures AC3TH installation manual

fine fixtures

fine fixtures AC3TH installation manual

LIXIL HP50 Series quick start guide

LIXIL

LIXIL HP50 Series quick start guide

KOLO ATOL PLUS installation manual

KOLO

KOLO ATOL PLUS installation manual

Hans Grohe PuraVida 15073000 Instructions for use/assembly instructions

Hans Grohe

Hans Grohe PuraVida 15073000 Instructions for use/assembly instructions

Toto TS111B8 Installation and owner's manual

Toto

Toto TS111B8 Installation and owner's manual

Kohler K-1158-H2 Homeowner's guide

Kohler

Kohler K-1158-H2 Homeowner's guide

Coram Showers OFFSET QUADRANT manual

Coram Showers

Coram Showers OFFSET QUADRANT manual

baliv DU-2010 manual

baliv

baliv DU-2010 manual

odass OD-1710 instruction manual

odass

odass OD-1710 instruction manual

Oxygenics Evolution Easy installation instructions

Oxygenics

Oxygenics Evolution Easy installation instructions

Bradley Express SS Series installation instructions

Bradley

Bradley Express SS Series installation instructions

Helvex TH-974 installation guide

Helvex

Helvex TH-974 installation guide

DURAVIT C.1 C15240 0090 Instructions for mounting and use

DURAVIT

DURAVIT C.1 C15240 0090 Instructions for mounting and use

Sunshower PURE SOLO manual

Sunshower

Sunshower PURE SOLO manual

manuals.online logo
manuals.online logoBrands
  • About & Mission
  • Contact us
  • Privacy Policy
  • Terms and Conditions

Copyright 2025 Manuals.Online. All Rights Reserved.