manuals.online logo
Brands
  1. Home
  2. •
  3. Brands
  4. •
  5. Reece
  6. •
  7. Bathroom Fixture
  8. •
  9. Reece METHVEN AURAJET AIO User manual

Reece METHVEN AURAJET AIO User manual

METHVEN
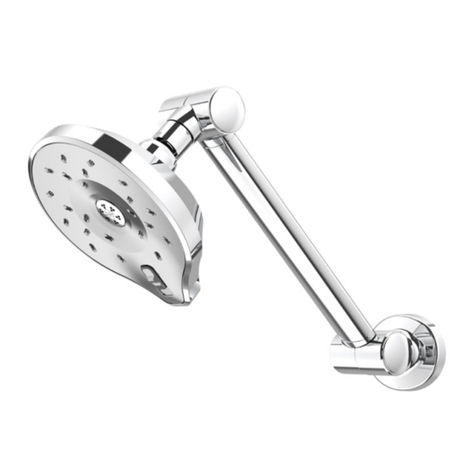
AURAJET AIO RAIL SHOWER
CLEANING RECOMMENDATIONS
We recommend the use of soapywater or approved cleaners. This
product should not be cleaned with abrasivematerials.Damage caused
by improper treatment is not covered by the product warranty – refer to
warranty conditions on the last page.
To see the complete Aio range go to
www.reece.com.au/bathrooms
SPECIFICATIONS
Recommended Use Domestic, hotel and commercial
Colour Chrome with white face
Chrome with satin chrome face
Pressure Rating Suitable for high pressure applications and has
been WELS certified to the following:
Minimum operating pressure 150kPa
Maximum operating pressure 500kPa
Temperature Rating Maximum continuous working temperature 70°C
(recommended 38°C - 42°C)
Minimum 1°C
Suitable Hot Water
Units
Storage Tank: Yes
Continuous Flow: Yes
Gravity Feed: Not recommended
WELS Stars: 3
Flow rate: 9L/min
Standards AS/NZS 3662
Spray Patterns Aurajet Spray
Disclaimer: Products in this specification manual must by regulation be installed by
licensed and registered trade people. The manufacturer/distributor reserves the right to
vary specifications or delete models from their range without prior notification. Dimensions
are nominal measurements only. Dimensions and set-outs listed are correct at time of
publication however the manufacturer/distributor takes no responsibility for printing errors.
Tech Page Version 1
Both
Adjustable
46
56
Variable
198
216
Typical
570 - 745
800
107
AOSRCPAU AOSRCPWHAU
page 1 of 4
The more
stars the more
water efficient
WATER R AT ING
www.waterrating.gov.au
In accordance with AS/NZS 6400
Licence No. 0095
Methven Australia Pty Ltd
9.0 litres per
minute
METHVEN
AURAJET AIO RAIL SHOWER
INSTALLATION INSTRUCTIONS
Plumbers, please ensure a copy of the installation
instructions is left with the end user for future reference
Step 1
• Mount the wall boss housings in desired position with the screws.
Check the mounts are vertically aligned. Ensure the grub screws
are located on the correct sides as shown.
Step 2
• Slide soap dish onto the rail
Step 4
• Tighten the tensioning screws lightly with the hex key
provided.
Rail can be oriented so that handset sits on opposite
side of rail.
Step 5
• Match the mounting brackets to wall
bosses and push into place.
• Slide rail up or down to centralise the
brackets
• Remove the rail and tightenthe
tensioning screws firmly.
• Relocate the rail onto wall bosses and
tighten grub screws top and bottom.
1850mm (Recommended)
1000mm Rail 810-945mm
700mm Rail 510-645mm
800mm Rail 570-745mm
Grub Screw
Underside
Grub Screw
Topside
Protection
Pad
FLOOR
Step 3
• Fit the internal mounting brackets by locating in slot and
rotating 90°.
Step 6
• To adjust slider position, rotate the
slider handle to unlock and lock the
slider as shown.
Unlock
Lock
page 2 of 4
METHVEN
AURAJET AIO RAIL SHOWER
INSTALLATION INSTRUCTIONS
Plumbers, please ensure a copy of the installation
instructions is left with the end user for future reference
Care and Cleaning
We recommend the use of soapy water or approved cleaners. This product should not be cleaned with abrasive materials.
Damage caused by improper treatment is not covered by the product warranty – refer to warranty conditions on the last page.
A filter washer should be installed in the hose cone on the water outlet and it should be cleaned periodically.
If shower performance is compromised by the build-up of lime-scale, clean by using a soft toothbrush and gently scrubbing
along the spray slot under running water.
Step 1
• Wall lining hole should be cut or finished as per the dimension shown in the diagram on the right
• Cut off the threaded nipple 13±2mm from the wall lining and apply thread seal tape to ensure a
good seal.
Elbow Installation:
13±2mm
26mm max
Step 2
• Screw the elbow onto the nipple ensuring that the o-ring is sufficiently compressed to create a
watertight seal.
• Ensure that the elbow is oriented vertically with the outlet oriented downwards.
Step 3
• Connect hose to elbow and handset
• Ensure swivelling cone is connected to the handset
Handset
Flat
Washer
Swivelling
Cone
page 3 of 4
METHVEN
SATINJET ESCAPE MKII
HI RISE SHOWER
Don’t risk it, use a licensed plumber.™
REECE PRODUCT QUALITY GUARANTEE
You have purchased a quality product from Reece Pty Ltd
ABN 84 004 097 090 (“Reece”). This product is covered by a
Lifetime replacement product warranty, including spare parts,
and a 12 month warranty covering labour.
LIFETIME YEAR WARRANTY – DOMESTIC USE
This warranty covers faults in the product construction, material
and assembly. Products which are, found upon inspection
by an authorised Reece representative, to be defective
in construction, material or assembly, will be repaired or
exchanged with an equivalent product free of charge. Replaced
items become Reece’s property.
All replacement products will be available for collection without
charge to the customer at the nearest Reece branch to the
customer’s location, or elsewhere as agreed between the
customer and Reece.
Labour and Spare Parts
The labour for the replacement of products and spare parts
to which this warranty applies will be supplied by Reece or
relevant supplier using licensed plumbers engaged by Reece or
relevant supplier within 1 year from the date of purchase.
Spare parts found upon inspection by an authorised Reece
representative to be defective in construction, material
or assembly, will be replaced free of charge for the life of
the product.
Warranty Conditions
This warranty will apply only under all of the
following conditions:
• The item has been installed by a licensed plumber
• The item has been installed for and subjected to domestic
residential use only
• Failure is due to a fault in the manufacture of the product
• Proof of purchase (including the date of purchase)
is provided
• The installation of the product is in accordance with the
instructions provided
This warranty does not cover products purchased as an
ex-display without being fully checked and tested for sale by
the manufacturer.
This warranty does not include faults caused by:
• Unsuitable or improper use
• Incorrect installation or installation not in accordance with
the instructions provided
• Installation or part installation by the purchaser or any person
other than a LICENSED PLUMBER
• Normal wear and tear
• Inadequate or complete lack of maintenance
• Chemical, electrochemical or electrical influences
• Harsh detergents or abrasive cleaners used on
product finishes
1 YEAR WARRANTY – COMMERCIAL USE
‘Commercial’ use is all use other than for normal domestic
residential purposes, including use in non-business places as in
public buildings, schools, sports centres and in establishments
that contain private bathrooms with high frequency of use by
many individuals, such as hotels, motels, retirement villages
and hospitals.
The Commercial warranty covers this product against
manufacturing faults in the construction, material and assembly
of both the finished products and any spare parts for a period
of 1 year from the date of purchase. Products and spare
parts which are found upon inspection by an authorised
Reece representative to be defective in construction, material
or assembly will be repaired or exchanged free of charge.
Replaced items become Reece’s property. The labour for the
replacement of products and spare parts to which this warranty
applies will be supplied by Reece or relevant supplier using
licensed plumbers engaged by Reece or relevant supplier.
The Warranty Conditions and exclusions which apply to the
domestic use warranty also apply to this commercial warranty.
EXCLUSIONS
To the fullest extent permitted by law, Reece excludes all liability
for damage or injury to any person, damage to any property,
and any indirect consequential or other loss or damage.
CLAIM PROCEDURE
For all warranty queries customers are to contact the branch
where the product was purchased. These details can be found
on your purchase invoice.
Our goods come with guarantees that cannot be excluded
under the Australian Consumer Law. You are entitled
to a replacement or refund for a major failure and for
compensation for any other reasonably foreseeable loss or
damage. You are also entitled to have the goods repaired or
replaced if the goods fail to be of acceptable quality and the
failure does not amount to a major failure.
SHOWER.METH.T2.LIFE
Don’t risk it, use a licensed plumber.™
LIFE
TIME
Q
U
A
L
I
T
Y
G
U
A
R
A
N
T
E
E
page 3 of 3
METHVEN
AURAJET AIO RAIL SHOWER
Don’t risk it, use a licensed plumber.™
page 4 of 4

This manual suits for next models

2

Other Reece Bathroom Fixture manuals

Reece Lancaster 800 User manual

Reece

Reece Lancaster 800 User manual

Reece Posh Domaine User manual

Reece

Reece Posh Domaine User manual

Reece POSH A User manual

Reece

Reece POSH A User manual

Reece Kado Era User manual

Reece

Reece Kado Era User manual

Reece Posh Domaine MK2 User manual

Reece

Reece Posh Domaine MK2 User manual

Reece Posh Solus Powder Room Vanity Unit User manual

Reece

Reece Posh Solus Powder Room Vanity Unit User manual

Reece KADO Lux Oval User manual

Reece

Reece KADO Lux Oval User manual

Reece KADO Cirque User manual

Reece

Reece KADO Cirque User manual

Reece hideaway+ User manual

Reece

Reece hideaway+ User manual

Reece posh User manual

Reece

Reece posh User manual

Reece ISSY GLIDE TWIN 750 Quick start guide

Reece

Reece ISSY GLIDE TWIN 750 Quick start guide

Reece Posh Solus MK3 User manual

Reece

Reece Posh Solus MK3 User manual

Reece 1789900 User manual

Reece

Reece 1789900 User manual

Reece Laufen ILBAGNOALESSI One Drop In Basin 500 User manual

Reece

Reece Laufen ILBAGNOALESSI One Drop In Basin 500 User manual

Reece METHVEN SATINJET ESCAPE MKII User manual

Reece

Reece METHVEN SATINJET ESCAPE MKII User manual

Reece Showerama 610 Single Bowl Quick start guide

Reece

Reece Showerama 610 Single Bowl Quick start guide

Reece Posh Solus Installation guide

Reece

Reece Posh Solus Installation guide

Reece 1789884 User manual

Reece

Reece 1789884 User manual

Reece Omnivo Neo User manual

Reece

Reece Omnivo Neo User manual

Reece KADO User manual

Reece

Reece KADO User manual

Reece Alape User manual

Reece

Reece Alape User manual

Reece Posh Maintenance manual

Reece

Reece Posh Maintenance manual

Reece MILLI EXO TOILET ROLL HOLDER User manual

Reece

Reece MILLI EXO TOILET ROLL HOLDER User manual

Reece AXA Uno User manual

Reece

Reece AXA Uno User manual

Popular Bathroom Fixture manuals by other brands

Bradley 500 Series Installation

Bradley

Bradley 500 Series Installation

Lefroy Brooks Mackintosh MK 4663 installation guide

Lefroy Brooks

Lefroy Brooks Mackintosh MK 4663 installation guide

ProFlo PF5200CP installation instructions

ProFlo

ProFlo PF5200CP installation instructions

agape LIMON ILIX425 Assembly instructions

agape

agape LIMON ILIX425 Assembly instructions

iDo PORSGRUND Showerama Operating and maintenance instructions

iDo

iDo PORSGRUND Showerama Operating and maintenance instructions

Toto TBN02201U Installation and owner's manual

Toto

Toto TBN02201U Installation and owner's manual

Project Source FSI S4PC CROM manual

Project Source

Project Source FSI S4PC CROM manual

Fontana Showers FS9082 installation instructions

Fontana Showers

Fontana Showers FS9082 installation instructions

OVE SEDONA 48 installation manual

OVE

OVE SEDONA 48 installation manual

NOSAG INEOLINE PURE Operating and assembly instructions

NOSAG

NOSAG INEOLINE PURE Operating and assembly instructions

INDA A0415A Mounting instructions

INDA

INDA A0415A Mounting instructions

Jacuzzi SPRAY GUARD installation instructions

Jacuzzi

Jacuzzi SPRAY GUARD installation instructions

American Standard Serin T064900 installation instructions

American Standard

American Standard Serin T064900 installation instructions

Miomare 274849 Assembly, operating and safety instructions

Miomare

Miomare 274849 Assembly, operating and safety instructions

OVE TAMPA installation manual

OVE

OVE TAMPA installation manual

Gessi OVALE 26948 installation instructions

Gessi

Gessi OVALE 26948 installation instructions

Kinedo Kinemagic Design DES1306AG-C installation instructions

Kinedo

Kinedo Kinemagic Design DES1306AG-C installation instructions

Decor Star PL-019-SS manual

Decor Star

Decor Star PL-019-SS manual

manuals.online logo
manuals.online logoBrands
  • About & Mission
  • Contact us
  • Privacy Policy
  • Terms and Conditions

Copyright 2025 Manuals.Online. All Rights Reserved.