Pantone 534 Blue
Pantone 123 Yellow
Pantone 485 Red
Pantone 123 Yellow
Pantone 534 Blue
Black Rich Black -
20/20/20/100
Blue - 100/80/30/5
Yellow - 0/27/100/0
Red - 10/100/100/5
Yellow - 0/27/100/0
Blue - 100/80/30/5
Only if you REALLY need them:
Pantone 534 Blue - 100/80/30/5
Pantone 485 Red - 10/100/100/5
Pantone 123 Yellow - 0/27/100/
INSTRUMENTS
5. Press the button to change the numerical value of the set
digits.Holdthebuttonandthevaluewillkeepvarying.
6. PresstheON/OFFbuttonturntheonandofftheoutputfollowed
bydisplayingtheONorOFFsymbol.
25% Step Current Output
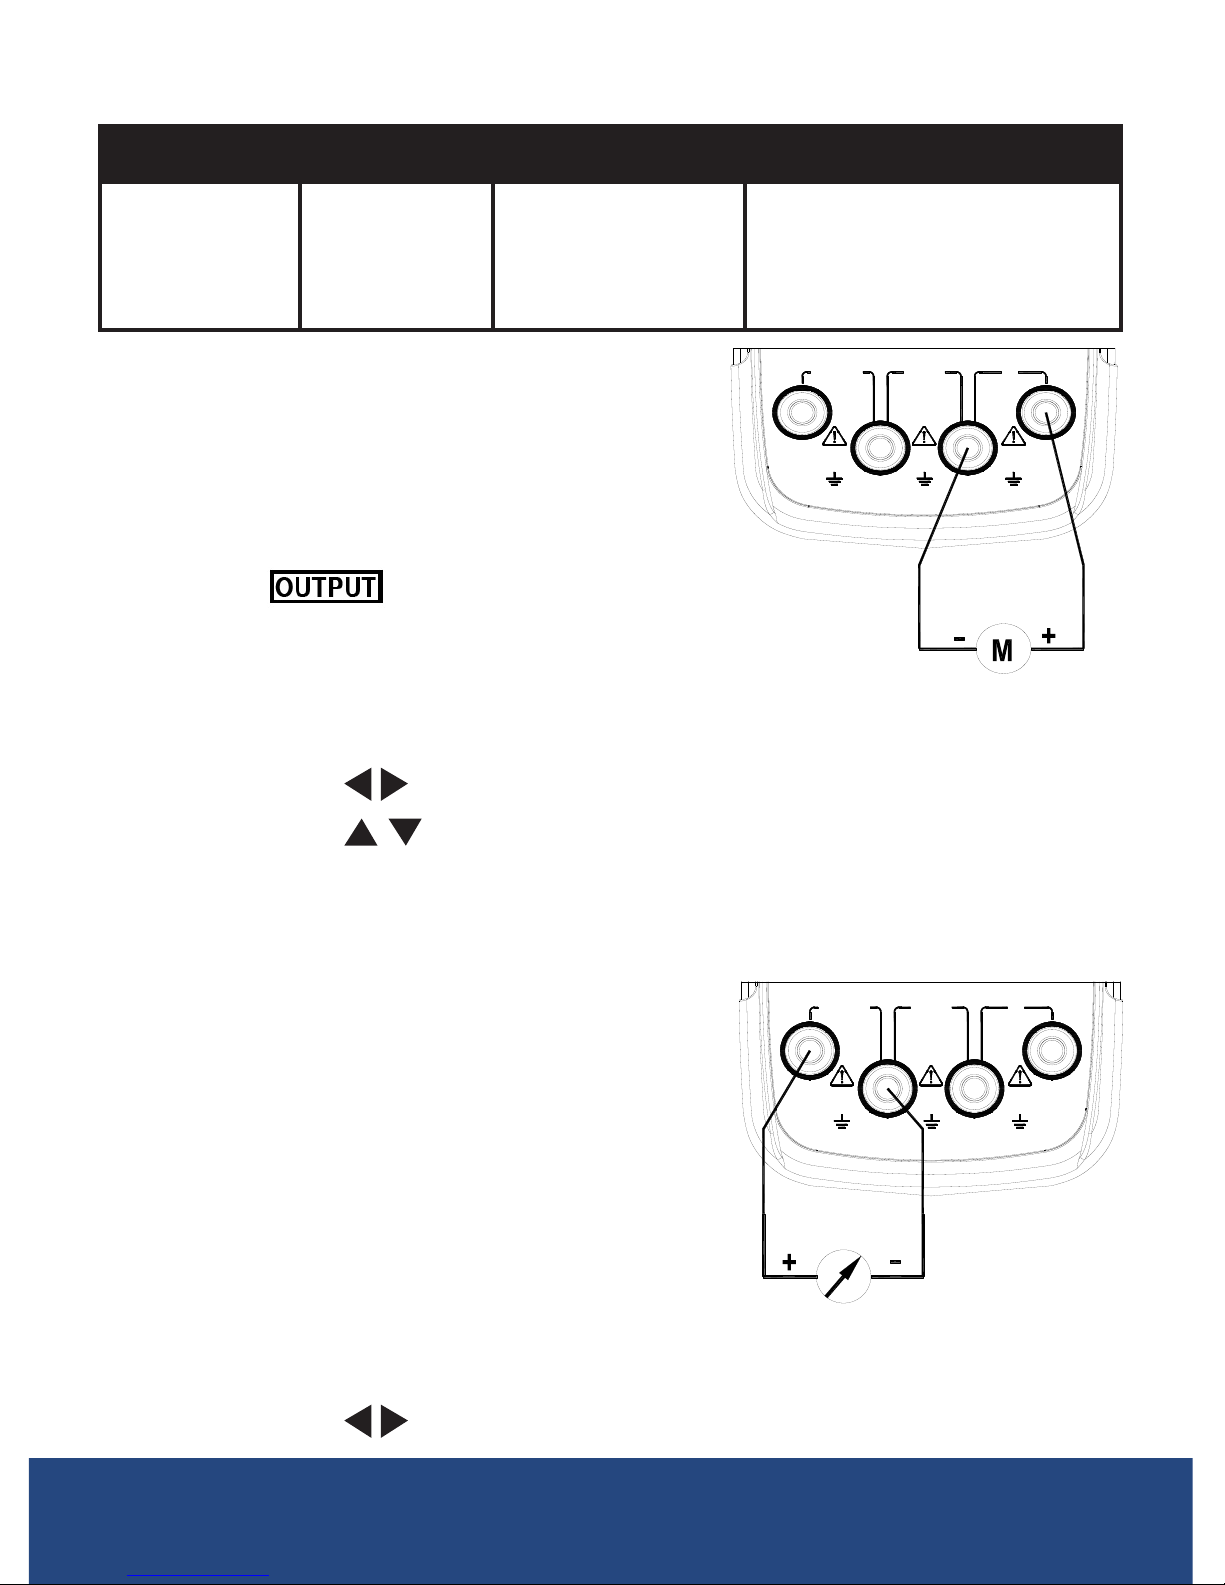
1. Connect the test leads to the meter as stated in the Current
Output procedures.
2. PresstheV/mAbuttontoselectthemAfunctionanddisplaythe
mAormA%unit.
3. PressthemaA25%buttonand will appear on the LCD.
4. PressthemA/%buttontoselectthesetoutputtomAor%and
displaythemAormA%unit.
5. Press the buttontochangetheoutputinavalueof25%,
inwhich0%indicates4mAand100%indicates20mA.
6. PresstheON/OFFbuttonturntheonandofftheoutputfollowed
bydisplayingtheONorOFFsymbol.
Current Output Set for Zero Point & Full Scale
1. Connect the test leads to the meter as stated in the Current
Output procedures.
2. PresstheV/mAbuttontoselectthemAfunctionanddisplaythe
mAormA%unit.
3. PressthemaA25%buttonand will appear on the LCD.
4. PressthemA/%buttontoselectthesetoutputtomAor%and
displaythemAormA%unit.
5. PresstheV/mAbuttontoselectthemAfunctionanddisplaythe
mAormA%unit.
6. PressthemA25%buttonand will appear on the LCD.
7. Press the button tochangetheoutputinavalueof100%,
inwhich0%indicates4mAand100%indicates20mA.Pressthe
mA100%toexitthestepcurrentoutput.
continued ...
REED Instruments