2
WORK AREA
1. Keep your work area clean and well lit. Cluttered benches
and dark areas invite accidents.
2. Do not operate power tools in explosive atmospheres,
such as in the presence of ammable liquids, gases, or
dust.Powertoolscreatesparkswhichmayignitethedustor
fumes.
3. Keep bystanders, children, and visitors away while operat-
ing a power tool.Distractionscancauseyoutolosecontrol.
ELECTRICAL SAFETY
1. Grounded tools must be plugged into an outlet properly
installed and grounded in accordance with all codes
and ordinances. Never remove the grounding prong or
modify the plug in any way. Do not use any adaptor plugs.
Check with a qualied electrician if you are in doubt as to
whether the outlet is properly grounded. Ifthetoolsshould
electricallymalfunctionorbreakdown,groundingprovidesalow
resistancepathtocarryelectricityawayfromtheuser.
2. Avoid body contact with grounded surfaces such as pipes,
radiators, ranges and refrigerators. Thereisanincreased
riskofelectricshockifyourbodyisgrounded.
3. Don’t expose power tools to rain or wet conditions. Water
enteringapowertoolwillincreasetheriskofelectricshock.
4. Do not abuse the cord. Never use the cord to carry the
tools or pull the plug from an outlet. Keep cord away from
heat, oil, sharp edges or moving parts. Damagedcords
increasetheriskofelectricshock.
5. When operating a power tool outside, use an outdoor
extension cord marked “W-A” or “W”.Thesecordsarerated
foroutdooruseandreducetheriskofelectricshock.
6. Use proper extension cords (see chart).Insufcientconduc-
torsizewillcauseexcessivevoltagedrop,lossofpowerand
overheating.
7. Connect the tool to an AC power supply that matches
the name plate specications.Incorrectvoltagesupplycan
causeelectricalshockorburns.
PERSONAL SAFETY
1.Stay alert, watch what you are doing and use common
sense when operating a power tool. Do not use tool while
tired or under the inuence of drugs, alcohol, or medica-
tion. Amomentofinattentionwhileoperatingpowertoolsmay
resultinseriouspersonalinjury.
2. Dress properly. Do not wear loose clothing or jewelry.
Contain long hair. Keep your hair, clothing and gloves
away from moving parts. Looseclothes,jewelry,orlonghair
canbecaughtinmovingparts.
3. Avoid accidental starting. Be sure switch is OFF before
plugging in. Carryingtoolswithangerontheswitchorplug-
gingintoolsthathavetheswitchONinvitesaccidents.
4. Remove adjusting keys or wrenches before turning on the
tool. Awrenchorakeythatisleftattachedtoarotatingpartof
thetoolmayresultinpersonalinjury.
5. Do not overreach. Keep proper footing and balance at all
times. Properfootingandbalanceenablesbettercontrolofthe
toolinunexpectedsituations.
6. Use safety equipment. Always wear eye protection. Dust
mask,non-skidsafetyshoes,hardhat,orhearingprotection
mustbeusedforappropriateconditions.
TOOL USE AND CARE
1. Use clamps or other practical methods to secure and sup-
port the workpiece to a stable platform. Holdingtheworkby
handoragainstyourbodyisunstableandmayleadtolossof
control.
2. Do not force the tool. Use the correct tool for your applica-
tion. Thecorrecttoolwilldothejobbetterandsaferattherate
forwhichitisdesigned.
3. Do not use the tool if switch does not turn it ON or OFF.
Anytoolthatcannotbecontrolledwiththeswitchisdangerous
andmustberepaired.
4. Disconnect the plug from the power source before mak-
ing any adjustments, changing accessories, or storing the
tool. Suchpreventivesafetymeasuresreducetheriskofstart-
ingthetoolaccidentally.
5. Store idle tools out of reach of children and other un-
trained persons. Toolsaredangerousinthehandsofun-
trainedusers.
6. Maintain tools with care. Keep cutting tools sharp and
clean. Properlymaintainedtools,withsharpcuttingedgesare
lesslikelytobindandareeasiertocontrol.
7. Check for misalignment or binding of moving parts, break-
age of parts, and any other condition that may affect the
tool’s operation. If damaged, have the tool serviced before
using. Manyaccidentsarecausedbypoorlymaintainedtools.
8. Use only accessories that are recommended by the manu-
facturer for your model. Accessoriesthatmaybesuitablefor
onetoolmaybecomehazardouswhenusedonanothertool.
SERVICE
1. Tool service must be performed only by qualied repair
personnel. Serviceormaintenanceperformedbyunqualied
personnelcouldresultinariskofinjury.
2. When servicing a tool, use only identical replacement
parts. Follow instructions in
the Maintenance section of
this manual. Useofunauthor-
izedpartsorfailuretofollow
MaintenanceInstructionsmay
createariskofelectricshock
orinjury.
SPECIFIC SAFETY RULES
TheOperator’sManualcontains
specicsafetyinformationand
instructionsforyourprotectionagainstseriousinjuriesincluding:
•Lossofngers,hands,armsorotherbodypartsifclothingor
glovesgetcaughtinmovingparts.
•Electricalshockorburnsfromcontactwithwires,motororother
powerdriveparts.
• Impactinjuries,includingbrokenbonesifmachinetipsoveror
workpiecefalls.
• Eyeinjuries,includingbeingblindedbytheworkpieceor
workpiecechips.
Read and follow the safety labels on the machine.
Knowthelocationandfunctionsofallcontrolsbeforeusing
thetool.
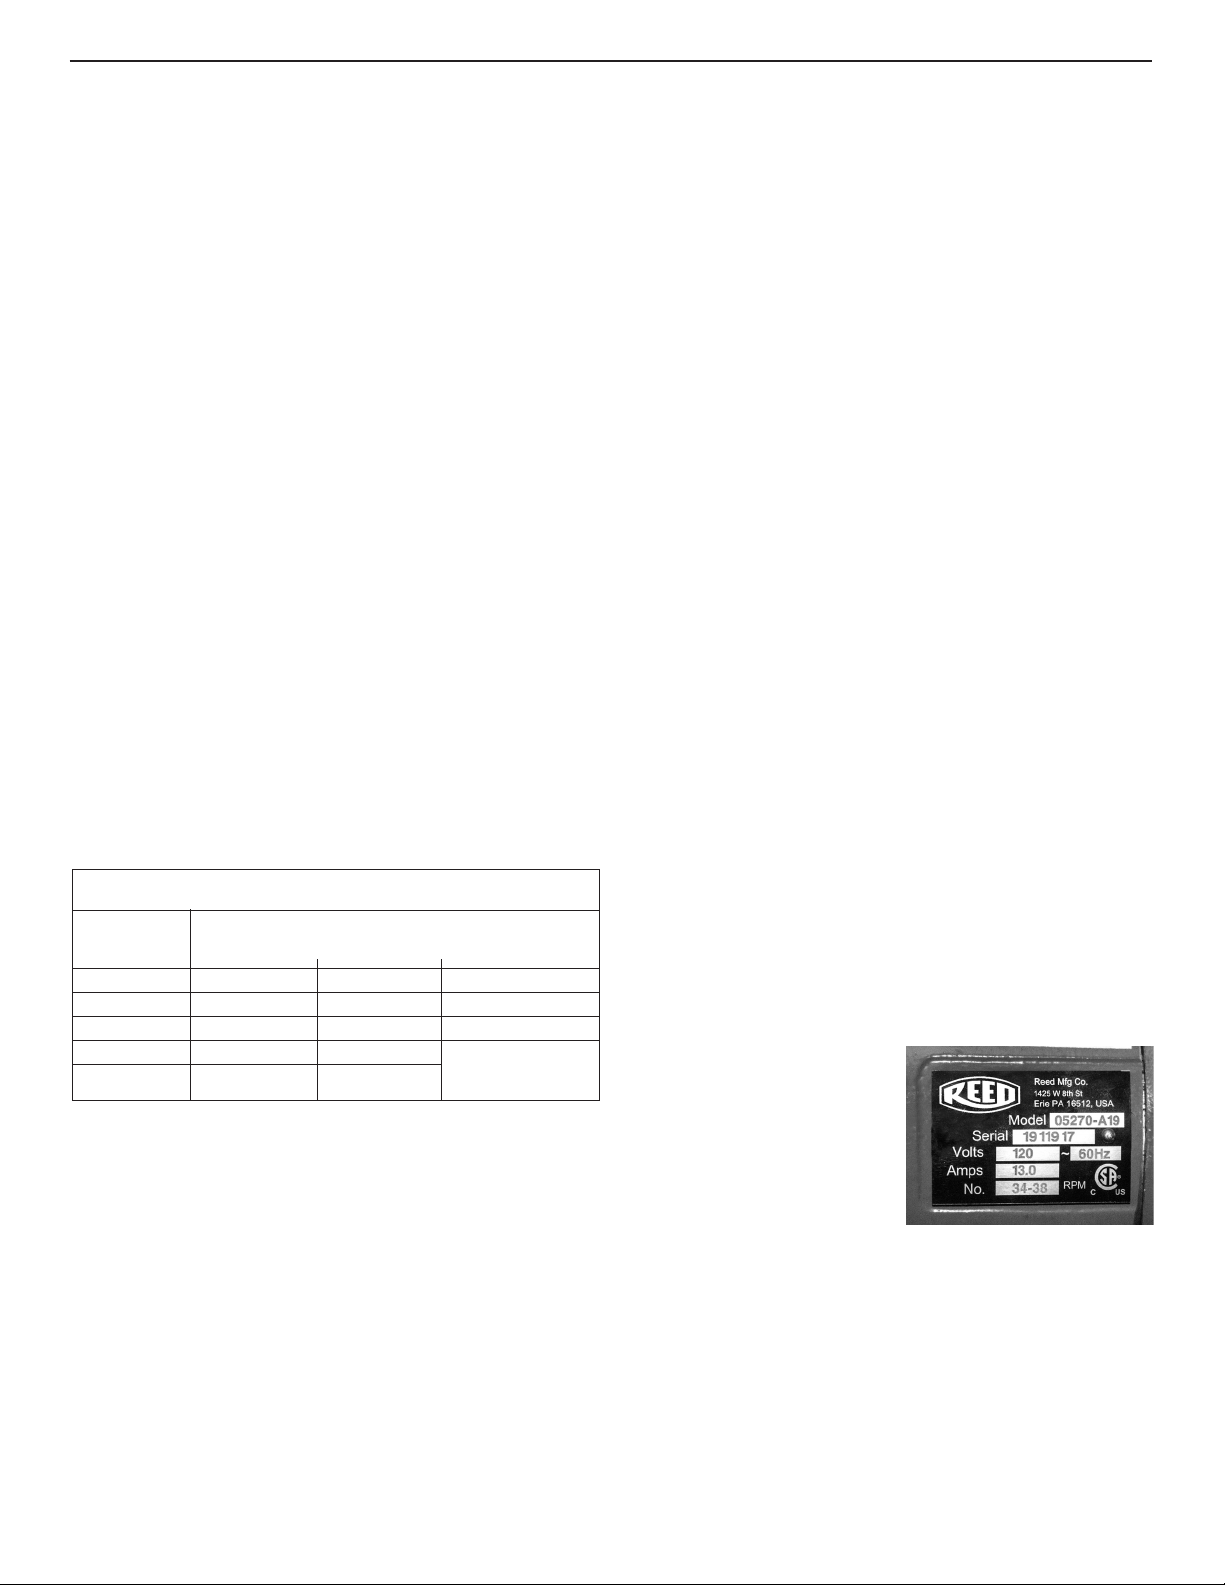
Reed Manufacturing
700PD Power Drive
Minimum Wire Gauge for Cord Set
Nameplate TOTAL LENGTH (IN FEET)
Amps0 - 25 26 - 50 51 - 100
0-6 18AWG 16AWG 16AWG
6-10 18AWG 16AWG 14AWG
10-12 16AWG 16AWG 14AWG
12-16 14AWG 12AWG
NOT
RECOMMENDED
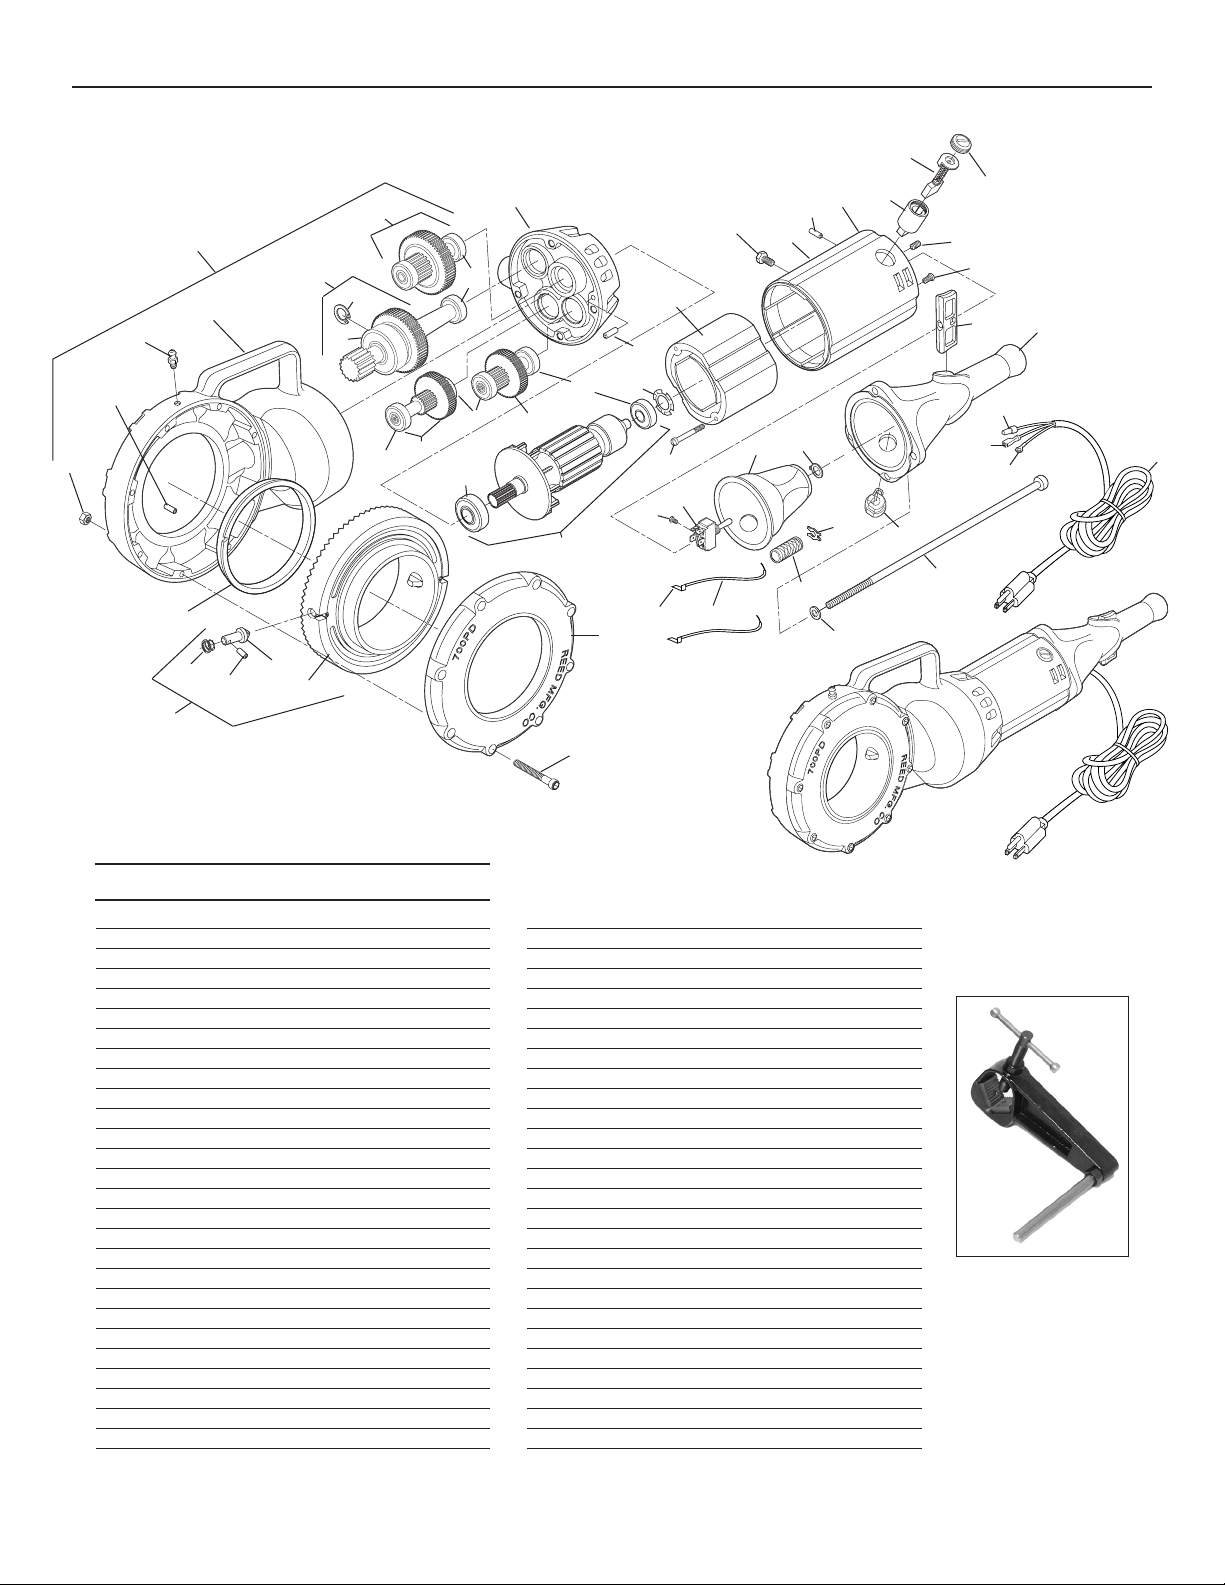
Please submit tool serial number
when requesting service.