10
3. Press the RANGbuttontoselecttherangeof1.0000Vor100.00mV.
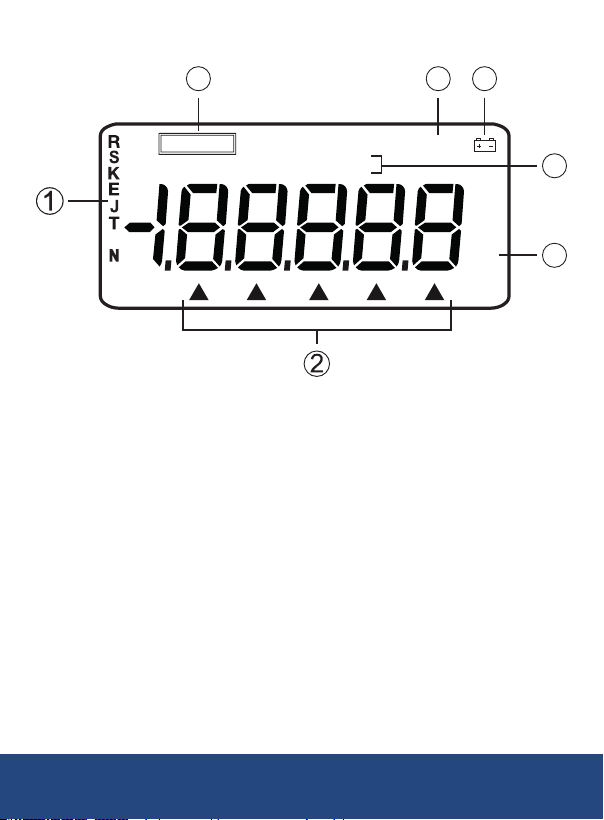
"V"or"mV"willappearonthedisplay.
4. Press the and buttons to move the on-screen cursor in order to
select the desired digit on the display.
5. Press the and buttons to change the numerical value of each
digit.(Numericalvaluecannotbechangedbeyondrangemaximum.)
6. Press the ZERObuttonandtheoutputwillbesetto00.00mV
or0.0000V.
Simulating Output from Thermocouple (TC)
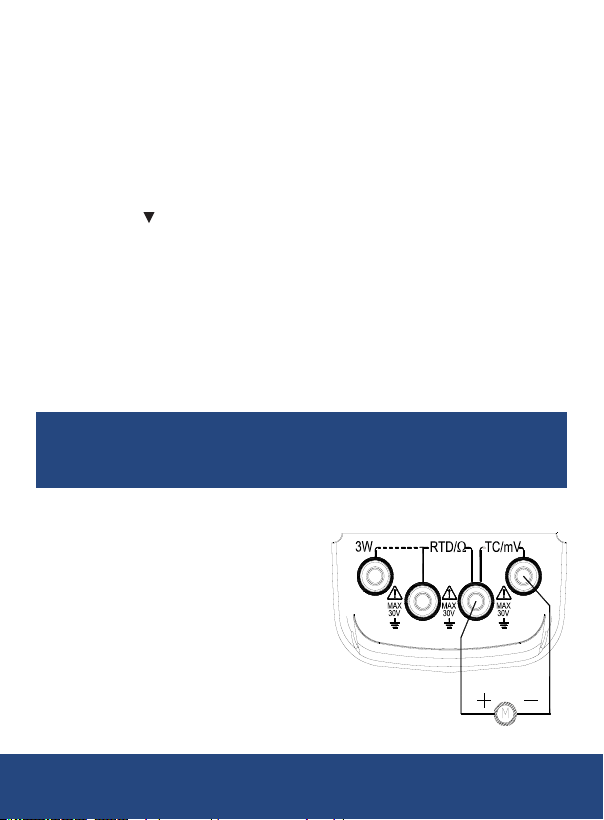
1. Insertoneendofthetestleadintotheoutput(TC/mV)jackofthe
meter and connect the other end to the input of the instrument under
test, as shown in the above diagram.
2.
Press the FUNCbuttontoselect"ThermocoupleOutput"."R"and
"°C"willappearonthedisplay.
3. Press the RANG button to select the type of thermocouple.
4. Press the and buttons to move the on-screen cursor in order to
select the desired digit on the display.
5. Press the and buttons to change the numerical value of each
digit.(Numericalvaluecannotbechangedbeyondrangemaximum.)
6. Automatic compensation for reference-junction temperature.
7. Press the ZERObuttonandtheoutputwillbedirectlysetto0000°C
(RorStype),400°C(Btype)or0000.0°C(othertype).
8. Press the °C/°Fbuttontoselecttheunit°Cor°F.
Note: During the direct calibration of an instrument with reference-junction
temperature compensation, it is recommended to press the RJ-ON button
so that the instrument can start the function of automatic reference-
junction compensation. Thus providing the required thermo-electromotive
forceforoutputfollowedbydisplayingthesymbol"RJ-ON"where:
Output thermoelectric force = corresponding emf of set
temperature – emf of room temperature
•
It takes two seconds for the instrument to start its internal referencejunction
temperature. After this, each automatic compensation occurs at
10 second intervals.
continued...
REED Instruments