Renishaw XR20-W User manual

User guide
F-9950-0400-01 B
XR20-W rotary axis calibrator

Legal information
Disclaimer
Renishaw has made considerable efforts to ensure the content of this document
is correct at the date of publication but makes no warranties or representations
regarding the content. Renishaw excludes liability, howsoever arising, for any
inaccuracies in this document.
Trade marks
RENISHAW and the probe symbol used in the RENISHAW logo are registered
trade marks of Renishaw plc in the United Kingdom and other countries.
apply innovation and names and designations of other Renishaw products
and technologies are trade marks of Renishaw plc or its subsidiaries.
All other brand names and product names used in this document are trade
names, trade marks, or registered trade marks of their respective owners.
Copyright
© 2018 Renishaw plc. All rights reserved.
This document may not be copied or reproduced in whole or in part, or transferred
to any other media or language, by any means without the written prior
permission of Renishaw plc.
The publication of material within this document does not imply freedom from the
patent rights of Renishaw plc.
Warranty
Equipment requiring attention under warranty must be returned to your equipment
supplier.
Unless otherwise specifically agreed in writing between you and Renishaw, if you
purchased the equipment from a Renishaw company, the warranty provisions
contained in Renishaw’s CONDITIONS OF SALE apply. You should consult these
conditions in order to find out the details of your warranty but, in summary, the
main exclusions from the warranty are if the equipment has been:
• neglected, mishandled or inappropriately used; or
• modified or altered in any way except with the prior written agreement of
Renishaw.
If you purchased the equipment from any other supplier, you should contact them
to find out what repairs are covered by their warranty.
XR20-W rotary axis calibrator
Renishaw part no: F-9950-0400-01
Issued: 07.2018
Renishaw reserves the right to make changes to this document and to the product
described herein without obligation to notify any person of such changes.

WEEE
The use of this symbol on Renishaw products and/or accompanying
documentation indicates that the product should not be mixed with
general household waste upon disposal. It is the responsibility of
the end user to dispose of this product at a designated collection
point for waste electrical and electronic equipment (WEEE) to
enable reuse or recycling.
Correct disposal of this product will help to save valuable
resources and prevent potential negative effects on the
environment. For more information, please contact your local
waste disposal service or Renishaw distributor.
“La operación de este equipo está sujeta a las siguientes dos condiciones:
(1) es posible que este equipo o dispositivo no cause interferencia perjudicial y
(2) este equipo o dispositivo debe aceptar cualquier interferencia, incluyendo la
que pueda causar su operación no deseada.”
XR20-W rotary axis calibrator
Legal information
International regulations and conformance
EC compliance
Renishaw plc declares that the XR20-W system complies with the applicable
directives, standard and regulations. A copy of the full EC Declaration of
Conformity is available upon request.
In compliance with BS EN 61010-1:2001 the product is safe to use in the following
environmental conditions:
• Indoor use only
• Altitude up to 2000 m
• Maximum relative humidity (non-condensing) of 80% for
temperatures up to 31 °C decreasing linearly to
50% relative humidity at 40 °C
• Pollution Degree 2
Complies with
IDA Standards
DA104642
Radio communications
Class 2 Bluetooth® device
Output power: 0 dBm maximum
Frequency band: 2.402 - 2.480 GHz
Communication distance: 10 m typical operation
For details of national radio approvals for this device, see the Compliance
with radio device regulations document on the Calibration product quality and
conformance web pages.
Further radio approval country specific statements can be found below:
Singapore
Reg. No. N2095-11
Mexico

低功率電波輻性電機管理辦法
第十二條經型式認證合格之低功率射頻電機,非經許可,公司、商號或使用者均不
得擅自變更頻率、加大功率或變更原設計之特性及功能。
第十四條低功率射頻電機之使用不得影響飛航安全及干擾合法通信;經發現有干擾
現象時,應立即停用,並改善至無干擾時方得繼續使用。前項合法通信,指依電信
規定作業之無線電信。低功率射頻電機須忍受合法通信或工業、科學及醫療用電波
輻射性電機設備之干擾
Este equipamento opera em caráter secundário, isto é, não tem direito a proteção
contra interferência prejudicial, mesmo de estações do mesmo tipo, e não pode
causar interferência a sistemas operando em caráter primário.
XR20-W rotary axis calibrator
RoHS compliance
Packaging
components
Material ISO 11469 Recycling
guidance
Internal box Cardboard Not applicable Recyclable
Outer box Cardboard Not applicable Recyclable
Insert Cardboard Not applicable Recyclable
Bag Low density polyethylene LDPE Recyclable
Taiwan
Brazil
Frequency bandwidth (MHz) 2400 to 2483 MHz
Modulation GFSK
Output power (W) 0.0676 W

USA and Canadian regulations
FCC
Information to the user (47CFR:2001 part 15. 19)
This device complies with Part 15 of the FCC rules. Operation is subject to the
following conditions:
1. This device may not cause harmful interference.
2. This device must accept any interference received, including interference that
may cause undesired operation.
Information to the user (47CFR:2001 part 15.21)
The user is cautioned that any changes or modifications, not expressly approved
by Renishaw plc or authorised representitive, could void the user’s authority to
operate the equipment.
Canada - Industry Canada (IC)
This device complies with RSS 210 of Industry Canada. Operation is subject to
the following two conditions: (1) this device may not cause interference, and (2)
this device must accept any interference, including interference that may cause
undesired operation of this device.
L’utilisation de ce dispositif est autorisée seulement aux conditions suivantes :
(1) il ne doit pas produire d’interference et (2) l’utilisateur du dispositif doit étre
prêt à accepter toute interference radioélectrique reçu, même si celle-ci est
susceptible de compromettre le fonctionnement du dispositif.
XR20-W rotary axis calibrator

Contents
Safety information ............................................... 7
Safety warnings ................................................ 7
Battery safety .................................................. 8
Mechanical safety ............................................... 8
Laser optical safety .............................................. 8
Transportation .................................................. 9
EU REACH SVHC communication .................................. 9
System overview ............................................... 10
System components ............................................ 11
Calibration software kit .......................................... 12
Setting up a test ................................................ 14
Setting up the hardware ......................................... 14
Setup XM system .............................................. 16
Setup XL system............................................... 18
Bluetooth®setup ............................................... 21
Feedrate ..................................................... 22
Different mounting configurations .................................. 23
Setup errors .................................................. 28
Diagnostics and troubleshooting . . . . . . . . . . . . . . . . . . . . . . . . . . . . . . . . . . 32
XR20-W fault finding ............................................ 32
Status LEDs .................................................. 33
Care and handling .............................................. 34
Recalibration .................................................. 34
Calibration certificate ........................................... 35
Care and maintenance .......................................... 35
Storage and environmental specification ............................ 35
Cleanliness of optics ............................................ 36
System specification ............................................ 37
USB power supply ............................................. 39
Power supply: rechargeable battery ................................ 40
Weights and dimensions......................................... 42
XR20-W rotary axis calibrator

7
XR20-W rotary axis calibrator
Safety information
Use of controls or adjustments or performance of
procedures other than those specified herein may result
in hazardous radiation exposure.
Ensure that you read and understand the XR20-W user
guide before using any XR20-W system.
The XR20-W rotary axis calibrator can be used in a variety of environments and
applications. To ensure the safety of the user and other personnel in the vicinity
it is therefore paramount that a comprehensive risk assessment is carried out for
the machine under test before using the XR20-W rotary axis calibrator.
This should be carried out by qualified users (requiring machine competency,
applicable technical knowledge and a trained risk assessor) with consideration for
the safety of all personnel. The risks identified must be mitigated prior to using the
product. The risk assessment should pay particular attention to machine, manual
handling, mechanical, laser, electrical, power and fibre optic safety.
Based on current research, the wireless devices used in this product would not
seem to pose a significant health problem for the vast majority of pacemaker
wearers. However, people with pacemakers may want to ensure a minimum
distance of 3 cm between the product and pacemaker.
Safety warnings
The XR20-W rotary axis calibrator system is designed to be used to test machine
tools. As such, the user will need to prepare and run a part program which moves
the machine as required. Do not spin the optics. It is assumed therefore that the
user is thoroughly familiar with the operation of the machine tool and its controller
and knows the location of all emergency stop switches. Also, if it is necessary to
operate the machine with the guards or any safety feature removed or disabled, it
is the responsibility of the operator to ensure that alternative safety measures are
taken in line with the machine manufacturer’s operating instructions or relevant
codes of practice. Safety procedures should be in accordance with the user’s risk
assessment.
The XR20-W device works in conjunction with a Renishaw laser system. Before
using the laser system, please read the safety section of the relevant Laser user
guide.
The XR20-W can reflect the laser beam from the laser around the room as it
rotates. Consideration should be given to other users working in the area.
If this equipment is used in a manner not specified by the manufacturer, the
protection provided by the equipment may be impaired.

8
XR20-W rotary axis calibrator
Battery safety
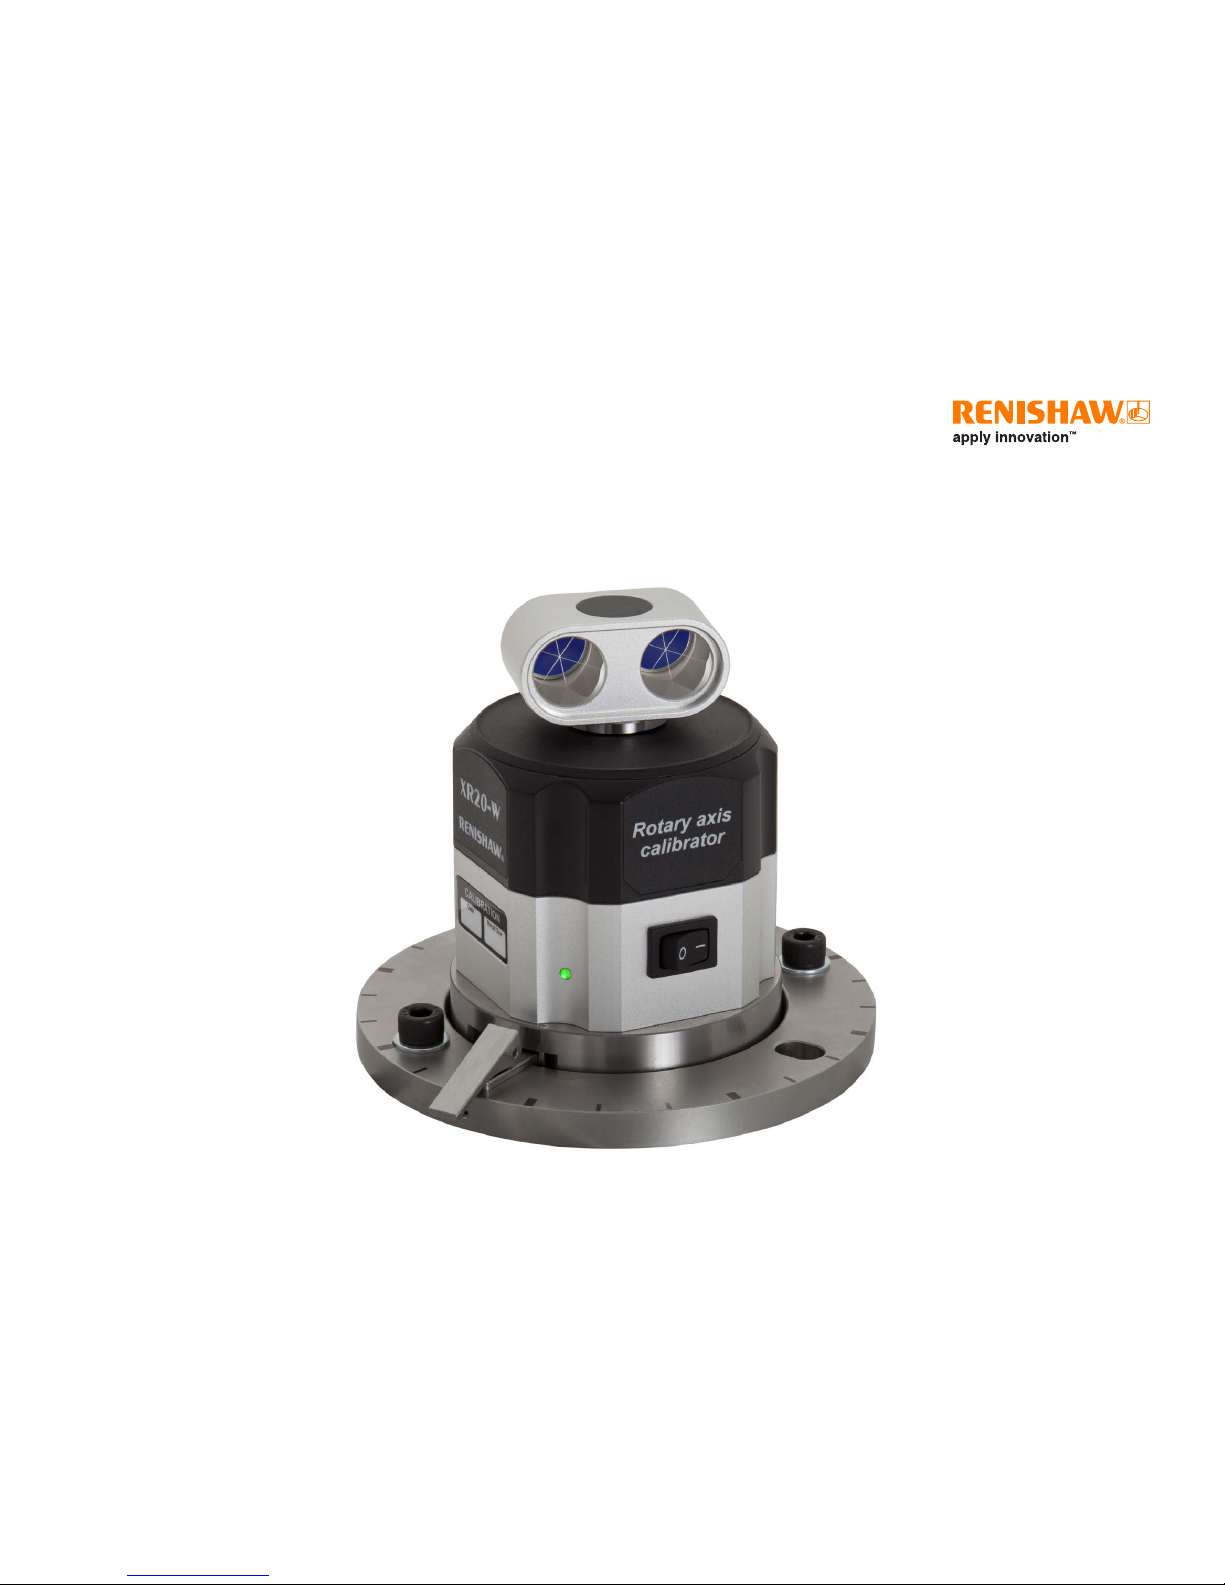
The XR20-W rotary axis calibrator is supplied with rechargeable batteries.
• Once depleted, recharge the battery in the charger provided: do not attempt
to charge the battery by other means.
• For specific battery operating, safety and disposal guidelines, please refer to
the battery manufacturers’ literature.
• Replace the batteries only with the specified type.
• Ensure that all batteries are inserted with the correct polarity.
• Do not store batteries in direct sunlight.
• Do not heat or dispose of batteries in a fire.
• Do not short-circuit or force discharge the batteries.
• Do not disassemble, pierce, deform or apply excessive pressure to the
batteries.
• Do not swallow the batteries.
• Keep the batteries out of the reach of children.
• Do not get batteries wet.
• If a battery is damaged, exercise caution when handling it.
Mechanical safety
• When setting up and mounting Renishaw laser calibration equipment,
beware of pinch and/or crush hazards that may be created e.g. due to
magnetic mounting bases.
• Beware of trip hazards that may be created when using Renishaw
equipment, e.g. due to trailing cables.
• Exercise caution if components are to be mounted to moving or rotating
machinery. Beware of cables becoming entangled.
• Exercise extreme caution if Renishaw equipment is to be mounted to
machinery that may accelerate rapidly or move at high speed, which could
lead to items colliding or being ejected.
• If it is necessary to operate the machine with the guards or any safety
feature removed or disabled, it is the responsibility of the operator to
ensure that alternative safety measures are taken in line with the machine
manufacturer’s operating instructions or relevant codes of practice.
• If you are using a part program or error correction parameters generated by
Renishaw software, it is the responsibility of the user to validate these at low
feedrate and be prepared to operate the emergency stop button if necessary.
Laser optical safety
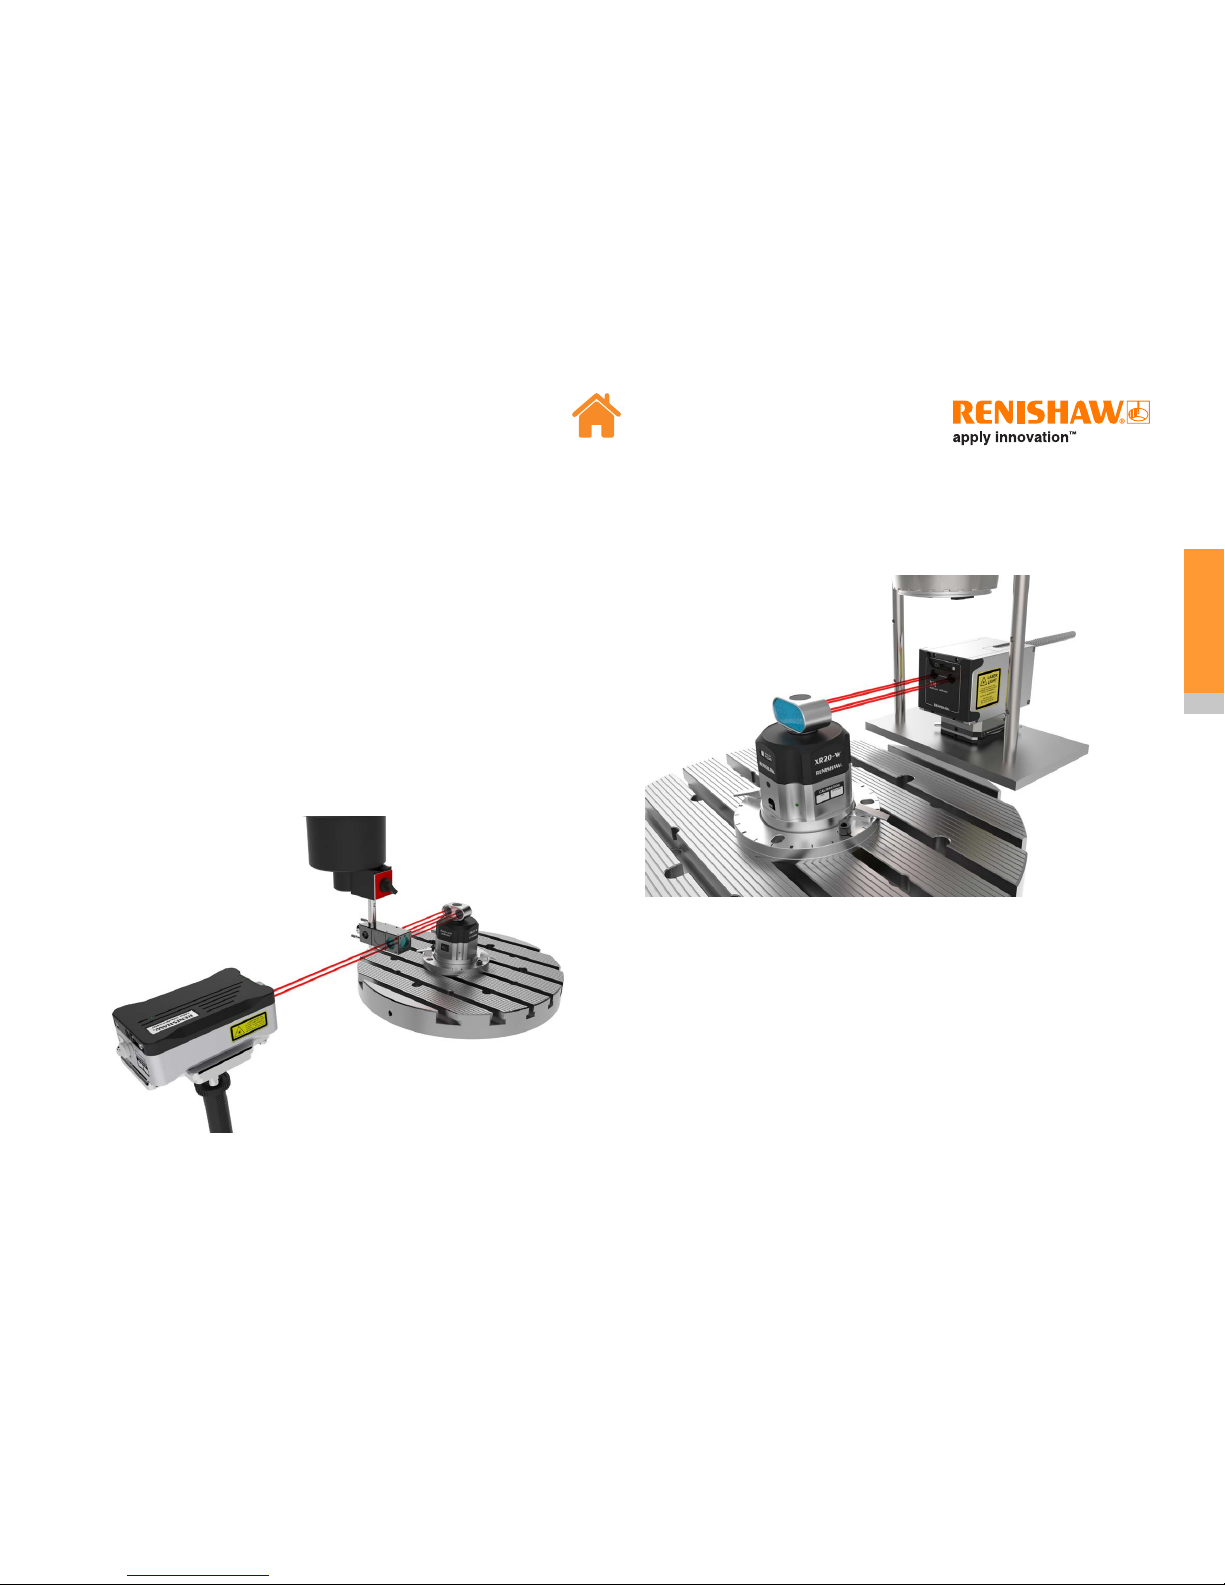
• In accordance with (IEC) EN60825-1, Renishaw XL-80 and XM systems
used to provide a laser source for XR20-W are class 2M lasers and safety
goggles are not required (under normal circumstances the eye will blink and
look away before damage can occur).
• Do not stare directly into the laser beams or view them with optical
equipment such as telescopes, convergent mirrors or binoculars as
permanent retinal damage could occur.
• Do not direct the beam at other people or into areas where people
unconnected with the laser might be present. It is safe to view a diffuse-
reflected beam during system alignment.

9
XR20-W rotary axis calibrator
Transportation
Please ensure that you comply with international and national battery transport
regulations when transporting batteries or XM system kits.
The XR20-W uses a lithium ion battery. Lithium batteries are classified as
dangerous goods and strict controls apply on their shipment by air. To reduce the
risk of shipment delays, should you need to return your XR20-W to Renishaw for
any reason, do not return any batteries.
The operation of wireless appliances on aircraft is forbidden by many airlines
to prevent interference with communication systems. Remove the battery from
the receiver unit when boarding an aircraft to ensure it cannot be switched on
inadvertently.
EU REACH SVHC communication
Please see the relevant battery manufacturers’ website for further
information:
Varta:
https://www.varta-storage.com/wp-content/uploads/2017/08/
VARTA_Design_Library_56456_701_099.zip
The use of this symbol on the batteries, packaging or accompanying documents
indicates that used batteries should not be mixed with general household waste.
Please dispose of the used batteries at a designated collection point. This will
prevent potential negative effects on the environment and human health which
could otherwise arise from inappropriate waste handling. Please contact your
local authority or waste disposal service concerning the separate collection
and disposal of batteries. All lithium and rechargeable batteries must be fully
discharged or protected from short circuiting prior to disposal.

10
XR20-W rotary axis calibrator
System overview
XR20-W is a rotary axis calibrator designed for measuring rotary axes, key
features include:
• Compatible with Renishaw’s XL-80 or XM systems
• Compact and lightweight
• Quick and simple mounting system
• Easy alignment with built-in alignment aid
• Wireless operation by utilising Bluetooth communication
• Battery powered (can be powered by external USB if required)
• Typical system configurations are shown in figure 1 and 2 for use with XL-80
and XM-60.
Figure 1 - typical set-up for calibrating a rotary axis using XL-80 as the laser
reference.
Figure 2 - typical set-up for calibrating a rotary axis using XM as the laser
reference.
The CARTO data capture software uses both the measured angle and the
position from the XR20-W’s internal encoder scale to very accurately measure
the positioning performance of the table under test. The rotation of an axis is
calibrated by rotating it sequentially through a number of angular targets, pausing
at each defined target to capture a reading. As the axis rotates, the software
counter-rotates the XR20-W to ensure that the laser beam is returned back to the
laser, maintaining signal strength.

11
XR20-W rotary axis calibrator
System components
1XR20-W
2Centration aid
3Mounting ring
4Mounting ring adaptor
5Battery Li-Polymer
6Calibration software kit
7Battery charger & cables
8XR20-W case
9Chuck adaptor
6
8
7
5
2
9
3
4
1

12
XR20-W rotary axis calibrator
Calibration software kit
The XR20-W rotary axis calibrator is supplied with the “Calibration software kit”
which comprises:
• CARTO suite
• User guides and documentation for XM, XL-80 and XC-80.
The CARTO suite features two applications:

13
XR20-W rotary axis calibrator
Mounting ring
The mounting ring bolts or clamps directly to the surface of machine and locks the
XR20-W in position.
Mounting ring adaptor
The mounting ring adaptor plate enables the XR20-W to be fitted to rotary tables
with unsuitable centre recesses. It can also be used to secure the XR20-W rotary
axis calibrator to the chuck adaptor and custom mounts.
Chuck adaptor
The chuck (lathe) adaptor has a 40 mm diameter to fit most popular chuck sizes. It
can also be used to secure the XR20-W to custom mounts.
Centration aid
The centration aid allows the mounting ring to be easily centred to the axis of
rotation of the machine under test before the XR20-W rotary axis calibrator is
mounted to the machine.

14
XR20-W rotary axis calibrator
Setting up a test
Setting up the hardware
Before proceeding please read the safety section.
1. Prepare the machine for calibration. Remove all tools from the spindle of the
machine and retract them into the tool holder. Ensure surfaces are clean and
free of swarf, debris and burrs. Ensure that the laser beam can reach the rotary
table without obstruction.
2. The XR20-W will require a defined test method to be entered into the machine
tool control via a part program. The test method and part program can be
generated from the CARTO software. For further information, see the CARTO
Capture manual.
3. Ensure that your PC is Bluetooth enabled and that the CARTO software is
installed. See the Bluetooth setup section for more information.
4a. For XL-80 use mount the laser head on the stage and tripod. Turn on the laser
and it will begin stabilisation. For safety, the shutter of the laser should initially
be rotated to its closed position.
4b. For XM system use, suspend the XM launch unit within the machine
environment, switch on the laser unit to begin stabilisation. For safety, the
shutter of the XM launch unit should be in the closed position.

15
XR20-W rotary axis calibrator
Both XL-80 and XM laser systems are classified as Class 2 and
safety goggles are not required (under normal circumstances
the eye will blink and look away before damage can occur).
Please refer to the relevant laser system manual.
5.
Connect the laser to the PC. If you want to monitor the environment during
calibration, then plug the environmental compensator to the PC. Place the
temperature sensors in suitable positions on or around the machine and connect
them to the environmental compensator. For more information on setting up the
laser and environmental compensator, refer to the relevant laser user guide.
6. Before mounting the XR20-W to the rotary axis ensure the mounting ring and
XR20-W facing ring are clean and free of swarf, debris and burrs. See the Care
and handling section for more information.
7. Alignment of the rotary table can be carried out visually with the centration aid
from the XR20-W kit or by using a dial test indicator (DTI). The centration of the
mounting ring should be aligned to the following specification:
XL-80 use <± 1 mm:
XM-60 use <± 0.25 mm:
8. Once aligned, the mounting ring should be fixed to the axis using bolts
mounted through the mounting holes into the machine’s T-Slots. When the
T-Slots do not pass under the mounting holes then toe clamps may need to be
used. Remove the centration aid.

16
XR20-W rotary axis calibrator
9. Switch on the XR20-W briefly to check the battery power by confirming that
the LED goes green, then switch off again to conserve battery power. If the
LED is amber then change the battery. See the power supply: rechargeable
battery section for more details and the Diagnostics and trouble shooting
section for a full list of LED states.
10. Attach the XR20-W to the mounting ring. Ensure the clamp levers are
released (in the up position). Align the red spot on the facing ring with the
red spot on the mounting ring so that the slots in the facing ring are aligned
with the clamps. Lower the facing ring on to the table surface, then rotate the
XR20-W clockwise until the clamps are aligned above the clamping surfaces.
11. Lock the clamp levers down to secure the XR20-W.
For XL-80, proceed to page 18.
Setup XM system
1. Attach the beam blocker to the front of the XM launch unit.
1Beam blocker
1
2. Translate the laser launch horizontally and vertically so that the laser beam hits
the target on the alignment aid as shown:

17
XR20-W rotary axis calibrator
3. Observe the reflected beam on the launch beam blocker. Adjust the pitch of the
launch so that the reflected beam is on the centreline.
1Beam aperture
2Reflected beam
2
1
4. Translate vertically to align the beam again as per image in step 2.
5. Turn the XR20-W optics back around so that the retroreflectors are pointing
back towards the laser within ±2°.
Note: if it is difficult to access the optics, use the 180° rotation feature in
the software. Refer to the jog function section in CARTO software for more
details.
Now XM system setup is complete, go to page 22.

18
XR20-W rotary axis calibrator
Setup XL system
1. For XL-80 use, assemble the magnetic base, optics mounting kit and the
angular interferometer optic and attach to the machine spindle as shown. In this
example the input aperture of the angular interferometer is on the right hand
side. See Optical setup section for alternative mounting schemes. Refer to the
XL laser system user guide for more information on the optics mounting kit and
angular interferometer.
1Mounting pillar
2Magnetic mount
3Clamp block
4Angular interferometer
1
3
2
4
2. Move the machine using the hand wheel in X, Y and Z to provisionally position
the angular interferometer between the laser and the XR20-W. The angular
interferometer should be relatively close to the XR20-W angular reflector to
optimise measurement performance but ensure that it cannot collide during the
test. Ensure that the angular interferometers input aperture is aligned with the
right hand retro reflector in the angular reflector.
3. Using the machine’s handwheel raise the interferometer, attached to the
spindle, out of the way in Z only. Do not move X or Y so that the alignment
between the XR20-W and the angular interferometer is maintained.
4. Rotate the alignment aid on the back of the angular reflector so that it faces the
laser.
Note: if it is difficult to access the angular reflector, it can be moved using
the jog functions in CARTO Capture.
5. Position the laser and tripod in front of the machine. To simplify setup, use
a level on the top of the laser to ensure that the laser is level and hence
nominally perpendicular to the machine’s axis of rotation.
6. Rotate the laser shutter to the 6 mm beam alignment position.
1Beam aperture
2Target
1
2

19
XR20-W rotary axis calibrator
7. Adjust the laser so that the beam hits the alignment aid. For more information
on laser alignment controls, refer to the relevant laser user guide.
8. Transate the XL-80 horizontally and vertically so that the laser beam hits the
target on the alignment aid as shown:
9. To minimise measurement errors the laser beam should be aligned
perpendicular to the machine’s axis of rotation. Refer to the setup errors
section for more information. Adjust the pitch of the laser so that the beam
reflects onto an imaginary horizontal line which passes through the centre of
the shutter’s output aperture as shown.
1Beam aperture
2Reflected beam
12
Note: do not be concerned if the laser is destabilised.

20
XR20-W rotary axis calibrator
10. Turn the laser shutter so that the 3 mm aperture is set. Check that the beam
returning from the retroreflectors is concentric inside the white target. Make
translation adjustments to the laser and tripod, if required.
1Reduced beam aperture
2Target
2
1
11. Fix a target into the input aperture of the angular interferometer and lower the
interferometer back into position by using the Z control on the handwheel. The
beam from the laser should now be concentric with the white target.
1Angular interferometer
2Reduced laser beam
3Target
3
12
12. Remove the target from the angular interferometer. The beams should now
pass through the angular interferometer and both beams returned from the
XR20-W’s angular reflector should now overlap on the middle of the laser
shutter’s target.
1Reduced beam aperture
2Target
2
1
13. Turn the shutter to 6 mm aperture and check that good signal strength is
obtained.
1Beam aperture
2Detector aperture
12
14. Switch on the XR20-W and check the status LEDs go green.
Table of contents
Other Renishaw Test Equipment manuals