When properly set up, the
full system looks like this:
▼
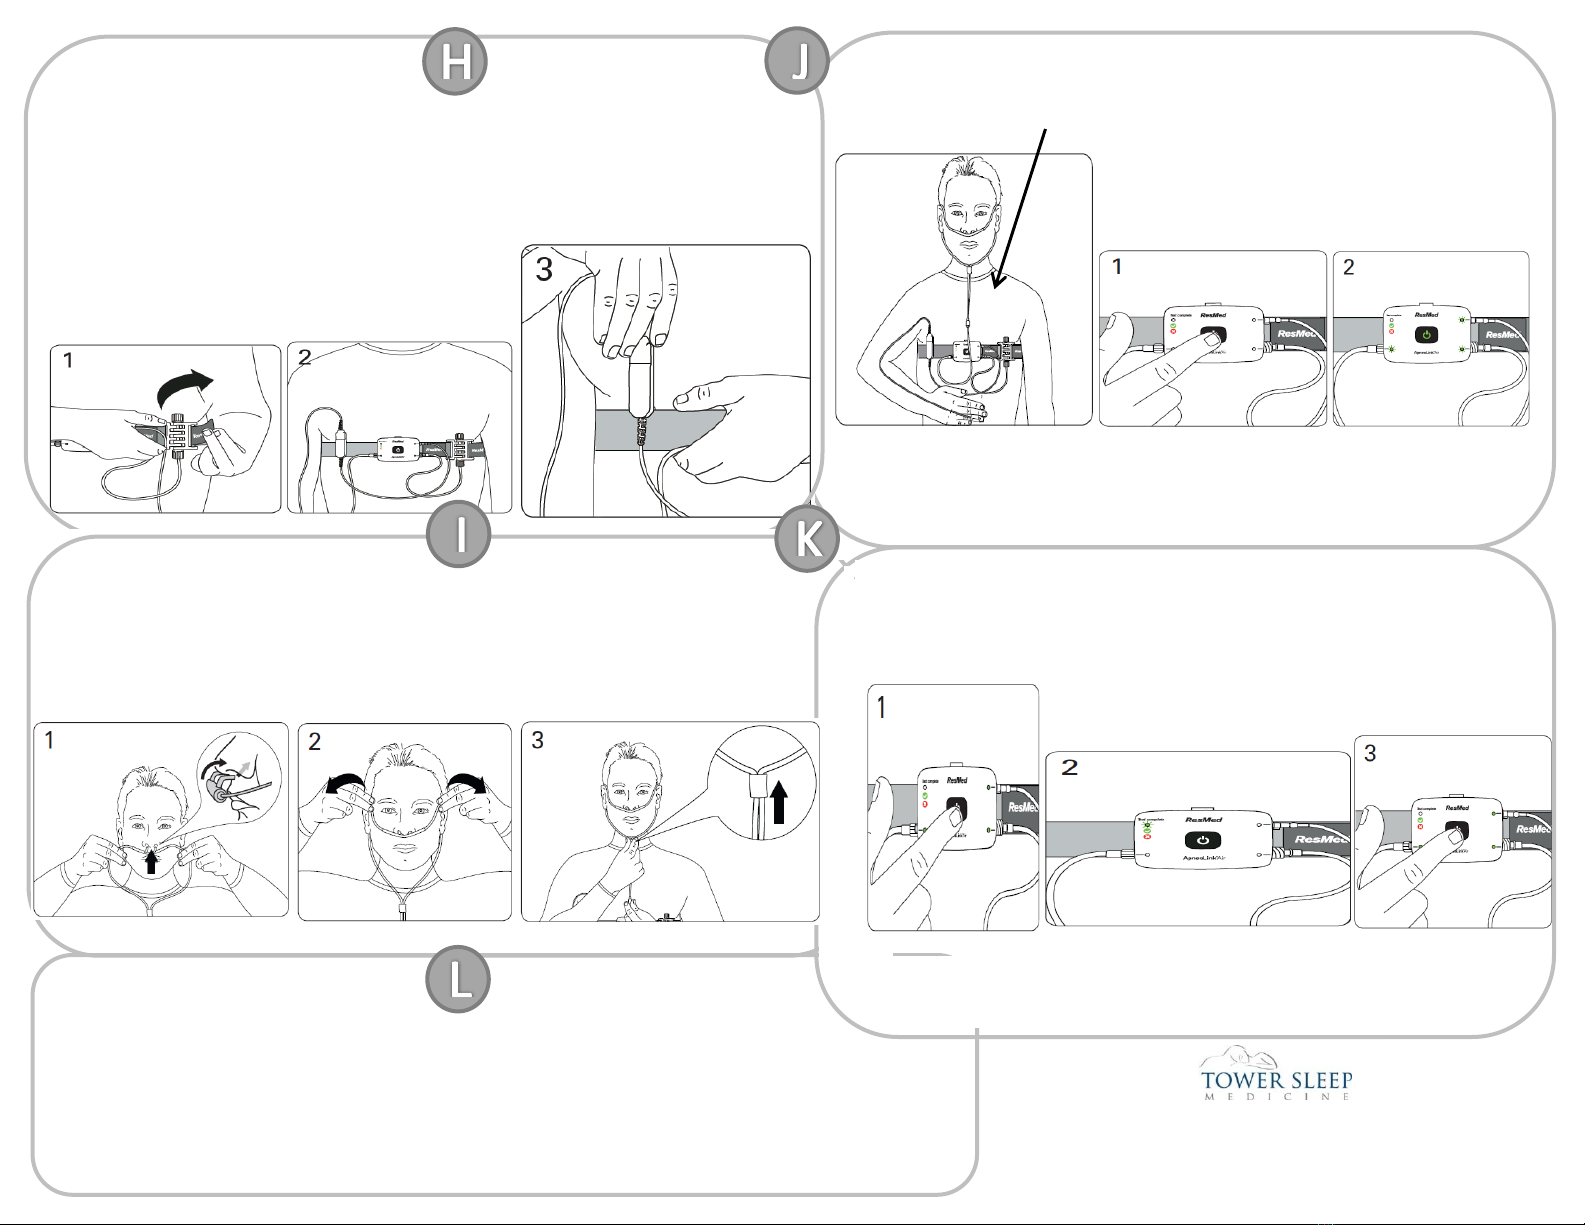
Press and hold the
power button in the
center of the device
for about three
seconds or until the
light turns on.
Check that lights next to
the accessories you are
using are green. If any of
these lights are red and
blinking, the accessories
are not attached correctly.
Disassembling and returning the device
When the test is completed:
Remove the belt from your body.
Remove the device from the belt.
Remove all the connectors from the device.
Throw away the nasal cannula and the disposable finger
sensor (see the Equipment section on the first page).
Screw the protective caps back on the effort
sensor and nasal cannula connectors.
Place everything else back in the bag and return it to
your physician or healthcare provider as requested.
Disconnect the finger sensor from the oximeter.
Do not attempt to clean the device.
8635 W. 3rd Street, Suite 965 Los Angeles, CA 90048
For Medical Emergencies During Use, Please Dial 911
24-Hour Emergency Call Service: (310) 657-4337
Once you have started the test, go to sleep as normal. The lights on the device
will dim after 10 minutes. If you have to get up during the night for any reason,
leave the device on unless you do not intend to go back to sleep. You can
remove the oximeter finger sensor if you need to go to the bathroom or wash
your hands. Replace the oximeter finger sensor before going back to sleep.
Note: If cannula does not stay in nose, use medical tape or bandages on cheeks to hold in place.
CAUTION: To avoid irritation or allergic reactions, wear the belt and device over a long-sleeved shirt.
Pull the belt around your
body. Thread the end of
the belt through the slot on
the effort sensor (if used)
and fasten the tab to the
belt. If you are not using
the effort sensor, attach
the tab to the belt.
Check that the
belt is secure
and comfortable
and that the
device is
positioned over
the center of your
chest.
If using an oximeter, slide the clip
onto the belt. The clip should be
worn on the same side of your
body as the oximeter finger sensor.
Fitting the nasal cannula
WARNING: Ensure that the cannula is fitted as described so as not to pose a strangulation risk.
Insert the prongs into your
nostrils. Make sure the curved
side is pointing towards the
back of your nose.
Loop the plastic
tubing around
your ears
Pull the slider up towards your
chin until the plastic tubing is
secure and comfortable.
Stopping the test - check if test complete
Press the power
button for about
three seconds.
Check that the test complete
indicator light is lit and green. This
means the test is complete. If the
test indicator light is red, replace
the batteries and repeat the test
tomorrow night.
Press and hold the
power button for
about three
seconds to turn off
the device.
• To re-check the test complete indicator light, press the power button until the light
turns on (about three seconds), then briefly press the power button again.
• To replace the batteries, open the battery cover on the back of the device and
insert two new AAA batteries.
• The device does not need any servicing or maintenance before recording.


