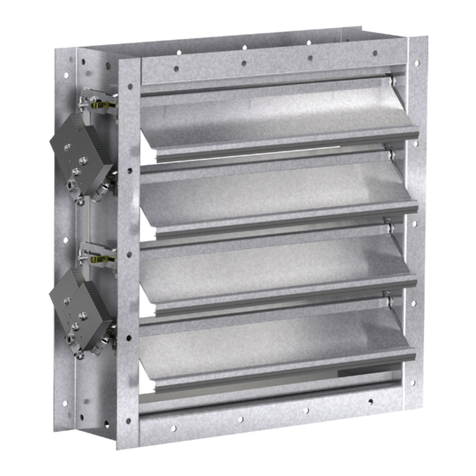
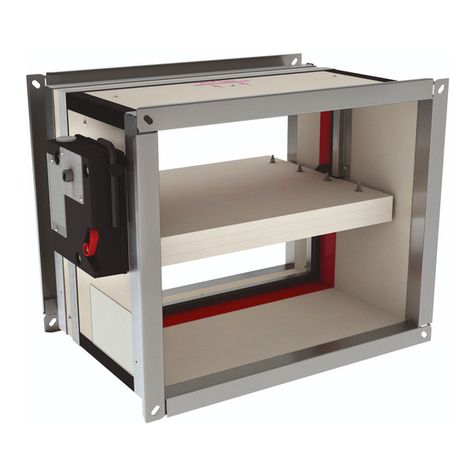
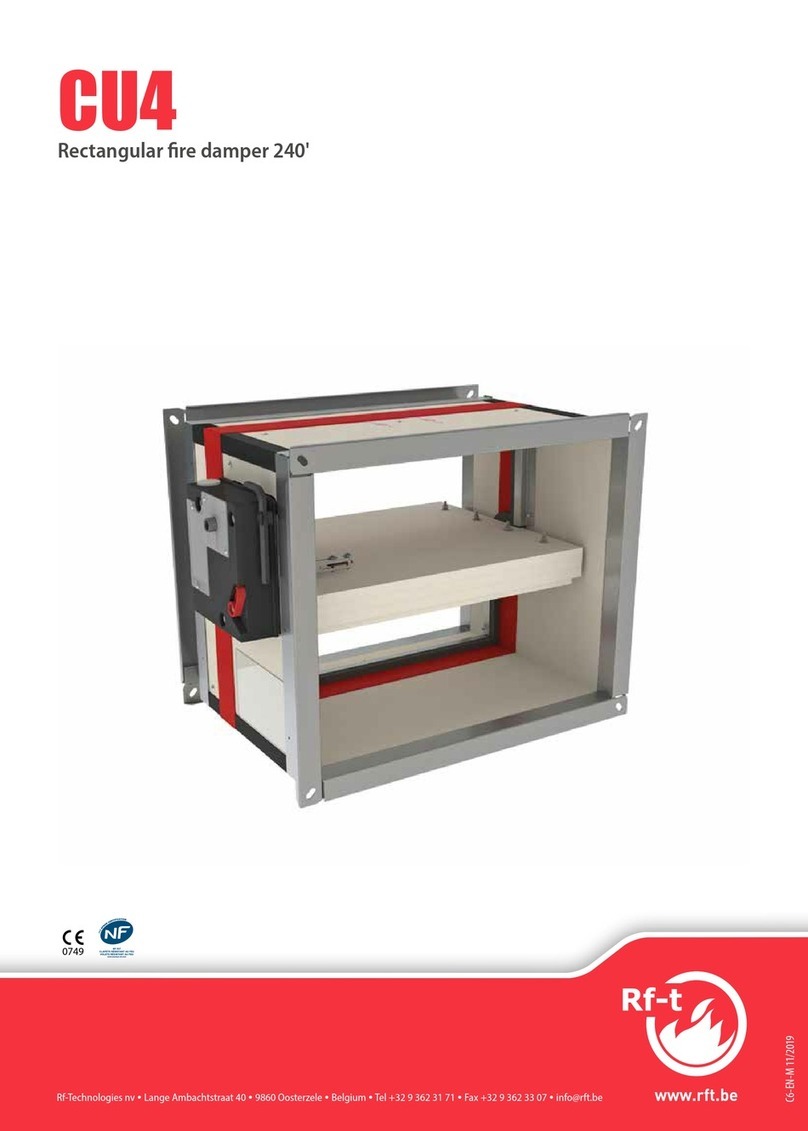
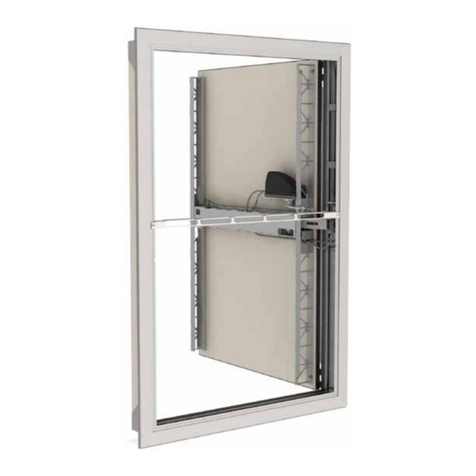
Rf-t KAMOUFLAGE MP Series User manual

www.rft.be
en
Rf-Technologies nv Lange Ambachtstraat 40 9860 Oosterzele Belgium Tel +32 9 362 31 71 Fax +32 9 362 33 07 [email protected]
1812
V28-EN-A 09/2019
KAMOUFLAGE MP
Motorised, aesthetic and CE marked smoke control shutter
can be perfectly integrated in many smoke control systems

2Table of content
Table of content
Declaration of performance 4
Product presentation KAMOUFLAGE MP 5
Range and dimensions KAMOUFLAGE MP 1V60 - 1V120 6
Evolution - kits 6
Options - at the time of order 6
Storage and handling 7
Installation 7
Operation: manual opening 8
Operation: manual closing 8
Electrical connection 9, 24
Position in the shaft 10
Installation into vertical concrete shaft with built-in mounting frame 11
Installation into vertical concrete shaft (without a mounting frame) 13
Installation into vertical shaft with built-in mounting frame: general instructions for all types of shafts (other than concrete) 14
Installation into vertical shaft (without a mounting frame): general instructions for all types of shafts (other than concrete) 15
Installation into vertical shaft PROMATECT L500 with built-in mounting frame 16
Installation into vertical shaft PROMATECT L500 (without a mounting frame) 16
Installation into vertical shaft GEOFLAM (LIGHT) / GEOTEC with built-in mounting frame 17
Installation into vertical shaft GEOFLAM (LIGHT) / GEOTEC (without a mounting frame) 17
Installation into vertical shaft TECNIVER with built-in mounting frame 18
Installation into vertical shaft TECNIVER (without a mounting frame) 18
Installation into vertical shaft GLASROC F V500 with built-in mounting frame 19
Installation into vertical shaft GLASROC F V500 (without a mounting frame) 19
Installation into vertical shaft EXTHAMAT with built-in mounting frame 20
Installation into vertical shaft EXTHAMAT (without a mounting frame) 20
Installation into vertical shaft DESENFIRE (HD) with built-in mounting frame 21
Installation into vertical shaft DESENFIRE (HD) (without a mounting frame) 21
Installation with minimal distances 22
Finishing 22
Product maintenance 23
Operation and mechanisms 24
Electrical connection 24
Weights 25
Selection data 25
Sample order 26
Approvals and certificates 26

3
Explanation of the abbreviations and pictograms
Wn = nominal width
Hn = nominal height
Sn = free air passage
E = integrity
I = thermal insulation
S = smoke leakage
60/120 = fire resistance time
Pa = pascal
o -> i = meets the criteria from the outside
(o) to the inside (i)
i <-> o = fire side not important
AA = automatic activation
multi = multi compartment
1500 = pressure level 3 (1500Pa)
ved = vertical duct
hod = horizontal duct
vew = vertical wall penetration
V = volt
W = watt
V AC = Volt alternating current
V DC = Volt direct current
E.TELE = power supply magnet
E.ALIM = power supply motor
Auto = automatic
Tele = remote controlled
Pnom = nominal capacity
Pmax = maximum capacity
DAS MOD = modular product
OP = option (delivered with the product)
KIT = kit (delivered separately for repair or
upgrade)
PG = connection flange to the duct
GKB (type A) / GKF (type F): "GKB" stands
for standard plasterboards (type A accor-
ding to EN 520) while "GKF" plasterboards
offer a higher fire resistance for a similar
plate thickness (type F according to EN
520)
Cal-Sil = calcium silicate
ζ [-] = pressure loss coefficient
Q = air flow
∆P = static pressure drop
v = air speed in the duct
Lwa = A-weighted sound power level
ME = motorised
H = habitat
aesthetic solution
-
superior air tightness (tested at 1500 Pa)
optimal free air passage and minimal pressure loss intermediate dimensions on request

4Declaration of performance
A-05/2019CE_DoP_Rf-t_V28_EN
DECLARATION OF PERFORMANCE
Declarationofperformance
CE_DoP_Rf-t_V28_EN
A-05/2019
1. Unique identication code of the product-type: KAMOUFLAGE MP
2. Intended use/es: Smoke control damper to be used in smoke control systems, in multi-compartment applications at re temperatures, or in single-compartment applications.
3. Manufacturer: Rf-Technologies NV, Lange Ambachtstraat 40, B-9860 Oosterzele
4. System/s of AVCP: System 1
5. Harmonised standard / European Assessment Document; notied body / European Technical Assessment,
Technical Assessment Body, notied body; certicate of constancy of performance:
EN 12101-8:2011, Efectis with identication number 1812; Efectis_1812_CPR_*** in requestEfectis_
6. Declared performance according to EN 12101-8:2011 (re resistance according to EN 1366-10, classication according to EN 13501-4)
Essential characteristics Performance
Range Product Wall type Wall Installation Classication
350x385 mm ≤ Kamouage 1V MP ≤ 700x1075 mm Kamouage 60 MP Shaft Promatect L500 ≥ 30 mm 1EI 60 (ved i no) S 1500 C10000 AA multi
Geoam ≥ 30 mm
Geotec ≥ 30 mm
Tecniver ≥ 35 mm
Glasroc F V500 ≥ 35 mm
Exthamat ≥ 25 mm
Desenre HD ≥ 25 mm HD
Concrete ≥ 90 mm
Masonry, concrete blocks, concrete ≥ 100 mm
Kamouage 120 MP Shaft Promatect L500 ≥ 40 mm 1EI 90 (ved i no) S 1500 C10000 AA multi
Geoam ≥ 35 mm
Tecniver ≥ 45 mm
Exthamat ≥ 30 mm
Desenre ≥ 25 mm THD
Concrete ≥ 90 mm
Masonry, concrete blocks, concrete ≥ 100 mm
Kamouage 120 MP Shaft Promatect L500 ≥ 50 mm 1EI 120 (ved i no) S 1500 C10000 AA multi
Geoam ≥ 45 mm
Geoam Light ≥ 35 mm
Geotec ≥ 45 mm
Tecniver ≥ 50 mm
Glasroc F V500 ≥ 50 mm
Exthamat ≥ 35 mm
Desenre HD ≥ 35 mm
Desenre ≥ 45 mm
Masonry, concrete blocks, concrete ≥ 100 mm
1 Type of installation: shaft-mounted 0/180°. Minimal in-between distances authorised.
max 4
max 2
Nominal activation conditions/sensitivity: Pass - automatic activation
Response delay (response time): closure time Pass - automatic activation
Operational reliability: cycling 10000 cycles (no load)
Durability of response delay: Pass
Durability of operational reliability: Pass
Approved accessories EASY-KAP ME/MP or EASY-KGC ME/MP mounting frame; motor VA MP MEC
High operational temperature (HOT 400/30): NPD (no performance determined)
Harmonised standard
EN 12101-8:2011
The performance of the product identied above is in conformity with the set of declared performance/s.This declaration of
performance is issued, in accordance with Regulation (EU) No 305/2011, under the sole responsibility of the manufacturer identi-
ed above.
Signed for and on behalf of the manufacturer by:
Mathieu Steenland, Technical Manager
Oosterzele, 05/2019
5
Product presentation KAMOUFLAGE MP
The Kamouflage MP is a motorised, aesthetic and CE marked smoke control shutter that can be perfectly integrated in many smoke
control systemss. It is certified in accordance with EN12101-8, suitable for vertical mounting in ducts or concrete shafts. Offering 60
or 120 minute fire resistance at minimum pressure loss, it is classified as suitable for multi-compartment applications. In addition,
Kamouflage MP has a C10000 cycling classification, which means it can be used in combined smoke control and environmental,
energy saving systems.
It opens to supply and release air or to evacuate smoke in emergency situations whilst maintaining its fire resistant integrity in
standby position.
The Kamouflage MP is designed for use in:
- Pressure Differential Systems (PDS): e.g. pressurising staircases.
- Smoke and Heat Exhaust Ventilation Systems (SHEVS): ventilating protected lobbies and corridors through shafts, either naturally
or mechanically, or a combination of both.
- Energy saving systems combined with PDS or SHEVS: e.g. night cooling systems.
Smoke evacuation shutters and dampers are suitable for use in ventilating protected lobbies, venting to shafts either naturally or
mechanically. They open to evacuate smoke in emergency situations whilst maintaining fire resistant integrity in standby position.
5optimal smoke control system thanks to higher free air passage and minimal pressure loss
5easy to install thanks to optional mounting frame (EASY KAP ME/MP or EASY KGC ME/MP) and its light weight
5easy to finish thanks to removable front plate
5aesthetic solution that can be integrated in any interior design
5simple operating tests through remote opening and resetting by an actuator
5fully integrable in the wall finish
5installation at minimal distances
∎tested according to EN 1366-10
∎compliant with EN 12101-8
∎fit for use as air release and air supply vent in PDS-systems according to EN 12101-6
∎suited as air supply and smoke evacuation vent in SHEVS-systems according to EN 12101-8
∎light weight: ≤ 35 kg
∎available with ready-to-install finish (white lacquered RAL 9010)
∎approved for installation in calcium-silicate, ‘Staff’, Tecniver, Glasroc, Extha and concrete shafts.
∎maintenance-free
∎superior air tightness (tested at 1500 Pa)
1. 1 shutter
2. aluminium frame
3. lock + key
4. connection compartement
5. actuating arm
6. resetting motor
7. product identification
3
1
5
6
4
7
2

6Range and dimensions KAMOUFLAGE MP
Range and dimensions KAMOUFLAGE MP
2
1
3
4
≥
125mm
10mm
5
6
7
8
112mm
(1V) Wn+ 82mm
(1V) Wn+ 72mm
1. Refractory material
2. Sealing if mounting frame
3. Mounting frame EASY-KAP ME/MP (optional)
4. EASY-KGC ME/MP mounting frame with drop guard (optional)
5. Nominal dimensions shutter Wn x Hn
6. Built-in dimensions without mounting frame (Wn+10) x (Hn+10)mm
7. Built-in dimensions with mounting frame (Wn+20) x (Hn+20)mm
8. Overall (outside) dimensions of the shutter (Wn+54) x (Hn+54)mm
≥ ≤
(Wn x Hn)
mm 350x385 700x1075
Evolution - kits
KITS VD24-VA Natural magnet 24 V DC
EASY-KAP ME/MP Mounting frame (delivered separately)
EASY-KGC ME/MP 1V Mounting frame with hinged drop guard grid (delivered separately)
Options - at the time of order
TL Trailing lead 3 m for external connection

7
Storage and handling
As this product is a safety element, it should be stored and handled with care.
Avoid:
• any kind of impact or damage
• contact with water
• deformation of the casing
It is recommended:
• to unload in a dry area
• not to flip or roll the product to move it
• not to use the damper as a scaffold, working table, etc.
• not to store smaller dampers inside larger ones
Installation
General points
∎The installation must comply with the installation manual delivered with the product and the classification report.
∎The installation of the shaft must comply with the classification report delivered by the shaft manufacturer.
∎Axis orientation: see the declaration of performance.
∎Verify if the blade can move freely.
∎Rf-t smoke dampers may be applied to ducts that have been tested according to EN 1366-8 and EN 1366-9, as appropriate. They
have to be constructed from similar materials with a fire resistance, thickness and density equal or superior to these of the tested
materials.
Caution: when fitting, the product should be handled with care and remain protected from any sealing products.
Caution: before putting the installation into operation, clean off all the dust and dirt.
Caution: bear in mind the blade’s clearance inside the smoke evacuation duct.

8Installation
Operation: manual opening
1
2
1. Remove the finishing cap from the shutter. To do this, use the
hook with key ring that is delivered with the product. You may
attach this tool to the key through its handy key ring.
20°
2. Unlocking 1V
Turn the key 20° anti-clockwise and push the shutter into its
open position.
Operation: manual closing
20°
1. Turn the key 20° anti-clockwise. Push the actuating arm in
the direction of the arrow and pull the shutter into its closed
position.
15°
2. Turn the key 15° clockwise. The key blocks in the lock and the
door can be pulled into its lock.
1 2
1 2

9
Installation
Electrical connection
1. The electrical connection is possible via the 2 corners at the
side of the hinges.
2. Drill a hole in the refractory material at the choosen corner(s).
The galvanised part at the inside of the shutter is already
indented.
3. Pierce an opening in the connection box. Affix the grommet
delivered with the product.
1
2
2
2
3
4
4. Lead the cables through the opening. Use the protective
sleeve (1), the fixation clips (2) and the plastic cable clamp
(3) to attach the cables to the frame. Lead the cables to
the connection box through the grommet (4) and connect
according to the electrical connection diagram.
Caution: after passing and fixing the cables, you need to seal
the drilled hole in the refractory around the electrical cables
with fire resistant adhesive sealant (BCM f.e.).
1 2
3 4

10 Installation
Position in the shaft
≥125≥125 ≥125
1. The shutter is affixed to the smoke evacuation shaft through
a sleeve. That sleeve can be installed either in the shaft, in the
axis of the shaft or outside the shaft (or shaft extension).
≥ 90 mm
≥ 90 mm
≥ 90 mm
≥ 125 mm
≥ 125 mm
≥ 125 mm
3. In order to prevent cracks around the opening in the long
term, a finishing layer (plasterboard, (cellular) concrete, rigid
wall) can be added between the mounting frame and the
opening.
≥ 90 mm
≥ 90 mm
≥ 90 mm
1 2
3 4

11
Installation
Installation into vertical concrete shaft with built-in mounting frame
The product was tested and approved in:
Product Range Wall type Classication
Kamouage 60 MP 350x385 mm ≤ Kamouage 1V MP ≤ 700x1075 mm Shaft Concrete ≥ 90 mm EI 60 (ved i no) S 1500 C10000 AA multi
Kamouage 60 MP 350x385 mm ≤ Kamouage 1V MP ≤ 700x1075 mm Shaft Masonry, concrete blocks, concrete
≥ 100 mm EI 60 (ved i no) S 1500 C10000 AA multi
Kamouage 120 MP 350x385 mm ≤ Kamouage 1V MP ≤ 700x1075 mm Shaft Concrete ≥ 90 mm EI 90 (ved i no) S 1500 C10000 AA multi
Kamouage 120 MP 350x385 mm ≤ Kamouage 1V MP ≤ 700x1075 mm Shaft Masonry, concrete blocks, concrete
≥ 100 mm EI 90 (ved i no) S 1500 C10000 AA multi
Kamouage 120 MP 350x385 mm ≤ Kamouage 1V MP ≤ 700x1075 mm Shaft Masonry, concrete blocks, concrete
≥ 100 mm EI 120 (ved i no) S 1500 C10000 AA multi
A=20-100 mm
A=20 mm
KAMOUFLAGE MP
EASY-KAP ME/MP
(W+A) x (H+A) mm
Mortar
1. In case the mounting frame is screwed:
Make an opening with dimensions (W+20) x (H+20) mm.
In case the mounting frame is fixed with mortar:
Make an opening with dimensions (W+20) x (H+20) mm till
(W+100) x (H+100) mm.
2. The mounting frame should always be fastened to the
concrete shaft with screws and dowels (Ø6 x minimum 60 mm,
steel or stainless steel).
For an opening with dimensions up to (W+20) x (H+20) mm:
Two fixing lugs are provided at the bottom and at the top of
the mounting frame: fold these against the shaft and fasten the
mounting frame with 4 screws Ø6 x 60 mm, taking care not to
misshape it. These screws can be inserted through any of the
punched holes in the lugs, depending on the thickness of the
shaft wall.
The finished opening must have the same size as the mounting
frame (W+10) x (H+10) mm.
For an opening with dimensions up to (W+100) x (H+100) mm:
Apply mortar around the opening to reduce the opening to
the outer dimensions of the frame, then proceed as mentioned
above to fasten the frame into the opening. Make sure that the
gap between the frame and the opening in sealed completely
with mortar.
The mortar must harden completely before the damper is
fastened to the mounting frame.
1 2

12 Installation
3. Put aside the screws that are affixed to one of the cross slats,
then unscrew the 4 cross slats of the mounting frame and fold
the 8 fastening plates in the frame.
When the EASY-KGC ME/MP mounting frame is used, unfold
the drop-guard grid (90°) in the shaft.
4. Rotate the four fastening plates on the damper 90° (to the
upright position).
5. Open the shutter and position it in the mounting frame.
Fasten the shutter onto the mounting frame with the 4 screws
supplied, as shown in the drawing. Tightening the screws pulls
the shutter towards the wall until its final position.
You can also slightly correct the angle of the shutter with
respect to the mounting frame.
Connect the mechanism according to the wiring diagram.
Caution: Connecting the frame to a uneven surface can lead
to distortion of this frame. Check whether the slack between
the frame and the surface of the door is still acceptable.
Check the mobility of the shutter.
3 4
5

13
Installation
Installation into vertical concrete shaft (without a mounting frame)
The product was tested and approved in:
Product Range Wall type Classication
Kamouage 60 MP 350x385 mm ≤ Kamouage 1V MP ≤ 700x1075 mm Shaft Concrete ≥ 90 mm EI 60 (ved i no) S 1500 C10000 AA multi
Kamouage 60 MP 350x385 mm ≤ Kamouage 1V MP ≤ 700x1075 mm Shaft Masonry, concrete blocks, concrete
≥ 100 mm EI 60 (ved i no) S 1500 C10000 AA multi
Kamouage 120 MP 350x385 mm ≤ Kamouage 1V MP ≤ 700x1075 mm Shaft Concrete ≥ 90 mm EI 90 (ved i no) S 1500 C10000 AA multi
Kamouage 120 MP 350x385 mm ≤ Kamouage 1V MP ≤ 700x1075 mm Shaft Masonry, concrete blocks, concrete
≥ 100 mm EI 90 (ved i no) S 1500 C10000 AA multi
Kamouage 120 MP 350x385 mm ≤ Kamouage 1V MP ≤ 700x1075 mm Shaft Masonry, concrete blocks, concrete
≥ 100 mm EI 120 (ved i no) S 1500 C10000 AA multi
1. Rotate the four fastening plates on the damper 90° (to the
upright position).
The fastening plates are not used for an installation without a
mounting frame.
KAMOUFLAGE MP
(Wn+10) x (Hn+10) mm
2. With the prepared opening the shutter can be handled
into position, from the room side. Ensure that the trailing lead
cables are not trapped at this stage and freely hang loose. Do
not distort or twist the frames as this will affect the correct
operation and sealing of the shutter. Check for squareness by
measuring the frame diagonals (they must measure the same).
Make an opening with dimensions (W+10) x (H+10) mm.
Fix the shutter in the opening using 4 screws and dowels
Ø6 x 40 mm.
Connect the mechanism according to the wiring diagram.
Check the mobility of the shutter.
1 2

14 Installation
Installation into vertical shaft with built-in mounting frame: general instructions for all types of shafts (other than concrete)
e
≥ 125 mm
KAMOUFLAGE MP
EASY-KAP ME/MP
e
A = 2 x e + 20 mm
(W+A) x (H+A) mm
(W+20) x (H+20) mm
1. Make an opening with dimensions (W+A) x (H+A) mm.
A = 2 x thickness sleeve (e) + 20 mm.
Fit a sleeve of the same type of material and thickness of the
duct (thickness e) of minimum 125 mm deep in the opening.
Fasten and seal the mounting frame. See details per type of
shaft hereafter.
2. Two fixing lugs are provided at the bottom and at the top of
the mounting frame: fold these against the sleeve.
When fixed with screws, fasten the mounting frame to the
sleeve with chipboard screws (Ø 6 x e) mm. These screws can
be fixed in one of the openings provided for this purpose,
depending on the depth of the sleeve.
Take care not to misshape the frame during its installation. The
finished opening must have the same size as the mounting
frame (W+10) x (H+10) mm.
3. Put aside the screws that are affixed to one of the cross slats,
then unscrew the 4 cross slats of the mounting frame and fold
the 8 fastening plates in the frame.
When the EASY-KGC ME/MP mounting frame is used, unfold
the drop-guard grid (90°) in the shaft.
4. Rotate the four fastening plates on the damper 90° (to the
upright position).
1 2
3 4

15
Installation
5. Open the shutter and position it in the mounting frame.
Fasten the shutter onto the mounting frame with the 4 screws
supplied, as shown in the drawing. Tightening the screws pulls
the shutter towards the wall until its final position.
It also makes it possible to slightly correct the angle of the
shutter with respect to the mounting frame.
Connect the mechanism according to the wiring diagram.
Caution: Connecting the frame to a non-flat surface can lead
to distortion of this frame. Check whether the slack between
the frame and the door leaf is still acceptable.
Check the mobility of the shutter.
Installation into vertical shaft (without a mounting frame): general instructions for all types of shafts (other than concrete)
1. Rotate the four fastening plates on the damper 90° (to the
upright position).
The fastening plates are not used for an installation without a
mounting frame.
KAMOUFLAGE MP
e
≥ 125 mm
e
A = 2 x e + 10 mm
(W+A) x (H+A) mm
(W+10) x (H+10) mm
2. Make an opening with dimensions (W+A) x (H+A) mm.
A = 2 x thickness sleeve (e) + 10 mm.
Fit a sleeve of the same type of material and thickness of the
duct (thickness e) of minimum 125 mm deep in the opening.
Place the shutter in the opening.
Ensure the cables are not trapped at this stage.
Fix the shutter in the opening using 4 screws Ø6 x 40 mm.
Caution: make sure that the screws don't exceed the sleeve's
thickness!
Connect the mechanism according to the wiring diagram.
Check the mobility of the shutter.
5
1 2

16 Installation
Installation into vertical shaft PROMATECT L500 with built-in mounting frame
The product was tested and approved in:
Product Range Wall type Classication
Kamouage 60 MP 350x385 mm ≤ Kamouage 1V MP ≤ 700x1075 mm Shaft Promatect L500 ≥ 30 mm EI 60 (ved i no) S 1500 C10000 AA multi
Kamouage 120 MP 350x385 mm ≤ Kamouage 1V MP ≤ 700x1075 mm Shaft Promatect L500 ≥ 40 mm EI 90 (ved i no) S 1500 C10000 AA multi
Kamouage 120 MP 350x385 mm ≤ Kamouage 1V MP ≤ 700x1075 mm Shaft Promatect L500 ≥ 50 mm EI 120 (ved i no) S 1500 C10000 AA multi
e
≥ 125 mm
KAMOUFLAGE MP
EASY-KAP ME/MP
e
A = 2 x e + 20 mm
(W+A) x (H+A) mm
(W+20) x (H+20) mm
1. Assemble the sleeve with staples and affix the assembled
sleeve to the shaft wall with staples.
Coat the edges of the opening with adhesive plaster type
Promacol S.
Screw the mounting frame to the sleeve with chipboard screw
(Ø 6 x e)mm. Two fixing lugs are provided at the bottom and at
the top of the mounting frame: fold these against the sleeve.
Seal the mounting frame with Promacol S taking care not to
misshape it. The finished opening must have the same size as
the mounting frame (W+10) x (H+10) mm.
Installation into vertical shaft PROMATECT L500 (without a mounting frame)
The product was tested and approved in:
Product Range Wall type Classication
Kamouage 60 MP 350x385 mm ≤ Kamouage 1V MP ≤ 700x1075 mm Shaft Promatect L500 ≥ 30 mm EI 60 (ved i no) S 1500 C10000 AA multi
Kamouage 120 MP 350x385 mm ≤ Kamouage 1V MP ≤ 700x1075 mm Shaft Promatect L500 ≥ 40 mm EI 90 (ved i no) S 1500 C10000 AA multi
Kamouage 120 MP 350x385 mm ≤ Kamouage 1V MP ≤ 700x1075 mm Shaft Promatect L500 ≥ 50 mm EI 120 (ved i no) S 1500 C10000 AA multi
KAMOUFLAGE MP
e
≥ 125 mm
e
A = 2 x e + 10 mm
(W+A) x (H+A) mm
(W+10) x (H+10) mm
1. Assemble the sleeve with staples and affix the assembled
sleeve to the shaft wall with staples.
1
1

17
Installation
Installation into vertical shaft GEOFLAM (LIGHT) / GEOTEC with built-in mounting frame
The product was tested and approved in:
Product Range Wall type Classication
Kamouage 60 MP 350x385 mm ≤ Kamouage 1V MP ≤ 700x1075 mm Shaft Geoam ≥ 30 mm EI 60 (ved i no) S 1500 C10000 AA multi
Kamouage 60 MP 350x385 mm ≤ Kamouage 1V MP ≤ 700x1075 mm Shaft Geotec ≥ 30 mm EI 60 (ved i no) S 1500 C10000 AA multi
Kamouage 120 MP 350x385 mm ≤ Kamouage 1V MP ≤ 700x1075 mm Shaft Geoam ≥ 35 mm EI 90 (ved i no) S 1500 C10000 AA multi
Kamouage 120 MP 350x385 mm ≤ Kamouage 1V MP ≤ 700x1075 mm Shaft Geoam ≥ 45 mm EI 120 (ved i no) S 1500 C10000 AA multi
Kamouage 120 MP 350x385 mm ≤ Kamouage 1V MP ≤ 700x1075 mm Shaft Geoam Light ≥ 35 mm EI 120 (ved i no) S 1500 C10000 AA multi
Kamouage 120 MP 350x385 mm ≤ Kamouage 1V MP ≤ 700x1075 mm Shaft Geotec ≥ 45 mm EI 120 (ved i no) S 1500 C10000 AA multi
e
≥ 125 mm
KAMOUFLAGE MP
EASY-KAP ME/MP
e
A = 2 x e + 20 mm
(W+A) x (H+A) mm
(W+20) x (H+20) mm
1. Coat the edges of the opening with adhesive plaster type
PLACOL (in case of Geoflam) or GEOCOL (S) (in case of Geotec).
In case of Geotec you can also assemble the sleeve with glue and
screws Ø 5 x (2 x e) mm and affix the assembled sleeve to the
shaft wall with glue and screws Ø 5 x (2 x e) mm every 100 mm.
Seal the joints between uprights and cross pieces and between
the lining and the wall with vegetable fibre caulking and
plaster or with GEOCOL (S) (in case of Geotec).
Two fixing lugs are provided at the bottom and at the top of
the mounting frame: fold these against the sleeve. Caulk the
mounting frame to the duct with vegetable fibre or (in case
of Geotec) you can also coat the opening with Geocol (S) and
fasten the mounting frame with screws of Ø 5 x e mm. Take
care not to misshape the frame. The finished opening must
have the same size as the mounting frame (W+10) x (H+10) mm.
Installation into vertical shaft GEOFLAM (LIGHT) / GEOTEC (without a mounting frame)
The product was tested and approved in:
Product Range Wall type Classication
Kamouage 60 MP 350x385 mm ≤ Kamouage 1V MP ≤ 700x1075 mm Shaft Geoam ≥ 30 mm EI 60 (ved i no) S 1500 C10000 AA multi
Kamouage 60 MP 350x385 mm ≤ Kamouage 1V MP ≤ 700x1075 mm Shaft Geotec ≥ 30 mm EI 60 (ved i no) S 1500 C10000 AA multi
Kamouage 120 MP 350x385 mm ≤ Kamouage 1V MP ≤ 700x1075 mm Shaft Geoam ≥ 35 mm EI 90 (ved i no) S 1500 C10000 AA multi
Kamouage 120 MP 350x385 mm ≤ Kamouage 1V MP ≤ 700x1075 mm Shaft Geoam ≥ 45 mm EI 120 (ved i no) S 1500 C10000 AA multi
Kamouage 120 MP 350x385 mm ≤ Kamouage 1V MP ≤ 700x1075 mm Shaft Geoam Light ≥ 35 mm EI 120 (ved i no) S 1500 C10000 AA multi
Kamouage 120 MP 350x385 mm ≤ Kamouage 1V MP ≤ 700x1075 mm Shaft Geotec ≥ 45 mm EI 120 (ved i no) S 1500 C10000 AA multi
KAMOUFLAGE MP
e
≥ 125 mm
e
A = 2 x e + 10 mm
(W+A) x (H+A) mm
(W+10) x (H+10) mm
1. Coat the edges of the opening with adhesive plaster type
PLACOL (in case of Geoflam) or GEOCOL (S) (in case of Geotec).
Seal the joints between uprights and cross pieces and between
the lining and the wall with vegetable fibre caulking and
plaster or with GEOCOL (S) (in case of Geotec).
In case of Geotec you can also assemble the sleeve with glue and
screws Ø 5 x (2 x e) mm and affix the assembled sleeve to the
shaft wall with glue and screws Ø 5 x (2 x e) mm every 100 mm.
1
1

18 Installation
Installation into vertical shaft TECNIVER with built-in mounting frame
The product was tested and approved in:
Product Range Wall type Classication
Kamouage 60 MP 350x385 mm ≤ Kamouage 1V MP ≤ 700x1075 mm Shaft Tecniver ≥ 35 mm EI 60 (ved i no) S 1500 C10000 AA multi
Kamouage 120 MP 350x385 mm ≤ Kamouage 1V MP ≤ 700x1075 mm Shaft Tecniver ≥ 45 mm EI 90 (ved i no) S 1500 C10000 AA multi
Kamouage 120 MP 350x385 mm ≤ Kamouage 1V MP ≤ 700x1075 mm Shaft Tecniver ≥ 50 mm EI 120 (ved i no) S 1500 C10000 AA multi
e
≥ 125 mm
KAMOUFLAGE MP
EASY-KAP ME/MP
e
A = 2 x e + 20 mm
(W+A) x (H+A) mm
(W+20) x (H+20) mm
1. Put glue type CF GLUE on the uprights and cross pieces
and between the lining and the wall. Screw the sleeve using
chipboard screws Ø5 x 70mm at 150 mm intervals.
Two fixing lugs are provided at the bottom and at the top of
the mounting frame: fold these against the sleeve. First coat the
opening with glue CF GLUE. Glue the mounting frame to the
lining taking care not to misshape it. The finished opening must
have the same size as the mounting frame (W+10) x (H+10) mm.
Installation into vertical shaft TECNIVER (without a mounting frame)
The product was tested and approved in:
Product Range Wall type Classication
Kamouage 60 MP 350x385 mm ≤ Kamouage 1V MP ≤ 700x1075 mm Shaft Tecniver ≥ 35 mm EI 60 (ved i no) S 1500 C10000 AA multi
Kamouage 120 MP 350x385 mm ≤ Kamouage 1V MP ≤ 700x1075 mm Shaft Tecniver ≥ 45 mm EI 90 (ved i no) S 1500 C10000 AA multi
Kamouage 120 MP 350x385 mm ≤ Kamouage 1V MP ≤ 700x1075 mm Shaft Tecniver ≥ 50 mm EI 120 (ved i no) S 1500 C10000 AA multi
KAMOUFLAGE MP
e
≥ 125 mm
e
A = 2 x e + 10 mm
(W+A) x (H+A) mm
(W+10) x (H+10) mm
1. Put glue type CF GLUE on the uprights and cross pieces
and between the lining and the wall. Screw the sleeve using
chipboard screws Ø5 x 70mm at 150 mm intervals.
1
1

19
Installation
Installation into vertical shaft GLASROC F V500 with built-in mounting frame
The product was tested and approved in:
Product Range Wall type Classication
Kamouage 60 MP 350x385 mm ≤ Kamouage 1V MP ≤ 700x1075 mm Shaft Glasroc FV500 ≥ 35 mm EI 60 (ved i no) S 1500 C10000 AA multi
Kamouage 120 MP 350x385 mm ≤ Kamouage 1V MP ≤ 700x1075 mm Shaft Glasroc FV500 ≥ 50 mm EI 120 (ved i no) S 1500 C10000 AA multi
e
≥ 125 mm
KAMOUFLAGE MP
EASY-KAP ME/MP
e
A = 2 x e + 20 mm
(W+A) x (H+A) mm
(W+20) x (H+20) mm
1. Put glue type GLASROC F V500 on the uprights and cross
pieces and between the lining and the wall. Screw the sleeve
using chipboard screws Ø5 x 70 mm at 150 mm intervals.
Two fixing lugs are provided at the bottom and at the top of
the mounting frame: fold these against the sleeve. First coat
the opening with glue GLASROC F V500. Glue the mounting
frame to the lining taking care not to misshape it. The finished
opening must have the same size as the mounting frame
(W+10) x (H+10) mm.
Installation into vertical shaft GLASROC F V500 (without a mounting frame)
The product was tested and approved in:
Product Range Wall type Classication
Kamouage 60 MP 350x385 mm ≤ Kamouage 1V MP ≤ 700x1075 mm Shaft Glasroc FV500 ≥ 35 mm EI 60 (ved i no) S 1500 C10000 AA multi
Kamouage 120 MP 350x385 mm ≤ Kamouage 1V MP ≤ 700x1075 mm Shaft Glasroc FV500 ≥ 50 mm EI 120 (ved i no) S 1500 C10000 AA multi
KAMOUFLAGE MP
e
≥ 125 mm
e
A = 2 x e + 10 mm
(W+A) x (H+A) mm
(W+10) x (H+10) mm
1. Put glue type GLASROC F V500 on the uprights and cross
pieces and between the lining and the wall. Screw the sleeve
using chipboard screws Ø5 x 70 mm at 150 mm intervals.
1
1

20 Installation
Installation into vertical shaft EXTHAMAT with built-in mounting frame
The product was tested and approved in:
Product Range Wall type Classication
Kamouage 60 MP 350x385 mm ≤ Kamouage 1V MP ≤ 700x1075 mm Shaft Exthamat ≥ 25 mm EI 60 (ved i no) S 1500 C10000 AA multi
Kamouage 120 MP 350x385 mm ≤ Kamouage 1V MP ≤ 700x1075 mm Shaft Exthamat ≥ 30 mm EI 90 (ved i no) S 1500 C10000 AA multi
Kamouage 120 MP 350x385 mm ≤ Kamouage 1V MP ≤ 700x1075 mm Shaft Exthamat ≥ 35 mm EI 120 (ved i no) S 1500 C10000 AA multi
e
≥ 125 mm
KAMOUFLAGE MP
EASY-KAP ME/MP
e
A = 2 x e + 20 mm
(W+A) x (H+A) mm
(W+20) x (H+20) mm
1. Coat the edges of the opening with adhesive plaster.
Seal the joints between uprights and cross pieces and between
the lining and the wall with vegetable fibre caulking and
plaster.
Two fixing lugs are provided at the bottom and at the top of
the mounting frame: fold these against the sleeve. Caulk the
mounting frame to the duct with vegetable fibre and taking
care not to misshape it. The finished opening must have the
same size as the mounting frame (W+10) x (H+10) mm.
Installation into vertical shaft EXTHAMAT (without a mounting frame)
The product was tested and approved in:
Product Range Wall type Classication
Kamouage 60 MP 350x385 mm ≤ Kamouage 1V MP ≤ 700x1075 mm Shaft Exthamat ≥ 25 mm EI 60 (ved i no) S 1500 C10000 AA multi
Kamouage 120 MP 350x385 mm ≤ Kamouage 1V MP ≤ 700x1075 mm Shaft Exthamat ≥ 30 mm EI 90 (ved i no) S 1500 C10000 AA multi
Kamouage 120 MP 350x385 mm ≤ Kamouage 1V MP ≤ 700x1075 mm Shaft Exthamat ≥ 35 mm EI 120 (ved i no) S 1500 C10000 AA multi
KAMOUFLAGE MP
e
≥ 125 mm
e
A = 2 x e + 10 mm
(W+A) x (H+A) mm
(W+10) x (H+10) mm
1. Coat the edges of the opening with adhesive plaster.
Seal the joints between uprights and cross pieces and between
the lining and the wall with vegetable fibre caulking and
plaster.
1
1
This manual suits for next models
2
Table of contents
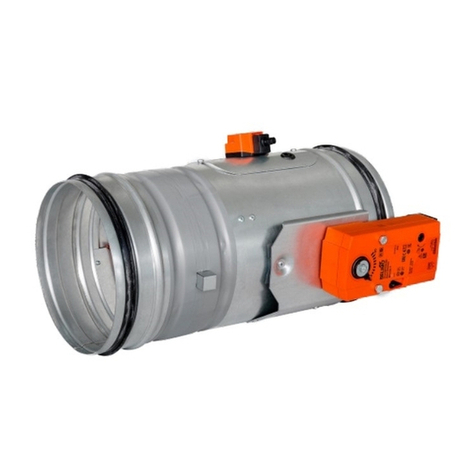
Other Rf-t Fire And Smoke Damper manuals
Popular Fire And Smoke Damper manuals by other brands

Ace
Ace FYN-N1 Operating and mounting instructions

Trox Technik
Trox Technik FKR-EU Supplementary Operating Manual

SOLID AIR
SOLID AIR FDC25 manual

Schako
Schako BKP-EN Installation, mounting and operating instructions

Carrier
Carrier 48DK024 installation instructions

Schako
Schako BKA-EN Additional operating instructions