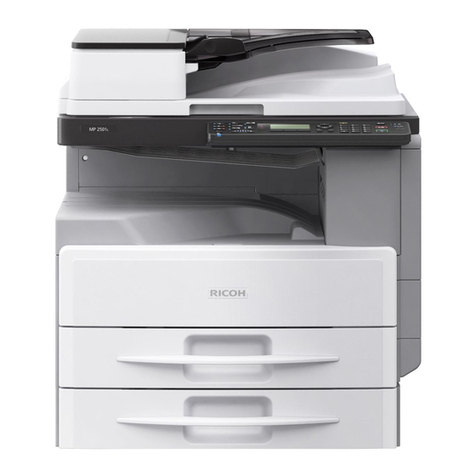
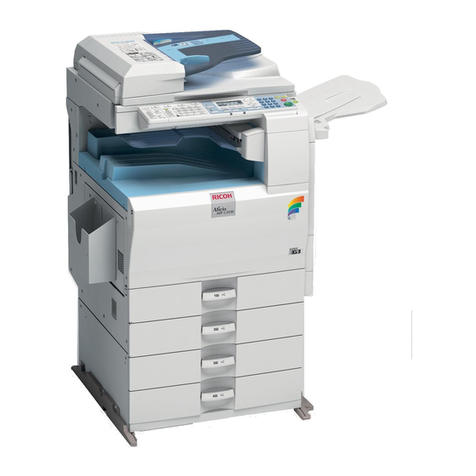
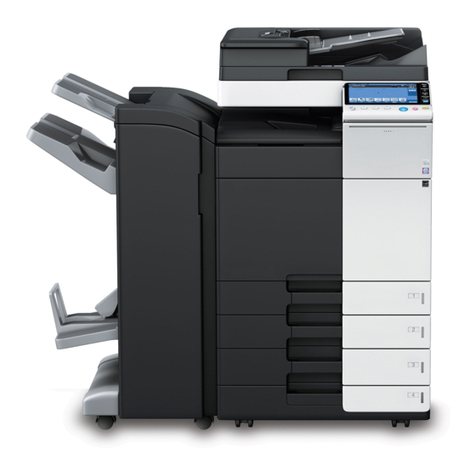
Ricoh aficio 1013 User manual

Keep going...
Before You
Use This
Machine
Before you can send or receive fax messages,
please take about 30 minutes to set up your machine.
Set up your machine using the following procedures.

1
RWARNING :
• Connect the power cord directly into a wall outlet and
never use an extension cord.
• Disconnect the power plug (by pulling the plug, not
the cable) if the power cable or plug becomes frayed
or otherwise damaged.
• To avoid hazardous electric shock or laser radiation
exposure, do not remove any covers or screws other
than those specified in Basic Features.
• Turn off the power and disconnect the power plug (by
pulling the plug, not the cable) if any of the following
occurs:
• You spill something into the machine.
• You suspect that your machine needs service or
repair.
• The external housing of your machine has been
damaged.
• Do not incinerate spilled toner or used toner. Toner
dust might ignite when exposed to an open flame.
• Disposal can take place at our authorized dealer.
• Dispose of the used toner cartridge in accordance
with the local regulations.
•
Keep the machine away from flammable liquids, gases,
and aerosols. A fire or an electric shock might occur.
• Connect the machine only to the power source de-
scribed on the inside front cover of Basic Features.
Connect the power cord directly into a wall outlet and
do not use an extension cord.
• Do not damage, break or make any modifications to
the power cord. Do not place heavy objects on it. Do
not pull it hard nor bend it more th an n ec essa ry. These
actions could cause an electric shock or fire.
• If the power cord is damaged (exposure of the core,
disconnection,etc.), contact your service representa-
tive to change a new one. Operating the machine with
a damaged power cord may cause an electric shock
or fire.
RCAUTION :
• Protect the machine from dampness or wet weather,
such as rain and snow.
• Unplug the power cord from the wall outlet before
you move the machine. While moving the machine,
you should take care that the power cord will not be
damaged under the machine.
• When you disconnect the power plug from the wall
outlet, always pull the plug (not the cable).
• Do not allow paper clips, staples, or other small metal-
lic objects to fall inside the machine.
• Keep toner (used or unused) and toner cartridge out
of reach of children.
• For environmental reasons, do not dispose of the
machine or expended supply waste at household
waste collection points. Disposal can take place at
an authorized dealer.
• The inside of the machine could be very hot. Do not
touch the parts with a label indicating "hot surface".
Otherwise an injury might occur.
• Our products are engineered to meet high standards
of quality and functionality, and we recommend that
you use only the expendable supplies available at an
authorized dealer.
• Before moving the machine, be sure to disconnect al l
external connections, especially the power cord from
the wall outlet. Damaged power cords are a fire and
electric shock hazard.
• To disconnect the power cord, pull it out by plug. Do
not drag the cord itself.
Doing so may result in damage to the cord, leading
to fire or electric shock.
• For safety reason, unplug the power cord from the wall
outlet if the machine will not be used for an extended
period of time such as holidays.
• The fusing section of this machine might be very
hot. Caution should be taken when removing misfed
paper.
• Keep the machine away from humidity and dust. Oth-
erwise a fire or an electric shock might occur. Do not
place the machine on an unstable or tilted surface. If
it topples over, an injury might occur.
•
Do not use aluminum foil, carbon paper, or similar
conductive paper to avoid a fire or a machine failure.
•
Make sure the room where you are using the machine
is well ventilated and spacious. Good ventilation is es-
pecially important when the machine is used heavily.
• Do not open toner cartridges forcefully. Toner can
spill, dirtying your clothes or hands, and possibly
resulting in accidental ingestion.
• If toner or used toner is inhaled, gargle with plenty of
water and move into a fresh air environment. Consult
a doctor if necessary.
• If toner or used toner gets into your eyes, flush thor-
oughly with eyswash or water. Consult a doctor if
necessary.
• If toner or used toner is swallowed, dilute by drinking
a large amount of water. Consult a doctor if neces-
sary.
• Avoid getting toner on your clothes or skin when
removing a paper jam or replacing toner. If your skin
comes into contact with toner, wash the affected area
throughly with soap and water.
• If toner gets on your clothing, wash with cold water.
Hot water will set the toner into the fabric and may
make removing the stain impossible.
• During operation, rollers for transporting the paper
and originals revolve. A safety device is being in-
stalled so that the machine can be operated safely.
But take care not to touch the rollers during operation.
An injury might occur.
• Fire and breakdown can result from heavy accumula-
tion of dust inside this machine. Consult your service
representative for details about and charges for clean-
ing the machine’s interior.
• If you have to move the machine when the optional
paper tray unit is attached, do not push on the main
unit's top section. Doing so can cause the optional pa-
per tray unit to detach, possibly resulting in injury.
Continued on next page

2
Continued on next page
1. Remove the plastic wrapping sheet from
the machine, and then remove all shipping
tape.
2.Turn the fixing material 90° counterclock-
wise.
(1)
(2)
3.Remove the fixing material to the right.
4.Open the Document Feeder (ADF) and take
out the protective sheet.
Preparing the
Toner Cassette
RWARNING :
• Do not incinerate used toner or toner cartridge. Toner
dust might ignite when exposed to an open flame.
Dispose of the used toner cartridge in accordance
with the local regulations.
RCAUTION :
• Keep toner (used or unused) and toner cartridges out
of the reach of children.
• Do not open toner cartridges forcefully. Toner can
spill, dirtying your clothes or hands, and possibly
resulting in accidental ingestion.
• If toner or used toner is inhaled, gargle with plenty of
water and move into a fresh air environment. Consult
a doctor if necessary.
• If toner or used toner gets into your eyes, flush thor-
oughly with eyswash or water. Consult a doctor if
necessary.
• If toner or used toner is swallowed, dilute by drinking
a large amount of water. Consult a doctor if neces-
sary.
• Avoid getting toner on your clothes or skin when
removing a paper jam or replacing toner. If your skin
comes into contact with toner, wash the affected area
thoroughly with soap and water.
• If toner gets on your clothing, wash with cold water.
Hot water will set the toner into the fabric and may
make removing the stain impossible.
1

3
11
.Remove the tape from the toner cassette.
10
.Hold the cassette horizontally and shake it
gently from side to side a few times.
8.Remove the fixing material.
9. Push the lever (1) and pull out the toner
cassette holding (1) and (2) .
5.Remove the fixing material from the axis.
6.Close the Document Feeder (ADF) and
make sure it locks securely into place.
7. Open the front cover.
(1)
(2)
Continued on next page

4
12
.Return the toner cassette.
Push the toner cassette in until it locks
securely into place.
13
.Remove the fixing material.
15
.Close the front cover.
14
.Pull the two red tags to remove the plastic
strips.
Important
• To avoid spilling toner, leave the toner cas-
sette installed while moving or transport-
ing the unit.
Keep going...

5
Continued on next page
5.Push the paper tray firmly until it locks into
place.
6.Stick the appropriate tray-number decal
and paper size decal on the locations indi-
cated in the illustration.
7.
If you changed the paper size of the paper
tray, set the paper size with the User Tools.
Reference
TSee “Changing the Paper Size Setting” in the
Advanced Features manual.
3.Push the metal base plate firmly down until
it locks into place.
4. Load the paper into the paper tray.
Preparing the
Main Paper
Tray
1. Pull the paper tray out of the
main unit.
2
2.If necessary, adjust the paper size.
As a default, the paper size in the tray is
set as A4.
Reference
TTo change the paper size in the paper tray, see
“Changing the Paper Size in the Main paper tray”
in the Advanced Features manual.

6
Important
• Do not plug or unplug the power cord with
wet hands or an electric shock might occur.
• Check the facsimile machine nameplate to
confirm the model code.
•
Make sure that 100% is shown on the display
before you turn the power switch off or unplug
the power cord. Fax files programmed in mem-
ory will be deleted 12 hours after you turn the
power switch off or unplug the power cord.
• Do not pull two paper trays out at the same
time. Having two paper trays filled with paper
in a fully extended position could cause the
machine to fall over.
(1)
Turn off the power switch of the machine.
(2)
Unplug the power cord of the machine
from the outlet.
(3)
Unplug the telephone line from the ma-
chine.
Note
After the installation, plug the power cord of the
machine back into the outlet, turn the power switch
on, and then connect the telephone line to the ma-
chine.
Attaching the
Control Panel
Sheets
1. Attach the three Control Panel
Sheets as shown.
Installing the Optional
Paper Tray Unit
If you install the Optional Paper Tray Unit later, read the
following WARNING, CAUTION and Important, and then
perform (1) to (3).
RWARNING :
• Connect the power cord directly into a wall outlet and
never use an extension cord.
• Disconnect the power plug (by pulling the plug, not
the cable) if the power cable or plug becomes frayed
or otherwise damaged.
• Connect the machine only to the power source
described on this manual . Connect the power cord
directly into a wall outlet and do not use an exten-
sion cord.
• Do not damage, break or make any modifications to
the power cord. Do not place heavy objects on it. Do
not pull it hard nor bend it more th an n ec essa ry. These
actions could cause an electric shock or fire.
• If the power cord is damaged (exposure of the core,
disconnection,etc.), contact your service representa-
tive to change a new one. Operating the machine with
a damaged power cord may cause an electric shock
or fire.
RCAUTION :
• Unplug the power co rd from the wall outlet before you
move the machine.
While moving the machine, you should take care that the
power cord will not be damaged under the machine.
• When you disconnect the power plug from the wall
outlet, always pull the plug (not the cable).
• Before moving the machine, be sure to disconnect all
external connections, especially the power cord from
the wall outlet. Damaged power cords are a fire and
electric shock hazard.
• To disconnect the power cord, pull it out by plug.
Do not drag the cord itself. Doing so may result in dam-
age to the cord, leading to fire or electric shock.
4
3
Continued on next page

7
Keep going...
6.Stick the appropriate tray-number decal
and paper-size decal on the locations indi-
cated in the illustration.
7. If you changed the paper size of the paper
tray, set the paper size with the User Tools.
Reference
TFor information about setting paper size, see
“Changing the Paper Size Setting” in the Advanced
Features manual.
After Setting the Paper Tray Unit
Reference
TFor information about loading paper, see “Loading Pa-
per in the Optional Paper Tray Unit” in the Advanced
Features manual.
2.Pull the paper tray part out of the unit, and
then remove the tape and cardboard at [C].
3.If necessary, adjust the paper size of the
paper tray.
Reference
TFor information about changing paper size, see
“Changing the Paper Size in the Optional Paper
Tray Unit” in the Advanced Features manual.
4.Push the paper tray in until it stops.
5.There are two pins on the top of the Paper
Tray Unit that point straight up. On the
bottom of the machine there are two holes.
Align the holes over the pins and lower the
machine gently onto the Paper Tray Unit.
Note
• Two people are better for lifting the machine.
• Be careful not to pinch your fingers.
Important
When lifting the machine, use the inset grips
on both sides. The machine could be dam-
aged or cause injury if dropped.
1. Remove the tape at [A], and then remove
the tape and cardboard at [B].

8
Connecting the
Power and
Switching On
Connecting the
Telephone
Line
There are similar sockets located at the left side
of the machine:
TEL: For the external telephone
LINE: Telephone line connection
1. Attach the ferrite core.
Loop the cable and attach the ferrite core as shown
in the illustration.
56
Note
• If "Call Service" appears on the display after the
power switch is turned on, turn the power switch
off, and check whether the tape has been removed
from the toner cassette and PCU.
See "1. Preparing the Toner Cassette".
1. Plug the cable into the outlet.
Important
• Power requirements : 220-240V, 50/60Hz
• Insert the power plug securely into the
outlet.
• Make sure that the outlet is near the ma-
chine and readily accessible.
• Do not connect other equipment to the
same outlet.
RWARNING :
• Connect the power cord directly into a wall outlet and
never use an extension cord.
• Connect the machine only to the power source
described on this Manual. Connect the power cord
directly into a wall outlet and do not use an exten-
sion cord.
• Do not damage, break or make any modifications to
the power cord. Do not place heavy objects on it. Do
not pull it hard nor bend it more th an n ec essa ry. These
actions could cause an electric shock or fire.
• If the power cord is damaged (exposure of the core,
disconnection,etc.), contact your service representa-
tive to change a new one. Operating the machine with
a damaged power cord may cause an electric shock
or fire.
Keep going...
2.Turn the power switch on.

9
Initial Settings &
Adjustments
The following display appears after the power
is turned on for the first time. Do not turn off
the power until you have completed the fol-
lowing procedure.
Language?: WV/OK
[ENGLISH]
Before using the machine, please adjust the
following settings:
• Language
• Country Code
• Date & Time
• Line Type
• Own Name, Fax Header, Fax Number
Important
For mistakes, press the Cancel key, and then
the OK key to register again. This function is
not available with “Language” and “Country
Code”.
7
1. Press the or key to select a language.
Your screen should now be displayed in the language
of your choice.
Language?: WV/OK
[ENGLISH]
ABC - YZ keys
(Quick Dial Keys 01-09 or 16-24)
Space key
(Quick Dial key 14 or 29)
Symbols key
(Quick Dial Keys 15 or 30)
Shift key
(Quick Dial key 13 or 28)
Number keys
Clear/Stop key
keys
Entering Letters
(A-Z, a-z)
Entering a Space
Entering Symbols
Switching between
uppercase and
lowercase
Entering digits
Deleting characters
Moving the cursor
Note
When entering characters, use the following
keys.
2.Insert the line cable into the socket labeled
“Line”.
3.
Connect the other end to your telephone line.
Continued on next page
EN GB H555-8381A

10
5.Enter the country code. You can confirm
country codes on the "Country Code List".
Caution
Make sure you enter the proper country code.
The machine might function improperly if you enter
the wrong code.
Country Code: /OK
[02]
Press the Clear/Stop key to erase mistaken num-
bers.
Country Code List
Code Country/Region Code Country/Region
00 France 34 Hungary
01 Germany 35 Czech
02 UK 36 Poland
03 Italy 02 Cyprus
04 Austria 06 Iceland
05 Belgium 02 Malta
06 Denmark 02 Saudi Arabia
07 Finland 18 Morocco
08 Ireland 18 Bahrain
09 Norway 02 Egypt
10 Sweden 02 Iran
11 Sw itzerland 02 Jord a n
12 Portugal 18 Kuwait
13
The Netherlands
02 Mauritius
14 Spain 02 Qatar
15 Israel 02 Oman
21 South Africa 02 UAE
32 Turkey 02 Zimbabwe
33 Greece
6.Press the OK key.
“Programmed” will flash on the display.
The following display appears.
Year: Press OK
[2002]
7. Make sure the current year setting is cor-
rect. If it is not, enter the year with the
number keys.
Year: Press OK
[2002]
8.Press the OK key.
9. Press or key to select the month.
Month: WV/OK
[March]
10
.Press the OK key.
11
.Enter the date with the number keys.
Day: Press OK
[ 1]
12
.Press the OK key.
13
.Enter the current hour setting (0 to 23)
with the number keys.
Time: Press OK
[12:00]
14
.Enter the current minute setting (00 to 59)
with the number keys.
Time: Press OK
[12:30]
2.Press the OK key. One of the following is
displayed.
A.
Year: Press OK
[2002]
B.
Country Code: WV/OK
Germany
When A is displayed: Go to step 7.
When B is displayed: You must select a
country or region name (country code) for
your machine. Go to step 3.
3.Press the or key to select a country
or region name. If your country or region
name is not displayed, select "Others".
4.Press the OK key.
A. ( If you select a country or region name
in step 3, the following display will appear.)
Year: Press OK
[2002]
B. ( If you select "Others" in step 3, the fol-
lowing display will appear.)
Country Code:
[02]
When A is displayed: Go to step 7.
When B is displayed: Go to step 5.

That’s it!
© 2006-2011
After Initial Settings
• You can check and adjust these settings using function
keys.
T
Language : See Chapter 6, "Selecting the Display
Language" in the Advanced Features manual.
TCountry Code : See Chapter 7, "Country" in the
Advanced Features manual.
TDate & Time : See Chapter 6, "Setting the Data
and Time" in the Advanced Features manual.
TLine Type : See Chapter 7, "Line Type" in the
Advanced Features manual.
TOwn Name, Fax Header, Fax Number : See
Chapter 3, "Own Name/Fax Header/Own Fax
Number" in the Basic Features manual.
Reference
See Chapter 10, “Installation” in the Advanced Features
manual for further information regarding installation.
Please keep this manual and any leftover
parts in a safe place.
20.
Press the OK key to keep the Fax Header
as it is.
“Programmed” will flash on the display.
Fax Number:
❚❚❚❚❚❚❚❚❚❚❚❚❚❚❚❚❚❚❚❚
21.
Enter your Fax Number including the
country and area code (but no pauses).
Fax Number: /OK
+4401234567890
❚❚❚❚❚❚
Note
• Enter “+” with the Symbols key.
22.
Press the OK key.
“Intial Setup Completed” will flash on the display.
The following display appears.
Ready 100% 12:30
Set Orig./Enter NO.
EN GB H555-8381A
Printed in France
15.
Press the OK key.
“Programmed” will flash on the display.
One of the following is displayed.
A.
Line Type: WV/OK
Pulse [Tone]
B.
Own Name:[ABC]
[
❚❚❚❚❚❚❚❚❚❚❚❚❚❚❚❚❚❚❚❚
]
When A is displayed: Go to step 16.
When B is displayed: Go to step 18.
16.
Press the or key to set your
machine for a tone dial line or a pulse dial
line.
Line Type: WV/OK
[Pulse] Tone
17.
Press the OK key.
“Programmed” will flash on the display.
The following display appears.
Own Name:[ABC]
[
❚❚❚❚❚❚❚❚❚❚❚❚❚❚❚❚❚❚❚❚
]
18.
Enter your office, company, or personal
name or any other appropriate identifica-
tion.
Own Name:[ABC] /OK
XYZ COMPANY
❚❚❚❚❚❚❚❚❚
Note
• The [Shift] key does not work when entering “Own
Name”. Only uppercase is available for “Own
Name”.
19.
Press the OK key.
“Programmed” will flash on the display.
The Own Name programmed in step 18 appears.
You should keep it.
Header:[ABC] /OK
XYZ COMPANY
❚❚❚❚❚❚❚❚❚
Other manuals for aficio 1013
3
Table of contents
Other Ricoh Copier manuals

Ricoh
Ricoh B003 User manual

Ricoh
Ricoh Pro C550EX User manual

Ricoh
Ricoh A217 User manual

Ricoh
Ricoh FT5035 User manual

Ricoh
Ricoh MP 401 spf User manual

Ricoh
Ricoh A163 User manual

Ricoh
Ricoh Aficio MP 171 Quick start guide

Ricoh
Ricoh Aficio SP 5200S User manual

Ricoh
Ricoh A229 User manual

Ricoh
Ricoh FT 4015 User manual

Ricoh
Ricoh FT5034 User manual

Ricoh
Ricoh AD1 User manual

Ricoh
Ricoh Gim-MF1a Quick start guide

Ricoh
Ricoh Aficio MP C3002 User manual

Ricoh
Ricoh BR-C1a Basic Manual

Ricoh
Ricoh Aficio MP 1350 User manual

Ricoh
Ricoh aficio 1013 User manual

Ricoh
Ricoh FW740 User manual

Ricoh
Ricoh 7650 User manual

Ricoh
Ricoh MPC 1500sp User manual