Ricoh Aficio MP C3000 Series Service manual

Operating Instructions
Printer Reference
Read this manual carefully before you use this machine and keep it handy for future reference. For safe and correct use, be sure to read the
Safety Information in "About This Machine" before using the machine.
Preparing the Machine
Setting Up the Printer Driver
Other Print Operations
Direct Printing from a Digital Camera (PictBridge)
Saving and Printing Using the Document Server
The Functions and Settings of the Machine
Appendix
1
2
3
4
5
6
7

Introduction
This manual contains detailed instructions and notes on the operation and use of this machine. For your
safety and benefit, read this manual carefully before using the machine. Keep this manual in a handy
place for quick reference.
Important
Contents of this manual are subject to change without prior notice. In no event will the company be li-
able for direct, indirect, special, incidental, or consequential damages as a result of handling or oper-
ating the machine.
Do not copy or print any item for which reproduction is prohibited by law.
Copying or printing the following items is generally prohibited by local law:
bank notes, revenue stamps, bonds, stock certificates, bank drafts, checks, passports, driver's licenses.
The preceding list is meant as a guide only and is not inclusive. We assume no responsibility for its
completeness or accuracy. If you have any questions concerning the legality of copying or printing cer-
tain items, consult with your legal advisor.
Caution:
Use of controls or adjustments or performance of procedures other than those specified in this manual
might result in hazardous radiation exposure.
Two kinds of size notation are employed in this manual. With this machine refer to the inch version.
Trademarks
Microsoft®, Windows®and Windows NT®are registered trademarks of Microsoft Corporation in the
United States and/or other countries.
Adobe®, PostScript®, Acrobat®, PageMaker®and Adobe Type Manager are registered trademarks of
Adobe Systems Incorporated.
PCL®is a registered trademark of Hewlett-Packard Company.
Apple, AppleTalk, EtherTalk, Macintosh, Mac OS and True Type are registered trademarks of Apple
Computer, Inc.
BonjourTM is a trademark of Apple Computer, Inc.
IPS-PRINTTM Printer Language Emulation Copyright©2000, Oak Technology, Inc., All Rights Reserved.
UNIX is a registered trademark in the United States and other countries, licensed exclusively through
X/Open Company Limited.
The Bluetooth®word mark and logos are owned by the Bluetooth SIG, Inc. and any use of such marks
by Ricoh Company, Ltd. is under license.
NetWare is a registered trademark of Novell, Inc.
PictBridge is a trademark.
Other product names used herein are for identification purposes only and might be trademarks of their
respective companies. We disclaim any and all rights to those marks.
The proper names of the Windows operating systems are as follows:
• The product name of Windows®95 is Microsoft®Windows®95
• The product name of Windows®98 is Microsoft®Windows®98
• The product name of Windows®Me is Microsoft® Windows® Millennium Edition (Windows Me)
• The product name of Windows®2000 are as follows:
Microsoft®Windows®2000 Professional
Microsoft®Windows®2000 Server
Microsoft®Windows®2000 Advanced Server
• The product name of Windows®XP are as follows:
Microsoft®Windows®XP Home Edition
Microsoft®Windows®XP Professional
• The product names of Windows ServerTM 2003 are as follows:
Microsoft®Windows ServerTM 2003 Standard Edition
Microsoft®Windows ServerTM 2003 Enterprise Edition
Microsoft®Windows ServerTM 2003 Web Edition
• The product name of Windows NT®4.0 are as follows:
Microsoft®Windows NT®Workstation 4.0
Microsoft®Windows NT®Server 4.0
Notes
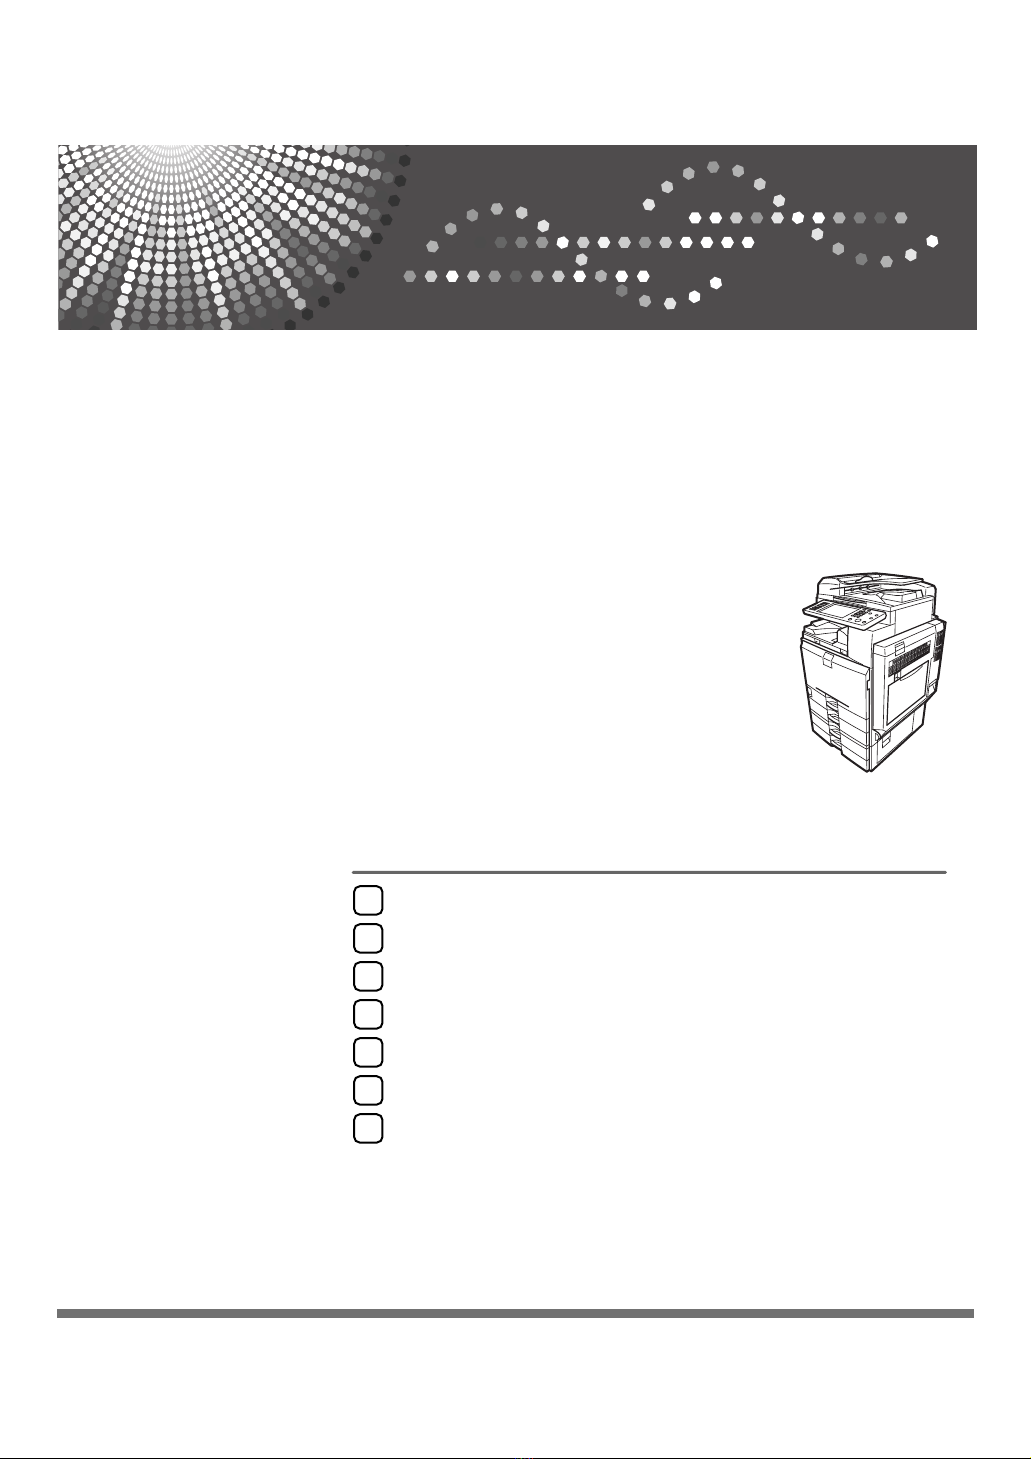
Some illustrations in this manual might be slightly different from the machine.
Certain options might not be available in some countries. For details, please contact your local dealer.
Depending on which country you are in, certain units may be optional. For details, please contact your
local dealer.

i
Manuals for This Machine
Refer to the manuals that are relevant to what you want to do with the machine.
❖About This Machine
Be sure to read the Safety Information in this manual before using the ma-
chine.
This manual provides an introduction to the functions of the machine. It also
explains the control panel, preparation procedures for using the machine,
how to enter text, and how to install the CD-ROMs provided.
❖General Settings Guide
Explains User Tools settings, and Address Book procedures such as register-
ing fax numbers, e-mail addresses, and user codes. Also refer to this manual
for explanations on how to connect the machine.
❖Trouble Shooting
Provides a guide to solving common problems, and explains how to replace
paper, toner, staples, and other consumables.
❖Security Reference
This manual is for administrators of the machine. It explains security func-
tions that the administrators can use to protect data from being tampered, or
prevent the machine from unauthorized use.
Also refer to this manual for the procedures for registering administrators, as
well as setting user and administrator authentication.
❖Copy/Document Server Reference
Explains Copier and Document Server functions and operations. Also refer to
this manual for explanations on how to place originals.
❖Facsimile Reference
Explains Facsimile functions and operations.
❖Printer Reference
Explains Printer functions and operations.
❖Scanner Reference
Explains Scanner functions and operations.
❖Network Guide
Explains how to configure and operate the machine in a network environ-
ment, and use the software provided.
This manual covers all models, and includes descriptions of functions and
settings that might not be available on this machine. Images, illustrations, and
information about operating systems that are supported might also differ
slightly from those of this machine.

ii
❖Other manuals
• Manuals for This Machine
•SafetyInformation
• Quick Reference Copy Guide
• Quick Reference Fax Guide
• Quick Reference Printer Guide
• Quick Reference Scanner Guide
• PostScript3 Supplement
•UNIXSupplement
• Manuals for DeskTopBinder Lite
• DeskTopBinder Lite Setup Guide
• DeskTopBinder Introduction Guide
•AutoDocumentLinkGuide
Note
❒Manuals provided are specific to machine types.
❒Adobe Acrobat Reader/Adobe Reader must be installed in order to view the
manuals as PDF files.
❒UNIX Supplement provides information about setting up and using the ma-
chine as a printer in a UNIX environment. For UNIX printing information,
visit our web site or consult your authorized dealer.

iii
TABLE OF CONTENTS
Manuals for This Machine ......................................................................................i
How to Read This Manual .....................................................................................1
Symbols .....................................................................................................................1
Display Panel..........................................................................................................2
Initial Display ..............................................................................................................2
Simplified Display.......................................................................................................3
Job List ...................................................................................................................4
Job List screen ...........................................................................................................4
Checking jobs in the print queue................................................................................5
Changing the order of jobs.........................................................................................6
Holding print jobs .......................................................................................................6
Deleting jobs ..............................................................................................................7
Checking Job History .................................................................................................7
Printer Features Menu ...........................................................................................8
Setting Paper on the Bypass Tray......................................................................12
Setting the Paper Size Using the Control Panel ......................................................14
Setting Custom Size Paper Using the Control Panel ...............................................15
Setting Thick Paper or OHP Transparencies Using the Control Panel ....................16
1. Preparing the Machine
Confirming the Connection Method...................................................................19
Network Connection.................................................................................................19
Local Connection .....................................................................................................22
Installing the Printer Driver.................................................................................23
Quick Install..............................................................................................................23
Installing the Printer Driver for the Selected Port .....................................................25
Using as a Windows Network Printer ................................................................36
Using as a NetWare Print Server / Remote Printer ...........................................38
Form Feed................................................................................................................40
Banner Page ............................................................................................................40
Printing after Resetting the Printer ...........................................................................40
Installing the Printer Driver Using USB .............................................................41
Windows Me - USB ..................................................................................................41
Windows 2000 - USB ...............................................................................................43
Windows XP, Windows Server 2003 - USB .............................................................44
Printing with Parallel Connection.......................................................................46
Installing the Printer Driver Using IEEE 1394 (SCSI print)...............................48
Windows 2000..........................................................................................................48
Windows XP, Windows Server 2003........................................................................50
Printing with Bluetooth Connection...................................................................52
Supported Profiles....................................................................................................52
Printing with Bluetooth Connection ..........................................................................53
Configuring Security Mode Settings.........................................................................54
Printing in the Security Mode ...................................................................................54
Making Option Settings for the Printer ..............................................................55
Conditions for Bidirectional Communication ............................................................55
If Bidirectional Communication Is Disabled..............................................................57

iv
Installing Font Manager 2000..............................................................................58
Using Adobe PageMaker Version 6.0, 6.5, or 7.0..............................................59
2. Setting Up the Printer Driver
PCL - Accessing the Printer Properties.............................................................61
Windows 95 / 98 / Me - Accessing the Printer Properties ........................................61
Windows 2000 - Accessing the Printer Properties ...................................................63
Windows XP, Windows Server 2003 - Accessing the Printer Properties .................65
Windows NT 4.0 - Accessing the Printer Properties ................................................67
RPCS - Accessing the Printer Properties..........................................................69
Windows 95 / 98 / Me - Accessing the Printer Properties ........................................69
Windows 2000 - Accessing the Printer Properties ...................................................71
Windows XP, Windows Server 2003 - Accessing the Printer Properties .................73
Windows NT 4.0 - Accessing the Printer Properties ................................................75
3. Other Print Operations
Printing a PDF File Directly.................................................................................77
Printing Method ........................................................................................................77
Using DeskTopBinder Lite .......................................................................................77
Using commands .....................................................................................................80
Unauthorized Copy Control ................................................................................81
Using [Data security for copying].................................................................................81
Using [Mask type:].....................................................................................................83
Important Notice.......................................................................................................84
Using the Print Job Function..............................................................................85
Selecting the Initial Print Job List .............................................................................88
Printing from the Print Job Screen ....................................................................89
Sample Print.............................................................................................................89
Locked Print .............................................................................................................93
Hold Print .................................................................................................................97
Stored Print ............................................................................................................100
Printing from the Jobs Per User ID Screen .....................................................104
Printing the Selected Print Job...............................................................................104
Printing All Print Jobs .............................................................................................106
Form Feed...........................................................................................................108
Printing from a Selected Tray.................................................................................108
Canceling a Print Job .............................................................................................109
Canceling a Print Job ........................................................................................110
Canceling a Print Job Using the Control Panel ......................................................110
Windows - Canceling a Print Job from the computer .............................................111
Checking the Error Log .....................................................................................112
Spool Printing ....................................................................................................113
User Defined Pages ...........................................................................................114
Printing with the Finisher..................................................................................115
Staple .....................................................................................................................116
Punch .....................................................................................................................118
Collate ....................................................................................................................120
Covers.................................................................................................................122

v
Chaptering ..........................................................................................................126
No slip sheets.........................................................................................................126
Inserting chapter slip sheets ..................................................................................127
Slip Sheet............................................................................................................128
4. Direct Printing from a Digital Camera (PictBridge)
What is PictBridge? ...........................................................................................129
PictBridge Printing ............................................................................................130
What Can Be Done on This Machine................................................................132
Index Printing .........................................................................................................133
Trimming ................................................................................................................134
Date and File Name Printing ..................................................................................134
Paper Size..............................................................................................................135
Image Print Size.....................................................................................................136
Multi-Image-Layout ................................................................................................137
Printing Quality.......................................................................................................138
Color Matching .......................................................................................................138
Paper type specification .........................................................................................139
Form Printing..........................................................................................................139
Camera Memo Printing ..........................................................................................139
Exiting PictBridge ..............................................................................................140
Other Reference Information ............................................................................141
5. Saving and Printing Using the Document Server
Accessing the Document Server......................................................................143
6. The Functions and Settings of the Machine
Mainframe ...........................................................................................................145
Functions................................................................................................................145
Interface .................................................................................................................145
List of the Setting Items ....................................................................................146
Web Image Monitor................................................................................................146
telnet ......................................................................................................................150
Settings that can be used with PostScript 3...........................................................151
7. Appendix
Specifications.....................................................................................................153
Options...................................................................................................................155
INDEX....................................................................................................... 158

vi

1
How to Read This Manual
Symbols
This manual uses the following symbols:
Indicates important safety notes.
Ignoring these notes could result in serious injury or death. Be sure to read these
notes. They can be found in the "Safety Information" section of About This Ma-
chine.
Indicates important safety notes.
Ignoring these notes could result in moderate or minor injury, or damage to the
machine or to property. Be sure to read these notes. They can be found in the
"Safety Information" section of About This Machine.
Indicates points to pay attention to when using the machine, and explanations
of likely causes of paper misfeeds, damage to originals, or loss of data. Be sure
to read these explanations.
Indicates supplementary explanations of the machine’s functions, and instruc-
tions on resolving user errors.
This symbol is located at the end of sections. It indicates where you can find fur-
ther relevant information.
[]
Indicates the names of keys that appear on the machine’s display panel.
{}
Indicates the names of keys on the machine’s control panel.

2
Display Panel
This section describes configuration using the display panel when the printer
function is selected.
Initial Display
Important
❒The machine switches to offline when you make settings when the machine
is online. After you complete the setting, the machine switches to online au-
tomatically.
❒If you make a setting when the machine is offline, it will stay offline after-
wards.
❒The function items displayed serve as selector keys. You can select or specify
an item by pressing it lightly.
❒When you select or specify an item on the display panel, it becomes highlight-
ed.
❒Keys dimmed (for example, ) cannot be used.
1. Operational status or messages
Displays current machine status, such as
“Ready”, “Offline”, and “Printing...”. In-
formation about the print job (user ID
and document name) appears in this sec-
tion.
2. [fOnline]/ [Offline]
When you press these keys, the machine
switches between online and offline.
When the machine is online, it can re-
ceive data from the computer.
When the machine is offline, it cannot re-
ceive data from the computer.
3. [Form Feed]
Press to print all the data left in the ma-
chine's input buffer.
• When the machine is online, the status
appears dimly.
• This function is not available with the
RPCS printer language.
4. [Job Reset]
Press to cancel the current print job.
1
2
3
4
5 6 7
8
AMU050S

3
If you press it when the machine is offline
and Hex Dump is selected, Hex Dump is
canceled.
5. [Print Jobs]
Press to display print jobs sent from a
computer.
6. [Error Log]
Press to display the error logs of print
jobs that sent from a computer.
7. [Spooling Job List]
Press to display spooled jobs.
8. Paper Tray Status indicators
The paper tray settings appear.
Note
❒When the power is turned on, the copier display is shown. This is a factory
default. This initial setting can be changed. See “System Settings”, General
Settings Guide.
Simplified Display
This section explains how to switch to the simplified display.
When you press {Simplified Display}, the screen changes from the initial display
to the simplified display. Letters and keys are displayed at a larger size, making
operations easier.
❖Example of a simplified display
Note
❒To return to the initial display, press {Simplified Display}again.
❒Certain keys do not appear on the simplified display.
ANV202S

4
Job List
Jobs printed using Copy, Document Server or Printer mode are temporarily
stored in the machine, and then executed in order. Using the Job List function
allows you to manage these jobs. For example, you can cancel incorrect job set-
tings or print an urgent document.
Note
❒You cannot use the Job List function when Interrupt Copy is active.
❒Documents that were printed using the Facsimile function are not displayed
in the job list.
Job List screen
This section explains displays and icons that appear in the Job List screen.
The Job List screen varies depending on whether [Job Order]is selected with
Print Priority for the System Settings. For the setting procedure, see "General
Features", General Settings Guide.
❖When [Job Order]is not selected:
The job list is displayed for each of the functions.
21
3
AMG059S

5
❖When [Job Order]is selected:
The job list is displayed for all functions in the order of print jobs.
ASwitches between job lists for each function.
BSwitches between [Current / Waiting Job List]and [Job History].
CDisplays reserved job numbers.
DDisplays the function used to print jobs.
: Job printed using copy function.
: Job printed using printer function.
: Job printed using Document Server function.
: Job printed using DeskTopBinder.
: Job printed using Web Image Monitor.
Checking jobs in the print queue
You can check the contents of jobs in the print queue.
APress [Job List].
BSelect the job you want to check.
CPress [Details], and then check the contents.
DPress [Exit].
AMG060S
2
3 4

6
Changing the order of jobs
You can change the order in which print jobs in the job list are served:
APress [Job List].
BSelect the job whose order you want to change.
CPress [Change Order].
DChange the order using [Top], [Previous], or [Next].
EPress [OK].
Holding print jobs
The machine holds jobs that are queued and currently printing.
APress [Job List].
BSelect the job(s) to hold.
CPress [Suspend Printing].

7
Deleting jobs
You can delete a job currently printing or jobs in the print queue:
APress [Job List].
BSelect the job you want to delete.
To delete multiple print jobs, select all print jobs you want to delete.
CPress [Delete Reservation].
DPress [Yes].
Checking Job History
You can view the history contents of printed jobs.
APress [Job List].
BPress [Job History].
A list of completed print jobs appears.
CPress [Details]to check the contents of the displayed jobs.
DPress [Exit].

8
Printer Features Menu
The following explains settings and meanings of functions on Printer Feature.
Printer Feature screen appears when you press the {User Tools/Counter}key. For
details, see “Printer Features”, General Settings Guide.
❖List / Test Print
❖Maintenance
Menu Description
Multiple Lists You can print the configuration page and er-
ror log.
Configuration Page You can print the machine's current configu-
ration values.
ErrorLog You can print error logs listing all errors that
occurredduring printing.
MenuList You can print a Menu Listshowing the ma-
chine's function menus.
PCL Configuration / Font Page You can print the current configuration and
installed PCLfont list.
PS Configuration / Font Page You can print the current configuration and
installed PostScriptfont list.
This menu can be selected only when the op-
tional PostScript3 unit is installed.
PDF Configuration / Font Page You can print the current configuration and
installed PDFfont list.
This menu can be selected only when the op-
tional PostScript3 unit is installed.
Hex Dump You can print in the Hex Dumpmode.
Menu Description
Menu Protect This function lets you protect menu settings
from accidentalchange. It makes it impossi-
ble to change menu settings with normal
proceduresunless you perform the required
key operations.
In a network environment, only administra-
tors can makechanges to menu settings.
List / Test Print Lock You can lock the [List / Test Print]menu.
Delete All Temporary Print Jobs You can delete all print jobs temporarily
stored in themachine.
Delete All Stored Print Jobs You can delete all print jobs stored in the ma-
chine.
4 Color Graphic Mode You can adjust the image density.

9
❖System
Menu Description
Print Error Report You can print an error report when a printer
or memoryerror occurs.
Auto Continue You can select this to enable Auto Continue.
When it is On,printing continues after a sys-
tem error occurs.
Memory Overflow Select this to have a memory overflow error
report printed.
Job Separation You can enable Job Separation.
This menu can be selected only when a fin-
isher (optional)is installed.
Auto Delete Temporary Print Jobs You can select to automatically delete print
jobs temporarilystored in the machine.
Auto Delete Stored Print Jobs You can select to automatically delete print
jobs storedin the machine.
Initial Print Job List You can set the default Printer screen when
you press [Print Jobs].
Memory Usage You can select the amount of memory used
in Font Priority or Frame Priority, according
to paper size or resolution.
Duplex You can select to have print on both sides of
each page.
Copies You can specify the number of print sets.
This settingis disabled if the number of pag-
es to print has been specified with the
printerdriver or another command.
Blank Page Print You can select whether or not to print blank
pages.
Reserved Job Waiting Time You can specify how long the machine waits
to receive aprint job before allowing other
functions such as the copier and scanner
functionsto interrupt it.
Printer Language You can specify the printer language.
Sub Paper Size You can enable the Auto Substitute Paper
Size (A4↔LT)feature.
Page Size You can select the default paper size.
Letterhead Setting You can rotate original images when printing.
When printing, original images are always
rotated by 180degrees. Therefore, output
might not be as expected when printing onto
letterheador preprinted paper requiring ori-
entation. Using this function, you can speci-
fyimage rotation.
Bypass Tray Setting Priority You can specify which of the two options,
(Printer) Driver / Command or MachineSet-
tings, has priority for determining the paper
size for thebypass tray.

10
❖Host Interface
❖PCL Menu
Edge to Edge Print You can select whether or not to print on the
entire sheet.
Default Printer Language You can set the default printer language if
the machinecannot find the printer language
automatically.
Tray Switching You can set to switch the paper tray.
Menu Description
I/O Buffer You can set the size of the I/OBuffer. Normal-
ly it is not necessary to change this setting.
I/O Timeout You can set how many seconds the machine
should wait beforeending a print job. If data
from another port usually arrives in the mid-
dleof a print job, you should increase this
timeout period.
Menu Description
Orientation You can set the page orientation.
Form Lines You can set the number of lines per page.
Font Source You can set the storage location of the de-
fault font.
Font Number You can set the ID of the default font you
want to use.
Point Size You can set the point size you want to use for
the selectedfont.
Font Pitch You can set the number of characters per
inch for the selectedfont.
Symbol Set You can specify the set of print characters for
the selectedfont. The available options are as
follows:
Courier Font You can select a courier font type.
Extend A4 Width You can extend the printing area width
when printing onA4 sheet with PCL.
Append CR to LF When set to On, a carriage return will follow
each linefeed: CR=CR, LF=CR−LF, FF=CR−FF.
Resolution You can set the print resolution in dots per
inch.
Menu Description

11
❖PS Menu (optional)
❖PDF Menu (optional)
Note
❒Some options do not appear depending optional units or selected printer lan-
guages.
❒Some options cannot be set depending on security settings.
Reference
For details, see “Printer Features”, General Settings Guide.
For more information about copier features and system settings, see Copy
Reference and General Settings Guide.
Menu Description
Data Format You can select a data format.
Resolution You can set the print resolution in dots per inch.
Color Setting You can make an RGB setting.
Color Profile You can set the color profile.
Menu Description
Change PDF Password You can set the password for the PDF file ex-
ecuting PDFDirect Print.
PDF Group Password You can set the group password already
specified with DeskTopBinderLite.
Resolution You can set the print resolution in dots per
inch.
Color Setting You can make an RGB setting.
Color Profile You can set the color profile.

12
Setting Paper on the Bypass Tray
This section gives instructions for setting paper on the bypass tray.
For details about paper size and paper type, see “Recommended Paper Size and
Types”, About This Machine.
Important
❒The following functions are disabled when printing from the bypass tray:
• Duplex/Booklet printing
•AutoTraySelect
•AutoTraySwitching
• Rotating Collate
• Staple (when the optional unit is installed)
• Punch (when the optional unit is installed)
AOpen the bypass tray.
BGently insert paper face down into the bypass tray until the beeper sounds,
and then adjust the paper guides to the paper size.
If the paper size of the paper guide and the paper do not match, skewing and
misfeeds might occur.
Do not stack paper over the limit mark, otherwise a skewed image or mis-
feeds might occur.
Open out the extender to support paper sizes larger than A4 L, 81/2×11 L.
Fan the paper to get air between the sheets to avoid a multi-sheet feed.
1. Extender 2. Paper Guide
AMF023S
AMF024S
This manual suits for next models
2
Table of contents
Other Ricoh Copier manuals

Ricoh
Ricoh Pro C720s User manual

Ricoh
Ricoh FT4220 Installation guide

Ricoh
Ricoh MP CW2201sp User manual

Ricoh
Ricoh FW770 User manual

Ricoh
Ricoh A219 User manual

Ricoh
Ricoh Di-C1.5a User manual

Ricoh
Ricoh E7 Series Service manual

Ricoh
Ricoh FW 810 User manual

Ricoh
Ricoh FT5034 User manual

Ricoh
Ricoh Pro C550EX Installation and maintenance instructions

Ricoh
Ricoh Pro C550EX User manual

Ricoh
Ricoh DSc535 User instructions

Ricoh
Ricoh FW830 User manual

Ricoh
Ricoh Aficio 480W User manual

Ricoh
Ricoh Pro 8100S User manual

Ricoh
Ricoh FT5580 User manual

Ricoh
Ricoh 7650 User manual

Ricoh
Ricoh D127 Quick start guide

Ricoh
Ricoh FW770 User manual

Ricoh
Ricoh Aficio 1075 User manual