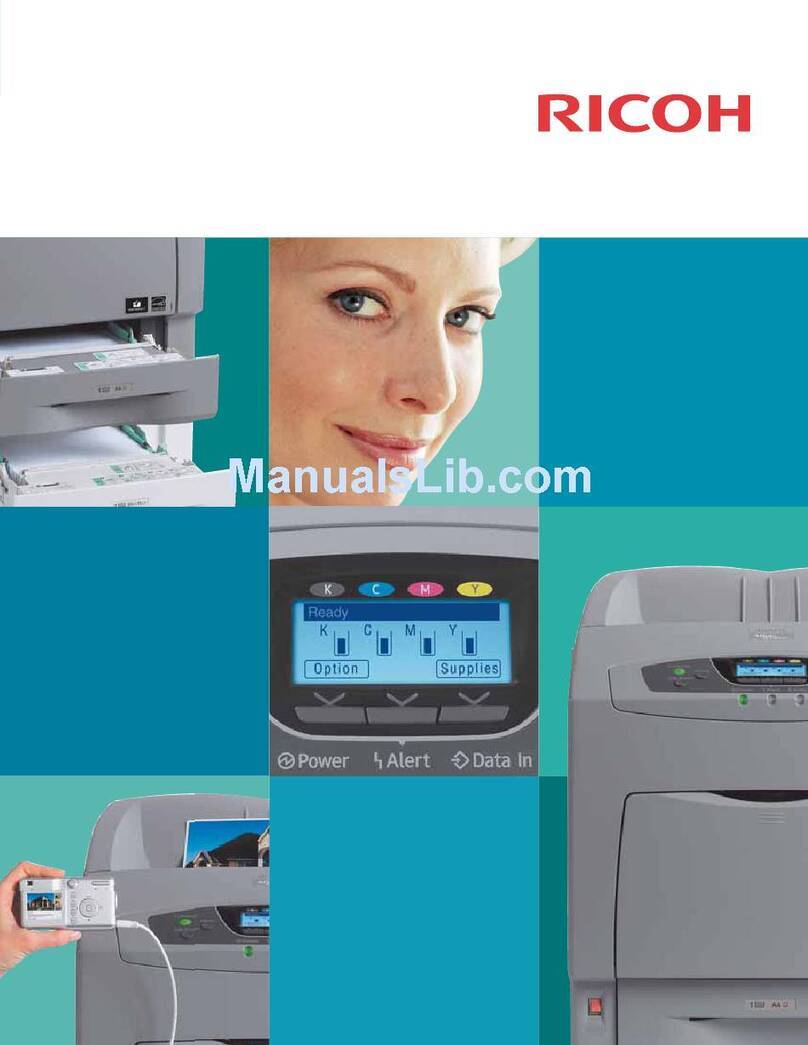
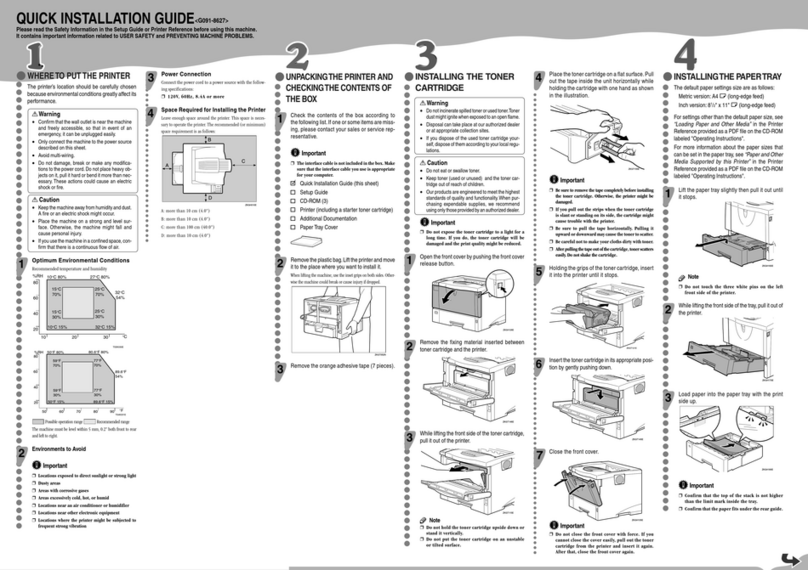
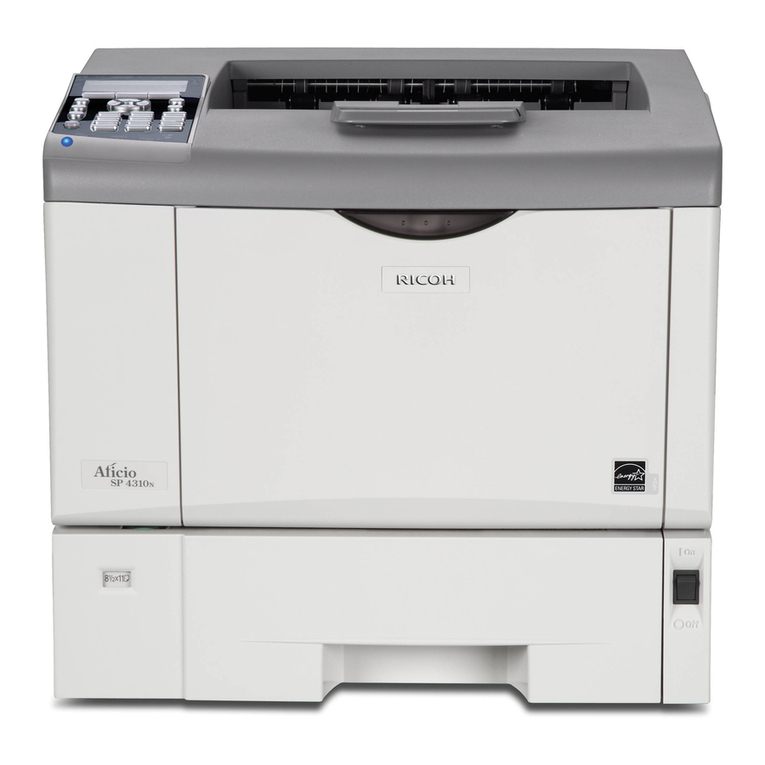
Ricoh GW Series Service manual

Technical Bulletin PAGE: 1/2
Model: General (GW Models) Date: 20-Dec-01 No.: RGene010
Subject: Series Print Mode Prepared by: K. Misugi
From: Technical Services Dept., GTS Division
Classification: Troubleshooting
Mechanical
Paper path
Part information
Electrical
Transmit/receive
Action required
Service manual revision
Retrofit information
Other ( )
In response to complaints from customers that the intervals between jobs are too long
when sent in series, a new service switch has been added to improve performance.
New service switch:
Controller SP mode bit switch 2, bit 1
Series print mode On/Off
0: Off (default setting)
1: On
This switch has been added to the following GW models:
K-P1 (Kir-P1), J-P1, A-P3 (Adonis-P3), and R-C2 (Russian-C2).
Enter the printer controller service mode, access the bit switch settings display, then
change bit 1 of bit switch 2 to “1.”
Important: Do not change any other settings. (The default setting is “0.”)
Descriptions:
Series print mode Off (default):
The machine starts to feed paper for the next job after the last sheet of the previous job
has fed out from the machine.
Series print mode On:
The machine starts to feed paper for the next job before the last sheet of the previous job
is fed out.
00000000
Bit 7 Bit 0
Change this bit to 1

Technical Bulletin PAGE: 2/2
Model: General (GW Models) Date: 20-Dec-01 No.: RGene010
Conditions for use:
For the Series Print mode to become effective, jobs must be sent from the same PC, using
the same PDL and interface (Ethernet, IEEE1284, IEEE1394).
Limitations:
Series Print mode cannot be used when:
- The above conditions are not met
- Stapling or punching is used
- A user code is used
- Color and black-and-white jobs are mixed (only for color machines)
Remarks:
When enabled, the machine handles the jobs waiting to be printed as a single job.
When the Job Reset key on the operation panel is pressed, all jobs combined by this
feature are cancelled.
Applied from the following software versions:
K-P1: Controller Ver. 1.11
J-P1: 1st mass production of P1b
A-P3: 1st mass production
U-P1: 1st mass production
R-C2: 1st mass production

T
echnical
B
ulletin
PAGE: 1/8
Model:
General RTB
Date:
8-Nov-02
No.:
RGene011
Subject:
Euro symbol not printed with PS driver
Prepared by:
T. Itoh
From:
Technical Services sec. Service Planning Dept.
Classification:
Troubleshooting
Mechanical
Paper path
Part information
Electrical
Transmit/receive
Action required
Service manual revision
Retrofit information
Other ( )
SYMPTOM
When printing with the PS driver, the Euro currency symbol is not printed out with 112 of
136 fonts, which are stored in the font ROM in GW-based products.
The following are GW-based products:
Model-K3, Model-K P2, Russian-C2, Adonis- C2, Model-A P3, Model-J P1b, Model-J CF
Model-U P1, Model-U C1, Martini-C1.
CAUSE
The Euro currency symbol was not included in the font ROM.
SOLUTION
Temporary Solution (1)
A workaround for each operating system has been previously released on the FAQ page,
and is included on pp. 5-8 below.
Temporary Solution (2)
Although the font ROM will be modified as a permanent solution (details below), before
this can be applied, the controller firmware has been modified on the following GW-based
products:
Product Firmware Version Product Firmware Version
Model-K3 1.01 (Controller) Model-J P1b 2.18 (Controller)
Model-K P2 1.06.1 (Controller) Model-J CF 1.11 (Printer Application)
Russian-C2 2.03 (Printer Application) Model-U P1 2.20 (Printer Application)
Adonis-C2 3.09 (Printer Application) Model-U C1 1.22 (Printer Application)
Model-A P3 1.08 (Controller) Martini-C1 1.01 (Printer Application)
Specifically, the Euro currency symbol has been added along with the “PS fonts download”
feature, which allows the symbol to be downloaded to machine RAM. Enable this feature
by changing the setting of Bit SW#3-0 to “1 (ON)” in SP mode (default: OFF).

T
echnical
B
ulletin
PAGE: 2/8
Model:
General RTB
Date:
8-Nov-02
No.:
RGene011
Remarks for Temporary Solution 2:
1. Switching PDL to PS takes approximate 7 to 10 seconds.
When PS fonts download is enabled, the Euro symbol is temporarily downloaded to
the machine RAM at the first PS printing job, and whenever the PDL is switched from
RPCS or PCL to PS. The total download time is approximately 7 to 10 seconds. This is
because once the data is downloaded, it will remain in the RAM until the PDL is
switched or the power turned off.
2. Printing high image area documents at 1200 dpi may cause a memory overflow error
in machines equipped only with 32MB of memory (ex. Model-K P2).
This is because the PS fonts download feature uses approximately 800kB, which can
bring the amount of available memory close to capacity with the above printing
conditions.
Workaround:
! Printing at 600dpi may prevent an overflow, even with just the 32MB memory
installed.
! Changing the memory usage setting from “Frame Priority” to “Font Priority” may
prevent an overflow.
Permanent Solution
Modification of the font ROM on the ROM DIMM or the Controller Board, from October ’02,
production or later (details differ depending on the model). Specifically, the Euro currency
symbol has been added to the 112 fonts mentioned above.
Note:
1. When the new ROM DIMM or Controller Board is installed, it is not necessary to
disable the PS fonts download feature (temporary solution).
2. An MB will be issued separately announcing the P/N change for the ROMM DIMM and
Controller Boards, and cut-in serial number.
ROM DIMM and Controller Board P/N:
Model Where the font
ROM is soldered
Current
P/N
Model Where the font
ROM is soldered
Current
P/N
G0735712 Model-J CF ROM DIMM G5706687Model-K P2 Controller
G0745712 Model-U P1 ROM DIMM G0705851
B3615117 B5295117Adonis-C2 ROM DIMM
B3625118
Model-U C1 ROM DIMM
B4635117
G0656022 G3395117Model-A P3 Controller
G0656023
Martini-C1 ROM DIMM
G3385117
B4615117 Model-K3 Controller B5165750Russian-C2 ROM DIMM
B4535117
Model-J P1b ROM DIMM G0776120

T
echnical
B
ulletin
PAGE: 3/8
Model:
General RTB
Date:
8-Nov-02
No.:
RGene011
Font Table
Euro symbol is printed correctly.
This is a symbol font, so no countermeasure is applied.
Both temporary and permanent solutions work to print out the Euro
currency symbol correctly.
AlbertusMT Helvetica Univers
AlbertusMT-Italic Helvetica-Bold Univers-Bold
AlbertusMT-Light Helvetica-BoldOblique Univers-BoldExt
AntiqueOlive-Bold Helvetica-Condensed Univers-BoldExtObl
AntiqueOlive-Compact Helvetica-Condensed-Bold Univers-BoldOblique
AntiqueOlive-Italic Helvetica-Condensed-BoldObl Univers-Condensed
AntiqueOlive-Roman Helvetica-Condensed-Oblique Univers-CondensedBold
Apple-Chancery Helvetica-Narrow Univers-CondensedBoldOblique
Arial-BoldItalicMT Helvetica-Narrow-Bold Univers-CondensedOblique
Arial-BoldMT Helvetica-Narrow-BoldOblique Univers-Extended
Arial-ItalicMT Helvetica-Narrow-Oblique Univers-ExtendedObl
ArialMT Helvetica-Oblique Univers-Light
AvantGarde-Book HoeflerText-Black Univers-LightOblique
AvantGarde-BookOblique HoeflerText-BlackItalic Univers-Oblique
AvantGarde-Demi HoeflerText-Italic Wingdings-Regular
AvantGarde-DemiOblique HoeflerText-Ornaments ZapfChancery-MediumItalic
Bodoni HoeflerText-Regular ZapfDingbats
Bodoni-Bold JoannaMT
Bodoni-BoldItalic JoannaMT-Bold
Bodoni-Italic JoannaMT-BoldItalic
Bodoni-Poster JoannaMT-Italic
Bodoni-PosterCompressed LetterGothic
Bookman-Demi LetterGothic-Bold
Bookman-DemiItalic LetterGothic-BoldSlanted
Bookman-Light LetterGothic-Slanted
Bookman-LightItalic LubalinGraph-Book
Carta LubalinGraph-BookOblique
Chicago LubalinGraph-Demi
Clarendon LubalinGraph-DemiOblique
Clarendon-Bold Marigold
Clarendon-Light MonaLisa-Recut
CooperBlack Monaco
CooperBlack-Italic NewCenturySchlbk-Bold
Copperplate-ThirtyThreeBC NewCenturySchlbk-BoldItalic
Copperplate-ThirtyTwoBC NewCenturySchlbk-Italic
Coronet-Regular NewCenturySchlbk-Roman
Courier NewYork
Courier-Bold Optima
Courier-BoldOblique Optima-Bold
Courier-Oblique Optima-BoldItalic
Eurostile Optima-Italic
Eurostile-Bold Oxford
Eurostile-BoldExtendedTwo Palatino-Bold
Eurostile-ExtendedTwo Palatino-BoldItalic
T
echnical
B
ulletin
PAGE: 4/8
Model:
General RTB
Date:
8-Nov-02
No.:
RGene011
Geneva Palatino-Italic
GillSans Palatino-Roman
GillSans-Bold StempelGaramond-Bold
GillSans-BoldCondensed StempelGaramond-BoldItalic
GillSans-BoldItalic StempelGaramond-Italic
GillSans-Condensed StempelGaramond-Roman
GillSans-ExtraBold Symbol
GillSans-Italic Tekton
GillSans-Light Times-Bold
GillSans-LightItalic Times-BoldItalic
Goudy Times-Italic
Goudy-Bold Times-Roman
Goudy-BoldItalic TimesNewRomanPS-BoldItalicMT
Goudy-ExtraBold TimesNewRomanPS-BoldMT
Goudy-Italic TimesNewRomanPS-ItalicMT
TimesNewRomanPSMT

T
echnical
B
ulletin
PAGE: 5/8
Model:
General RTB
Date:
8-Nov-02
No.:
RGene011
Workaround Announced on the FAQ Page
Question:
Euro Fonts printing problem
Answer:
If Euro Fonts can't be printed by the PS driver, the following solutions may be effective.
Solution
MacOS 9.x / 8.x
Use the AdobePS 8.8 printer driver.
Get the printer driver from the Adobe site on the web.
http://www.adobe.com/support/downloads/product.jsp?product=44&platform=Macintosh
Then select "ALL" for the "Font Inclusion" setting in the "PostScript Settings" window as follows.
Windows 95
Update Windows95 to "Euro Currency Support for Windows95".
You can get it from the following URL.
http://www.microsoft.com/windows95/downloads/contents/WURecommended/S_WUFeatured/
W95EuroPatch/Default.asp
Then the "Add Euro Currency Symbol to PostScript Fonts" check box is available.
Check "Add Euro Currency Symbol to PostScript Fonts". (Before update, the check box
doesn't work. )

T
echnical
B
ulletin
PAGE: 6/8
Model:
General RTB
Date:
8-Nov-02
No.:
RGene011
Windows95 after update
Windows 98 / ME / NT4.0 / XP
Check "Add Euro Currency Symbol to PostScript Fonts" .
Windows 98 / ME (Note: The AdobePS driver version 4.3.1 or later has "Add Euro Currency
Symbol to PostScript Fonts" in the "Fonts" tab.)

T
echnical
B
ulletin
PAGE: 7/8
Model:
General RTB
Date:
8-Nov-02
No.:
RGene011
Windows NT4.0
Windows XP

T
echnical
B
ulletin
PAGE: 8/8
Model:
General RTB
Date:
8-Nov-02
No.:
RGene011
Windows 2000
Update the printer driver to v5.5.2 or later.
You can get it from the printer driver v1.0.6 on the Adobe web site that includes the W2000 driver
v 5.5.2.
http://www.adobe.com/support/downloads/product.jsp?product=44&platform=Windows
Then the "Add Euro Currency Symbol to PostScript Fonts" check box is displayed.
Check "Add Euro Currency Symbol to PostScript Fonts".
Windows 2000 after update

T
echnical
B
ulletin
PAGE: 1/2
Model: Model U-P1 Date: 20-Dec-02 No.: RG071001
Subject: Image Skew Prepared by: H.K.
From: Technical Services sec. Service Planning Dept.
Classification: Troubleshooting
Mechanical
Paper path
Part information
Electrical
Transmit/receive
Action required
Service manual revision
Retrofit information
Other ( )
SYMPTOM
Image skew when feeding from mainframe Tray 1.
Cause
The operator does not set the side fence flush against the paper stack.
Field Action 1
Advise customers that the side fence should be set flush against the loaded paper stack,
or in cases where the customer gives approval, secure the side fences in place with two
screws.
Note: The level of skew will increase twofold if there is a 1mm gap between the paper and
side fence.
Field Action 2
As a supplement, the level of skew can be further minimized by increasing the paper
buckle with SP1-003. Try adjusting this value several times while checking the level of
skew on the printouts, keeping in mind that a higher value tends to cause Z-folds and a
lower value tends to cause paper jams.

T
echnical
B
ulletin
PAGE: 2/2
Model: Model U-P1 Date: 20-Dec-02 No.: RG071001
Field Action 3
The following sheets of Mylar have been added to the side fence from the September
production machines. For the field machines, please refer to the procedure below.
Part number Quantity Description
G0702735 2/Tray Guide Plate - Side Fence
Procedure
1. Clean the attachment surface on the
Front Side Fence (AF016097)
with alcohol.
2. Attach the Mylar (G0702735) to the
Front Side Fence as shown in the
illustration.
The following field machines
require the Mylar to be attached:
August '02 production serial numbers are as follows.
G071-17: P75268xxxxx
11 units were shipped to US market as test marketing machines (PMO).
G071-27: P75268xxxxx
11 units were shipped to RDG fields as test marketing machines (PMO).

T
echnical
B
ulletin
PAGE: 1/1
Model: General RTB Date: 27-Dec-02 No.: RGene012
Subject: GW Products - Hardware Ethernet Problem Prepared by: T. Itoh
From: Technical Services Sec. Service Planning Dept.
Classification: Troubleshooting
Mechanical
Paper path
Part information
Electrical
Transmit/receive
Action required
Service manual revision
Retrofit information
Other ( )
SYMPTOM
When the main switch is turned on, the error message “Hardware Ethernet Problem” may
be displayed under the following condition on the GW-based products.
Conditions:
• Network speed on the hub has been set to 100Mbps fixed with full duplex, and
• Length of network cable is too long (60 m or more) or the cable quality is not good
enough
CAUSE
When the main switch is turned on, the machine performs a loop-back test. If the cable
length is too long or its quality is not good enough, the damping factor for the data
transmission becomes worse, and the machine incorrectly detects an error during this test.
This happens only when the network speed is set to 100Mbps fixed with full duplex. The
PHY chip used on the controller board causes this.
SOLUTION
- Temporary Solution -
• Set the network speed on the hub to Auto-sensing,
• Use a shorter cable or a cable with a lower damping factor, or
• Disconnect the network cable and power on the printer; then, set the cable after the
printer comes to the ready condition.
- Permanent Solution -
The controller firmware will be modified to avoid the incorrect detection of this error
message. The schedule of firmware modification is as follows.
Product Type Product Firmware Modification
Cut-in Schedule
Fax Kaiser 3
Model-K P1
Model-K P2
Model-J P1b
Model-J CF
at next modification
Model-U P1e ’03 January production run
Printer
Model-A P3 ’03 March production run
Model-R C2
Model-A C2
Model-M C1
at next modification run
MFP
Model-U C1 ’03 February production run
NOTE:
Firmware will be
posted in the usual
manner when it is
released.

RG071002 Technical Bulletin PAGE: 1/1
Model: Model U-P1 Date: 20-Jan-03 No.: RG071002
Subject: Service Manual Prepared by: Y.Urushihara
From: Technical Services Sec. Service Planning Dept.
Classification: Troubleshooting
Mechanical
Paper path
Part information
Electrical
Transmit/receive
Action required
Service manual revision
Retrofit information
Other ( )
Please apply the following correction to your Model U-P1 Service Manuals.
Page 3.23
The orientation of both bearings in the illustration below should be reversed.
Note: This is an illustration correction only. The procedure itself is unchanged.
3.8.2 TRANSFER ROLLER
1.Brace [A] (Screwx1)
2.Guide [B]
Note: To remove the screws, turn the
roller unit on its pivot.
3.Transfer roller [C]
(E-ringx2, Bushing x2, Bearingx2)
[B]
[C]
[A]

Technical Bulletin PAGE: 1/9
Model: Model U-P1 Date: 3-Feb-03 No.: RG071003
Subject: Firmware History -Main Unit Controller Prepared by: H.K.
From: Technical Services Sec. Service Planning Dept.
Classification: Troubleshooting
Mechanical
Paper path
Part information
Electrical
Transmit/receive
Action required
Service manual revision
Retrofit information
Other (Firmware History)
This is to inform you of the Main Unit Controller firmware history.
Part No. Program name
G0705940 Version C.SUM Production
KG0705941K.bin
G0705940K.bin V2.24 6E31
EF54 February Production ‘03
JV2.22.1 -January Production ‘03
H-V2.22 -November Production
‘02
G-V2.21 -Not applied to the
production machines
F-V2.20 -Not applied to the
production machines
E-V2.19 -Not applied to the
production machines
D-V2.18 -August production ‘02
Note for updating test marketing machines (PMO) firmware:
Default values of the fusing temperature (SP1-105 ), paper transfer currents (SP2-310-001 to SP2-
314-032), and paper transfer adjustment (SP2-903-01) have been reviewed. When firmware is
updated to V2.20 or later for the first time, please check these settings. If the settings are still old
ones, please set the type to 0 and press the # key in SP2-905-01 and SP1-905-01. For details,
please refer to the corrected symptom explanations in V2.20 and V2.18 (pp. 2, 3 below).
August '02 production serialnumbers:
lG071-17: P75268xxxxx
11 units were shipped to US market as the test marketing machines (PMO).
lG071-27: P75268xxxxx
11 units were shipped to RDG fields as the test marketing machines (PMO).
Note for updating main unit controller firmware:
Whenever updating main unit controller firmware from v2.22.1 or earlier to v2.24 or later, please be
sure to update the BICU firmware at the same time to v1.38 or later. The BICU firmware history is
described in RTB No. RG071004.

Technical Bulletin PAGE: 2/9
Model: Model U-P1 Date: 3-Feb-03 No.: RG071003
Main Unit Controller
Symptom Corrected Version
SP1-105-01 (Fusing Temperature): Default for idling start changed from 145 to 140
(see SP mode table below).
SP2-801-02 (AdditionalValue of the charge corona cleaning interval) has been newly
added. The cleaning interval for the additional charge corona unit has been adjusted
asshown.
[0 ~5000 / 100 / 100counts/step]
With this new SP, it is possible to adjust the interval for charge corona cleaning in the
middle of a job:
Old:
The charge corona cleaning is carried out after 600(SP2-801-1) development
counts, at job end or after 700(no adjustment)development counts (stops in the
middle of the job).
After
The charge corona cleaning is carried out after 600(SP2-801-1) development
counts, at job end or after 700(= the sum of the settings in SP2-801-1 and-2)
development counts (stops in the middle of the job).
V2.24
Hardware Ethernet Problem: For details, please refer to General RTB #RGene012.
Selecting a HDD font or DIMM font may sometimes reduceavailable memory.
Printing speed is sometimes low when printing an AutoCAD file.
V2.22.1
The m
achine may freeze during printing when using a certain application w/HDD font
or DIMM font selection.
Text characters may appear darker with a certain raster image.
Graphics objects may appear darker when available memory is low.
The wireless LAN card sometimes cannot communicate
with the printer when the
WEPkey isON.
V2.22
Translation corrections for some words in Polish and German. V2.21
lSP1-905-01 (pressure roller type) has been newly added.
0: new pressure roller type (2.1mm),1 : old pressure roller type (1.5mm)
This has been added due to the pressure roller modification applied t
o prevent fusing
jams (wrapping around the pressure roller), whereby the layer thickness o
f the
pressure roller was changed from 1.5 mm to 2.1mm from first production.
NOTE :
When updating from v2.19 or former to v2.20 or later, it is necessary to
manually enter a value of 0 into this SP mode and then press #
, which instructs the
machine to use the new data for fusing control.
lSome default values of SP1-
105 (Fusing Temperature) have been changed.
See new defaulttable below. (new settings input from August ’02production).
V2.20

Technical Bulletin PAGE: 3/9
Model: Model U-P1 Date: 3-Feb-03 No.: RG071003
Symptom Corrected Version
Default settings for SP2-944-4 and –5 have been changed to reduce the
OPC
lubrication mode cycle :
SP2-944-4: Sheets-1:[10 to 80/ 30 (old :20) / 1sheet/step]
SP2-944-5: Sheets-2:[10 to 80/ 60 (old : 40) / 1sheet/step]
Euro symbol not printed with PS driver (for details, see Gen
eral RTB No.
RGene011).
Minor bug corrections. V2.19
First release.
Display for SP5-
945 (MidThickPaper) deleted, as this setting can be performed in
User Tools.
SP1-920-1 to 3 (PFMtrDelayTime) has been newly added (seetable below).
SP2-310 to2-314: Some defaults have been changed (see table below).
Default value of SP2-903 (PaperTrans_Low) has been changed from
8.0 to 1.0 to
improve image qualityin low-temperature and low-humidity conditions:
Adjusts the paper transfer current appliedwhen themachine is at low temperature.
[0.0 ∼70.0 / 1.0 / 0.1µA/step]
lSP2-905-
01 (paper transfer roller type) has been newly added due to a shape
modification to the paper transfer roller to increase transferability (from 1st
production).
0:New papertransfer roller type (Drum type),
1: Old paper transfer roller type (straight type)
NOTE:
When updating from v2.18 to v2.19 or later, please check to see that the new
defaults for the following SPs have been applied (new default table below). If they
have not, set SP2-905-01 to a value of 0 and press #.
August production machines
have the drum type installed, therefore it is not necessary to set this to 0 on these
machines.
lDue to the paper transfer roller modification above, defaults have been chan
ged
for SP2-310-001 to SP2-314-032 (paper transfer current SPs), and SP2-903-
01
(paper transfer adjustment).
Default for SP2-943 (Discharge Threshold) has been changed from
17.0 to 15.0, and
the minimum setting changed from 13.0 to 9.0.
Note: Aswithall DFU SP modes, please do not adjust the setting.
Adjusts the threshold of discharge.DFU
[9.0 ~22.0 / 15.0 / 1.0 g/m3/step]
V2.18

Technical Bulletin PAGE: 4/9
Model: Model U-P1 Date: 3-Feb-03 No.: RG071003
SP1
New defaults(Old default)
PFMtrDelayTime
1Tray:Plain
2By-pass:Plain
Adjuststhe timing of the paper feed motor when the
registration roller feeds the paper by the fusing motor.
This adjusts the paper buckle at the registration by the
start timing of the paper feed motor. Normally, the paper
buckle is adjusted by SP1-003. It is not necessaryto
adjust in the the field. (The copierversion has aclutch to
control the timing. This adjustment is only for the printer
model.)
[0 ~50 /15 / 5/step] DFU
920
3Tray:SmallSize [0 ~50 /0/ 5/step] DFU
(Small size: A4/LT or narrower)
Fusing_Temp.
1H: Pre Sets the temperature at which the heating roller starts
idling.
[100 ~180 / 140 (145) / 1°C/step]
105*
2H: _Ready
Sets the temperature at which the heating rollerenters
theprint readycondition.
[100 ~180 / 155 (165) / 1°C/step]
3H: _Standby Sets the heating roller temperature forthe ready
(standby) condition. After the main switchhas been
turnedon, the machine enters this condition when the
heating roller temperature reaches the temperature
specified in this SP mode. When the machine is
recovering from energy saver or auto off mode,the
machinebecomes ready whenboth heat and pressure
roller temperaturesreachthe specified temperature.
Pressure roller: SP1-105-16
[100 ~180 / 160 (175) / 1°C/step]
4H: Plain/1C Sets the heating roller temperature forplain paperin
single-color mode.
[120 ~190 / 155 (160) / 1°C/step]
5H: Plain/FC Sets the heating roller temperature forplain paperin full-
color mode.
[120 ~190 / 160 (170) / 1°C/step]
6H: M-Thick/1C Sets the heating roller temperature formedium thickness
paperin single-color mode.
[120 ~190 / 165 (170) / 1°C/step]
7H: M-Thick/FC Sets the heating roller temperature formedium thickness
paperin full-color mode.
[120 ~190 / 170 (180) / 1°C/step]
8H: Thick/1C Sets the heating roller temperature forthick paperin
single-color mode .
[120 ~190 / 165 (170) / 1°C/step]
105*
9H: Thick/FC Sets the heating roller temperature forthick paperin full-
color mode.
[120 ~190 / 170 (175) / 1°C/step]

Technical Bulletin PAGE: 5/9
Model: Model U-P1 Date: 3-Feb-03 No.: RG071003
10 H:OHP/1C Sets the heating roller temperature forOHP sheets in
single-color mode.
[120 ~190 / 165 (170) / 1°C/step]
11 H: OHP/FC Sets the heating roller temperature forOHP sheets in
full-color mode.
[120 ~190 / 175 (180) / 1°C/step]
12 H: Duplex/1C Sets the heating roller temperature forduplexprinting
(both sides) in single-colormode.
[120 ~190 / 150 (155) / 1°C/step]
13 H: Duplex/FC Sets the heating roller temperature for duplex printing
(both sides) in full-color mode.
[120 ~190 / 155 (165) / 1°C/step]
14 P: Pre Sets the temperature at which the pressure roller starts
idling.
[10 (30)~100 / 10(30) / 1°C/step]
15 P: _Ready
Sets the temperature at which the pressure roller
becomes ready for printing.
[60 ~150 / 65(80) / 1°C/step]
16 P: _Standby Sets the pressure roller temperature for the ready
(standby) condition. After the main switchhas been
turnedon, the machine enters this condition when the
pressure roller temperature reaches the temperature
specified in this SP mode. When the machine is
recovering from energy saver or auto off mode,the
machinebecomes ready whenboth heat and pressure
roller temperaturesreachthe specified temperature.
Heating roller: SP1-105-3
[60~150 / 110 (120) / 1°C/step]
27 H: OFFSET+ Sets the heating roller temperature correction for when
room temperature is 15°Corlower.
[0 ~20 / 5/ 1°C/step]
28 P: OFFSET+ Sets the pressure roller temperature correction for when
room temperature is 15°Corlower.
[0 ~20 / 0/ 1°C/step]
29 H: OFFSET–Sets the heating roller temperature correction for when
room temperature is 30°C orhigher.
[0 ~20 / 5/ 1°C/step]
105*
30 P: OFFSET–Sets the pressure roller temperature correction for when
room temperature is 30°C orhigher.
[0 ~20 / 0/ 1°C/step]

Technical Bulletin PAGE: 6/9
Model: Model U-P1 Date: 3-Feb-03 No.: RG071003
SP2
New defaults(Old default)
PaperTrans_LL1 (Paper Transfer LL1)
The display indicates: Paper Weight/Side 1 or 2/Paper Width (mm)
1Nrml/1st/-297 Sets the papertransfer current when absolute humidity
AH(g/m3) is in the following range:
0 <AH ≤3.5 (this is the ‘LL1’ humidity range)
Adjust only if there are problems with insufficient transfer
in the image area of the copy for a particular paper type
or mode, or in response to field problems as directed by
technical support staff.
[0 ~70.0 /25.0 (32.0) / 0.2µA/step]
2Nrml/1st/257-296 [0 ~70.0 /25.0 (34.0) / 0.2µA/step]
3Nrml/1st/210-256 [0 ~70.0 /25.0 (36.0) / 0.2µA/step]
4Nrml/1st/129-209 [0 ~70.0 /25.0 (39.0) / 0.2µA/step]
5Nrml/1st/-128 [0 ~70.0 /25.0 (42.0 / 0.2µA/step]
6Mid/1st/-297 [0 ~70.0 /26.0 (33.0) / 0.2µA/step]
7Mid/1st/257-296 [0 ~70.0 /26.0 (35.0) / 0.2 µA/step]
8Mid/1st/210-256 [0 ~70.0 /26.0 (37.0) / 0.2 µA/step]
9Mid/1st/129-209 [0 ~70.0 /26.0 (40.0) / 0.2 µA/step]
10 Mid/1st/-128 [0 ~70.0 /26.0 (43.0) / 0.2µA/step]
11 Thk/1st/-297 [0 ~70.0 /14.0 (16.0) / 0.2µA/step]
12 Thk/1st/257-296 [0 ~70.0 /15.0 (19.0) / 0.2µA/step]
13 Thk/1st/210-256 [0 ~70.0 /16.0 (21.0) / 0.2µA/step]
14 Thk/1st/129-209 [0 ~70.0 /18.0 (24.0) / 0.2µA/step]
15 Thk/1st/-128 [0 ~70.0 /20.0 (27.0) / 0.2µA/step]
16 Nrml/2nd/-297 [0 ~70.0 /28.0 (38.0) / 0.2µA/step]
17 Nrml/2nd/257-296 [0 ~70.0 /30.0 (40.0)/ 0.2µA/step]
18 Nrml/2nd/210-256 [0 ~70.0 /28.0 (42.0) / 0.2µA/step]
19 Nrml/2nd/129-209 [0 ~70.0 /28.0(43.0) / 0.2µA/step]
20 Nrml/2nd/-128 [0 ~70.0 /28.0 (44.0) / 0.2µA/step]
21 Mid/2nd/-297 [0 ~70.0 /29.0 (39.0) / 0.2µA/step]
22 Mid/2nd/257-296 [0 ~70.0 /31.0 (41.0) / 0.2µA/step]
23 Mid/2nd/210-256 [0 ~70.0 /29.0 (43.0) / 0.2µA/step]
24 Mid/2nd/129-209 [0 ~70.0 /29.0 (44.0) / 0.2µA/step]
25 Mid/2nd/-128 [0 ~70.0 /29.0 (45.0) / 0.2µA/step]
26 Thk/2nd/-297 [0 ~70.0 /12.0 (16.0) / 0.2µA/step]
27 Thk/2nd/257-296 [0 ~70.0 /16.0 (19.0) / 0.2µA/step]
28 Thk/2nd/210-256[0 ~70.0 /20.0 (21.0) / 0.2µA/step]
29 Thk/2nd/129-209 [0 ~70.0 /24.0 / 0.2 µA/step]
30 Thk/2nd/-128 [0 ~70.0 /28.0 (26.0) / 0.2µA/step]
31 OHP/297 [0 ~70.0 /16.0 / 0.2 µA/step]
310*
32 OHP/210 [0 ~70.0 /20.0 (22.0) / 0.2µA/step]
PaperTrans_LL2 (Paper Transfer LL2)
The display indicates: Paper Weight/Side 1 or 2/Paper Width (mm)
311*
1Nrml/1st/-297 Sets the papertransfer current when absolute humidity
AH(g/m3) is in the following range:
3.5<AH ≤8.0 (this is the ‘LL2’ humidity range)
SeeSP2-310 for comments.
[0 ~70.0 /27.0 (36.0) / 0.2µA/step]
311* 2Nrml/1st/257-296 [0 ~70.0 /28.0 (38.0) / 0.2µA/step]
Table of contents
Other Ricoh Printer manuals

Ricoh
Ricoh Aficio AP2700 User manual

Ricoh
Ricoh C231 User manual

Ricoh
Ricoh SP 5310DN User manual

Ricoh
Ricoh SP C240 Series Mounting instructions

Ricoh
Ricoh Priport JP5000 User manual

Ricoh
Ricoh Aficio SG 3110DN Manual

Ricoh
Ricoh Aficio MP 5500 User manual

Ricoh
Ricoh A850 User manual

Ricoh
Ricoh SP 330DN User manual

Ricoh
Ricoh Aficio 2105 Installation and maintenance instructions

Ricoh
Ricoh Aficio SP C811DN Series User manual

Ricoh
Ricoh SP 210 User manual

Ricoh
Ricoh Ri 1000 User manual

Ricoh
Ricoh B121 User manual

Ricoh
Ricoh DDP 70e User manual

Ricoh
Ricoh MP C6502SP Quick start guide

Ricoh
Ricoh 402850 User manual

Ricoh
Ricoh FW830 User manual

Ricoh
Ricoh C7528 Operating manual

Ricoh
Ricoh Aficio SPC222SF User manual