Riken Keiki OX-03 User manual

Personal Oxygen Gas Monitor
OX-03
Operating Manual
PT0E-1288

Safety information
The Personal Gas Monitor Model 03 series (GP-03,
OX-03, CO-03, HS-03) are a gas monitor designed to
provide continuous exposure monitoring of combustible
gas (GP-03), Oxygen (OX-03) or toxic gas (CO-03 and
HS-03) in hazardous location.
GP-03: combustible gas monitor
OX-03: oxygen monitor
CO-03, HS-03: toxic gas monitor
Specification for safety
• Ex ia IIC T4/T3 Ga
• Ex ia I Ma
• Ambient temperature range : -20°C to +50°C
Electrical data
• T4:Powered by two series AAA size alkaline
batteries, model LR03 by TOSHIBA or model
MN2400/PC2400 by DURACELL.
• T3:Powered by two series AAA size Ni-MH
batteries, model eneloop by PANASONIC.
Certificate numbers
• IECEx Certificate number : IECEx DEK 13.0092
• ATEX Certificate number : DEKRA 13 ATEX
0229
List of standards
• IEC 60079-0:2011 • EN60079-0:2012
• IEC 60079-11:2011 • EN60079-11:2012
• IEC 60079-26:2006 • EN60079-26:2007
• EN50303:2000
WARNING
• Do not replace batteries in hazardous location.
• Do not attempt to disassemble or alter the
instrument.
• Use only with two series connected Alkaline AAA
batteries, type LR03 manufactured by Toshiba or
type MN2400/PC2400 by Duracell, or use two
series connected chargeable battery type eneloop
manufactured by Panasonic.
• T4:type LR03 manufactured by Toshiba and
MN2400/PC2400 by Duracell. T3: type eneloop
manufactured by Panasonic.
INST. No. 0 0 0 0 0 0 0 0 0 0 0
AB C D E
A: Manufacturing year (0-9)
B: Manufacturing month
(1-9,XYZ for Oct.-Dec.)
C: Manufacturing lot
D: Serial number
E: Code of factory
• II 1G Ex ia IIC T4/T3 Ga
I M1 Ex ia I Ma
Phone : +81-3-3966-1113
Fax : +81-3-3558-9110 GIII
E-mail : [email protected]
Web site : http://www.rikenkeiki.co.jp

1
<Contents>
1. Outline of the Product ............................. 3
1-1. Preface ............................................. 3
1-2. Purpose of use ................................. 3
1-3. Definition of DANGER, WARNING,
CAUTION, and NOTE ...................... 4
2. Important Notices on Safety.................... 5
2-1. Danger cases ................................... 5
2-2. Warning cases .................................. 5
2-3. Precautions ...................................... 6
3. Product Components .............................. 8
3-1. Checking the package ...................... 8
3-2. Names and functions for each part... 9
4. How to Use ........................................... 11
4-1. Preparation for start-up .................. 11
4-2. Power-on and power-off ................. 12
4-3. Performing air calibration................ 13
4-4. How to detect.................................. 14
4-5. Seeing information.......................... 15
5. Operations and Functions ..................... 17
5-1. Gas alarm activation....................... 17
5-2. Fault alarm activation ..................... 19
5-3. Data logger function ....................... 19
6. Maintenance.......................................... 20
6-1. Maintenance intervals and items .... 20
6-2. User mode ...................................... 22
6-3. How to clean................................... 27
6-4. List of recommended regular
replacement parts........................... 27
6-5. Filter replacement........................... 28
7. Storage and Disposal............................ 29
7-1. Procedures to store the gas monitor
or leave it for a long time ................ 29

2
7-2. Procedures to use the gas monitor
again .............................................. 29
7-3. Disposal of products ....................... 30
8. Troubleshooting .................................... 32
9. Product Specifications........................... 33

3
1
Outline of the Product
1-1. Preface
Thank you for choosing our personal oxygen
gas monitor OX-03 (hereinafter referred to as
the gas monitor). Please check that the
model number of the product you purchased
is included in the specifications on this
manual.
This manual explains how to use the gas
monitor and its specifications. It contains
information required for using the gas
monitor properly. Not only the first-time users
but also the users who have already used the
product must read and understand the
operating manual to enhance the knowledge
and experience before using the monitor.
1-2. Purpose of use
This product is a single gas monitor used to
detect oxygen in the air.
Detection results are not intended to
guarantee life or safety in any way.

4
1-3. Definition of DANGER, WARNING,
CAUTION, and NOTE
Throughout this manual, the following
indications are used to ensure safe and
effective work.
DANGER This message indicates that improper
handling may cause serious damage
on life, health or assets.
WARNING This message indicates that improper
handling may cause serious damage
on health or assets.
CAUTION This message indicates that improper
handling may cause minor damage on
health or assets.
NOTE This message indicates advice on
handling.

5
2
Important Notices on Safety
2-1. Danger cases
2-2. Warning cases
DANGER
About explosion-proof
Do not modify or change the circuit or structure, etc.
When measuring the oxygen concentration, do not
measure anything but a mixture of air and
combustible gases or vapors and toxic gases.
When using the gas monitor in a hazardous area,
take the following countermeasures for preventing
dangers resulting from electrostatic charges.
(1) Wear anti-static clothes and conductive shoes
(anti-static work shoes).
(2) For indoor use, use the gas monitor while
standing on a conductive work floor (with a
leakage resistance of 10 MΩor less).
The gas monitor has a different explosion-proof
class depending on the battery type.
Because it has a different certificate number too,
check the battery number against the certification
plate number before use.
Replace the batteries in a non-hazardous area.
Use only the batteries specified by RIKEN KEIKI on
this gas monitor.
WARNING
Fresh air adjustment in the atmosphere
When the fresh air adjustment is performed in the
atmosphere, check the atmosphere for freshness
before beginning the adjustment. If other gases
exist, the adjustment cannot be performed
properly, thus leading to dangers when the gas
leaks.
Battery level check
Before use, check that there remains sufficient
battery power. When the gas monitor is not used for
a long period, the batteries may be exhausted.
Replace them with new ones before use.
If a low battery voltage alarm is triggered, gas
detection cannot be conducted. If the alarm is
triggered during use, turn off the power and
promptly replace the batteries.

6
2-3. Precautions
WARNING
Others
Do not throw the gas monitor into fire.
Do not wash the gas monitor in a washing machine
or ultrasonic cleaner.
Do not block the buzzer sound hole. No alarm
sound can be heard.
CAUTION
Do not use the gas monitor where it is exposed to oil,
chemicals, etc. Do not submerge the gas monitor
under water on purpose.
Do not use in a place where the gas monitor is
exposed to liquids such as oil and chemicals.
The gas monitor, being compliant to IP67, is not
water-pressure-resistant. Do not use the gas
monitor where a high water pressure is applied to it
(under a faucet, shower, etc.) or submerge it under
water for a long time. The gas monitor is
water-proof only in fresh water and running water,
and not in hot water, salt water, detergent,
chemicals, human sweat, etc.
CAUTION
Do not place the gas monitor where water or dirt
gets accumulated. The gas monitor placed at such
a location may cause malfunction due to water or
dirt that gets into the buzzer opening.
Do not use the gas monitor in a place where the
temperature drops below -20ºC or rises over 50ºC.
The operating temperature of the gas monitor is -20
to 50ºC. Do not use the gas monitor at higher
temperatures, humidities, and pressures or at lower
temperatures than the operating range.
Avoid long-term use of the gas monitor in a place
where it is exposed to direct sunlight.
Do not store the gas monitor in a sun-heated car.
Do not use a transceiver near the gas monitor.
Radio wave from a transceiver near the gas
monitor may disturb readings. If a transceiver is
used, it must be used in a place where it disturbs
nothing.
Do not use the gas monitor near a device that emits
strong electromagnetic waves (high-frequency or
high-voltage devices).
Never fail to perform a regular maintenance.
Since this is a safety unit, a regular maintenance
must be performed to ensure safety. Continuing to
use the monitor without performing a maintenance
will compromise the sensitivity of the sensor, thus
resulting in inaccurate gas detection.
7
CAUTION
Others
Pressing buttons unnecessarily may change the
settings, preventing alarms from activating
correctly. Operate the gas monitor using only the
procedures described in this operating manual.
Do not drop or give shock to the gas monitor. The
water-proof and explosion-proof properties and
accuracy may be deteriorated.
Do not pick the sensor or buzzer opening with a
sharp-pointed item. The unit may cause
malfunction or get damaged, possibly resulting in
incorrect measurements.
Do not give strong shock or vibration to the gas
monitor because it is a precision device.

8
3
Product Components
3-1. Checking the package
After unpacking, be sure to check that all the
accessories are included in the package.
OX-03 (the main unit)
Rubber protection cover (pre-attached to the
main unit)
Alligator clip (pre-attached to the main unit)
Batteries (pre-installed in the main unit)
Operating manual (this document)

9
3-2. Names and functions for each
part
<Appearance>
Buzzer sound opening
* Sounds intermittent beeps
during switch operation or
at an alarm state.
Sensor part
* Has a gas sensor at the far
end of the dust filter.
Display (LCD)
*Displays the gas
concentration and other
information.
POWER/MODE button
* Used to turn on and off the
power and enter modes.
A
IR button
* Used to perform air
calibration and
operate in modes.
A
larm lamp
*Blinks (red) at an
alarm state.
Gas name indication
* Indicates a gas to be
detected by the gas
monitor.
Rubber protection cove
r
* Protects the main unit.
Communication port
* Used for the data logger
function. For details, see "5-3.
About data logger function".

10
<Appearance>
<Display>
Battery cover
* Can be removed by
loosening the fixing
screw.
A
lligator clip
* Used to attach the gas
monitor to the top of
the pocket.
Information display
* Displays information in the display
mode, etc. It usually displays nothing.
Gas name and information
indication
* Indicates a gas to be detected
by the gas monitor and
information such as modes.
Battery level icon
* Displays the
remaining battery
power level by the
number of marks.
Operation display
* Blinks the heart mark
at a normal state.
Gas concentration display
* Displays the current detection
result.

11
4
How to Use
4-1. Preparation for start-up
Before starting gas detection, check the
followings
Check that the protective film attached on
the display from shipping is removed.
Check that the batteries are installed.
Check that the dust filter is free of dust.
Check that the gas monitor is not damaged.
<Installing the batteries>
CAUTION
Turn off the power of the gas monitor before
replacing the batteries.
Replace both of the two batteries with new ones at
one time.
Pay attention to the polarities of the batteries when
replacing them.
Use only the batteries specified by RIKEN KEIKI on
this gas monitor.
Replace the batteries in a non-hazardous area.
CAUTION
The display is covered by the protective film to
prevent scratches from shipping.
Be sure to remove this film before use.
Gas monitor with this film will not satisfy the
explosion-proof performance.
(1) Check that the power is turned off.
(2) Loosen the battery cover fixing screws
and open the cover.
(3) Remove the old batteries and install the
new ones while paying attention to the
polarities.
(4) Close the cover and fasten the fixing
screws.

12
4-2. Power-on and power-off
<How to power-on>
Press the POWER button until the buzzer
blips. After the LCD display switches as
follows, the gas monitor enters the detection
mode.
<<Start-up Procedure>>(About 15 seconds)
All lights ON->Date and time->Battery
voltage->Detection range->1st alarm
setpoint value->2nd alarm setpoint
value->Detection mode (Blip Blip)
NOTE
When powering on after leaving the gas monitor for
more than five minutes with the batteries removed,
such as when powering on for the first time or
replacing the batteries, the monitor enters the clock
adjustment mode. In this case, see "6-2-1. Time
settings" to set the date and time.
NOTE
When the communication port of this gas monitor and
another gas monitor is in the place of symmetrical, do
not turn on the power.
The status of gas monitor suddenly may move the
communication mode "TRANS PC".
In that case, turn off the power once.
After that, then turn it on again.
At that time, so as the each other communication port is
not to the place of symmetrical, be careful.
<How to power-off>
Keep the POWER button pressed until the
buzzer blips three times (Blip Blip Blip) from
the TURN - OFF display and the LCD turns
off.
* Open the clip * Open the battery cover

13
4-3. Performing air calibration
NOTE
If the air calibration fails, AIR - FAIL is displayed on the
LCD. Press the POWER/MODE button to reset the alarm
(calibration failure). When the alarm is reset, the value
before air calibration is displayed.
Item LCD Details
Detection
Mode
* Check that the gas
monitor is in the
detection mode.
AIR
AIR -
HOLD
* Keep the AIR button
pressed until the LCD
display switches from
AIR - HOLD (1st buzzer
sound, blip) to ADJ
(2nd buzzer sound,
blip) and then release
the button.
AIR
ADJ
Returns to
the
detection
mode
* After adjustment, it
automatically returns to
the detection mode.
WARNING
When the air calibration is performed in the
atmosphere, check the atmosphere for freshness
before beginning the air calibration. If other gases
exist, the adjustment cannot be performed properly,
thus leading to dangers when the gas leaks.
CAUTION
Perform air calibration under pressure and
temperature/humidity conditions close to those in
the operating environment and in fresh air.
Perform air calibration after the reading is
stabilized.
If there is a sudden temperature change of 15ºC or
more between the storage and operation locations,
turn on the power of the gas monitor, let it leave for
about 10 minutes in a similar environment to the
operation location, and perform air calibration in
fresh air before using it.

14
4-4. How to detect
After air calibration, attach the gas monitor to
the top of the breast pocket with the alligator
clip not to hide the sensor. The detection
mode is used for normal operations.
The gas monitor consists of the following modes.
NOTE
Open the clip as shown in the right
figure and attach it to the top of the
breast pocket, etc.
The clip can be turned by 45
degrees at a time.
When the gas concentration displays
less than the alarm setpoint, the
alarm can be reset by pressing any
button down.
Turn off the
monitor and take
an appropriate
action
depending on
the failure.
A
fter air calibration is successfully
completed, it automatically returns to
the detection mode.
Detection mode
A
ir calibration mode
Dis
p
la
y
mode
Gas alarm <Self-latchin
g
>
Fault alarm <Self-latchin
g
>
Press the
MODE
button
Pressing the
MODE button or
performing no
operations for
more than 20
seconds returns
the gas monitor
back to the
detection mode.
Keep the
A
IR
button

15
4-5. Seeing information
Press the MODE button to enter the display
mode. Every time the MODE button is
pressed, various pieces of information are
displayed in turn. The gas detection is
running in the background in this mode. If the
concentration of detected gas exceeds the
alarm setpoint value, the gas monitor
automatically returns to the detection mode.
Item LCD Details
Detection
Mode
MODE
MIN
Displays
minimum value
detected from
power-on to the
present.
* To clear the peak
value, press and hold
the AIR button until the
HOLD display
disappears.
MODE
MAX
Displays
maximum
value detected
from power-on
to the present.
MODE
F.S .
Displays the
full scale of
this monitor.
* When the monitor
displays the full scale,
1st and 2nd alarm
setpoint values are
displayed alternately
every time the AIR
button is pressed.
MODE
Date and
time
Displays the
internal clock
MODE
Returns to
the detection
mode.

16
NOTE
If no switch operations are performed, the monitor
automatically returns to the detection mode in about
20 seconds.
If no switch operations are performed, the backlight is
automatically turned off in about 30 seconds (except at
an alarm state).
When the gas monitor displays the full scale, hold AIR
+ MODE buttons down to perform the alarm test.

17
5
Operations and Functions
5-1. Gas alarm activation
An alarm is triggered when the concentration
of the detected gas reaches or exceeds the
alarm setpoint value <Self-latching
operations>.
<Alarm activation>
Alarm type LCD Operation
First alarm
Setting: 19.5%
Buzzer:Slow
intensity
change
Lamp/Vibration:
Slow and
intermittent
Display:
Concentration
display
blinking
Displays
WARN
Second alarm
Setting: 23.5%
Buzzer:Fast
intensity
change
Lamp/Vibration:
Fast and
intermittent
Display:
Concentration
display
blinking
Displays
ALRM
Over alarm
Setting: 40.0%
Buzzer: Fast
intensity
change
Lamp/Vibration:
Fast and
intermittent
Display:
Concentration
display
blinking
Displays
OVER

18
<How to reset the alarm>
After the concentration of detected gas
settles below the alarm setpoint value, press
any button to reset the gas alarm.
NOTE
Even if the concentration of detected gas exceeds the
alarm setpoint value, the operations of buzzer, lamp
and vibration continue (self-latching) until any button
is pressed (the alarm is reset).
This manual suits for next models
3
Table of contents
Other Riken Keiki Monitor manuals

Riken Keiki
Riken Keiki OX-07 User manual

Riken Keiki
Riken Keiki GM-600 User manual

Riken Keiki
Riken Keiki FP-300AGZS User manual

Riken Keiki
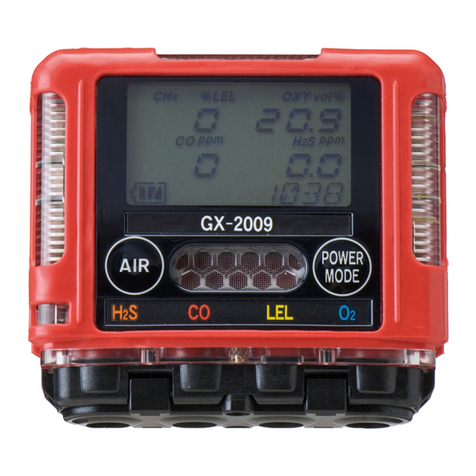
Riken Keiki GX-2009 User manual

Riken Keiki
Riken Keiki GX-2012 Series User manual

Riken Keiki
Riken Keiki SD-2500 User manual

Riken Keiki
Riken Keiki SF6 Series User manual

Riken Keiki
Riken Keiki RI-215A User manual

Riken Keiki
Riken Keiki RX-8500 User manual

Riken Keiki
Riken Keiki GX-3R User manual