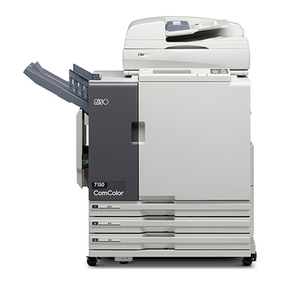
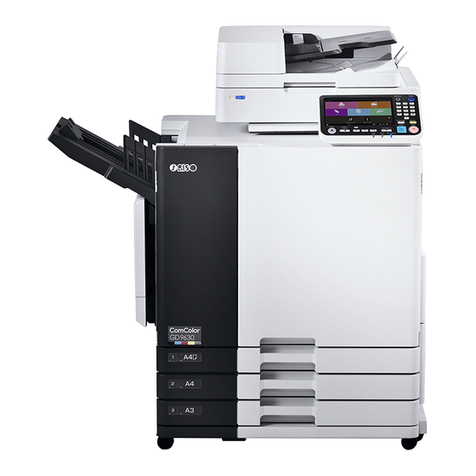
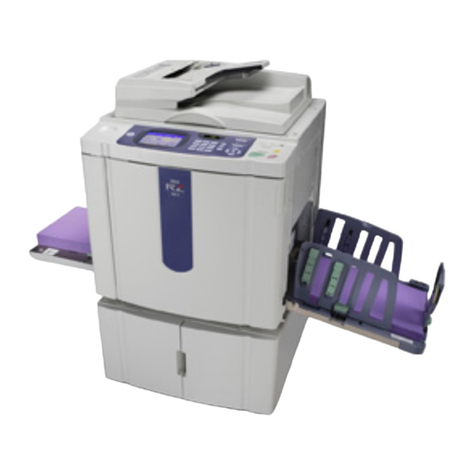
Riso Comcolor Series User manual

This guide describes total operation features and specifications.
052-36061-800
Applicable Printer models
9150/9150R/9110/9110R
7150/7150R/7110/7110R
3150/3150R/3110/3110R
2150

CAUTION
After reading this guide, keep it in handy for future reference.
The "Safety Precautions" are provided in the supplemental
Safety Information. Be sure to read through them prior to use.
Options and functions vary depending on the model.
✓: available
N/A: not available
*1 When ComColor 3150/3150R/3110/3110R is connected, some restrictions are placed on the staple, punch and booklet functions.
*2 The [Mixed size original] function in scanner mode is available only for reading.
For ComColor 3150/3150R/3110/3110R
Regular size paper whose width exceeds 216 mm (8 1/2”) is not displayed on the printer driver screen and the operation panel.
ComColor
9150/9150R/
7150/7150R
ComColor
9110/9110R/
7110/7110R
ComColor
3150/3150R
ComColor
3110/3110R
ComColor
2150
Maximum Print
Area
Printable Area
(Margin)
Connectivity of a
Multifunction
Finisher (optional)
(Booklet,
Staple/Punch,
Paper folding
functions, etc)
✓✓✓✓✓
*1
*1
FeedTray (Mixed
size original, Slip
sheet, Add cover)
✓N/A*2✓N/A*2✓
Connectivity of the
External Controller
ComColorExpress
IS1000C / IS950C
(optional)
✓✓✓✓
N/A
Connectivity of the
Perfect Binder
(optional)
✓✓
N/A N/A N/A
Connectivity of the
Wrapping Envelope
Finisher (optional)
✓N/A N/A N/A N/A
(12 3/8”× 21 9/16”) (12 3/8”× 21 9/16”) (8 1/4”× 21 7/16”) (8 1/4”× 21 7/16”) (12 3/8”× 21 9/16”)
Standard:
3 mm (1/8”)
Maximum:
1 mm (0.04”)
Standard:
3 mm (1/8”)
Maximum:
1 mm (0.04”)
Standard:
5 mm (3/16”)
Maximum:
3 mm (1/8”)
Standard:
5 mm (3/16”)
Maximum:
3 mm (1/8”)
Standard:
3 mm (1/8”)
Maximum:
1 mm (0.04”)
ComColor Series User’s Guide 09

1
ComColor Series User’s Guide 09
About This Guide
Preface
Thank you for using the ComColor Series product.
This ComColor Series is an inkjet printer that is network-compatible and performs high-speed, color printing.
You can use the various functions of this printer to print data and monitor printer operations from a computer.
And with the optional scanner, you can copy originals, save and use scanned data, and use various functions.
The following five guides are supplied with this machine.
●Basic Guide
This guide describes the basic printer, copy, and scanner operations and how to replace consumables.
Please start by reading this guide.
●User's Guide (this guide)
This guide describes handling precautions, specifications, operations and settings of each function.
Please read this guide when you want to know details about this machine.
●Administrator's Guide
This guide describes the machine settings and options (IC card reader, scanner, etc.) to be performed by the
administrator.
●Troubleshooting Guide
This guide describes the action to take when a paper jam or other problem occurs.
●Safety Information
This guide describes safety precautions and specifications.
About This Guide
(1) No part of this guide may be reproduced in whole or in part without the permission of RISO KAGAKU
CORPORATION.
(2) The contents of this manual may undergo changes without prior notice to reflect improvements in the product.
(3) RISO shall not be liable for any consequence of using this guide or the machine.
Trademark Credits
Microsoft, Windows and Windows Vista are registered trademarks of Microsoft Corporation in the U.S. and/or other
countries.
ColorSet is a trademark of Monotype Imaging Inc. registered in the U.S. Patent & Trademark Office and may be registered
in certain jurisdictions.
FeliCa is a registered trademark of Sony Corporation.
Mifare is a registered trademark of Royal Philips Electronics.
ComColor and FORCEJET are trademarks of RISO KAGAKU CORPORATION.
is a registered trademark of RISO KAGAKU CORPORATION in Japan and other countries.
All other product names and company names written in this guide are trademarks or registered trademarks of their
respective companies.

2
ComColor Series User’s Guide 09
Symbols, Notations, and Screenshots Used in This Guide
■Symbols Used in This Guide
Indicates cautions that should be noted for safe use of this machine.
Indicates important items that should be noted or are prohibited.
Indicates useful information or additional information.
■Names of Keys and Buttons
The names of hard keys on the operation panel and buttons on the touch panel screen or computer window are
indicated with square brackets [ ].
■Names of Optional Equipment
The following are the names of the optional equipment used in this guide. An individual name is used for each item of
equipment when describing its unique features.
* Optional stacking tray connected to the right side of the machine
■Illustrations Used in This Guide
The screenshots and illustrations contained in this guide may vary depending on the model of the machine, or the
usage environment, including the connected optional equipment.
Because ComColor 2150 uses black ink and red ink, the following screen displays may vary.
●Color modes on the printer driver screen and the copy mode screen
●Remaining ink indicators on each mode screen
●The general screen
●The meter display screen
Similarly on the RISO Console screen, the displays related to the inks may vary.
Name Used in This Guide Optional Equipment
Standard tray High capacity feeder
Stacking tray* Wide stacking tray
Auto-control stacking tray
High capacity stacker
Example: Press the [STOP] key.
Example: Press [ADF scan & pause]. Example: Select the [Mixed size]
check box.
Operation Panel Touch Panel Screen Computer Window

3
ComColor Series User’s Guide 09
Contents
About This Guide .....................................................................................1
Symbols, Notations, and Screenshots Used in This Guide ..............................................2
Part Names and Functions ......................................................................7
Main Unit and Optional Scanner ........................................................................ 7
Face Down Offset Stapler (optional) .................................................................. 9
High Capacity Feeder (optional) ...................................................................... 10
Stacking Tray (optional) ................................................................................... 11
High Capacity Stacker (optional) ...................................................................... 12
Multifunction Finisher (optional) ....................................................................... 13
Operation Panel ............................................................................................... 14
Touch Panel ..................................................................................................... 15
Touch Panel Operations ........................................................................17
Using the Touch Panel ..................................................................................... 17
Logging In ........................................................................................................ 17
Entering Text .................................................................................................... 19
List of Settings for Each Mode .............................................................20
Print Preparations ..................................................................................26
Turning the Power On/Off ................................................................................ 26
Loading Paper .................................................................................................. 27
Preparing the Stacking Tray (optional) ............................................................. 33
Setting the Corrugators to the High Capacity Stacker ..................................... 34
Removing Printouts from the High Capacity Stacker ....................................... 35
Placing the Stacking Tray in the Carriage ........................................................ 37
Chapter 1 Printer Driver................................................................................................1-1
Overview of Print Operations ..............................................................1-2
Printer Driver Screen .......................................................................................1-2
Procedure ........................................................................................................1-3
List of Settings .................................................................................................1-5
Basic Settings .......................................................................................1-7
[Basic] Tab ......................................................................................................1-7
[Layout] Tab ..................................................................................................1-12
[Image] Tab ...................................................................................................1-15
[Finishing] Tab ...............................................................................................1-19
[Advanced] Tab .............................................................................................1-27
[About] Tab ....................................................................................................1-32

4
ComColor Series User’s Guide 09
Environment Settings .........................................................................1-33
[Environment] Tab .........................................................................................1-33
Chapter 2 Copy..............................................................................................................2-1
Overview of Copy Operations ..............................................................2-2
Procedure ........................................................................................................2-2
List of Settings .................................................................................................2-7
Basic Settings .......................................................................................2-9
Color mode ......................................................................................................2-9
Reproduction size .........................................................................................2-10
Feed tray .......................................................................................................2-10
Original ..........................................................................................................2-13
Scanning level ...............................................................................................2-14
Duplex/Simplex .............................................................................................2-14
Direct Access/Selections entry .........................................................2-16
Direct Access entry .......................................................................................2-17
Selections entry .............................................................................................2-17
Copying Functions .............................................................................2-18
Save as default .............................................................................................2-18
Check setting ................................................................................................2-18
Save/Call setting ...........................................................................................2-19
Select layout ..................................................................................................2-22
Copy and pause ............................................................................................2-23
Additional copies ...........................................................................................2-24
Save to folder ................................................................................................2-24
Save to archive .............................................................................................2-25
ADF scan & pause ........................................................................................2-26
Scanning size ................................................................................................2-27
Mixed size original .........................................................................................2-28
Book shadow erase .......................................................................................2-28
Multi-up .........................................................................................................2-29
Stamp Page/Date ..........................................................................................2-31
Image quality .................................................................................................2-35
Gamma control ..............................................................................................2-35
Image control ................................................................................................2-36
Base color level .............................................................................................2-36
Print density ..................................................................................................2-37
Program ........................................................................................................2-37
Add cover ......................................................................................................2-42
Collate/slip sheet ...........................................................................................2-43
Auto-Rotate ...................................................................................................2-44
Staple/Punch .................................................................................................2-45
Paper folding .................................................................................................2-47
Booklet ..........................................................................................................2-48
5
ComColor Series User’s Guide 09
Output tray ....................................................................................................2-50
Paper guide control .......................................................................................2-51
Jump wing control .........................................................................................2-52
Head cleaning ...............................................................................................2-52
Front door release .........................................................................................2-53
View balance .................................................................................................2-53
Overlay ..........................................................................................................2-53
Interrupt copy ................................................................................................2-55
Chapter 3 Scanner.........................................................................................................3-1
Overview of Scan Operations ..............................................................3-2
Procedure ........................................................................................................3-2
List of Settings .................................................................................................3-8
Basic Settings .......................................................................................3-9
File format .......................................................................................................3-9
Reproduction size .........................................................................................3-10
Scanning size ................................................................................................3-10
Color mode ....................................................................................................3-10
Scanning level ...............................................................................................3-11
Duplex/Simplex .............................................................................................3-11
Scanning Functions ............................................................................3-12
Save as default .............................................................................................3-12
Check setting ................................................................................................3-12
Save/Call setting ...........................................................................................3-12
Original ..........................................................................................................3-12
Book shadow erase .......................................................................................3-13
Image size .....................................................................................................3-13
Mixed size original .........................................................................................3-13
Gamma control ..............................................................................................3-14
Image control ................................................................................................3-14
Base color level .............................................................................................3-14
PIN code .......................................................................................................3-14
Front door release .........................................................................................3-15
Chapter 4 Printer ...........................................................................................................4-1
Overview of Printer Mode Operations .................................................4-2
Procedure ........................................................................................................4-2
List of Settings .................................................................................................4-5
Managing Jobs ......................................................................................4-6
[Active] Screen ................................................................................................4-6
[Waiting] Screen ..............................................................................................4-7
[Finished] Screen ............................................................................................4-8
[Folder] Screen ................................................................................................4-9
Changing Finished Job and Folder Job Settings ..........................................4-12

6
ComColor Series User’s Guide 09
Printing a Job Held by an External System ...................................................4-14
Printer Function Settings ...................................................................4-15
Online ............................................................................................................4-15
Feed tray .......................................................................................................4-15
Head cleaning ...............................................................................................4-16
Paper guide control .......................................................................................4-16
Jump wing control .........................................................................................4-16
Front door release .........................................................................................4-16
Chapter 5 RISO Console...............................................................................................5-1
Overview of the RISO Console ............................................................5-2
Starting the RISO Console ..............................................................................5-3
[Monitoring] Menu .................................................................................5-4
[General] Screen .............................................................................................5-4
[System] Screen ..............................................................................................5-5
[User] Screen ..................................................................................................5-5
[License Info.] Screen .....................................................................................5-6
[Meter display] Menu ............................................................................5-7
[Details] Screen ...............................................................................................5-7
[Limit] Screen ..................................................................................................5-7
[Report] Screen ...............................................................................................5-8
[Printer] Menu ........................................................................................5-9
[Active] Screen ..............................................................................................5-10
[Waiting] Screen ............................................................................................5-10
[Finished] Screen ..........................................................................................5-11
[Folder] Screen ..............................................................................................5-11
[Functions] Screen ........................................................................................5-12
[Scanner] Menu ...................................................................................5-13
Chapter 6 Appendix.......................................................................................................6-1
Specifications ........................................................................................6-2
Consumables ......................................................................................6-15
Ink Cartridges ................................................................................................6-15
Features of the Multifunction Finisher ..............................................6-16
Staple Function and Orientation of the Paper ..................................6-17
Index .....................................................................................................6-18

7
ComColor Series User’s Guide 09
Part Names and Functions
Main Unit and Optional Scanner
<The ComColor 9150 is shown in this illustration.>
aFace Down Tray
The printouts are output face-down.
bOperation Panel
Use to perform operations or settings.
cFront Cover
Open when paper is jammed or when replacing an ink
cartridge.
Normally (when there are no problems such as
paper jams), this cannot be opened. When you
want to open it, turn the [Front door release] to
ON.
dStandard Tray
Load special paper (thick paper, envelopes, etc.) here.
Plain paper can also be loaded in the standard tray.
ePaper Feed Pressure Adjustment Lever
Use to adjust the paper feed pressure to suit the paper
type in the standard tray.
fStandard Tray Paper Guide
Use to prevent paper in the standard tray from becoming
misaligned.
gPaper Feed Guide Lever
Use to slide or fix the standard tray paper guide. Levers
are located on both sides of the standard tray paper
guide, in two positions.

8
ComColor Series User’s Guide 09
hMain Power Switch
Use to turn the main power ON and OFF. Usually the power
is left ON.
When the high capacity feeder is connected, use
its main power switch. For details, see "High
Capacity Feeder (optional)" (p. 10).
iScanner Socket
Use to connect the scanner power cord.
jMain Unit Socket
Use to connect the main unit power cord.
kStandard Tray Descent Button
Use to move the standard tray up or down when
replacing or adding paper to it.
lFeed Tray
Set the paper to be used for printing here. Special paper
such as thick paper cannot be set.
mUSB Port
Use to connect a USB flash drive to save scanner data or
to output print jobs saved in a USB flash drive.
Use USB flash drive compatible with Mass
Storage Class and USB 1.1 or 2.0 specifications.
nScanner (Optional)
Use to copy or scan documents that are read from the
platen glass or the ADF.
oScanner Lamp (green/red)
Lights up in green when the scanner is ready to be used.
Flashes in green when starting up or while reading, and
flashes in red when an error occurs.
pPlaten Glass
Set the original face down and aligned with the position
of the arrow in the top left.
qOriginal Cover
Pull down to cover the original when reading it on the
platen glass.
rAutomatic Document Feeder (ADF)
Up to about 100 originals can be automatically fed.
sADF Original Unit Lever
Pull this lever up to open the original unit cover when
originals are jammed.
tADF Original Guide
Slide to fit the width of the original.
uADF Original Output Tray
Documents that are read from the ADF are output here.
vScanner Power Switch
Use to turn the scanner power ON and OFF. Usually the
power is left ON.

9
Part Names and Functions
ComColor Series User’s Guide 09
Face Down Offset Stapler (optional)
If the optional face down offset stapler is connected, you can staple printed sheets, or perform the offset
output by print unit.
aStacking tray
Printouts are output face down.
The output tray slides. For normal output, align X
and Windicated by bto use the tray.
cJam Release Cover
If paper jamming occurs during paper transfer from the
printer to the face down offset stapler, open this cover
and remove the jammed sheet.
dStaple Cartridge
Pull out the staple cartridge to replace a staple, or if a
staple is jammed.
eStaple Cover
Open this cover if a staple is jammed, or to replace the
staple cartridge.
fFace Down Offset Stapler Socket
Connect the face down offset stapler power cord.
Tray setting position Paper type and output
conditions
XW
Align Xand W.Normal (other than the
following)
XW
Slide the tray and place
Wto b.
For thin paper smaller
than B5 without staple

10
ComColor Series User’s Guide 09
High Capacity Feeder (optional)
If the optional high capacity feeder is connected, you can load approximately 4,000 sheets (plain paper,
recycled paper).
aPaper Feed Pressure Adjustment Lever
Use to set the paper feed pressure to either "Standard" or
"Card" to suit the paper type in the high capacity feeder.
bStandard Tray Descent Button
Use to move the high capacity feeder up or down when
replacing or adding paper.
cPaper Feed Guide Lever
Use to slide or fix the standard tray paper guide. Levers
are located on both sides of the standard tray paper
guide, in two positions.
dFront Cover
Open this cover when you turn the main power switch to
ON/OFF or when paper jamming occurs.
eMain Power Switch
Use to turn the main power ON and OFF when the high
capacity feeder is connected. Usually the power is left
ON.
fStandard Tray Paper Guide
Use to prevent paper in the high capacity feeder from
becoming misaligned.
gEnvelope Guide
Use to print an envelope. Adjust the inclination angle to
suit the type of envelope you are using.
hEnvelope Guide Angle Adjustment Lever
Use to adjust the inclination angle of the envelope guide.
Adjust the angle of the envelope guide to any of the four
levels.
iEnvelope Guide Paper Feed Pressure
Adjustment Lever
Use to adjust the feed pressure to suit the quality of
envelope you are using.
jStandard Tray Padding Cover
Remove the cover when you load sheets smaller than A4
(LTR) or larger than A3 (LDR), or C5/DL-R envelopes.
kHigh Capacity Feeder Socket
Use to connect the high capacity feeder power cord. The
socket is located to the right of the back of the standard
tray.
If the high capacity feeder is connected, you
cannot use the standard tray.
lMachine Socket
Use to connect the machine power cord.
mPaper Transfer Cover
If paper jamming occurs, open this cover and remove the
jammed sheets.

11
Part Names and Functions
ComColor Series User’s Guide 09
Stacking Tray (optional)
The auto-control stacking tray and wide stacking tray are available as optional stacking trays.
• With the auto-control stacking tray, the paper guides adjust automatically to fit the paper size.
• With the wide stacking tray, move the
paper
guides (sides and end) to match the size of the paper for printing.
<The auto-control stacking tray is shown in this
illustration.> aPaper Arranger
Set to suit the paper type so that the output paper is
neatly aligned.
bPaper Guides Open Button
Use to spread the paper guides apart. Operation varies
depending on whether paper is present or not.
•When the machine is idle and there is no paper in the
stacking tray, the guides open to the loading position.
•When the machine is idle and there is paper in the
stacking tray, the paper guides spread apart, making it
easy to remove the paper. The paper guides that
spread apart when the button is pressed vary
depending on the "Admin. Settings".
This button is found only on the auto-control
stacking tray.
cPaper Guide (end)
dPaper Guide (side)
Use to prevent output paper in the stacking tray from
becoming misaligned.

12
ComColor Series User’s Guide 09
High Capacity Stacker (optional)
If the optional high capacity stacker is connected, you can stack approximately 4,000 sheets (plain paper,
recycled paper). You can retrieve the output printouts with the carriage.
aStacking Tray Descent Button
Press to remove printouts from the stacking tray. If you
press the stacking tray descent button, the stacking tray
lowers to the bottom (the position of the carriage). The
stacking tray stops when you press the stacking tray
descent button during lowering. If you press the button
again, the stacking tray continues lowering. The stacking
tray does not operate during printing even if you press
the stacking tray descent button. Press with the right and
left covers closed.
bRight Cover
Open this cover to remove printouts, to set a carriage, or
to remove a jammed paper.
cPaper Guide
Use to prevent output printouts from becoming
misaligned.
dCorrugator
Set to feed paper smoothly according to the paper type
and align printouts to stack neatly.
eCarriage
Set inside the high capacity stacker. Connect the
stacking tray to the carriage to move high-volume
printouts.
fStacking Tray
Printouts are output here.
gLeft Cover
If paper jamming occurs during paper transfer, open this
cover and remove the jammed paper.
hHigh Capacity Stacker Socket
Use to connect the high capacity stacker power cord. The
socket is located to the bottom of the back of the left
cover.
●Do not open the cover during printing. You
cannot print with the cover open.
●The type of carriage you can use is the
genuine carriage for the high capacity stacker.

13
Part Names and Functions
ComColor Series User’s Guide 09
Multifunction Finisher (optional)
If you connect the optional multifunction finisher, you can staple or punch the printed paper or create a
booklet.
aTop Tray
The printouts are output here when punching is
performed.
bStacking Tray
The printouts are output here when the staple or offset
output function is used.
cEject Button
Use this button to move the printouts in the booklet tray
to the position where you can easily retrieve them.
dBooklet Tray
Booklets and 2-fold printouts are output here.
eRight Cover
Open to replace the staple cartridge or if paper is
jammed.
fLeft Cover
Open to remove the jammed paper from the paper feed
path between the printer and the finisher.
gMultifunction Finisher Socket
Use to connect the multifunction finisher power code.
The socket is located on the back of the finisher.

14
ComColor Series User’s Guide 09
Operation Panel
Various operations and settings can be performed using the operation panel.
You can also identify the machine status or errors such as paper jamming from the lamp colors and whether
the lamps light up or flash.
aPower Schedule Lamp
Lights up when you set the "Power schedule".
bMain Power Lamp
Lights up when the main power is "ON".
cWake Up Key
Lights up when the machine is in the backlight OFF or sleep
status. Then, press to make the machine ready for operation.
Press to enter the power saving mode manually after a
job is finished.
dSub Power Key
Use to turn the power ON and OFF. Lights up when the
power is ON. To switch to OFF, press and hold.
eInterrupt Lamp
Lights up during copy interrupt.
fRESET Key
Press to return the settings to their default values.
gInterrupt Key
Press to temporarily stop the job that is in progress and
execute a different job.
hSTOP Key
Press to stop the job that is in progress.
iSTART Key
Press to start an operation.
jStart Lamp
Lights up when the START key is ready to be used.
kError Lamp
Flashes when an error occurs.
lClear Key
Press to clear letters or numbers that have been entered.
mData Receive Lamp
Flashes when data is being received.
nNumeric Keys
Press to enter numbers.
If you press the key, the copy/scanner mode
setting registration screen appears.
oTouch Panel
Use to perform operations or settings.
This panel also displays information such as error
messages and confirmation messages (p. 15 "Touch
Panel").
pCounter Key
Press to switch into the meter display screen. The print
and copy sheet limits as well as the number of used and
remaining sheets are displayed. You can print out
displayed information and save it in a USB flash drive.
For details on the meter display screen, see "[Meter
display] Menu"(p. 5-7) in "How to Use Useful Functions".
qFunction Keys
Use as shortcut keys for moving to the mode by
registering modes or functions. They are registered in the
"Admin. Settings".
rMODE Key
Press to switch to the mode screen.

15
Part Names and Functions
ComColor Series User’s Guide 09
Touch Panel
●Mode Screen
This is a screen to select the mode you want to
use. Press a mode button to access that mode. On
this screen, you can see the remaining amount of
ink and machine status.
You can access this screen anytime when pressing
the MODE key on the operation panel.
The buttons displayed vary depending on your
model, the optional equipment connected and
settings details.
a[Login]
Press this button to log in.
While you are logged in, this button is labeled
[Logout], and the name of the current user is
displayed next to the button.
bPrinter Status Button
This button indicates the current machine status: Idle,
Printing, Error, or Offline.
Press the button to switch to the printer mode screen.
cFORCEJETTM Link Icon
This icon indicates whether all parts required for printing
are working correctly. The icon is grayed out if accurate
color management is not possible.
dRemaining Ink Indicator
These icons indicate how much of each ink color is left.
The icons flash when less than 10% of the capacity is
left. Prepare a new ink cartridge of the color that flashes.
eMode Buttons
Press these buttons to access screens for each mode.
Lock icons in the upper left corner of a button indicate
that you must log in to access that mode.
●The mode buttons are not displayed unless the
optional equipment has been connected.
●Buttons for modes that the current user is not
authorized to use are grayed out.
f[Status]
Press this button to check General, System, or User
information.
g[Front door release]
The front cover of the machine is normally locked (except
if a problem has occurred). To open the front cover, press
this button.
●Mode Screens
Pressing a mode button on the mode screen will
switch to that mode screen.
■Printer Mode Screen
Manage or check print jobs (jobs stored in shared or
personal folders on the machine, or jobs sent from a
computer).

16
ComColor Series User’s Guide 09
■Copy Mode Screen (Optional)
Control copying on this screen.
■Scanner Mode Screen (Optional)
Control scanning on this screen.
■Status Screen
●General Screen
Enables you to check the status of the consumables,
such as paper or ink.
●System Screen
Enables you to check the model of the machine, MAC
and IP addresses and other information.
●User Screen
Enables you to check the logged in user name and
group. This screen is displayed only when a user is
logged in.
●License Info. Screen
Enables you to view information about the license of
the system in the machine.

17
ComColor Series User’s Guide 09
Touch Panel Operations
You can operate the machine by using the touch panel and keys on the operation panel. To use a button on
the touch panel, touch it with your finger. That action is referred to as "press" in step-by-step instructions in
this guide.
Using the Touch Panel
■Buttons
To select a button on the touch panel, press the
button.
"■" displayed in the lower right corner of a button
indicates that pressing the button will display another
screen to complete the settings.
If "■" is not displayed, the button activates or deactivates
the function each time it is pressed. Active functions are
displayed in orange.
Buttons that are not available under the current
conditions are grayed out. You can use these
buttons when the required conditions are met.
■Confirming or Canceling Settings
When [OK] is displayed on a screen, you must
press [OK] to save the settings. If you do not press
[OK], the settings may be discarded.
To cancel the settings you have completed, press
[Cancel].
Logging In
Lock icons in the upper left corner of mode buttons
indicate that you must log in to access those
modes.
When deactivated When activated
Lock icon

18
ComColor Series User’s Guide 09
●How to Log In
●When using an optional IC card reader, you
can log in by holding the IC card over the card
reader.
●When using external system link, you must
select the billing account when you log in to the
copy mode. Specify the account on the [Billing
account] screen.
●When using multiple external servers (LDAP
servers) to perform authentication, you can
specify the login domain.
To specify the domain when you log in, ask
your administrator.
1
Press [Login].
2
On the [Login] screen, select your
name.
To find your name, press [S] or [T] at right to
scroll through names, or press the index buttons
on the bottom of the screen to display their
corresponding names.
After you select your name, the [Password input]
screen is displayed.
3
Enter the password and press [OK].
The screen for the mode you have logged in is
displayed.
After finishing operations, be sure to press [Logout].
Ask your administrator if you cannot find your
name, or if you have forgotten the password.
●Changing Login Passwords
1
Once you are logged in, press
[Status] on the mode screen.
2
On the [User] screen, press
[Password change].
Other manuals for Comcolor Series
3
This manual suits for next models
13
Table of contents
Other Riso Printer manuals

Riso
Riso EZ Series User manual

Riso
Riso VALEZUS T2100 User manual

Riso
Riso HC5500 User manual

Riso
Riso ComColor GL Series User manual

Riso
Riso HC5500T User manual

Riso
Riso MH9 Series User manual

Riso
Riso ComColor 9150 Service manual

Riso
Riso GOCCOPRO QS200 User manual

Riso
Riso CZ180 Series User manual

Riso
Riso HC5500 User manual

Riso
Riso 9450 User manual

Riso
Riso GR2750 User manual

Riso
Riso GOCCOPRO QS2536 User manual

Riso
Riso HC5000T User manual

Riso
Riso ComColor IS900C User manual

Riso
Riso Comcolor X1 Series User manual

Riso
Riso RN SERIES User manual

Riso
Riso RZ1090 User manual

Riso
Riso ComColor FT Series User manual

Riso
Riso HC5500T User manual