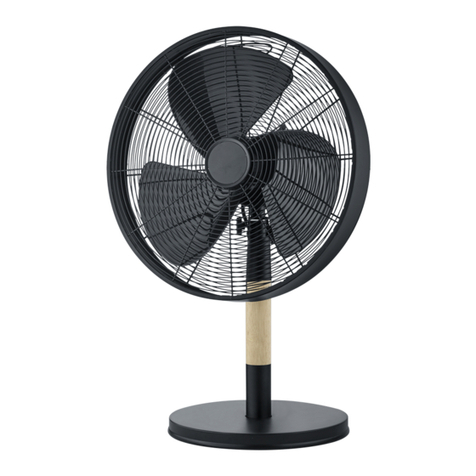
RL R036-06 User manual

Reality Leuchten GmbH | Gut Nierhof 17 | D-59757 Arnsberg | www.reality-leuchten.de
Develo ed in Germany by
Made in PRC
Art.-Nr.: R036-06
220V-240V ~ 50H , max. 70W
reality-leuchten.de/
R036-06

Das Produkt darf nicht mit dem Hausmüll entsorgt werden. Das Produkt muss
stattdessen am Ende seiner Lebensdauer zu einer Annahmestelle für das Recycling
on elektrischen und elektronischen Geräten gebracht werden. Dies gilt auch für die
ggf. im Lieferumfang befindlichen Batterien oder Akkus. Bitte erfragen Sie diese
Stelle bei Ihrer zuständigen kommunalen Verwaltung.
Das Gerät ist ausschließlich für den Betrieb in trockenen Innenräumen geeignet.
Das Gerät ist mit einem Stecker mit Schutzleiteranschluss ausgestattet
Das Gerät ist mit einem Stecker ohne Schutzleiteranschluss ausgestattet
Das Gerät ist zum Betrieb an Schutzkleinspannung bzw. Sicherheitskleinspannung ausgelegt.
Das Gerät erfügt über 2 unterschiedliche Leistungsstufen.
Das Gerät erfügt über 3 unterschiedliche Leistungsstufen.
Das Gerät erfügt über einen Wassertank zum Befeuchten der Raumluft.
Das Gerät ist mit einem Touch Display ausgestattet, was eine komfortable Auswahl der unterschiedlichen
Einstellungen ermöglicht.
Das Gerät erfügt über eine Timerfunktion
Das Gerät erfügt über eine Oszillationsfunktion, die eine schwingende Bewegung des Ventilators bei
gleichzeitiger Ventilation ermöglicht.
Der Ventilatorkopf lässt sich in geringem Umfang neigen.
Das Gerät erfügt über eine Raumbefeuchtungsfunktion, welche zu einem zusätzlichen Kühleffekt beiträgt.
Vorsicht bei langen Haaren. Diese können om Luftstrom angesaugt werden. Halten Sie ausreichend Abstand.
Legen Sie keine Gegenstände, wie z.B. Kleidungsstücke auf das Gerät.
Stecken Sie keine Gegenstände oder Finger durch die Schutzgitter.
Lösen Sie niemals den Netzstecker aus der Steckdose indem Sie an der Netzleitung ziehen.
Betreiben oder bedienen Sie das Gerät nicht mit feuchten oder nassen Händen
Stellen Sie das Gerät standsicher und in geeigneter Entfernung on Hitzequellen wie z.B. Öfen auf.
Das Gerät kann on Kindern ab 8 Jahren sowie on Personen mit reduzierten physischen, sensorischen oder mentalen
Fähigkeiten oder Mangel an Erfahrung und / oder Wissen benutzt werden, wenn sie beaufsichtigt oder bezüglich des
Gebrauchs des Gerätes unterwiesen wurden und die daraus resultierenden Gefahren erstanden haben.
Kinder dürfen nicht mit dem Gerät spielen. Reinigung und Benutzer-Wartung dürfen nicht durch Kinder ohne
Beaufsichtigung durchgeführt werden.
Sicherheitshinweise
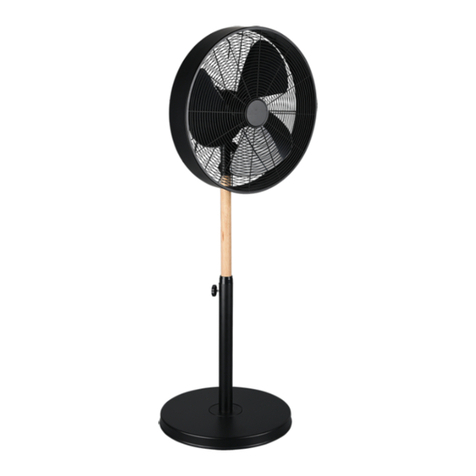
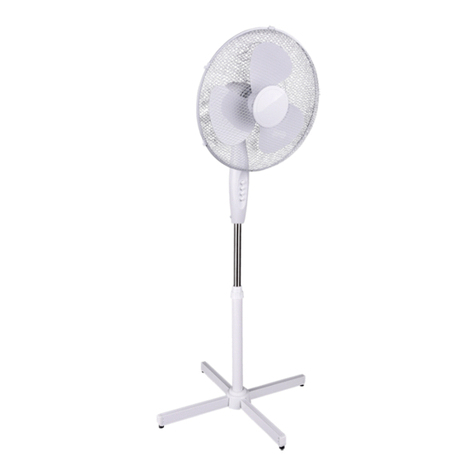
Der Ventilator verfügt über folgende Merkmale sofern diese auf der schematischen Zeichnung gezeigt werden:
DE

11. Metall erbindung
10. Flügelbefestigungsschraube & -mutter
9. Stati bein
8. Stati halterung
7. Höhen erstellknopf
6. Höhen erstellbares Rohr
5. Ständerfeststellknopf
4. Ein- / Aus- / Geschwindigkeitsknopf
3. U-Halterung
2. Ventilatorblatt
1. Ventilatorschutz
Montage
Vor der Inbetriebnahme überprüfen Sie bitte nochmals die korrekte Montage der Schutzgitter, es besteht
Verletzungsgefahr falls diese nicht richtig montiert wurden. Das Gerät darf generell nur im komplett montierten Zustand
betrieben werden.
Stellen Sie sicher, dass die angeschlossene Zuleitung frei on Beschädigungen ist. Betreiben Sie niemals ein Gerät mit
schadhafter Zuleitung. Es besteht die Gefahr eines Stromschlags.
Stellen Sie das Gerät aufrecht und standsicher auf. Achten Sie bei der Platzierung des Ventilators darauf, dass Vorhänge
oder andere Gegenstände die Luftströmung nicht behindern. Stecken Sie den Netzstecker in eine ordnungsgemäß
abgesicherte Netzsteckdose.
Inbetriebnahme
Reinigen Sie das Gerät nur im Ausgeschalteten Zustand mit gezogenem Netzstecker. Benutzten Sie hierzu ein weiches,
fusselfreies Tuch. Dieses kann ggf. leicht angefeuchtet werden. Vermeiden Sie Kontakt on elektrischen Bauteilen und
Feuchtigkeit. Lassen Sie das Gerät nach der Reinigung öllig abtrocknen be or Sie es wieder in Betrieb nehmen. Verwenden
Sie keine aggressi en Reinigungsmittel.
Pflege
Bewahren Sie alle Sicherheitshinweise und Anweisungen für die Zukunft auf.

Max. Luftgeschwindigkeit (je Stufe): 1,4 // 1,8 // 2,0 m/s
Leistungsaufnahme im Standby: 0 W
Max. Volumenstrom: 53,51 m³/min
Ventilator Schallleistungspegel (je Leistungsstufe)
Ser ice erhältnis: 0,79 (m³/dak.)/W
Leistungsaufnahme: 70 W
echnische Informationen
e.Entfernen Sie den Ständerfeststellknopf (5) aus dem Rohr unter der U-Halterung (3), stecken Sie das Rohr in die Oberseite
des höhen erstellbaren Rohres (6) und richten Sie die Löcher an den Rohren aus, setzen Sie den Ständerfeststellknopf (5)
ein und ziehen Sie ihn fest.
d. Schrauben Sie den Höhen erstellknopf (7) ab und ziehen Sie das Innenrohr nach oben, um die Höhe einzustellen. Stellen
Sie sicher, dass der Knopf ollständig angezogen ist, be or Sie fortfahren.
c. Öffnen Sie die Beine. Verbinden Sie die drei Metall erbindungen (11) mit der Flügelbefestigungsschraube und -mutter
(10) .
b. Wiederholen Sie dies mit zwei weiteren Beinen
a. Befestigen Sie den Metallteil des hölzernen Stati beins (9) am Stati halter (8), richten Sie die Löcher aus und bringen Sie
die Befestigungsschrauben an. Achten Sie auf die Ausrichtung des Beinendes. Setzen Sie die Mutter ein und ziehen Sie sie
gut an.

The product must not be disposed of with household waste. Instead, at the end of
its ser ice life the product must be taken to an acceptance point for the recycling
of electrical and electronic equipment. This also applies to the batteries and/or
rechargeable batteries (if included in the scope of deli ery). Please contact your
local authority for further information.
The de ice is only suitable for use in dry indoor areas.
The de ice is fitted with a plug with protecti e conductor terminal
The de ice is fitted with a plug without protecti e conductor terminal
The de ice is designed for operation with protecti e low oltage or safety low oltage.
The de ice has 2 different output le els.
The de ice has 3 different output le els.
The de ice has a water tank for humidifying the room air.
The de ice is equipped with a touch display, which allows easy selection of the different settings.
The de ice has a timer function
The de ice is equipped with an oscillation function that allows the fan to oscillate with simultaneous entilation.
The fan may be tilted to a small extent.
The de ice has a room humidifying function which contributes to an additional cooling effect.
Be careful with long hair. These can be sucked in by the air flow. Keep sufficient distance.
Do not place any objects, such as clothing, on the de ice.
Do not poke any objects or fingers through the protecti e screens.
Ne er disconnect the mains plug from the socket by pulling on the mains cable.
Do not operate or operate the de ice with damp or wet hands
Install the de ice securely and at a suitable distance from heat sources such as sto es.
The de ice may be used by children 8 years of age and older and by persons with reduced physical, sensory or mental
abilities or lack of experience and/or knowledge, if they ha e been super ised or instructed in the use of the de ice and
ha e understood the resulting dangers. Children must not play with the de ice. Cleaning and user maintenance must not be
carried out by children without super ision.
Safety information
he fan has the following features as long as they are shown on the schematic drawing:
EN

11. Metal link
10. Butterfly Fastening Screw & Nut
9. Tripod Leg
8. Tripod Holder
7. Height adjustable knob
6. Height adjustment pipe
5. Stand Locking Knob
4. On / Off / Speed Knob
3. U-holder
2. Fan Blade
1. Fan Guard
Assembly
Before commissioning, please check the correct installation of the protecti e screens again; there is a risk of injury if they
are not installed correctly. Generally, the de ice may only be operated when completely assembled. Make sure that the
connected supply cable is free of damage. Ne er operate a de ice with a defecti e supply cable. There is a risk of electric
shock. Position the de ice upright and stable. When positioning the fan, make sure that curtains or other objects do not
obstruct the air flow. Insert the power plug into a properly fused power socket.
Commissioning
Only clean the de ice when it is switched off and with the mains plug unplugged. Use a soft, lint-free cloth. This can be
slightly moistened if necessary. A oid contact with electrical components and moisture. After cleaning, allow the de ice to
dry completely before putting it back into operation. Do not use aggressi e cleaning agents.
Care
Keep all safety instructions and instructions for future reference.

Max. Air Velocity: 1,4 // 1,8 // 2,0 m/s
Stand By Power Consumption: 0 W
Max. Fan Flow Rate: 53,51 m³/min
Fan Sound Power Le el: 57,9 // 63,8 // 64,4 dB(A)
Ser ice Value: 0,79 (m³/dak.)/W
Power Rating: 70 W
echnical Information
e.Remo e the stand locking knob (5) from the pipe beneath the U-holder (3), insert the pipe into the top of the height
adjustable pipe (6) and align the holes on the pipes, insert the stand locking knob (5) and tighten it.
d. Unscrew the height adjustment knob (7), and pull up the inner tube to adjust the height. Ensure that the knob is fully
tightened before proceeding.
c. Open the legs. Connect the three metal links (11) with the butterfly fastening screw and nut (10).
b. Repeat with two other legs
a. Attach the metal part of the wooden tripod leg (9) to the tripod holder (8), line up the holes and fit the securing screws.
Take care of the orientation of the leg end. Fit the nut and tighten well.

Ne pas jeter le produit dans les ordures ménagères. À la fin de sa durée de ie,
il doit être apporté à un point de récupération des déchets destiné au recyclage
des appareils électriques et électroniques. C‘est également alable pour les piles
ou les accus é entuellement fournis a ec la li raison. Merci de consulter otre
administration municipale compétente pour les adresses de ces points.
L’appareil est exclusi ement réser é à un usage intérieur et au sec.
L’appareil est équipé d’un câble d’alimentation relié à la terre.
L’appareil est équipé d’un câble d’alimentation sans terre.
L’appareil est conçu pour fonctionner a ec une très basse tension de protection ou une très basse tension de
sécurité.
L’appareil dispose de deux itesses différentes.
L’appareil dispose de trois itesses différentes.
L’appareil est équipé d’un réser oir d’eau pour humidifier l’air ambiant.
L’appareil est équipé d’un panneau tactile facilitant la sélection des différents paramètres.
L’appareil est équipé d’une minuterie.
L’appareil dispose d’une fonction d’oscillation permettant au entilateur de pi oter au cours de la entilation.
La tête du entilateur est légèrement inclinable.
L’appareil peut être utilisé comme humidificateur d’air, ce qui procure un effet rafraîchissant supplémentaire.
Faites attention aux che eux longs, ils peu ent être aspirés par le flux d’air. Tenez- ous à distance suffisante.
Ne placer aucun objet (par exemple, un êtement) sur l’appareil.
N’introduisez aucun objet ou doigt au tra ers de la grille de protection.
Ne débranchez jamais l’appareil en tirant sur le câble d’alimentation.
Ne manipulez et n’utilisez pas l’appareil a ec des mains mouillées ou humides.
Installez l’appareil sur une surface stable à distance de source de chaleur (par exemple, un four).
Cet appareil peut être utilisé par des enfants de plus de 8 ans, ainsi que par des personnes aux capacités physiques,
sensorielles ou mentales réduites ou manquant d’expérience ou de connaissances, s’ils sont sur eillés ou ont reçu des
instructions au sujet de l’utilisation de l’appareil et sont donc conscients des dangers encourus.
Les enfants ne doi ent pas jouer a ec l’appareil. L’entretien et le nettoyage de la machine ne doi ent pas être effectués par
des enfants sans sur eillance.
FR
Consignes de sécurité
Le ventilateur présente les caractéristiques suivantes dans le cas où elles sont indiquées sur le schéma :

11. Liaison métallique
10. Vis et écrou de fixation papillon
9. Patte de trépied
8. Support de trépied
7. Bouton de réglage de hauteur
6. Tuyau de réglage de hauteur
5. Bouton de errouillage de socle
4. Bouton Marche / Arrêt / Vitesse
3. Support en U
2. Pale de entilateur
1. Protège- entilateur
Assemblage
A ant de mettre en marche l’appareil, euillez érifier à nou eau que la grille de protection ait été correctement installée.
Une installation incorrecte peut être une source de danger pou ant entrainer des blessures. En règle générale l’appareil ne
doit être utilisé qu’une fois complétement monté.
Assurez- ous que le câble d’alimentation ne soit pas endommagé. Ne mettez jamais en marche un appareil a ec un
système d’alimentation électrique défectueux, cela peut entrainer des risques de choc électrique.
Installez l’appareil en position erticale et stable. Lors du placement du entilateur, faites attention que des rideaux ou
d’autres objets n’entra ent pas le flux d’air. Branchez le câble d’alimentation à une prise électrique conforme aux normes
de sécurité.
Mise en service
Ne nettoyez l’appareil que lorsque celui-ci est éteint et débranché. Utilisez pour ce faire un chiffon doux et non pelucheux
que ous pou ez légèrement humidifier si nécessaire. É itez que les composants électriques soient en contact a ec de
l’humidité. Après le nettoyage, laissez sécher complètement l’appareil a ant de le remettre en marche. N'utilisez pas de
produits d’entretien agressifs.
Entretien
Conser ez toutes les consignes de sécurité et les instructions pour de futures consultations.

courant d'air maximal (par ni eau): 1,4 // 1,8 // 2,0 m/s
puissance en standby: 0 W
débit maximal: 53,51 m³/min
puissance acoustique entilateur (par ni eau): 57,9 // 63,8 // 64,4 dB(A)
rapport de ser ice: 0,79 (m³/dak.)/W
puissance: 70 W
Informations techniques
e.Retirez le bouton de errouillage de socle (5) du tuyau en-dessous du support en U (3), insérez le tuyau sur le haut du
tuyau de réglage de hauteur (6) et alignez les trous sur les tuyaux, insérez le bouton de errouillage du socle (5) et serrez-le.
d. Dé issez le bouton de réglage de hauteur (7), et tirez le tube intérieur pour régler la hauteur. Assurez- ous que le bouton
est entièrement serré a ant de continuer.
c. Ou rez les pattes. Connectez les trois liaisons métalliques (11) à l’aide de la is et écrou fixation papillon (10).
b. Répétez l’opération a ec les deux autres pattes
a. Fixez la partie métallique de la patte de trépied en bois (9) au support de trépied (8), alignez les trous et fixez les is de
fixation. Veillez à l’orientation de l’extrémité de la patte. Insérez l’écrou et serrez bien.

Het product mag niet met het huis uil worden afge oerd. Het product moet in plaats
daar an aan het einde an zijn le ensuur naar een innameplek oor recyclen an
elektrische en elektronische apparaten worden gebrcht. Dat geldt ook oor de
e entueel meegele erde batterijen of accu‘s. Informeer naar deze plaats bij uw
lokale o erheid.
Het apparaat is uitsluitend geschikt oor de werking in droge binnenruimtes.
Het apparaat is uitgerust met een stekker met aardleiding.
Het apparaat is uitgerust met een stekker zonder aardleiding.
Het apparaat is oor de werking aan een lage eiligheidsspanning oorzien.
Het apparaat beschikt o er 2 erschillende ermogenstrappen.
Het apparaat beschikt o er 3 erschillende ermogenstrappen.
Het apparaat beschikt o er een watertank oor het be ochtigen an de kamerlucht.
Het apparaat is met een Touch display uitgerust, wat een comfortabele selectie an de erschillende instellingen
mogelijk maakt.
Het apparaat beschikt o er een timerfunctie
Het apparaat beschikt o er een oscillatiefunctie die een slingerende beweging an de entilator bij een
gelijktijdige entilatie mogelijk maakt.
De entilatorkop kan in geringe mate o erhellen.
Het apparaat beschikt o er een kamerbe ochtigingsfunctie die aan een extra koeleffect bijdraagt.
Wees oorzichtig als u lang haar hebt. Het kan door de luchtstroom aangezogen worden. Houd oldoende afstand.
Leg geen oorwerpen, zoals b . kledingstukken, op het apparaat.
Steek geen oorwerpen of ingers door de beschermrooster.
Los nooit de netstekker uit het stopcontact doordat u aan het netsnoer trekt.
Gebruik of bedien het apparaat niet met ochtige of natte handen.
Installeer het apparaat stabiel en op een geschikte afstand tot hittebronnen, zoals b . o ens.
Het apparaat kan door kinderen met een leeftijd anaf 8 jaar en door personen met erminderde fysieke, zintuiglijke of
mentale capaciteiten of met een gebrek aan er aring en/of kennis gebruikt worde als ze onder toezicht staan of met het
oog op het gebruik an het apparaat onderricht werden en de daaruit oort loeiende ge aren begrepen hebben.
Kinderen mogen niet met het apparaat spelen. Reiniging en gebruikersonderhoud mogen niet door kinderen zonder
toezicht uitge oerd worden.
NL
Veiligheidsaanwijzingen
De ventilator beschikt over volgende kenmerken, voor zover deze op de schematische tekening getoond worden:

11. Metalen erbinding
10. Vleugelbe estigingsschroef en -moer
9. Statiefpoot
8. Statiefhouder
7. Verstelknop oor de hoogte
6. Buis oor de hoogteaanpassing
5. Vergrendelingsknop oor de rechtopstaande positie
4. Aan-/uit-/snelheidsknop
3. U-houder
2. Ventilatorblad
1. Ventilatorscherm
Montage
Gelie e óór de ingebruikname nogmaals de correcte montage an de beschermroosters te controleren, er bestaat ge aar
oor erwondingen indien deze niet juist gemonteerd werden. Het apparaat mag o er het algemeen alleen in de compleet
gemonteerde toestand gebruikt worden.
Vergewis u er an dat het aangesloten snoer rij an beschadigingen is. Gebruik nooit een apparaat met een defect snoer. Er
bestaat ge aar oor een elektrische schok.
Installeer het apparaat rechtop en stabiel. Let er bij de plaatsing an de entilator op dat gordijnen of andere oorwerpen
de luchtstroming niet belemmeren. Steek de netstekker in een zoals oorgeschre en be eiligd stopcontact.
Ingebruikname
Reinig het apparaat alleen in de uitgeschakelde toestand met uitgetrokken netstekker. Gebruik hier oor een zachte,
pluis rije doek. Deze kan e entueel lichtjes be ochtigd worden. Vermijd contact an elektrische componenten met
ochtigheid. Laat het apparaat na de reiniging olledig droog worden oordat u het weer in gebruik neemt. Gebruik geen
agressie e reinigingsmiddelen.
Onderhoud
Berg alle eiligheidsinstructies en aanwijzingen oor de toekomst op.

Max. luchtsnelheid (per ni eau): 1,4 // 1,8 // 2,0 m/s
Energie erbruik in standby: 0 W
Max. olumestroom: 53,51 m³/min
Ventilator geluids ermogenni eau (per ni eau): 57,9 // 63,8 // 64,4 dB(A)
Bedrijfswaarde: 0,79 (m³/dak.)/W
Energie erbruik: 70 W
echnische informatie
e.Verwijder de ergrendelingsknop oor de rechtopstaande positie (5) an de buis onder de U-houder (3), steek de buis in
de bo enkant an de in de hoogte erstelbare buis (6) en leg de openingen an de buis op dezelfde hoogte. Steek de
ergrendelingsknop oor de rechtopstaande positie (5) erin en draai hem ast.
d. Draai de erstelknop oor de hoogte (7) los en trek de binnenste buis omhoog om de lengte te erstellen. Zorg er oor
dat de knop helemaal astgedraaid is, oordat u erdergaat.
c. Open de poten. Verbind de drie metalen erbindingen (11) met de leugelbe estigingsschroef en -moer (10).
b. Doe hetzelfde met de twee andere poten
a. Be estig het metalen deel an de houten statiefpoot (9) op de statiefhouder (8), zet de openingen op dezelfde hoogte
en be estig de be estigingsschroe en. Houd rekening met de oriëntatie op het uiteinde an de poot. Be estig de moer en
draai hem goed ast.

Il prodotto non de e essere smaltito insieme ai rifiuti domestici. Al termine della sua
durata il prodotto de e essere consegnato in un punto di raccolta per il riciclaggio di
apparecchi elettrici ed elettronici. Questo ale anche per le batterie o gli accumulatori
contenuti nel olume di fornitura. La preghiamo di informarsi sui punti di raccolta
presso le autorità comunali competenti.
Il dispositi o è esclusi amente indicato all'utilizzo in ambienti interni asciutti.
Il dispositi o è dotato di una spina con allacciamento per conduttore di protezione.
Il dispositi o è dotato di una spina senza allacciamento per conduttore di protezione.
Il dispositi o è progettato per l'utilizzo a bassa e/o bassissima tensione di sicurezza.
Il dispositi o dispone di 2 di ersi li elli di potenza.
Il dispositi o dispone di 3 di ersi li elli di potenza.
Il dispositi o dispone di un serbatoio d'acqua per umidificare l'aria ambiente.
Il dispositi o è dotato di un display touch per una pratica selezione delle arie impostazioni.
Il dispositi o dispone di una funzione timer.
Il dispositi o dispone di una funzione di oscillazione che consente un mo imento oscillatorio del entilatore con
contemporanea entilazione.
È possibile inclinare la testa del entilatore in misura limitata.
Il dispositi o dispone di una funzione di umidificazione ambientale che contribuisce a creare un effetto di
raffrescamento supplementare.
Prestare attenzione ai capelli lunghi: essi possono enire aspirati dalla corrente d'aria. Mantenere una distanza sufficiente.
Non coprire il dispositi o con oggetti, quali ad es. capi di abbigliamento.
Non inserire oggetti o le dita nella grata di protezione.
Non scollegare mai la spina dalla presa tirando il ca o di rete.
Non azionare o utilizzare il dispositi o con mani umide o bagnate
Posizionare il dispositi o in una posizione stabile ed a una distanza adeguata da fonti di calore, quali ad es. forni.
Il dispositi o può essere utilizzato da bambini a partire dagli 8 anni di età e da persone con capacità fisiche, sensoriali e
mentali ridotte o pri e di esperienza e/o conoscenze se super isionati o istruiti sull'utilizzo del dispositi o e ne hanno
compreso i pericoli risultanti. I bambini non de ono giocare col dispositi o. La pulizia e la manutenzione non de ono essere
eseguite da bambini non super isionati.
Avvertenze di sicurezza
IT
Il ventilatore dispone delle seguenti caratteristiche, se illustrate nel disegno schematico:

11. Tirante in metallo
10. Vite e dado di fissaggio a farfalla
9. Gamba del treppiede
8. Supporto del treppiede
7. Manopola regolazione altezza
6. Tubo per regolazione dell'altezza
5. Manopola blocco asta
4. Manopola Acceso/Spento/Velocità
3. Supporto a U
2. Pala del entilatore
1. Protezione del entilatore
Montaggio
Prima della messa in funzione si prega di controllare nuo amente il corretto montaggio della grata di protezione, poiché
sussiste pericolo di lesioni qualora non fosse montata correttamente. Il dispositi o de e essere generalmente messo in
funzione esclusi amente se completamente montato. Accertarsi che la linea di alimentazione collegata non sia
danneggiata. Non azionare mai un dispositi o con linea di alimentazione difettosa: sussiste il pericolo di folgorazione.
Collocare il dispositi o in posizione eretta e stabile. Durante il posizionamento del entilatore, accertarsi che le tende o altri
oggetti non ostacolino la corrente d'aria. Inserire la spina in una presa adeguatamente protetta.
Messa in funzione
Pulire il dispositi o solo dopo a erlo spento ed a er scollegato la spina. A tale scopo, utilizzare un panno morbido che non
lasci pelucchi; è possibile inumidirlo leggermente, se necessario. E itare il contatto tra componenti elettriche ed umidità.
Dopo la pulizia, far asciugare completamente il dispositi o prima di rimetterlo in funzione. Non utilizzare detergenti
aggressi i.
Pulizia
Conser are tutte le a ertenze di sicurezza e le istruzioni per una consultazione futura.

Max. elocità dell'aria (per li ello): 1,4 // 1,8 // 2,0 m/s
Potenza assorbita in standby: 0 W
Max. portata olumetrica: 53,51 m³/min
Li ello potenza sonora entilatore (per li ello): 57,9 // 63,8 // 64,4 dB(A)
Valore di esercizio: 0,79 (m³/dak.)/W
Potenza assorbita: 70 W
echnical Information
e.Rimuo ere la manopola di blocco dell’asta (5) dal tubo al di sotto del supporto a U (3), inserire il tubo nella parte
superiore del tubo regolabile in altezza (6) e allineare i fori sui tubi, inserire la manopola di blocco asta (5) e serrarla.
d. S itare la manopola di regolazione dell'altezza (7) e solle are il tubo interno per regolare l'altezza. Assicurarsi che la
manopola sia completamente serrata prima di procedere.
c. Aprire le gambe. Collegare i tre tiranti metallici (11) con la ite e il dado di fissaggio a farfalla (10).
b. Ripeti con altre due gambe
a. Fissare la parte metallica della gamba del treppiede in legno (9) al supporto del treppiede (8), allineare i fori e montare le
iti di fissaggio. Prestare attenzione all'orientamento dell'estremità inferiore della gamba. Inserire il dado e serrarlo con
forza.

El producto no debe ser desechado con la basura doméstica. Por el contrario,
el producto debe entregarse en un centro de reciclado de equipos eléctricos y
electrónicos al finalizar su ida útil. Esto también es aplicable para las pilas o baterías
incluidas en la entrega. Por fa or, pregunte por este centro en su administración
local responsable.
El aparato está diseñado exclusi amente para su uso en espacios cerrados y secos.
El aparato está equipado con un enchufe con toma de tierra.
El aparato está equipado con un enchufe sin toma de tierra.
El aparato está diseñado para su uso con oltajes PELV o
SELV.
El aparato dispone de 2 elocidades.
El aparato dispone de 3 elocidades.
El aparato dispone de un depósito de agua para humedecer el ambiente de la habitación.
El aparato está equipado con una pantalla táctil, que permite seleccionar cómodamente las diferentes
configuraciones.
El aparato dispone de una función de temporizador.
El aparato dispone de una función de oscilación, que permite al entilador un mo imiento oscilatorio al mismo
tiempo que airea.
La cabeza del entilador puede inclinarse ligeramente.
El aparato dispone de una función de humidificación, que contribuye al efecto refrescante.
Cuidado con el pelo largo. El flujo de aire podría absorberlo. Mantenga una distancia prudente.
No coloque ningún objeto, como por ejemplo ropa, sobre el aparato.
No introduzca objetos o los dedos por la rejilla de seguridad.
Nunca tire del cable para desconectar el enchufe de la toma de corriente.
Nunca encienda ni utilice el aparato con las manos mojadas o húmedas.
Coloque el aparato en un lugar seguro y adecuado, alejado de cualquier fuente de calor, como por ejemplo un horno.
Este aparato puede ser utilizado por niños a partir de 8 años, así como por personas con discapacidades físicas, sensoriales
o intelectuales o por personas sin experiencia o conocimientos, siempre que se les super ise o se les enseñe cómo funciona
el aparato y siendo conscientes de los riesgos que esto conlle a. Los niños no deben jugar con este aparato. Los niños no
deben realizar la limpieza y el mantenimiento sin super isión.
Información de seguridad
ES
El ventilador dispone de estas características siempre que se muestren en el siguiente dibujo esquemático.

11. Enlace metálico
10. Tornillo de sujeción y tuerca mariposa
9. Pata del trípode
8. Soporte del trípode
7. Perilla de ajuste de altura
6. Tubo de ajuste de altura
5. Perilla de fijación del pie
4. Perilla de encendido / apagado / elocidad
3. Soporte en U
2. Aspa del entilador
1. Protector del entilador
Montaje
Antes de ponerlo en marcha asegúrese de que la rejilla de protección está adecuadamente montada, en caso contrario
existe riesgo de lesiones. En general, el aparato solo puede ponerse en marcha si está completamente montado. Asegúrese
de que el cable de alimentación no está deteriorado. Nunca utilice un aparato con el cable de alimentación deteriorado.
Existe riesgo de descargas eléctricas. Coloque el aparato sobre una superficie horizontal y segura. Asegúrese de que en la
ubicación del entilador cortinas u otros objetos no obstaculizan el flujo de aire. Conecte el enchufe a una toma de
corriente adecuada y segura.
Puesta en marcha
Asegúrese de que el aparato está apagado y desenchufado de la corriente antes de limpiarlo. Utilice para ello un paño
sua e y que no deje pelusa. Si es necesario puede estar ligeramente humedecido. E ite que los componentes eléctricos
entren en contacto con la humedad. Deje que el aparato se seque por completo después de limpiarlo y antes de ponerlo en
funcionamiento. No utilice limpiadores agresi os.
Mantenimiento
Conser e todas las indicaciones de seguridad y las instrucciones.

Max. Velocidad del aire (por grado): 1,4 // 1,8 // 2,0 m/s
Potencia absorbida en Standby: 0 W
Max. Flujo olumétrico: 53,51 m³/min
Ni el de potencia acústica del entilador (por grado): 57,9 // 63,8 // 64,4 dB(A)
Valor de funcionamiento: 0,79 (m³/dak.)/W
Potencia suministrada: 70 W
Información técnica
e.Retire la perilla de fijación del pie (5) del tubo que se encuentra bajo el soporte en U (3), inserte el tubo en la parte
superior del tubo ajustable en altura (6) y alinee los agujeros de los tubos, inserte la perilla de fijación del pie (5) y apriétela.
d. Desatornille la perilla de ajuste de altura (7) y tire del tubo interior hacia arriba para ajustar la altura. Asegúrese de que la
perilla está bien apretada antes de proceder.
c. Abra las patas. Conecte los tres enlaces metálicos (11) mediante el tornillo de sujeción y la tuerca mariposa (10).
b. Repita con las otras dos patas
a. Sujete la parte metálica de la pata del trípode de madera (9) al soporte del trípode (8), alinee los agujeros y apriete los
tornillos de ajuste. Tenga cuidado con la orientación del extremo de la pata. Ajuste la tuerca y apriétela bien.

Produktu nie wolno utylizować z odpadami z gospodarstw domowych. Zamiast tego
produkt należy pod koniec okresu jego użytkowania przekazać do punktu zbiorczego
zajmującego się recyklingiem urządzeń elektrycznych i elektronicznych. Dotyczy to
również baterii i akumulatorów, które ewentualnie są w zakresie dostawy. Proszę w
tym zakresie zasięgnąć informacji we właściwej administracji komunalnej.
Urządzenie przeznaczone jest wyłącznie do eksploatacji w suchych wnętrzach.
Urządzenie wyposażone jest w wtyczkę z przyłączem przewodu ochronnego
Urządzenie wyposażone jest w wtyczkę bez przyłącza przewodu ochronnego
Urządzenie dostosowane jest do eksploatacji przy napięciu znamionowym bardzo niskim z uziemieniem lub przy
napięciu znamionowym bardzo niskim bez uziemienia.
Urządzenie posiada 2 różne poziomy mocy.
Urządzenie posiada 3 różne poziomy mocy.
Urządzenie posiada zbiornik na wodę do zwilżania powietrza w pomieszczeniu.
Urządzenie wyposażone jest w dotykowy wyświetlacz, co umożliwia komfortowy wybór różnych ustawień.
Urządzenie posiada funkcję tmier’a
Urządzenie posiada funkcję oscylacji, która umożliwia drgania wentylatora przy jednoczesnej wentylacji.
Głowicę wentylatora można w niewielkim zakresie pochylać.
Urządzenie posiada funkcję nawilżania pomieszczenia, która przyczynia się do dodatkowego efektu chłodzenia.
Zachować ostrożność w przypadku długich włosów. Mogą one zostać zassane przez strumień powietrza. Należy zachować
wystarczający odstęp.
Na urządzeniu nie wolno kłaść żadnych przedmiotów, jak np. części garderoby.
Przez kratkę ochronną nie wolno wkładać żadnych przedmiotów lub palców.
Nigdy nie wolno wyjmować wtyczki sieciowej z gniazda sieciowego, pociągając za przewód sieciowy.
Urządzenia nie należy eksploatować lub obsługiwać wilgotnymi lub mokrymi rękoma
Urządzenie należy ustawić z stabilnym miejscu i w odpowiedniej odległości od źródeł ciepła, jak np. piece.
Urządzenie może być używane przez dzieci od 8 roku życia, jak również przez osoby o obniżonych zdolnościach fizycznych,
sensorycznych lub mentalnych lub przez osoby nieposiadające doświadczenia i / lub wiedzy, jeżeli pozostają one pod
nadzorem lub zostały poinstruowane pod kątem używania urządzenia i zrozumiały wynikające z tego zagrożenia.
Dzieciom nie wolno bawić się urządzeniem. Dzieciom nie wolno bez nadzoru dokonywać oczyszczania i konserwacji
użytkownika.
Wskazówki bezpieczeństwa
Wentylator posiada następujące właściwości, jeżeli są one przedstawione na rysunku schematycznym:
PL
Table of contents
Languages:
Other RL Fan manuals
Popular Fan manuals by other brands
REMKO
REMKO KWK ZW Series Operating and installation instructions

urban ambiance
urban ambiance UHP9130 installation manual
SagiCofim
SagiCofim DIF.P Assembly, installation and maintenance manual
Hornbach
Hornbach 10273954 Mounting instructions
Emerson
Emerson Botanica CF2500HTW01 owner's manual

Westinghouse
Westinghouse Graham owner's manual
Visual Comfort & Co.
Visual Comfort & Co. Maverick 3MAVR60 Series manual
Orbegozo
Orbegozo WF 0242 instruction manual

air&me
air&me FANTASY user manual
Zehnder Rittling
Zehnder Rittling ComfoAir Compact CA155WM User/Homeowner Guide
Fanelite
Fanelite FB-50 operating manual
jablotron
jablotron Futura installation manual
