manuals.online logo
Brands
  1. Home
  2. •
  3. Brands
  4. •
  5. Robus
  6. •
  7. Lighting Equipment
  8. •
  9. Robus RSI4L-01 User manual

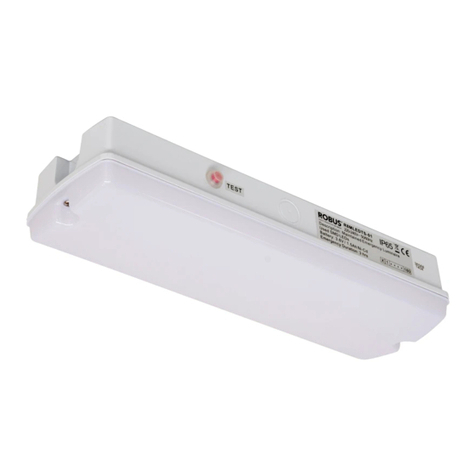
Robus RSI4L-01 User manual

INSTRUCTION MANUAL
The emergency lighting must be inspected and tested
regularly in accordance with local codes of practice.
Note: for safety reasons tests should be carried out
during daylight hours.
The minimum recommended test schedule is as follows:
After installation, allow 24 hours to ensure full battery
charge and then interrupt the supply; the maximum
duration time is 3 hours. Check that LEDs are still
lighting.
1. Daily check that charge indicator LED is working.
2. Monthly, interrupt mains for a short period and
check LED lights.
3. Annual 12 month check, full duration test.
Interrupt mains supply, LEDs will light and
should last for a minimum 3 hours operation:
batteries must be replaced when they can no
longer support 3 hour operation.
4. Complete record sheet on installation and retain in
maintenance file.
5. Update file with ongoing test records for inspection
by fire officer or other duly authorised person.
Testing De noodverlichting moet regelmatig worden gecontroleerd
en getest in overeenstemming met de plaatselijke
praktijkrichtlijnen. Opmerking: om veiligheidsredenen
moeten testen tijdens daglichturen worden uitgevoerd. Het
minimum aanbevolen testschema ziet er als volgt uit:
Na installatie 24 uur wachten om ervoor te zorgen dat de
batterij volledig is opgeladen en daarna de
stroomvoorziening onderbreken; de maximum duur is 3 uur.
Controleer of de leds nog licht geven.
1. Controleer dagelijks of de ladingindicator van de led
werkt.
2. Schakel maandelijks de stroomvoorziening even uit en
controleer de ledlampen.
3. Verricht jaarlijks een complete inspectie, een test van
volledige duur. Schakel de stroomvoorziening uit. De leds
zullen oplichten en dienen ten minste 3 uur mee te gaan.
De batterijen moeten worden vervangen als ze geen 3
uur meer werken.
4. Vul het registratieblad van de installatie in en bewaar in
het onderhoudsbestand.
5. Werk het bestand bij met de verschillende testresultaten
ter inspectie van de brandweer of een andere naar
behoren bevoegde persoon.
Testen
Issue 1 160921 Page 1
Information for the Product user:
Installation
1. Please note the requirement to dispose of Waste Electrical & Electronic Equipment separately from household waste
(WEEE marked with crossed out wheelie bin symbol).
2. Please consider your role in contributing to re-use and recycling by returning this product at end of life to a collection centre
for waste electrical equipment or a Civic Amenity site, or to a retail outlet from which you are purchasing a replacement.
3. This equipment may contain substances that are hazardous to health and the environment if disposed of carelessly. It is
important that it is separated from normal household waste and recycled in the WEEE chain.
4. The “crossed out wheelie bin symbol” on a product indicates this equipment must not be disposed of in normal household
waste, but should be disposed of according to local WEEE regulations.
0°C < Ta < +40°C, 220V – 240V ~ 50/60Hz, Class II, Battery Warranty: 3 Years
Luminaire is non-dimmable.
0°C < Ta < +40°C, 220V – 240V ~ 50/60Hz, Class II, Batterij Garantie: 3 Jaar
Niet-dimbare armatuur.
Installatie
Informatie voor de gebruiker van het product:
1. Hou bij het verwijderen van afval rekening met de regeling voor afgedankte elektrische en elektronische apparatuur, gescheiden van
gewoon huishoudelijk afval (AEEA, pictogram van een kliko met een kruis erdoorheen).
2. Neem uw verantwoordelijkheid op het vlak van hergebruik en recycling door dit product aan het einde van zijn levenscyclus in te
leveren bij een inleverpunt voor elektronisch afval, een milieupark of een winkel waar u een nieuw product koopt.
3. Deze apparatuur kan stoffen bevatten die gevaarlijk zijn voor de gezondheid en het milieu indien ze onachtzaam wordt weggegooid.
Het is belangrijk dat ze gescheiden gehouden wordt van het normaal huishoudelijk afval en gerecycled wordt in het netwerk voor
AEEA.
4. Het pictogram van een kliko met een kruis erdoorheen op een product betekent dat dit apparaat niet samen met het gewone
huishoudelijk afval mag worden weggegooid, maar dat het dient te worden verwijderd in overeenstemming met de lokale regelgeving
voor AEEA (afgedankte elektrische en elektronische apparatuur).
EN NL
1. Ensure mains supply is switched off before commencing
installation.
2. Open front cover by removing screws.
3. Drill three mounting holes and the cables holes on the base
of fitting.
4. Mark appropriated fixing points on the wall, ensure that the
holes do not impinge on joists, pipe work, cables or other
building services.
5. Insert wall plug and then fix the base onto the wall using
screws provided.
6. Feed power cables through knockout, and connect to
supply terminals: Brown to SL, Blue to N and Green/Yellow
to E. For fitting always on, link terminal SL to terminal PL.
For fitting controlled by switch, connect switched live wire to
terminal SL and permanent live to PL.
Note: a: Use IP Gland on the cable knockout in order to
ensure waterproof. b: Cable size: fit with 4*1.5mm. c: Don’t
recommend loop in/out. d: Wired through one end which is
closest to the PCB terminal block. e: The fitting works as
non-maintained if SL terminal not connected.
7. Write installation date on the battery and connect battery to
PCB.
8. Refit the front cover.
9. Remove the protected film to reveal adhesive legend, and
label it onto the diffuser.
Please ensure the legend cannot wrinkle on the diffuser.
1. Zorg dat het lichtnet is uitgeschakeld voordat u begint met
de installatie.
2. Open de voorste afdekking door de schroeven te verwijderen.
3. Boor drie montagegaten en de kabelgaten in de basis van
de armatuur.
4. Markeer de gepaste bevestigingspunten op de muur en zorg dat
u geen leidingen, kabels of andere voorzieningen van het
gebouw kunt beschadigen.
5. Steek de stekker in het stopcontact en bevestig de basis
aan de muur met de bijgeleverde schroeven.
6. Voer de voedingskabels door de uitsparing en sluit ze op de
aansluitklemmen aan: Bruin op SL, Blauw op N en Groen/Geel
op E. Om de armatuur permanent aan te hebben verbindt u
aansluitklem SL met aansluitklem PL. Bij een armatuur die met
een schakelaar wordt bediend, verbindt u de geschakelde
stroomdraad met aansluitklem SL en de permanente
stroomdraad met PL. Opmerking: a: Gebruik een IP pakking bij
de kabeluitsparing voor een waterdichte afdichting. b:
Kabelgrootte: met 4*1,5 mm. c: Lus in/uit niet aanbevolen. d:
Voer het kabeluiteinde door dat het dichtst bij de
PCB-aansluitstrook zit. e: De armatuur werkt niet zelfstandig als
aansluitklem SL niet is aangesloten.
7. Schrijf de installatiedatum op de batterij en sluit de batterij
aan op de PCB.
8. Bevestig de voorste afdekking.
9. Verwijder de beschermfolie om het zelfklevende symbool
zichtbaar te maken en plak het op de diffusor. Let erop dat
het symbool niet kan kreuken op de diffusor.
RSI4L-01
SAPPHIRE 4W EMERGENCY BULKHEAD IP65 WHITE C/W LEGENDS
RSI4L-01
SAPPHIRE 4 W NOODSCHOT IP65 WIT C/W SYMBOLEN
Switch on supply:
The green led should come on indicating correct battery
charge status, all LEDs will come on. When supply to
the permanent live PL is lost, battery will operate fitting
in emergency mode. Interrupt supply by pressing the test
switch, the fitting will then operate in emergency mode
for a short period of time.
Market Surveillance:
LS Code of energy efficiency Class D. YGBH03-1BT
Remove front screws and take off diffuser.
Using soldering iron disconnect LED plate.
The light source contained in the luminaire shall only be
replaced by a qualified person.
Markttoezicht:
LS-code voor energie-efficiëntieklasse D. YGBH03-1BT
Verwijder de schroeven aan de voorkant en neem de
diffusor weg. Gebruik een soldeerbout om de led-plaat
los te maken. De lichtbron in de armatuur mag alleen
worden vervangen door een gekwalificeerd persoon.
Schakel de stroom in:
De groene led moet nu branden om aan te geven dat de
laadstatus van de batterij correct is, alle leds gaan branden.
Als de stroomvoorziening naar de permanente stroomdraad
PL wordt onderbroken, wordt de armatuur in noodmodus
gevoed door de batterij. Onderbreek de voeding door de
testschakelaar in te drukken, de armatuur werkt dan gedurende
korte tijd in de noodmodus.
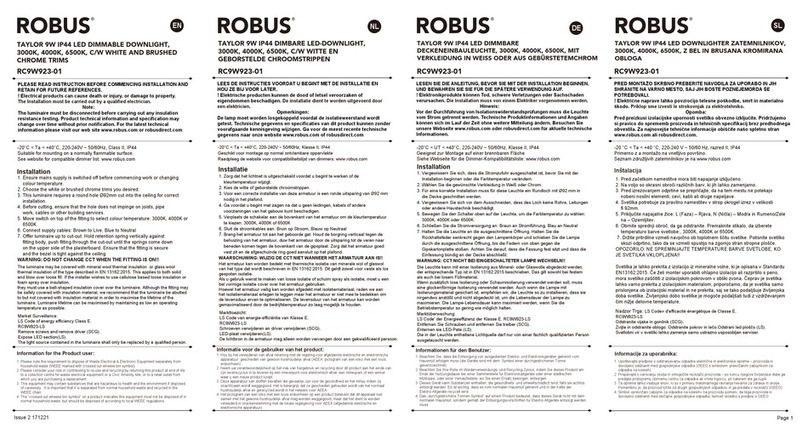
PLEASE READ INSTRUCTION BEFORE COMMENCING INSTALLATION AND RETAIN FOR FUTURE REFERENCES.
! Electrical products can cause death or injury, or damage to property.
The Installation must be carried out by a qualified electrician
.
Note:
The luminaire must be disconnected before carrying out any insulation resistance testing.
Product technical information and specification may change over time without prior notification. For the latest technical
information please visit our web site www.robus.com or robusdirect.com
LEES DE INSTRUCTIES VOORDAT U BEGINT MET DE INSTALLATIE EN HOU ZE BIJ VOOR LATER.
! Elektrische producten kunnen de dood of letsel veroorzaken of eigendommen beschadigen.
De installatie dient te worden
uitgevoerd door een elektricien
.
Opmerkingen:
De lamp moet worden losgekoppeld voordat de isolatieweerstand wordt getest.
Technische gegevens en specificaties van dit product kunnen zonder voorafgaande kennisgeving wijzigen. Ga voor de meest
recente technische gegevens naar onze website www.robus.com of robusdirect.com
Die Notbeleuchtung muss gemäß den lokalen Vorschriften
regelmäßig gewartet und geprüft werden: Hinweis: Aus
Sicherheitsgründen sollte die Wartung stets bei Tageslicht
durchgeführt werden. Der Wartungsplan sollte mindestens
die folgenden Maßnahmen umfassen: Nach der Installation
den Akku 24 Stunden lang aufladen, um eine maximale
Aufladung zu gewährleisten; anschließend die.
Stromversorgung unterbrechen (max. 3 Stunden) und
sicherstellen, dass die LEDs aufleuchten.
1. Täglich überprüfen, ob die LED-Ladestatusanzeige
ordnungsgemäß funktioniert.
2. Einmal im Monat die Stromversorgung für kurze Zeit
unterbrechen und die LED-Leuchten kontrollieren.
3. Einmal jährlich einen vollständigen Funktions- und
Dauertest durchführen.Die Stromversorgung
unterbrechen. Daraufhin sollten die LEDs aufleuchten
und mind. 3 Stunden lang in Betrieb. bleiben:Falls die
LEDs weniger als 3 Stunden lang aufleuchten,
muss der Akku ausgetauscht werden.
4. Nachder Installation sämtliche Maßnahmen
schriftlichfesthalten und mit dem Wartungsbogen
aufbewahren.
5. Den Wartungsbogen stets auf dem neuesten Stand
halten (für Kontrollen durch die Feuerwehr bzw.
entsprechend befugtes Personal).
Page 2
Informationen für den Benutzer:
1. Beachten Sie, dass die Entsorgung von ausgedienten Elektro- und Elektronikgeräten getrennt vom Hausmüll erfolgen muss (die
Geräte sind mit dem Symbol einer durchgestrichenen Tonne gekennzeichnet).
2. Beachten Sie Ihre Rolle im Wiederverwendungs- und Recycling-Zyklus, indem Sie dieses Produkt am Ende der Nutzungsdauer bei
einer Sammelstelle für. Elektronikaltgeräte oder einer städtischen Müllkippe, oder einer Verkaufsstelle, wo Sie einen Ersatz besorgen,
entsorgen.
3. Dieses Gerät kann Substanzen enthalten, die gesundheits- und umweltschädlich sind, falls sie achtlos entsorgt werden. Es ist wichtig,
dass es vom normalen Hausmüll getrennt und in der Kette der Elektro-Altgeräte recycelt wird.
4. Das „durchgestrichene Tonnen-Symbol“ auf einem Produkt bedeutet, dass dieses. Gerät nicht mit dem normalen Hausmüll, sondern
gemäß der Entsorgungsvorschriften für Elektro-Altgeräte entsorgt werden muss.
Informations pour l’utilisateur du produit :
1. Veuillez, s’il vous plait, noter l’importance de disposer des Déchets d’Equipement Electriques et Electroniques séparément des
déchets ménagers (DEEE représenté par une poubelle barrée d’une croix).
2. Veuillez tenir compte de l’importance de votre contribution à la réutilisation et au recyclage de ce produit en fin de vie en le retournant
dans un centre de collecte de déchets des équipements électriques ou dans le point de vente à partir duquel vous effectuez l’achat du
produit de remplacement.
3. Cet équipement peut contenir des substances dangereuses pour la santé et l’environnement s’il est jeté n’importe où. Il est important
de le séparer des ordures ménagères et le recycler dans une consigne DEEE appropriée.
4. La “poubelle barrée d’une croix” présent sur le produit indique que cet appareil ne doit pas être jeté dans les ordures ménagères mais
doit être éliminé conformément à la réglementation DEEE locale.
DE FR
0°C < UT < +40°C, 220-240V ~ 50/60Hz, Klasse II, Batterie-Garantie: 3 Jahre
Leuchte ist nicht dimmbar.
Installation Funktionsprüfungen
Le luminaire doit être inspecté et testé régulièrement en
accord avec les codes de pratiques locaux. Remarque :
pour des raisons de sécurité les tests doivent être effectués
durant la journée où la lumière du jour est présente. Le
programme de test d’essai minimal recommandé est le
suivant : Après installation, attendre 24 heures afin
d’assurer une charge complète de la batterie, puis coupez
l’alimentation : la durée de fonctionnement max est de 3h,
vérifiez que les LED éclairent toujours.
1. Quotidiennement : Vérifiez que l’indicateur LED
fonctionne.
2. Mensuellement : Coupez l’alimentation, sur une courte
période de temps afin de vérifier la lumière des LED.
3. Annuellement : faites un test complet. Coupez
l’alimentation, les LED vont éclairer et devraient
fonctionner pendant minimum 3 heures: les batteries
doivent être remplacées quand elles ne peuvent pas
supporter 3 heures de fonctionnement.
4. Complétez la fiche d’enregistrement et conservez-la
dans le dossier maintenance.
5. Mettez à jour le fichier avec les tests suivants dans le cas
d’une inspection par toute personne dûment autorisée.
Test
0°C < Ta < +40°C, 220-240V ~ 50/60Hz, Classe II, Batterie Garantie: 3 Ans
Ce luminaire est à intensité non-variable.
Installation
1. Vergewissern Sie sich, dass die Stromzufuhr ausgeschaltet ist,
bevor Sie mit der Installation beginnen.
2. Öffnen Sie die vordere Abdeckung durch Entfernen der
Schrauben.
3. Bohren Sie drei Befestigungslöcher und die Löcher für die Kabel
in die Bodenplatte der Leuchte.
4. Zeichnen Sie geeignete Befestigungspunkte an der Wand an;
vergewissern Sie sich vorher, dass die Löcher keine Rohre,
Leitungen oder andere Haustechnik beschädigen.
5. Stecken Sie den Dübel ein und bringen Sie die Bodenplatte
mithilfe der beiliegenden Schrauben an der Wand an.
6. Führen Sie die Stromkabel durch die Ausbrechöffnung und
schließen Sie sie an die Versorgungsklemmen an: Braun an
„SL“, Blau an „N“ und Gelb/Grün an „E“. Bei dauerhaft
eingeschalteten Leuchten den Anschluss „SL“ mit dem
Anschluss „PL“ verbinden. Wenn die Leuchte durch einen
Schalter gesteuert werden soll, das Schalterkabel an „SL“ und
das dauerhaft spannungsführende Kabel an „PL“ anschließen.
Hinweis: a - Verwenden Sie eine IP-Dichtschraube an der
Kabelausbruchöffnung, um die Wasserdichtigkeit zu
gewährleisten. b - Kabelgröße: passend für 4*1,5 mm. c -
Durchgangsverdrahtung wird nicht empfohlen. d - Die
Verdrahtung erfolgt über das Ende, das der Leiterplattenklemme
am nächsten liegt. e - Wenn „SL“ nicht angeschlossen ist,
funktioniert die Leuchte im Bereitschaftsmodus.
7. Notieren Sie das Installationsdatum auf dem Akku und
schließen Sie den Akku an die Leiterplatte an.
8. Setzen Sie die Front-Abdeckung wieder auf.
9. Entfernen Sie die Schutzfolie von der selbstklebenden
Beschriftung und kleben Sie sie auf den Diffusor. Achten Sie
darauf, dass der Schriftzug auf dem Diffusor keine Falten wirft.
1. Vérifier que l’alimentation électrique est coupée avant de
commencer l’installation.
2. Enlever les vis de fixation de la verrine.
3. Percer les trois trous de fixation ainsi que les trous de passage
des câbles dans l’embase de fixation.
4. Marquer les points de fixation sur le mur et vérifier que les trous
ne sont pas sur le passage de chevêtres, conduites, câbles ou
autres éléments de la construction.
5. Insérer la prise murale puis fixer l’embase contre le mur à l’aide
des vis fournies.
6. Passer les câbles d’alimentation dans l’ouverture défonçable
puis les connecter aux bornes d’alimentation : brun à la phase
(SL), bleu au neutre (N) et jaune/vert à la terre (E). Pour une
alimentation permanente, relier la borne SL à la borne secteur
(PL). Pour la commande par interrupteur, connecter le fil
alimenté par l’interrupteur à la borne SL et l’alimentation
permanente à la borne PL. Remarque : a : insérer le
presse-étoupe IP dans le passage de câble afin d’assurer
l’étanchéité de l’installation. b : section de conducteurs : 4 ×1,5
mm². c : il est recommandé de ne pas enrouler le câble en
entrée ou sortie. d : câbler le bloc via l’extrémité la plus proche
du bloc de bornes de la carte de circuits imprimés. e : la
connexion fonctionne en mode non permanent si la borne SL
n’est pas connectée.
7. Inscrire la date d’installation sur la batterie et connecter la
batterie à la carte de circuits imprimés.
8. Reposer la verrine.
9. Enlever le film de protection du pictogramme adhésif et
l’appliquer sur le diffuseur. Veiller à appliquer le pictogramme
sur le diffuseur sans le plisser.
RSI4L-01
SAPPHIRE 4 W NOTBETRIEB-BULKHEAD IP 65 WEISS MIT
BESCHRIFTUNG
RSI4L-01
BLOC APPLIQUE D’ÉCLAIRAGE DE SÉCURITÉ 4 W BLANC IP65
SAPPHIRE AVEC PICTOGRAMMES
Marktüberwachung:
LS Code der Energieeffizienzklasse D. YGBH03-1BT
Entfernen Sie die vorderen Schrauben und nehmen Sie den Diffusor
ab. Klemmen Sie die LED-Platine mithilfe eines Lötkolbens ab. Die
in der Leuchte enthaltene Lichtquelle darf nur von einer fachlich
qualifizierten Person ausgetauscht werden.
Surveillance du marché :
Code de rendement énergétique LS Classe D. YGBH03-1BT
Enlever les vis de la face avant et déposer le diffuseur.
Déconnecter la platine LED à l’aide d’un fer à souder.
Seuls les techniciens qualifiés sont habilités à remplacer la source
lumineuse contenue dans le luminaire.
Allumer le luminaire :
La LED verte s’allume pour indiquer le niveau de charge
correct de la batterie. Toutes les LED doivent s’allumer
dans ce cas. Quand l’alimentation via la borne secteur PL
est coupée, la lampe est alimentée par la batterie en mode
éclairage de secours. Appuyer sur l’interrupteur d’essai
pour couper l’alimentation. En pareil cas, l’éclairage
fonctionne en mode éclairage de secours pendant une
courte durée.
Strom einschalten:
Das grüne LED-Licht zeigt den korrekten Akkuladestand an,
alle LEDs leuchten auf. Wenn der Strom im Dauerbetrieb
ausfällt, betreibt der Akku die Lampe im Notlichtbetrieb.
Unterbrechen Sie die Stromzufuhr durch Drücken des
Testschalters, dann läuft die Lampe für kurze Zeit im
Notbetrieb.
LESEN SIE DIE ANLEITUNG, BEVOR SIE MIT DER INSTALLATION BEGINNEN, UND BEWAHREN SIE SIE FÜR DIE SPÄTERE
VERWENDUNG AUF.
! Elektronikprodukte können Tod, schwere Verletzungen oder. Sachschaden verursachen.
Die Installation muss von einem
Elektriker vorgenommen werden
.
Hinweis:
Vor der Durchführung von Isolationswiderstandsprüfungen muss die Leuchte vom Strom getrennt werden.
Technische Produktinformationen und Angaben können sich im Lauf der Zeit ohne weitere Mitteilung ändern. Besuchen Sie
unsere Webseite www.robus.com oder robusdirect.com für aktuelle technische Informationen.
VEUILLEZ LIRE LES INSTRUCTIONS AVANT DE COMMENCER L’INSTALLATION ET CONSERVEZ-LES POUR TOUTES UTILISATIONS
FUTURES.
Les produits électriques peuvent causer la mort, de graves blessures ou des dégâts matériels.
L’installation doit être effectuée par un
électricien qualifié
.
Remarque :
Le luminaire doit être déconnecté avant d'effectuer tout test de résistance a l’isolation.
Les informations techniques et caractéristiques peuvent changer au fil du temps sans notification préalable. Pour rester informé de ces
possibles modifications, veuillez consulter le site internet www.robus.com ou robusdirect.com
Page 3
Zasilna razsvetljava mora biti pregledana in testirana v
skladu z lokalnimi predpisi. Opomba: zaradi varnosti je
priporočeno teste izvajati podnevi oz. v času dnevne
svetlobe. Minimalni priporočeni urnik testiranja je
sledeč: Po namestitvi počakajte 24 ur, da se baterija
napolni do konca, nato pa prekinite napajanje;
maksimalni čas delovanja je 3 ure, preverite, če LED
diode še svetijo.
1. Dnevno preverite, da LED indikator polnjenja deluje
pravilno.
2. Na 1 mesec prekinite napajanje za kratek čas in
preverite delovanje LED diod.
3. Na 12 mesecev naredite test celotne dolžine
delovanja. Prekinite napajanje, LED diode bodo
svetile, kar mora trajati minimalno 3 ure: baterije
morate zamenjati, ko ne morejo več napajati
delovanja svetilke 3 ure.
4. Izpolnite evidenco testov ob namestitvi in jo shranite
v servisno knjižico.
5. Posodabljajte evidenco z novimi podatki o preizkusih
zaradi pregleda s strani požarnega inšpektorja ali
druge pooblaščene osebe.
1. Pred inštalacijo izključite omrežno napajanje.
2. Odprite pokrov spredaj tako, da odvijete in vzamete
ven vijake.
3. Izvrtajte tri montažne luknje in luknje za kable na
bazo fitinga.
4. Označite mesta za pritrditev na steno; preglejte in se
prepričajte, da z vrtanjem ne boste poškodovali
stropnikov, cevovoda, kablov in druge stavbne
napeljave.
5. Vstavite stenske vložke in s priloženimi vijaki pritrdite
bazo na steno.
6. Napeljite kabel skozi luknjo in priključite napajalne
sponke: rjava na SL, modra na N ter zeleno/rumena
na E. Za neprekinjeno svetenje, povežite sponko SL
na PL. Za upravljanje svetilke s stikalom priključite
fazo na sponko SL in trajno fazo na PL. Pomni: a: z
uvodnico IP vodotesno zatesniti kabelsko odprtino. b:
velikost kabla: 4 x 1,5 mm. c: zanka vhod/izhod ni
priporočljiva. d: ožičeno na enem koncu, ki je najbliže
sponkam PCB. e: fiting deluje samo v nujnih primerih,
če ne priključite sponke SL.
7. Vpišite datum inštalacije na baterijo in baterijo
priključite na PCB.
8. Namestite nazaj sprednji pokrov.
9. Odstranite zaščitni film z nalepke z legendo in jo
prilepite na difuzor. Nalepko prilepite na difuzor tako,
da se ne bo mečkala.
Testing
Informacije za uporabnika:
Montaža
1. Upoštevajte predpise o odstranjevanju odpadne električne in elektronske opreme – proizvoda ni dovoljeno odstraniti med
gospodinjske odpadke (OEEO s simbolom: prekrižanim zabojnikom za odpadke na kolesih).
2. Prispevajte k varovanju okolja in omogočite reciklažo proizvoda – po koncu njegove življenjske dobe ga predajte pristojnemu
zbirnemu centru za odpadke ali vrnite trgovcu, pri katerem ste ga kupili.
3. Ta oprema lahko vsebuje snovi, ki so v primeru malomarnega ravnanja nevarne za zdravje in okolje. Pomembno je, da
proizvod ločite od drugih gospodinjskih odpadkov in ga predate v reciklažo (OEEO).
4. Simbol »prekrižani zabojnik za odpadke na kolesih« na proizvodu pomeni, da tega proizvoda ni dovoljeno odstraniti med
običajne gospodinjske odpadke, temveč skladno s predpisi o OEEO.
0°C < Tdel < +40°C, 220V – 240V ~ 50/60Hz, Razred zaščite II, Garancija na baterijo: 3 leti
Svetilka nima možnosti zatemnitve.
SL
RSI4L-01
SAFIR 4 W NADOMETNA SVETILKA ZA NUJNE PRIMERE IP65
HLADNO BELA (CW) LEGENDE
Nadzor trga:
koda LS energetske učinkovitosti, razred D. YGBH03-1BT
Odvijte in odstranite vijake spredaj in snemite difuzor.
S spajkalnikom izključite ploščo LED.
Vir svetlobe v svetilki lahko zamenja samo kvalificirani delavec.
Vključite napajanje:
Zasvetiti mora zelena svetilka LED, ki označi zadostno
napolnjenost baterije; zasvetijo vse svetilke LED. Ob
izpadu napajanja stalne faze PL, začne baterija napajati
fiting v načinu za nujne primere. Napajanje prekinete
tako, da pritisnete na testno stikalo; fiting bo še kratek
čas deloval v načinu za nujne primere.
PRED MONTAŽO SKRBNO PREBERITE NAVODILA ZA UPORABO IN JIH SHRANITE NA VARNO MESTO, SAJ JIH BOSTE
POZNEJEMORDA ŠE POTREBOVALI.
! Električne naprave lahko povzročijo telesne poškodbe, smrt in materialno škodo.
Priklop sme izvesti le strokovnjak za
elektrotehniko
.
Opomba:
Pred preizkusi izolacijske upornosti svetilko obvezno izključite. Pridržujemo si pravico do sprememb proizvoda in tehničnih
specifikacij brez predhodnega obvestila. Za najnovejše tehnične informacije obiščite našo spletno stran www.robus.com ali
robusdirect.com
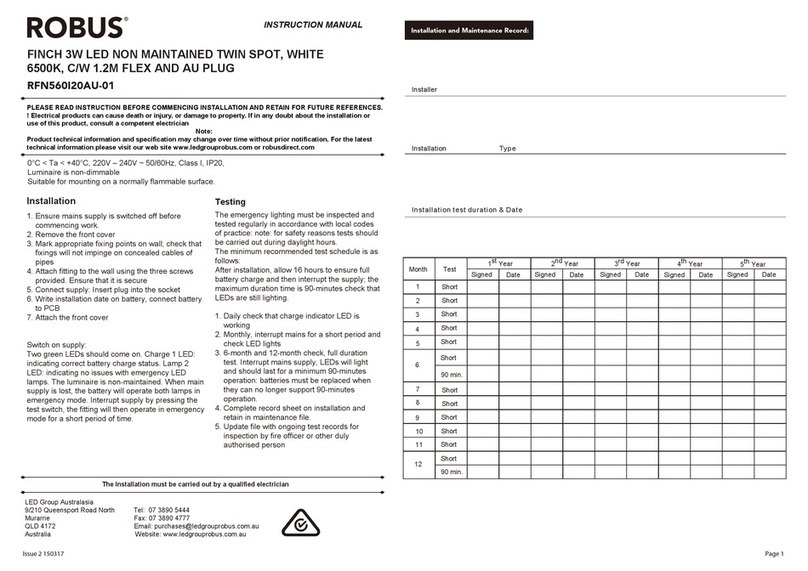
Installation and Maintenance Record: Installatie en onderhoud Record:
Installer
Installation Type
Installation test duration & Date
Installateur
Installatie Type
Installatie testduur & Date
Signed
Tekende
Month
Maand Test
Short
Short
Short
Short
Short
Short
Short
Short
Short
Short
Short
3Hr.
Short
1
2
3
4
5
6
7
8
9
10
11
12
Date
1st Year 1st Jaar
Date Date Date Date
Signed
Tekende
Signed
Tekende
Signed
Tekende
Signed
Tekende
2nd Year 2nd Jaar 3rd Year 3rd Jaar 4th Year 4th Jaar 5th Year 5th Jaar
IT: AVVERTENZA – I dispositivi elettrici possono causare lesioni gravi o la morte o danneggiare l’apparecchio. In caso di dubbi
sull’installazione o sull’utilizzo di questo prodotto, consultare un elettricista competente.
Assicurarsi che l’alimentazione principale sia spenta prima di effettuare interventi.
EST: HOIATUS! Elektritooted võivad põhjustada surma, raskeid vigastusi või varakahjustusi. Kui teil on toote paigaldamisel või kasutamisel
kahtlusi, küsige nõu asjatundlikult elektrikult. Enne töö alustamist veenduge, et elektrivool oleks välja lülitatud.
SLK: UPOZORNENIE - Elektrické výrobky môžu spôsobiť smrť, vážne zranenie alebo škodu na majetku. Ak máte akékoľvek pochybnosti o
inštalácii tohto výrobku, poraďte sa s kvalifikovaným elektrikárom. Pred začatím práce skontrolujte, že je hlavný zdroj
Page 4
Tel: +353 1 7099000
Fax: +353 1 7099060
Email: [email protected]
Website: www.robus.com
L.E.D Lighting & Electrical Distribution Group Ltd
IRE: Nangor Road, Dublin 12, D12 E7VP, Ireland
UK: Bracknell Enterprise & Innovation Hub, Ocean
House, 12th Floor, The Ring, Bracknell,
Berkshire RG12 1AX, UK
21
3 4
65
224mm
92mm
52mm
SL PL N

Other Robus Lighting Equipment manuals

Robus TOUCAN RTC184006-01 User manual

Robus

Robus TOUCAN RTC184006-01 User manual

Robus RVA192CCT26730 User manual

Robus

Robus RVA192CCT26730 User manual

Robus SONIC4 RSN15040MW-04 User manual

Robus

Robus SONIC4 RSN15040MW-04 User manual

Robus OHIO RHV18CCT3-01 User manual

Robus

Robus OHIO RHV18CCT3-01 User manual

Robus DRACO RDR6D2W-11 User manual

Robus

Robus DRACO RDR6D2W-11 User manual

Robus RSD6CCT3M-01 User manual

Robus

Robus RSD6CCT3M-01 User manual

Robus RSN10040DAS4-04 User manual

Robus

Robus RSN10040DAS4-04 User manual

Robus RVR1840-01 User manual

Robus

Robus RVR1840-01 User manual

Robus RVA3012DU-PSU User manual

Robus

Robus RVA3012DU-PSU User manual

Robus RLZ204006-24 User manual

Robus

Robus RLZ204006-24 User manual

Robus RC9W923-01 User manual

Robus

Robus RC9W923-01 User manual

Robus RMU1420-30 User manual

Robus

Robus RMU1420-30 User manual

Robus RDE6P030D-01 User manual

Robus

Robus RDE6P030D-01 User manual

Robus R8MULK-15 User manual

Robus

Robus R8MULK-15 User manual

Robus R8EM User manual

Robus

Robus R8EM User manual

Robus R5MSIK-RGBW User manual

Robus

Robus R5MSIK-RGBW User manual

Robus HARBOUR RHA10402FTV2-24 User manual

Robus

Robus HARBOUR RHA10402FTV2-24 User manual

Robus FINCH RFN9I65-01 User manual

Robus

Robus FINCH RFN9I65-01 User manual

Robus R4WLEDBHE-01 User manual

Robus

Robus R4WLEDBHE-01 User manual

Robus R18DIM-PSU User manual

Robus

Robus R18DIM-PSU User manual

Robus R2WLEDNME-01 User manual

Robus

Robus R2WLEDNME-01 User manual

Robus R3LED5S User manual

Robus

Robus R3LED5S User manual

Robus OHIO RHC0830-01 Manual

Robus

Robus OHIO RHC0830-01 Manual

Robus RHA58405FT-24 User manual

Robus

Robus RHA58405FT-24 User manual

Popular Lighting Equipment manuals by other brands

Gamma+ Rose XT LED 200 Zoom User instruction

Gamma+

Gamma+ Rose XT LED 200 Zoom User instruction

DualLite SEMPRA SEWL Series installation instructions

DualLite

DualLite SEMPRA SEWL Series installation instructions

Claypaky AXCOR WASH 300 instruction manual

Claypaky

Claypaky AXCOR WASH 300 instruction manual

Zero88 FROG 2 operating manual

Zero88

Zero88 FROG 2 operating manual

Evo-lite TRAX TX1-24-RGBW Series instruction manual

Evo-lite

Evo-lite TRAX TX1-24-RGBW Series instruction manual

Claypaky Sharpy instruction manual

Claypaky

Claypaky Sharpy instruction manual

Lightmybricks LEGO STAR WARS EXECUTOR SUPER STAR DESTROYER 75356 LIGHT... installation guide

Lightmybricks

Lightmybricks LEGO STAR WARS EXECUTOR SUPER STAR DESTROYER 75356 LIGHT... installation guide

Show Tec Compact Power Lightset V@ manual

Show Tec

Show Tec Compact Power Lightset V@ manual

Vari Lite Eventpar VL800 quick start guide

Vari Lite

Vari Lite Eventpar VL800 quick start guide

GOAL ZERO LIGHTHOUSE micro CHARGE user manual

GOAL ZERO

GOAL ZERO LIGHTHOUSE micro CHARGE user manual

Blue Wave Arctic Armor Leaf Net installation instructions

Blue Wave

Blue Wave Arctic Armor Leaf Net installation instructions

ledscom LC-EL-057-WW Assembly instructions

ledscom

ledscom LC-EL-057-WW Assembly instructions

LIVARNO LUX G1 mini operating instructions

LIVARNO LUX

LIVARNO LUX G1 mini operating instructions

X-Cite TWINSPOT Installation & operating instructions

X-Cite

X-Cite TWINSPOT Installation & operating instructions

Desisti LEONARDO instruction manual

Desisti

Desisti LEONARDO instruction manual

Dop Choice BUTTERFLY GRID operating instructions

Dop Choice

Dop Choice BUTTERFLY GRID operating instructions

Astral Pool 00349 Installation and maintenance manual

Astral Pool

Astral Pool 00349 Installation and maintenance manual

HQ Power VDL1502RB manual

HQ Power

HQ Power VDL1502RB manual

manuals.online logo
manuals.online logoBrands
  • About & Mission
  • Contact us
  • Privacy Policy
  • Terms and Conditions

Copyright 2025 Manuals.Online. All Rights Reserved.