manuals.online logo
Brands
  1. Home
  2. •
  3. Brands
  4. •
  5. roco
  6. •
  7. Toy
  8. •
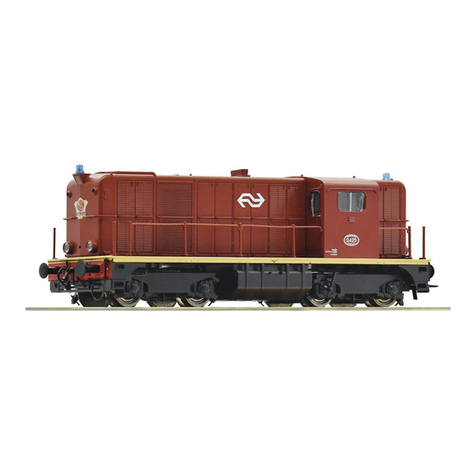
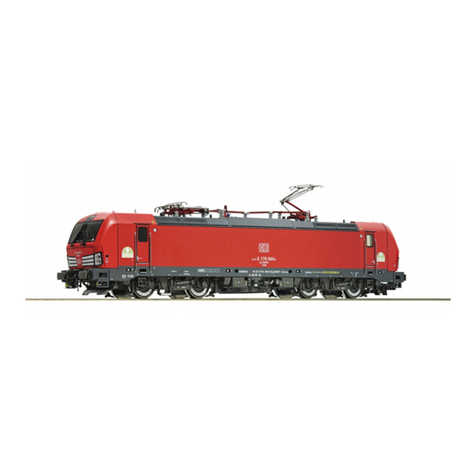
  9. roco 74242 User manual

roco 74242 User manual

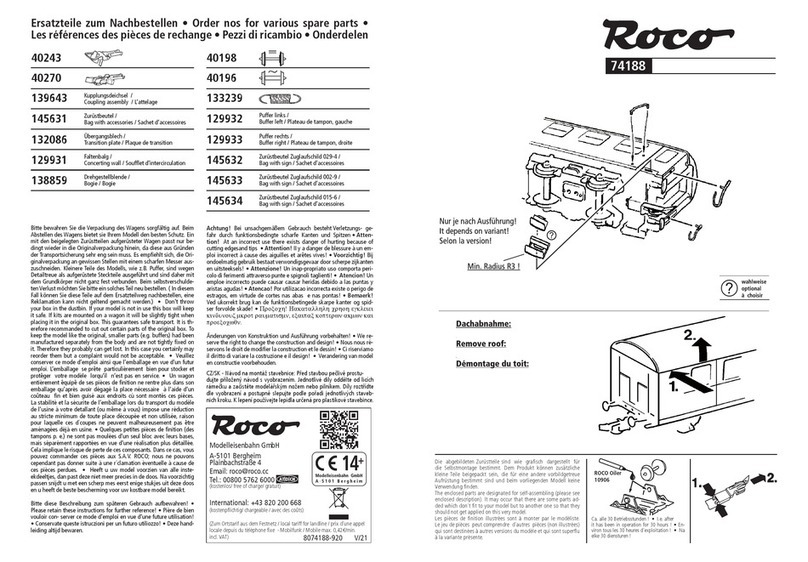
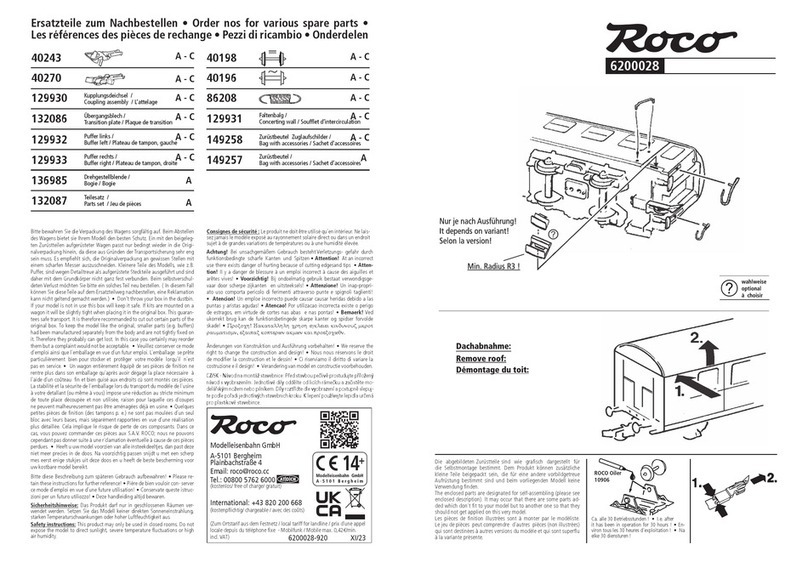
Ersatzteile zum Nachbestellen • Order nos for various spare parts •
Les références des pièces de rechange • Pezzi di ricambio • Onderdelen
Modelleisenbahn GmbH
A-5101 Bergheim
Plainbachstraße 4
Email: roco@roco.cc
Tel.: 00800 5762 6000
(kostenlos/ free of charge/ gratuit)
International: +43 820 200 668
(kostenpichtig/ chargeable / avec des coûts)
(Zum Ortstarif aus dem Festnetz / local tariff for landline / prix d‘une appel
locale depuis du téléphone xe - Mobilfunk / Mobile max. 0,42€/min.
incl. VAT)
AT|D|CH
Bitte bewahren Sie die Verpackung des Wagens sorgfältig auf. Beim Abstellen
des Wagens bietet sie Ihrem Modell den besten Schutz. Ein mit den beigeleg-
ten Zurüstteilen aufgerüsteter Wagen passt nur bedingt wieder in die Origi-
nalverpackung hinein, da diese aus Gründen der Transportsicherung sehr eng
sein muss. Es empehlt sich, die Originalverpackung an gewissen Stellen mit
einem scharfen Messer auszuschneiden. Kleinere Teile des Modells, wie z.B.
Puffer, sind wegen Detailtreue als aufgerüstete Steckteile ausgeführt und sind
daher mit dem Grundkörper nicht ganz fest verbunden. Beim selbstverschul-
deten Verlust möchten Sie bitte ein solches Teil neu bestellen. ( In diesem Fall
können Sie diese Teile auf dem Ersatzteilweg nachbestellen, eine Reklamation
kann nicht geltend gemacht werden.) • Don't throw your box in the dustbin.
If your model is not in use this box will keep it safe. If kits are mounted on a
wagon it will be slightly tight when placing it in the original box. This guaran-
tees safe transport. It is therefore recommanded to cut out certain parts of the
original box. To keep the model like the original, smaller parts (e.g. buffers)
had been manufactured separately from the body and are not tightly xed on
it. Therefore they probably can get lost. In this case you certainly may reorder
them but a complaint would not be acceptable. • Veuillez conserver ce mode
d’emploi ainsi que l’emballage en vue d’un futur emploi. L’emballage se prête
particulièrement bien pour stocker et protêger votre modèle lorqu’il n’est
pas en service. • Un wagon entièrement êquipê de ses pièces de nition ne
rentre plus dans son emballage qu’après avoir dégagé la place nécessaire à
l’aide d’un coûteau n et bien guisé aux endroits cù sont montés ces piéces.
La stabilité et la sécurite de l’emballage lors du transport du modèle de l’usine
à votre detallant (ou même à vous) impose une réduction au stricte minimum
de toute place découpée et non utilisée, raison pour laquelle ces d´coupes
ne peuvent malheureusement pas être aménagées déjà en usine. • Quelques
petites pièces de nition (des tampons p. e.) ne sont pas moulées d’un seul
bloc avec leurs bases, mais séparément rapportées en vue d’une réalisation
plus détaillée. Cela implique le risque de perte de ces composants. Dans ce
cas, vous pouvez commander ces pièces aux S.A.V. ROCO; nous ne pouvons
cependant pas donner suite à une r´clamation èventuelle à cause de ces pièces
perdues. • Heeft u uw model voorzien van alle insteekdeeltjes, dan past deze
niet meer precies in de doos. Na voorzichtig passen snijdt u met een scherp
mes eerst enige stukjes uit deze doos en u heeft de beste bescherming voor
uw kostbare model bereikt.
Bitte diese Beschreibung zum späteren Gebrauch aufbewahren! • Please re-
tain these instructions for further reference! • Pière de bien vouloir con- server
ce mode d’emploi en vue d’une future utilisation! • Conservate queste istruc-
zioni per un futuro utiliozzo! • Deze handleiding altijd bewaren.
Achtung! Bei unsachgemäßem Gebrauch besteht Verletzungs- gefahr durch
funktionsbedingte scharfe Kanten und Spitzen • Attention! At an incorrect
use there exists danger of hurting because of cutting edgesand tips • Atten-
tion! II y a danger de blessure à un emploi incorrect à cause des aiguilles et
arêtes vives! • Voorzichtig! Bij ondoelmatig gebruik bestaat verwondigsge-
vaar door scherpe zijkanten en uitsteeksels! • Attenzione! Un inap-propri-
ato uso comporta pericolo di ferimenti attraverso punte e spignoli taglienti!
• Atencion! Un emploe incorrecto puede causar causar heridas debido a las
puntas y aristas agudas! • Atencao! Por utilizacao incorrecta existe o perigo
de estragos, em virtude de cortes nas abas e nas pontas! • Bemaerk! Ved
ukorrekt brug kan de funktionsbetingede skarpe kanter og spidser forvolde
skade! • Proxoch! Hakatallhlh crhoh egkleiei kindunouz mkrot
raumatismn, exaipax kopterwn akmwn kai proexocwqn.
Änderungen von Konstruktion und Ausführung vorbehalten! • We reserve the
right to change the construction and design! • Nous nous réservons le droit
de modier la construction et le dessin! • Ci riserviamo il diritto di variare la
costruzione e il design! • Verandering van model en constructie voorbehouden.
CZ/SK - Návod na montáž stavebnice: Před stavbou pečlivě prostudujte příložený
návod s vyobrazením. Jednotlivé dily odděIte od licích rámečku a začistěte mo-
delářským nožem nebo pilníkem. Díly roztřídte dle vyobrazení a postupně slepuj-
te podle pořadi jednotlivých stavebnich kroku. K lepení používejte lepidla určená
pro plastikové stavebince.
Sicherheitshinweise: Das Produkt darf nur in geschlossenen Räumen ver-
wendet werden. Setzen Sie das Modell keiner direkten Sonneneinstrahlung,
starken Temperaturschwankungen oder hoher Luftfeuchtigkeit aus.
Safety instructions: This product may only be used in closed rooms. Do not
expose the model to direct sunlight, severe temperature uctuations or high
air humidity.
Consignes de sécurité : Le produit ne doit être utilisé qu’en intérieur. Ne lais-
sez jamais le modèle exposé au rayonnement solaire direct ou dans un endroit
sujet à de grandes variations de températures ou à une humidité élevée.
8074242-920 I/23
Die abgebildeten Zurüstteile sind wie grasch dargestellt für
die Selbstmontage bestimmt. Dem Produkt können zusätzliche
kleine Teile beigepackt sein, die für eine andere vorbildgetreue
Aufrüstung bestimmt sind und beim vorliegenden Modell keine
Verwendung nden.
The enclosed parts are designated for self-assembling (please see
enclosed description). lt may occur that there are some parts ad-
ded which don’t t to your model but to another one so that they
should not get applied on this very model.
Les pièces de nition illustrèes sont à monter par le modèliste.
Le jeu de pièces peut comprendre d’autres pièces (non illustrées)
qui sont destinées à autres versions du modèle et qui sont superu
à la variante présente.
Ca. alle 30 Betriebsstunden ! • I.e. after
it has been in operation for 30 hours ! • En-
viron tous les 30 heures d’exploitation ! • Na
elke 30 diensturen !
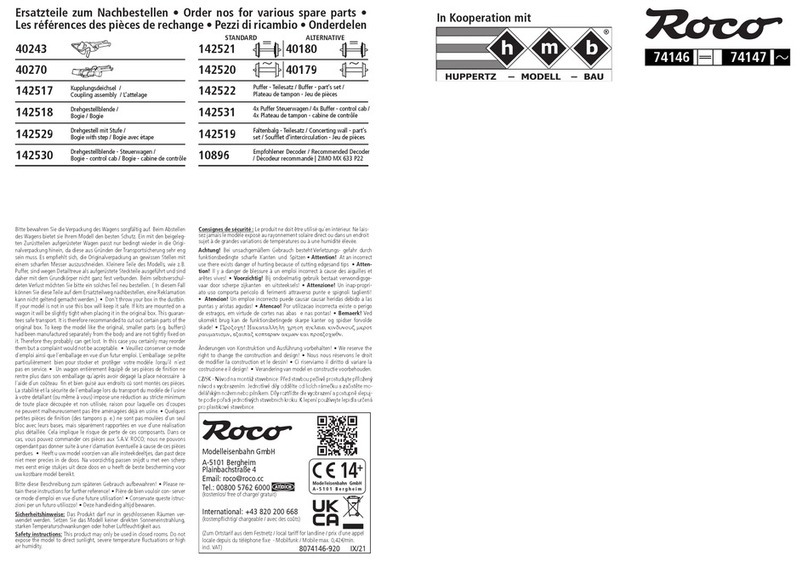
ROCO Oiler
10906
74242
Radkontakt /
Wheel contact
145163
Platine Innenbeleuchtung /
PCB interior lighting
145150
Platine /
PCB
145164
Puffer ach /
Buffer at
145397
Zurüstbeutel /
Bag with accessories
148579
86208
Brückenstecker PLUX 16 /
Connector PLUX 16
129630
40270
40243 145165
??
?
wahlweise
optional
volitelné
?kleben
cement
coller
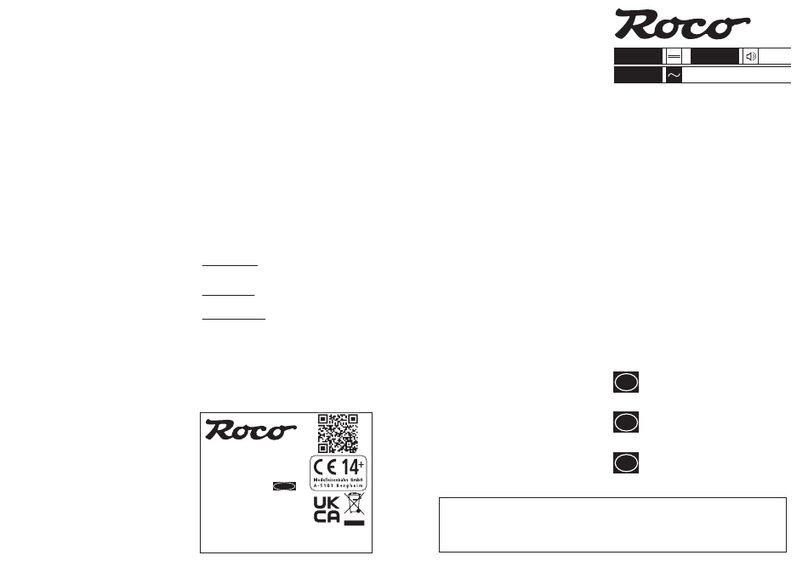
Einbau eines Decoders / Installation of function decoders / Provoz s více vlaky
Decoder 16-pin
1.
2.
3.
ON
1 2
ON
1 2
1.
Innenbeleuchtung
Interior light
vnitřní osvětlení
on / off
FS 2 / drivers cab 2 / stanoviště strojvedoucího 2
FS 1 / drivers cab 1 / stanoviště strojvedoucího 1
Stirnlicht
Front light Drivers cab
čelní osvětlení
DIP Switch
Bei Betrieb auf Digitalanlagen muß der Beiwagen zwingend mit einem PLUX Decoder
10895 ausgerüstet werden!
When operating on digital systems, the jumper must be changed in the car without
motor to PLUX Decoder 10895 !
Při jízdě v digitálním provozu musí být připojný vůz bezpodmínečně vybaven PLUX
dekoderom Art.Nr.10895!
Working with etched Labels
Please note! To achieve proper mounting of the enclosed etched labels will you please follow these instructions:
As delivered the etched label surface is completely covered with paint. To make the metal numbers and letters visible the paint must be
removed from the actual letter and numeral surfaces: this is done as follows:
1. Before removing the labels from the etched frame place them with their backs on a rm and completely level surface.
2. Remove the paint from the surface of the characters carefully either with the ROCO rubber (art. no. 10002) a sharp knife having a
straight edge or similar object (e.g. single-edge razor blade). Take care that while doing this the paint surface between the characters is
not damaged.
3. If the result is not satisfactory it is recommended that the remaining paint is removed with a suitable paint remover. Thoroughly dry the
labels and then reapply fresh paint. Repeat the removal of the paint from the surface of the characters after the new paint is completely dry.
4. Carefully extract the different labels from their etching frames and remove any remaining burrs.
5. Attach the etched labels with very small amounts of adhesive on top of the printed signs on the vehicle.
ROCO wishes you lots of pleasure with your new model.
GB
Verarbeitung geätzter Schilder
Bitte beachten! Um eine gute Montage der beiliegenden Ätzschilder zu erzielen, bitten wir folgendes zu beachten:
Im Lieferzustand ist die geätzte Schildoberäche vollständig lackiert. Um die Metallbuchstaben- und Ziffern sichtbar zu machen, muß die
Lackierung auf der Buchstaben- und Ziffernoberäche entfernt werden. Dazu wie folgt vorgehen:
1. Ohne sie aus dem Ätzrahmen zu entfernen, die Schilder mit ihrer Rückseite auf eine harte und völlig ebene Oberäche legen.
2. Mit dem ROCO-Rubber (Art.-Nr. 10002), mit einem scharfen Messer mit gerader Klinge oder mit einem ähnlichen Gerät die Farbe von
der Oberäche der Zeichen vorsichtig und sauber abziehen. Dabei darauf achten, daß man beim Abziehen der Farbe nicht zu tief gerät und
die Farboberäche zwischen den Zeichen verletzt.
3. Sollte das Ergebnis nicht befriedigend sein, empfehlen wir die verbliebene Farbe mit einem geeigneten Lösungsmittel (Pinselreiniger) vol-
lständig zu entfernen, die Schilder trocknen zu lassen und anschließend frische Farbe aufzutragen. Nach dem Durchtrocknen das Abziehen
der Farbe von den Zeichenoberächen wiederholen.
4. Mit Vorsicht die einzelnen Schilder aus ihrem Ätzrahmen heraustrennen und die verbliebenen Grate entfernen.
5. Mit sehr wenig Klebstoff die Ätzschilder über die aufgedruckten Schilder des Fahrzeuges kleben.
ROCO wünscht Ihnen hierbei viel Erfolg und viel Freude an Ihrem neuen Modell.
D
Práce s leptanými štítky
Dbejte, prosím, následujícího! Chcete-li dosáhnout dobré montáže přiložených leptaných štítků, dbejte, prosím,
následujících pokynů:
Povrch leptaného štítku je ve stavu, v jakém jsou štítky dodávány, zcela nalakován. Chcete-li učinit kovová písmena a číslice
viditelnými, je třeba odstranit z povrchu písmen a číslic lak. Za tímto účelem je třeba postupovat následujícím způsobem:
1. Položte štítky, aniž byste je odstranili z leptacího rámu, zadní stranou na tvrdý a naprosto rovný podklad.
2. Prostřednictvím ROCO-Rubber (číslo výrobku 10002), ostrého nože s rovným ostřím, nebo pomocí podobného nástroje opatrně a dočista
odstraňte barvu z povrchu znaků. Přitom dbejte na to, abyste se při odstraňování barvy nedostali příliš hluboko a nepoškodili barevný
povrch mezi znaky.
3. V případě, že by výsledek nebyl uspokojivý, vám doporučujeme, abyste zbylou barvu zcela odstranili vhodným rozpouštědlem (čisticím
přípravkem na štětce), nechali štítky vyschnout a následně nanesli čerstvou barvu. Po proschnutí zopakujte odstranění barvy z povrchu
znaků.
4. Opatrně vyjměte jednotlivé štítky z rámů a odstraňte zbylé otřepy.
5. Leptané štítky nalepte velmi malým množstvím lepidla přes natištěné štítky vozidla.
Firma ROCO vám přeje mnoho úspěchů a mnoho radosti s vaším novým modelem.
CZ

Other roco Toy manuals

roco BR 23 User manual

roco

roco BR 23 User manual

roco 74224 User manual

roco

roco 74224 User manual

roco 74035 User manual

roco

roco 74035 User manual

roco 7340001 User manual

roco

roco 7340001 User manual

roco 52560 User manual

roco

roco 52560 User manual

roco 73214 User manual

roco

roco 73214 User manual

roco 72803 User manual

roco

roco 72803 User manual

roco 111 DR User manual

roco

roco 111 DR User manual

roco H0 D-DLB User manual

roco

roco H0 D-DLB User manual

roco 70787 User manual

roco

roco 70787 User manual

roco T679 CSD User manual

roco

roco T679 CSD User manual

roco 71409A User manual

roco

roco 71409A User manual

roco BR 236 DB User manual

roco

roco BR 236 DB User manual

roco VT 628 DB User manual

roco

roco VT 628 DB User manual

roco 36088 User manual

roco

roco 36088 User manual

roco Z21-Booster User manual

roco

roco Z21-Booster User manual

roco 73913 User manual

roco

roco 73913 User manual

roco 32401 User manual

roco

roco 32401 User manual

roco 73116 User manual

roco

roco 73116 User manual

roco 74155 User manual

roco

roco 74155 User manual

roco 74862 User manual

roco

roco 74862 User manual

roco BR 193 User manual

roco

roco BR 193 User manual

roco 74150 User manual

roco

roco 74150 User manual

roco H0e User manual

roco

roco H0e User manual

Popular Toy manuals by other brands

V-tech Bounce & Play Llama Parents' guide

V-tech

V-tech Bounce & Play Llama Parents' guide

Micron Wings Glider V-Tail Bellbird manual

Micron Wings

Micron Wings Glider V-Tail Bellbird manual

PLAYTIVE JUNIOR 115588 Instructions for use

PLAYTIVE JUNIOR

PLAYTIVE JUNIOR 115588 Instructions for use

Lightmybricks 10314 installation guide

Lightmybricks

Lightmybricks 10314 installation guide

Step 2 Custom Kitchen 8284 manual

Step 2

Step 2 Custom Kitchen 8284 manual

V-tech Sing and Splash Fish user manual

V-tech

V-tech Sing and Splash Fish user manual

V-tech Pop-A-Ball Pop & Play Tower Parents' guide

V-tech

V-tech Pop-A-Ball Pop & Play Tower Parents' guide

V-tech TOOT-TOOT Cory Carson The Carson Playhouse Parents' guide

V-tech

V-tech TOOT-TOOT Cory Carson The Carson Playhouse Parents' guide

V-tech Myla's Sparkling Friends Mia Parents' guide

V-tech

V-tech Myla's Sparkling Friends Mia Parents' guide

KNEX Super Mario 3D World CAT MARIO user guide

KNEX

KNEX Super Mario 3D World CAT MARIO user guide

V-tech Ultimate Track Set user manual

V-tech

V-tech Ultimate Track Set user manual

KNEX Education Maker Kit Basic manual

KNEX

KNEX Education Maker Kit Basic manual

Hot Wheels Ai Guide

Hot Wheels

Hot Wheels Ai Guide

TopNotch Products Maverick Assembly manual

TopNotch Products

TopNotch Products Maverick Assembly manual

Step 2 Coffee Time Kitchen manual

Step 2

Step 2 Coffee Time Kitchen manual

V-tech Play & Dream Magic Mirror user manual

V-tech

V-tech Play & Dream Magic Mirror user manual

Fisher-Price T7156 quick start guide

Fisher-Price

Fisher-Price T7156 quick start guide

V-tech Lightning McQueen Atlas user manual

V-tech

V-tech Lightning McQueen Atlas user manual

manuals.online logo
manuals.online logoBrands
  • About & Mission
  • Contact us
  • Privacy Policy
  • Terms and Conditions

Copyright 2025 Manuals.Online. All Rights Reserved.