Rola 59972 Manual

PAGE 1
INSTRUCTION GUIDE FOR:
FPE END SUPPORT KIT SYSTEM
PAGE 1
ROLA FPE END SUPPORTS
59972

MAX 80 km/h
WARNING
PAGE 2
These instructions contain IMPORTANT safety information. Please read and keep for future reference.
NOTE: This Fit Kit instruction sheet is a supplement to the End Support instructions.
Users must read and understand all warnings and precautions before using the ROLA cross bar systems.
Installation is the end user’s responsibility and beyond Horizon Global’s control. Therefore, Horizon Global exclusively limits its Warranty to
the repair or replacement of a defective product. Damage to your vehicle, your cargo or any person or property is excluded.
• Maximum roof loads = weight of the cross bars + accessories + the weight of the load carried. Maximum load is defined by ROLA or
the Manufacturer- use which ever is lower.
Do not exceed vehicle carrying limits see owners manual or ROLA’s limits- whichever is lower. This is the weight of your
carried cargo plus the weight of the cross bars.
• Use only the ROLA recommend Rail kits and Fit Kits for your specific make, model and model year.
• To avoid vehicle paint damage, always insure the vehicle doors are open and straps fully extended down when installing
the cross bars.
• Make sure all bolts, straps, locks are tightened and locked before every trip. Check all for signs of wear and replace as
needed. Check loads periodically during trips.
• Remove your cross bars when not is use and before entering automatic car washes.
• Lower your driving speeds to less than posted speeds depending on road conditions, wind speeds and loads being carried.
WARNING
Weight of Cargo:
XX lbs. (XX kg)
Weight of Cross Bars:
See Fit Kit MAX. LOAD LIMIT:
165 lbs. (75 kg)
+ =

WARNING
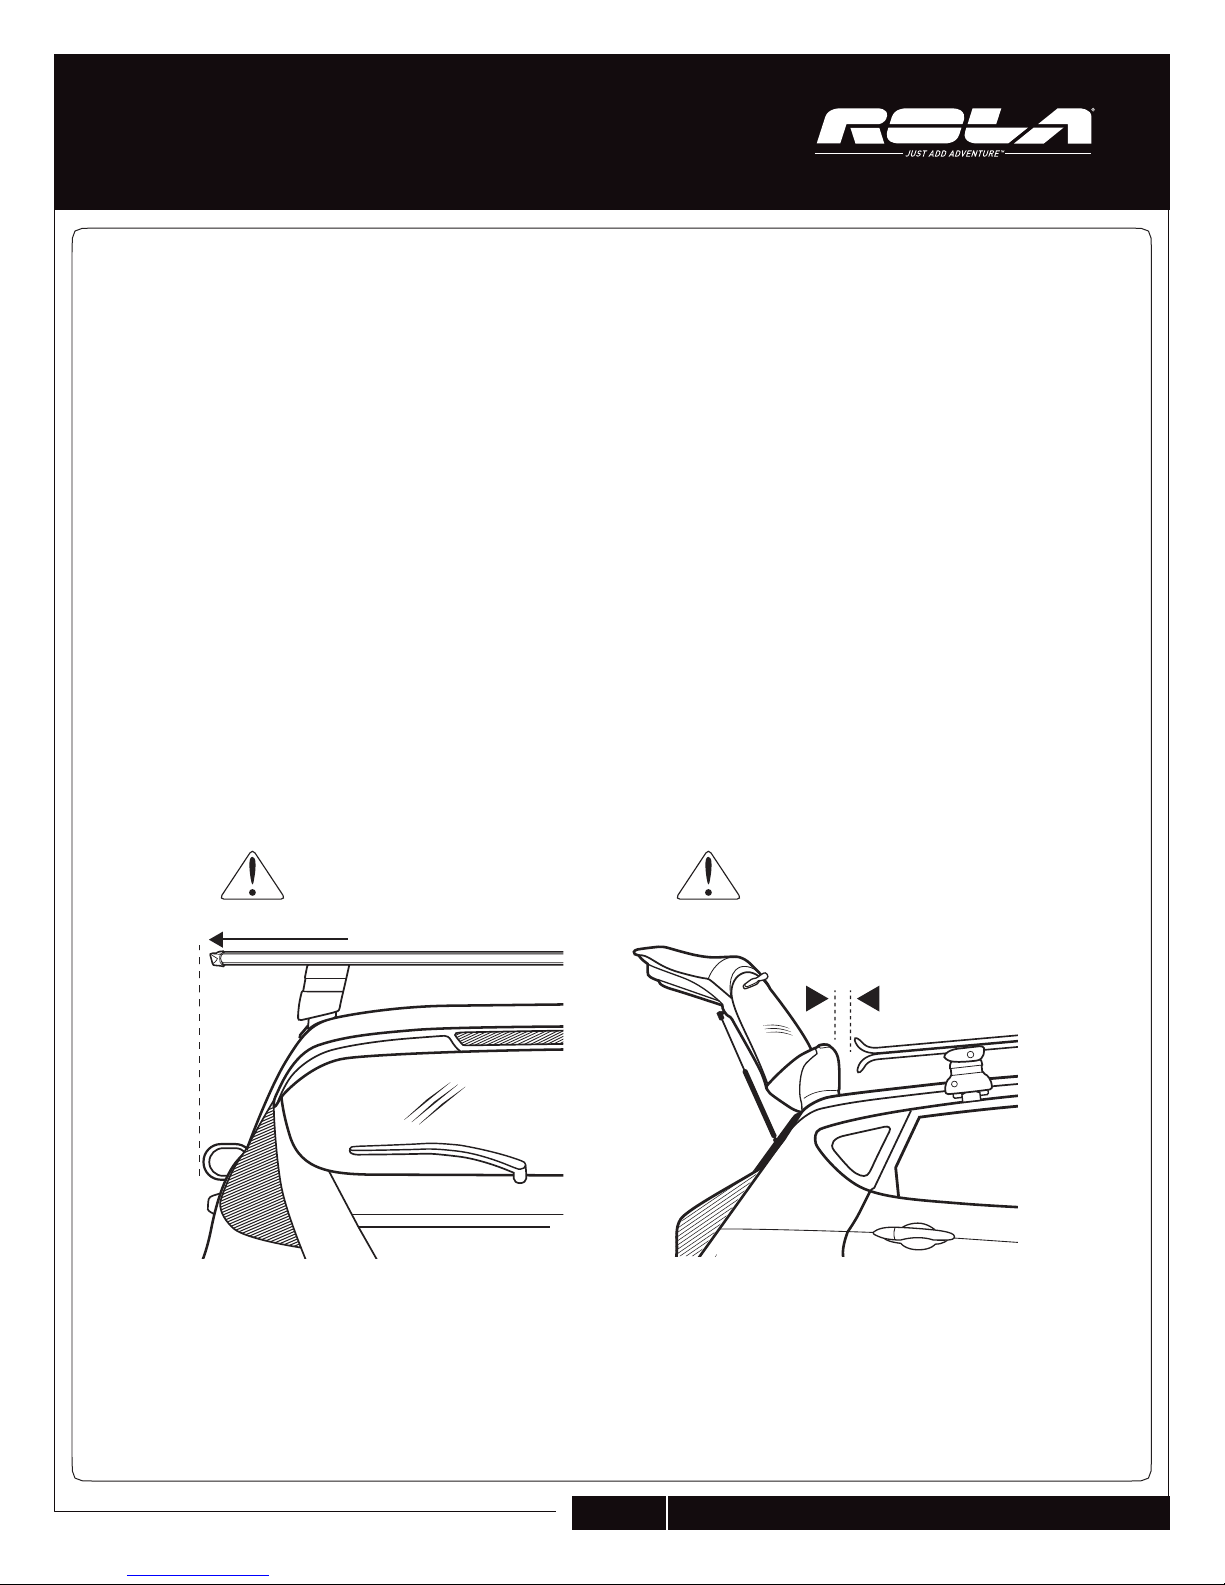
• All long loads such as (but not limited to) Canoes, Kayaks, Sailboards, Paddle
Boards and Construction materials must be tied down to the front and rear
bumpers or tow hooks. All loads must be secured with non-stretch straps.
• Cross Bars are not for off road use, use on trailers or towed vehicles.
• Be aware of the carried load width and height as these can affect car handling,
parking garage use or other vehicle height restrictions. Users are responsible for
understanding and obeying government laws where they drive.
• Do NOT use ROLA cross bars and accessories for purposes other than what they
are intended for or exceeding stated load limits. Failure to do so will voidall
warranties.
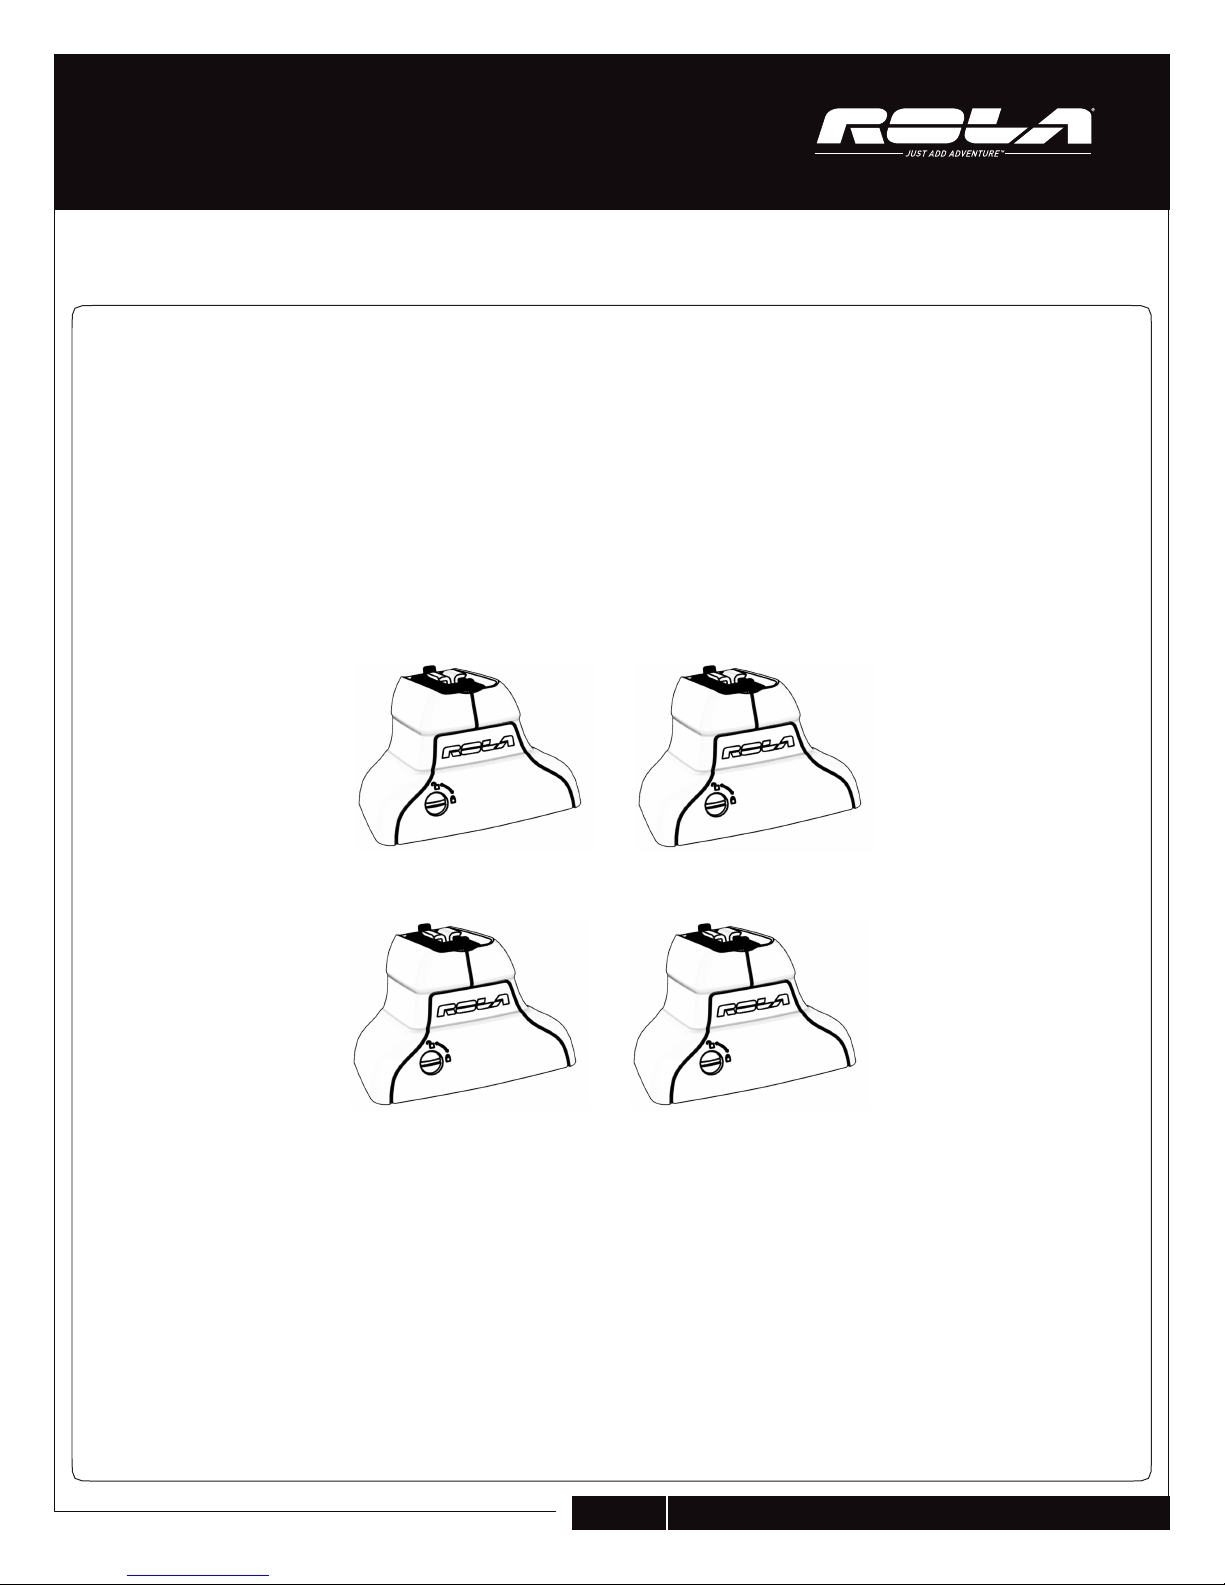
• All ROLA locks should be turned and lubricated periodically. Locks are intended
to deter theft but are not theft proof, please remove valuable gear if left
unattended. Place a spare key in the glovebox or some secure area.
• Check and replace worn out or defecive parts.
• The load carrier should always be cleaned and maintained, especially in
the winter.
• Screws, nuts and locks (if fitted) should be lubricated at regular intervals.
• When not in use, the product should be removed from the vehicle.
• When the product is removed from the vehicle, all loose parts should be
stored safely.
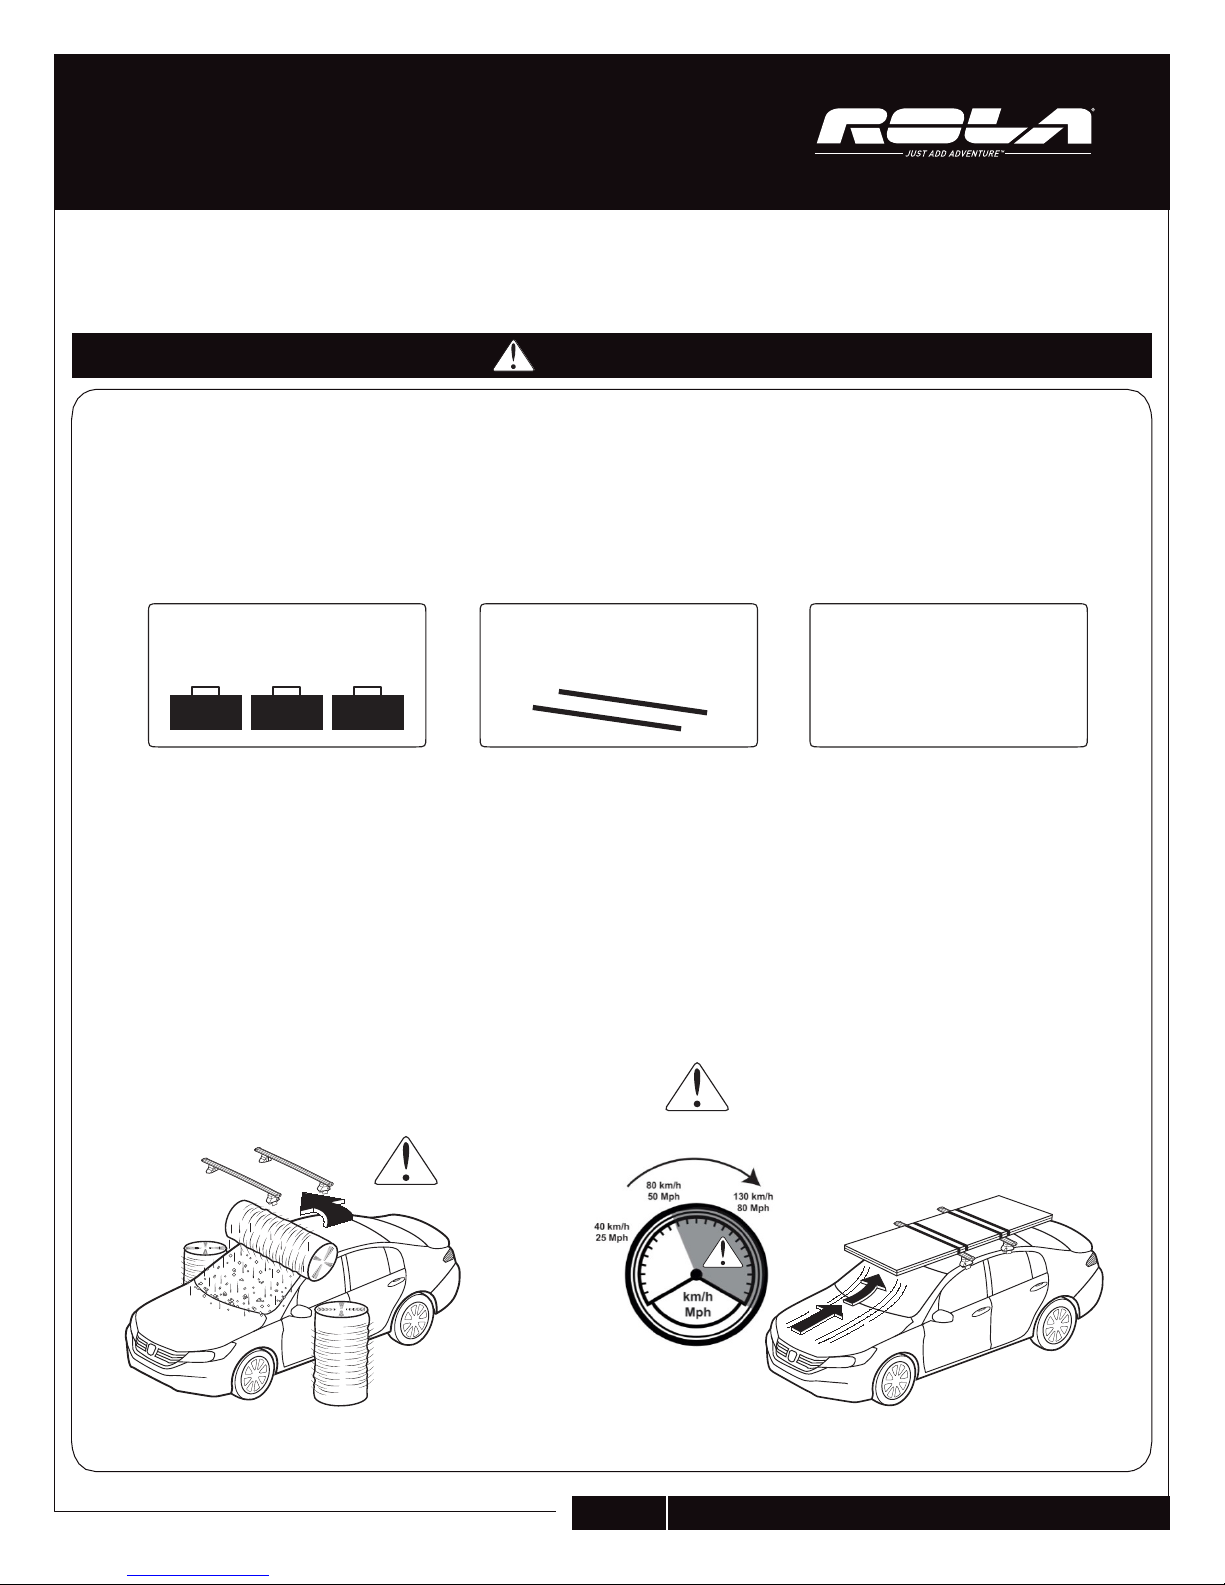
• Road speed should always be adjusted to suit the load being carried and the
current driving conditions such as road type and quality, wind conditions, traffic
intensity and applicable speed limits.
• Note that the vehicle’s total height increases when upright loads are carried.
• The vehicle’s driving characteristics and braking behavior change and it’s
vulnerability to side winds increases when a load is carried on the roof.
• Products fitted with a lock should always be locked during transport.
The proper attachment of this product in accordance with the enclosed instructions is critical to its proper performance. See instructions for
proper attachment, proper usage, and important safety messages. Cequent Consumer Products, Inc. has no control over, or responsibility
for, the attachment or the installation. Cequent Consumer Products, Inc. is NOT responsible nor will it be held liable for any damage
resulting from its attachment or improper use. Cequent Consumer Products, Inc. shall not be liable for any claims of any kind greater than
the purchase price of the product. Warranty information available upon request.
NOTICE: Your cross bars will not prevent property damage that may result from improper loading, securing, or driving.
PAGE 3
Review all Warnings, Instructions, and Warranty information carefully.
Failure to follow these warnings and instructions will void the Warranty.

PRIOR TO ASSEMBLY
• Check that all required parts are present before assembly by checking all the assembly instructions.
• Check that the vehicle’s roof surface and product parts are clean.
• Check and follow the proper assembly sequence steps.
• Check to use the proper defined distance between cross bars. If not defined use a minimum of 27.5” or 700mm, when carrying long
loads the cross bars should not be less than 23.5” or 600mm
• Check the cross bar is firmly attached on every use. Push and tug the bars and attaching straps, if any movement is noted secure
the unit more firmly. Test this regularly.
• Some sunroofs cannot be opened when cross bars are installed.
• Some radio antenna’s may be required to be removed with cross bars installed.
• No product modifications are allowed- this will void all warranties.
• Check that the maximum load is not exceeded. Use the ROLA load limit or the vehicle’s load limit- which ever is lower. Max. roof
load = Cross bar weight + Accessory carrier + Load carried.
• Check the loading does not exceed the carrier’s width and loads a spread evenly and to the lowest point possible.
• Surfboards should be loaded on top of each other not side by side and all long loads secured to the vehicle both front and rear.
• Ski and snowboards should be carried with the tips facing rearwards.
• Cross bars should not extend past sideview mirrors.
• When carrying longer gear on cross bars, make sure there is sufficient room to open rear hatch.
PAGE 4
MAX

INSTALLATION INSTRUCTIONS
PAGE 5
PARTS LIST
NOTE: Use this instruction guide and the crossbar Instructions to set up your ROLA cross bars.
4 End Supports

INSTALLATION INSTRUCTIONS
PAGE 6
PARTS NOT INCLUDED IN THIS KIT
ROLA Rails Extended Kit- RE43, RE47, RE53, RE60
ROLA Fit Kit- unique to vehicle application
Complete your vehicle Cross Bar System with our recommended Fit Kit and Rails Kit.
59315 (4) Lock Cores Kit
Includes Keys
59316 (8) Lock Cores Kit
Includes Keys
(2) Standard Keys
(1) Control Key
ROLA One Key Lock Core System

INSTALLATION INSTRUCTIONS
PAGE 7
1. Remove Rola RE cross bars from the carton.
Slide out the outer under-cover strips. Fig. A
2. Slide the positioning slider inward. The slider
will be positioned after the crossbar
assembly is on the vehicle. Fig. B
3. Open the cam levers on all the FPE end
supports. Fig. C
Fig. C
Fig. A
Fig. B
Under-cover strips
Cam
Lever
End tab (B)
Slide

INSTALLATION INSTRUCTIONS
PAGE 8
4. Slide the FPE end supports into the rails and leave loose until set into place on the vehicle’s
fixed mounting points. Fig. A
5. Follow your specific ROLA Fit Kit details to access your vehicle’s fixed points. Fig. B
6. Still following your specific Fit Kit directions, attach the mounting set screws into the vehicle’s
fixed points. Fig. C
Tip: place bar upside down for
easier handling of parts
Fig. B
Fig. A
Fig. C
Cover Style
Door Style

INSTALLATION INSTRUCTIONS
PAGE 9
7. Follow the Fit Kit instructions to attach the gasket pads to the correct cross bar positions.
8. Clean and dry the roof area where the cross bars install and install fixed point set screw.
9. Carefully position the cross bars over the fixed point set screws and spacer tube (if required).
Once on the car, position the rails to have equal amounts of overhang per side.
X"
X"

INSTALLATION INSTRUCTIONS
PAGE 10
10. Position and tighten the cross bar assemblies over
the fixed point set screws. Follow the fit kit
instructions for complete installation instructions.
Fig. A and Fig. B.
CAUTION: be sure to read your fit kit instructions
completely for vehicle specific information not
shown here.
11. Lock the FPE end supports and rails into position
by closing the cam levers as shown in Fig. C,
rechecking that the rails are centered on the
vehicle.
Note: Careful not to pinch fingers or hand!
Fig. A
Fig. C
Fig. B

Posi'on"Slider"Tab"
12. Now slide the Position Slider tabs outboard until they touch the back of the FPE end supports
leaving no gaps. Fig A
Slide the outer under-cover into place and mark with a pencil for length, remove and cut. Tip: Cut
approx. 1/8” or 2mm longer than needed to avoid gaps. Slide under-covers into place and replace
the end caps and lock in place.
13. Apply car position stickers to the inside of the
End Support cover doors. This will help reposition
the cross bars if removed later. Fig B
Push and tug on the now installed cross bar
assemblies to check for tightness in all 4 mounting
positions. If any looseness is detected, review the
installation steps and redo until completely firm.
Fig. C
Store your ROLA torque wrench in the vehicle’s
glove box or some other safe storage place.
CAUTION: Check the tensioning bolt torque reading
periodically on long trips or if the cross bars remain
on the car for long periods of time.
14. Close and lock the end support covers by turning the
quarter turn plugs to the locked icon position.
INSTALLATION INSTRUCTIONS
PAGE 11
!
Fig. A
Fig. C
Fig. B
FR
RR
RL

INSTALLATION OF LOCK CORES (IF PURCHASED)
PAGE 12
Remove the quarter turn lock plugs from the covers
(push out from the inside) Fig. A
Insert the Rola Control Key into the lock core then slide
the core into the covers. Hold back the core and remove
the control key Fig. B
Use your ROLA Standard Keys to lock and unlock the
covers Fig. C
Fig. A
Fig. C
Fig. B

Removing the cross bar from the vehicle:
Installing ROLA T-bolts:
For accessories requiring a T-bolt
ADDITIONAL INSTALLATION INSTRUCTIONS
PAGE 13
Door$Style$ Cover$Style$

SERVICE ITEMS AVAILABLE
PAGE 14
Save this page for later use.
RE-S3001 BUFFER STRIP
RE-S3002 UNDER-COVER
RE-S3003 POSITION SLIDER
RE-S3004 END CAP
RE-S3005 ¼TURN PLUG
FP-S3006 FP ROLA WRENCH
DF-S3009 DFE/FPE DOOR
FP-S3007 FP ALLEN (M4) WRENCH
FP-S3010 FP HARDWARE KIT
Accept no compromises, choose only quality roof racks and cargo carriers.
Table of contents
Other Rola Automobile Accessories manuals

Rola
Rola PMX132 User manual

Rola
Rola RMX Series User manual

Rola
Rola PMX023 User manual

Rola
Rola PMX018 User manual

Rola
Rola TOP RAIL KIT User manual

Rola
Rola PMX196 User manual

Rola
Rola V-TEX 59505 Manual

Rola
Rola 4 Place Bike Carrier - Folding Instruction manual

Rola
Rola 59400 User manual

Rola
Rola 59681 User manual
Popular Automobile Accessories manuals by other brands

Road Ranger
Road Ranger ET 210207 Installation instruction

ALIEN ENCLOSURES
ALIEN ENCLOSURES 67-69 CAMARO CONVERTIBLE TRUNK PANEL KIT instructions

Firefly
Firefly 87510011 manual

Volvo
Volvo 31285547 installation instructions

Clarion
Clarion BKX-1321-06 installation manual

AL-KO
AL-KO AMS2 MAMMUT TANDEM manual