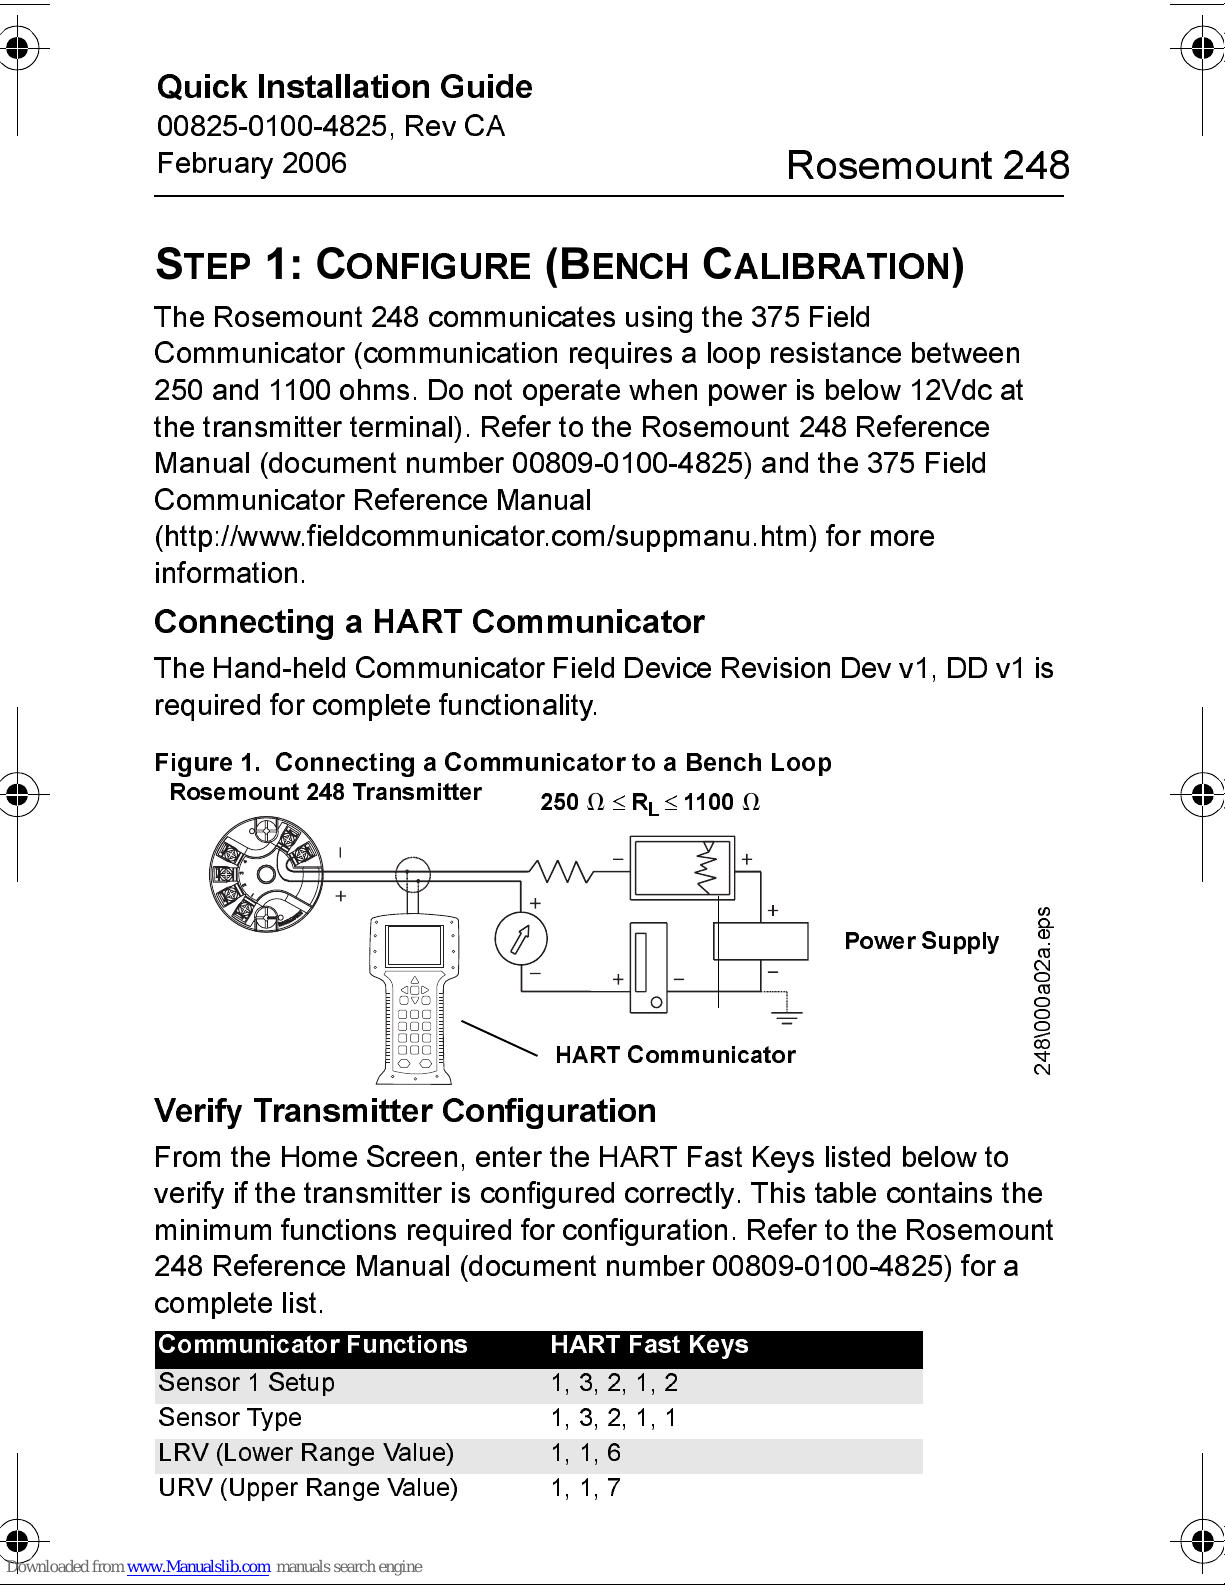
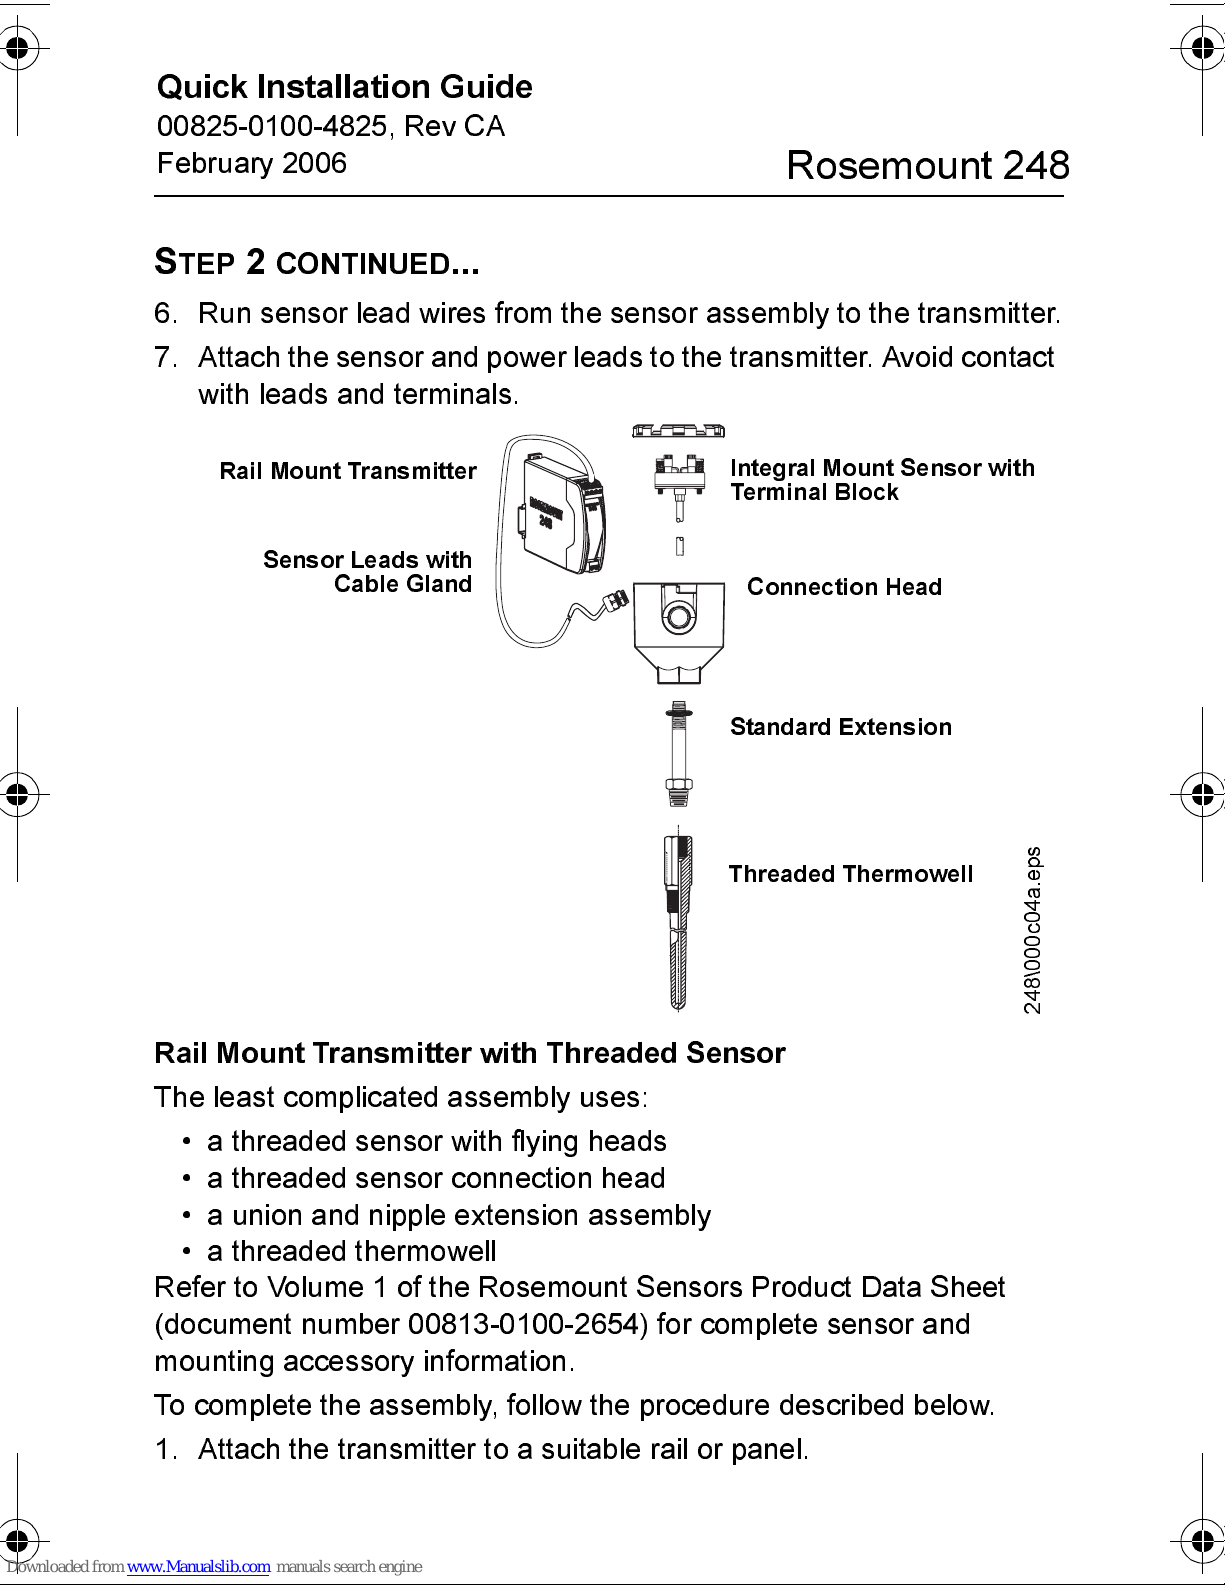
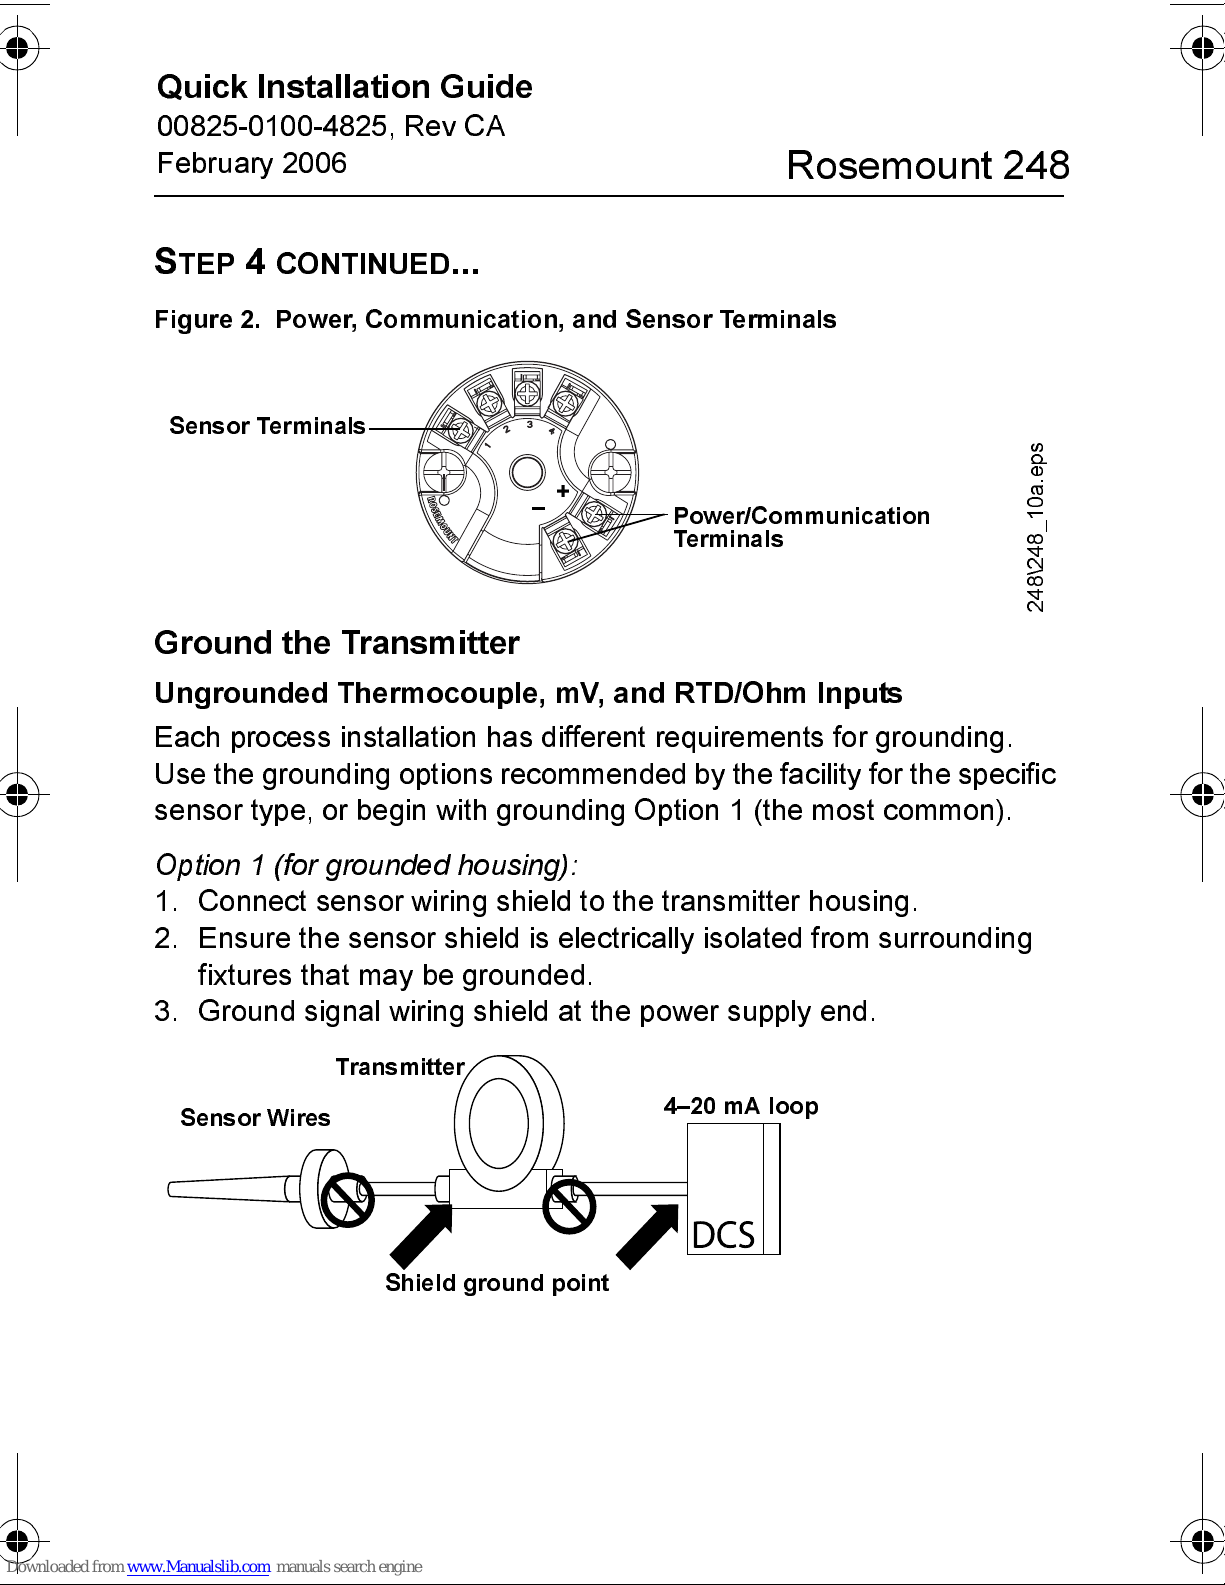
Rosemount 248 User manual
Other Rosemount Transmitter manuals

Rosemount
Rosemount Oxymitter 5000 User manual

Rosemount
Rosemount 3108 User manual

Rosemount
Rosemount 8712 User manual

Rosemount
Rosemount FISHER-ROSEMOUNT 244EH User manual

Rosemount
Rosemount 8712C User manual

Rosemount
Rosemount 848T User manual

Rosemount
Rosemount 2088 User manual

Rosemount
Rosemount 4600 User manual

Rosemount
Rosemount Oxymitter 4000 Training manual

Rosemount
Rosemount 3051 User manual

Rosemount
Rosemount 8732 Series User manual

Rosemount
Rosemount 702 User manual

Rosemount
Rosemount OCX 8800 User manual

Rosemount
Rosemount 3144P User manual

Rosemount
Rosemount 3300 Series User manual

Rosemount
Rosemount 1199 User manual

Rosemount
Rosemount 8732E User manual

Rosemount
Rosemount 8732E User manual

Rosemount
Rosemount 848T User manual

Rosemount
Rosemount 3244MV User manual