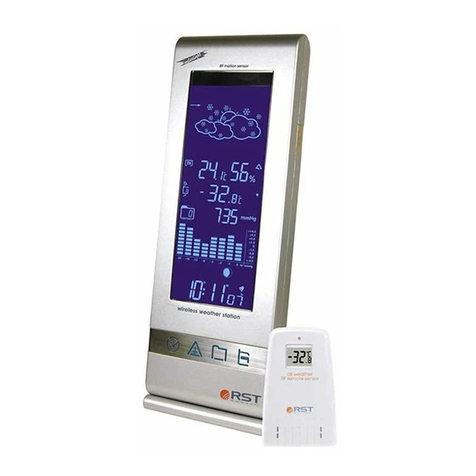
RST meteolight Q776 User manual

multi-color
weather station
meteolight Q776
RST88776
Q776
weather station
barometer.ru
manual
EN
RST88776-Manual-2020 22.01.2020 14:02 Стр ниц 1

метеостанция RST88776 weather station RST88776
Thank you for purchasing this device, please read the operating instructions
carefully to familarize yourself with the features and modes of operation before
using the product.
RST88776-Manual-2020 22.01.2020 14:02 Стр ниц 2

метеостанция RST88776 weather station RST88776
Unpacking and checking
1. Remove the weather station from the packaging, remove all protective films and keep the packaging materials
out of the reach of children.
2. Dispose of the materials separately according to type.
3. Check that all the items that should be included in the delivery are present and whether the weather station dis-
plays any damage.
Items included in the delivery
• Weather station x 1
• Support foot of base station x 1
• Outdoor sensor x 1
• Power adapter for base unit x 1
• Instruction manual x 1
Product functions
Product functions
• 6 function bottuns:MODE,▲/MEM,▼/HISTORY, CH , ALERT, SNOOZE/LIGHT
• 7 weather forecast indicator icons: sunny, semi-clear, cloudy, light rain, heavy rain, light snow, blizzard
• RCC receiveng system: GMT+3 (default)
• 6-digit time display: hours, minutes, seconds;
• Calendar instructions for 2019-2099.
• Indoor temperature display, resolution 0.1 ° C, detection range -10 ° C -50 ° C, detection time 30 seconds;
• Indoor humidity display, resolution 1%, detection range 20%-99%, detection time 30 seconds;
• outdoor temperature, resolution 0.1 ° C, detection range -50 ° C - +70 ° C;
• Outdoor humidity display, resolution 1%, detection range 20%-99%, detection time 30 seconds.
• Pressure display, Measuring range: 637.5mmHg ~787.5mmHg /850hpa~1050hpa,resolution 0.1mmHg,out of
range without restrictions.
• R receives 3 channels of signal.
• summer time function.
• Two AL alarm modes.
• Comfort indicator
• Inside and outside temperature and humidity trend value indication.
• Low battery indicator
RST88776-Manual-2020 22.01.2020 14:02 Стр ниц 3

метеостанция RST88776 weather station RST88776
• Internal and external low battery indication.
• Pressure history of the last 12 hours. Phase indication (dynamic).
• SNZ function,8 minutes delay alarm;
• 7-color LED backlight.
• A.B.C three backlight mode options.
• Air pressure unit mmHg and hpa switch display.
• Time zone setting (GMT+3), -12/+12 hour setting.
• Quiescent Current:<--
Operating elements and parts of the base unit
Operating buttons
Button MODE
• Activate settings mode: time, date, alarm
• Save changes to settings
Button CH
• R channel switching
• Disconnect/reconnect wireless sensor connection
Button ALERT
• ctivate/disactivate outdoor temperature alert function
• Alert setting for highest and lowest
Button SNOOZE•LIGHT
• Illuminate backlight
• Enter weather graph Settings
Button ▲/MEM
• Set values (increase)
• Display/delete stored MAX and MIN values
Button ▼/HISTORY
• Set values (decrease)
• Check the pressure history
• Enter A.B.C backlight Settings
RST88776-Manual-2020 22.01.2020 14:02 Стр ниц 4

метеостанция RST88776 weather station RST88776
RF sensor
RF sensor
1 Current channel
2 Outdoor temperature
3 Outdoor humidity
4 RCC receive
5 Low battery
6 LED indicating lamp
A Transfer temperature/transfer channel selestion button
B lnput/close signal search button RCC output heat sensor
C Output heat sensor
RST88776-Manual-2020 22.01.2020 14:02 Стр ниц 5

метеостанция RST88776 weather station RST88776
Initial setup
Initial setup
Follow the instructions in the order described and first put the batteries in the RF sensor. This is the only way for the weather
station to function without any problems. Do not press any buttons while switching the device on.
RF sensor
RF sensor
1. Use a thin screwdriver to remove the battery compartment cover on the back of the sensor.
2. Insert 2 AAA / 1.5 V batteries facing in the direction indicated on the bottom of the battery compartment. Make
sure that the poles of the batteries are correct (+/-). As soon as the sensor is receiving power, the red pilot light will
light up and thus display that data is being transmitted to the base unit.
3. Put the battery compartment cover back in place and screw it into place.
- Do not use batteries that have a voltage that is too low (only 1.2 V instead of 1.5 V). This affects the accuracy of
the measurements, among other things.
- If possible, use alkaline batteries instead of zinc-carbon batteries. Alkaline batteries last longer, particularly
outside in low temperatures.
Base unit
Base unit
You can operate the wireless weather station using the power adapter or with batteries. If the wireless weather station
is connected to a power socket, it will be operated using the power mains, even if there are batteries in the device. Re-
move depleted batteries from the battery compartment, as they can leak.
A) Power mains operation
ATTENTION
Use only the power adapter included in the delivery for power mains operation.
1. Insert the power adapter included in the delivery into the base unit port.
2. Plug the power adapter into a socket that corresponds to the voltage listed in the Technical Data.
3. Wait several minutes. The base unit needs this time to collect all the weather data and to receive radio signals
from the time signal transmitter.
RST88776-Manual-2020 22.01.2020 14:02 Стр ниц 6

метеостанция RST88776 weather station RST88776
B) Battery operation
1. Remove the battery compartment cover.
2. Insert 3 AAA / 1.5 V batteries facing in the direction indicated on the bottom of the battery compartment. Make
sure that the poles of the batteries are correct (+/-).
3. Put the battery compartment cover back in place and close it.
4. Wait several minutes. The base unit needs this time to collect all the weather data and to receive radio signals
from the time signal transmitter.
Standard mode operation
When the base unit has power, all the symbols on the display are shown for a brief moment. The display also briefly lights
up.
1. In the standard mode, press the “MODE” button to switch the current time and AL time.
2. In the standard mode, press and hold the “MODE” button to enter the time setting mode;
3. In standard mode, simply press the “CH” button to switch the R channel CH1 CH2 CH3 CH1
4. In standard mode, press and hold the “CH” button to enter R reception.
5. In standard mode, press the “ /HISTORY” button to view the barometric history.
6. In standard mode, press and hold the “ /HISTORY” button to enter A, B, C, backlight settings.
7. In standard mode, press “ /MEM” to view the maximum/minimum temperature and humidity.
8. In the standard mode, long press “ /MEM” to clear the maximum/minimum temperature and humidity.
9. In standard mode, single press "ALERT" switch temperature alarm
10. In standard mode, long press “ALERT” to enter ALERT temperature alarm setting
11. Press the “SNOOZE·LIGHT” button to light the backlight for 10 seconds. (Battery mode)
12. Press and hold the “SNOOZE·LIGHT” button to enter the weather graphic settings.
Time setting mode
Time setting mode
1. In the standard mode, press and hold the “MODE” button for >2 seconds to enter the time setting mode;
2. The set item will flash at 1Hz;
3. Setting order is: RCC ON/O DST ON/O Setting GMT 4.Setting hour minute year month day language pressure
unit Pressure value exit.
5. During the setting process, press “MODE” to confirm the setting result and enter the next level setting;
RST88776-Manual-2020 22.01.2020 14:02 Стр ниц 7

метеостанция RST88776 weather station RST88776
6. Setting process, press “ /MEM” button, the setting value is increased by 1, long press >2 seconds, 8 steps/second
to increase;
7. During the setting process, press “ /HISTORY” button, the set value will be decremented by 1, long press > 2 se-
conds, and 8 steps/second will be decremented;
8. When the button is not operated for 20 seconds, the setting mode will be automatically exited, and the set value
will be saved;
9. When RCC ON/O is set, the RCC symbol is displayed long, and ON or O is displayed at the time position and
blinks.
10. DST ON/O setting: Default DST O , can be manually changed to ON.
Alarm function
Alarm function
1. In the standard mode, press the “MODE” button to switch the time display mode to the ALARM time display
mode.
2. Switching order:TIME S-ALARM W-ALARM TIME
3. In the ALARM time mode, press the /MEM button to switch the corresponding ALARM symbol.
4. S-ALARM is a one-time alarm clock that can be set from Monday to Sunday. The bell symbol and single character
will be turned off immediately after the alarm is completed.
5. W-ALARM is an alarm clock from Monday to riday. It will not be heard on Saturdays and Sundays. It can be re-
peated from Monday to riday. After the alarm is completed, the bell symbol and mon-frl characters will not di-
sappear.
6. S-ALARM default time is 8:00, W-ALARM default time is 7:00
7. In the ALARM time display mode, press and hold the “MODE” button to enter the corresponding ALARM setting
mode, and the set item will flash at 1Hz frequency;
8. Setting Order:Hour Minute exit;
9. Press “ /MEM button, set value plus 1 and press for >2 seconds, then set value 8 steps/second to increase;
10. Press “ /HISTORY” button once, the set value will be decremented by 1, long press for >2 seconds, then the set
value will be decremented by 8 steps/second;
11. Set the result, just press the “MODE” button to confirm;
12. When the button is not operated for 20 seconds, the setting mode will be automatically exited and the set value
will be saved.
13. If two ALARMs arrive at the same time, W-ALARM takes precedence;
14. S-ALARM and W-ALARM can enter SNOOZE for five minutes in the alarm
15. When the alarm is ringing, press “SNOOZE·LIGHT” to delay the alarm for 8 minutes and press the “SNOOZE·LIGHT”
RST88776-Manual-2020 22.01.2020 14:02 Стр ниц 8

метеостанция RST88776 weather station RST88776
button to stop the alarm. Press the other button to disable the function.
16. If the backlight brightness is not in the strong brightness when the fire cow is not inserted or in the case of the fire
cow, when the alarm is loud, the backlight is at this time,need to achieve strong brightness (long light time and AL
time synchronization)
17. BUZZER alarm time 2 minutes
Stopping the alarm
Stopping the alarm
You will be woken by the alarm at the set time, and the sound will become more and more intense as the alarm conti-
nues.
• Snooze - Press the SNOOZE•LIGHT button to stop the alarm for approx. 5 minutes.
• Switch off the alarm completely - Press any button on the base unit (apart from SNOOZE•LIGHT), to stop the
alarm. The alarm will go off again after 24 hours.
• Automatic stop function- If you do not press any buttons, the alarm will automatically switch off after 2 minutes.
The alarm will go off again after 24 hours.
Starting radio reception
1)After loading the battery, after detecting the temperature/humidity, it will automatically enter the R reception
for 3 minutes, and the antenna symbol will increase dynamically.;
2)Press and hold the “CH” button for 2 seconds in the standard mode to clear the current display value and re-regi-
ster the R data.
3)The registered CH temperature and humidity have not received the valid signal of the same ID Code within 60
minutes, it will be open for 3 minutes (do not clear the ID), the reception will fail, the CH temperature and humi
dity will display --._°C-- %, then every Receive 3 minutes long (clear ID);
4)Synchronization cycle:CH1:57S,CH2:67S,CH3:79S;
5)Received at 1.5S before each synchronization arrival time, and the reception succeeds or exits after 3 seconds;
6)Priority: When the R long reception meets the alarm, the alarm is given priority, and the R is re-registered after
the alarm is over;
7)R In the case of no receipt or drop, the R reception must be automatically received every 30 minutes until it is re-
ceived;
8)If channel 1 is received, only channel 1 digits and temperature are displayed. If no channel is received, the 123
digits are displayed at the same time, and --._°C-- % (not flashing) is displayed;
9)Temperature range: -50 ° C - 70 ° C; humidity range: 20% - 99%;
10)R antenna does not need to change when is synchronized;
RST88776-Manual-2020 22.01.2020 14:02 Стр ниц 9

метеостанция RST88776 weather station RST88776
11) When the antenna is received, the R antenna symbol is dynamically incremented;
12) When the transmitter does not successfully receive the RCC, the R is only updated to update the temperature
and humidity;
13) When the receiver is set to RCC O , the R is only updated to update the temperature and humidity;
If the time signal contains DST information, the time is automatically adjusted according to the DST ON/O set-
ting after receiving;
14)Temperature range (negative sign) shows: when between 0~-9.9°C, the negative sign“-”is displayed in the first 8
word G segment;
15)If you manually change the time information, the RCC symbol disappears and is updated the next time you re-
ceive the R . If you do not want to update the time, you need to set the RCC ON/O to the O state.
16)If the R is not received for 6 minutes, the antenna is reduced by 1 grid; if R is not received for 12 consecutive mi-
nutes, the antenna is reduced by two grids;
Power on and reset
Power on and reset
1)When powering on or resetting, the LCD full screen is displayed for 3 seconds. Then, after the buzzer BI is heard, it
enters the weather setting mode. After the setting is completed or automatically exits the weather setting mode
after 20 seconds, it receives the R for 3 minutes and then exits.
2)Default: DC +3: (2019.1.1, 3:00, °C; 24HR, mmHg, DST O , RCC ON, GMT+3 Russian)
3)All standards: The weather is semi-sunny, ALARM: O (W-ALARM: 7:00; S-ALARM: 8:00);
4)Indoor temperature detection range: -10 ° C - +50 ° C (14.18 ° - +122 ° );
5)Humidity detection range: 20%-99%, detection period: 30 seconds, temperature resolution +/- 0.1 °C.
6)Temperature detection is paused when Alarm is ringing or RCC reception is in progress.
Choosing the location
ATTENTION
- Protect the base unit and wireless sensor from dust, shocks, extreme temperatures and direct sunlight.
- Protect the base unit from moisture. Only place the base unit in a dry, enclosed space.
- The wireless sensor is protected against moisture but must be protected against water, e.g. rain.
RST88776-Manual-2020 22.01.2020 14:02 Стр ниц 10

метеостанция RST88776 weather station RST88776
General
General
The base unit and wireless sensor exchange information over a radio frequency. or this reason, the location is important
for the range of the wireless connection. Note:
• The maximum distance between the base station and wireless sensor is 50 meters. However, this range is only po-
ssible with in open area.
• Shielding building materials such as reinforced concrete reduce or prevent the radio reception between the
base station and wireless sensor.
• Devices such as televisions, cordless phones, computers and fluorescent tubes can also interfere with the wireless
reception.
• Do not place the base unit and wireless sensors directly on the floor. This restricts the range.
• In low temperatures in winter the battery performance of the wireless sensors can be significantly reduced. This
reduces the transmitter range.
• Depending on your location, in rare cases the base unit can receive signals from another time signal transmitter,
or even alternate between the two time signal transmitters. This is not a device error. In this case, change the lo-
cation of the base unit.
or matters relating to the radio reception between the time signal transmitter and base unit, please observe the follo-
wing points:
• Place the base unit as close to a window as possible.
• Keep a distance from television units, computers and monitors. Base units should also not be located in the direct
vicinity of cordless phones.
• The reception is usually better at night. If the base unit has no reception during the day, it may well be that the
signal is received immediately and at full strength during the night.
• The weather, e.g. a big storm, can cause the signal reception to be disrupted.
• It is also possible for the time signal transmitter to be switched off for short periods of time, e.g. for maintenance
work.
RST88776-Manual-2020 22.01.2020 14:02 Стр ниц 11

метеостанция RST88776 weather station RST88776
Base unit
Base unit
DANGER
When installing the device on a wall, there must be no electrical cables, gas or water pipes in the wall at the installation
site. Otherwise there is a risk of electric shock!
• You can put the base unit on the desk or hang it up. It’s better to put on the desk.
• Place or hang the base unit as close to a window as possible. The reception is generally best there.
RF sensor
RF sensor
Place or hang the R sensor in a place where it is protected from direct weather (rain, sun, wind, etc.). Suitable locations
include e.g. under a porch or in a carport.
RST88776-Manual-2020 22.01.2020 14:02 Стр ниц 12

метеостанция RST88776 weather station RST88776
eather Station
eather Station
The highest and lowest temperature and humidity values by repeatedly pressing the ▲/MEM button.
• press once: the maximum values are shown
• press again: the minimum values are shown
• press again: returns to normal display
Press and hold the ▲/MEM button to delete the highest and lowest temperature and humidity values manually.
RST88776-Manual-2020 22.01.2020 14:02 Стр ниц 13

метеостанция RST88776 weather station RST88776
eather forecast
eather forecast
After setting up initially, the weather forecast can not be used for about 12 hours, as the weather station needs this time
to collect and evaluate the weather data.
The weather forecast is a result of the collected data and the measured changes in air pressure.
1. Moon phase
2. Temperature alert
3. Outdoor max\min
4. R Channel
5. Outdoor temperature
6. Indoor max\min
7. Outdoor temperature trend
8. Indoor temperature
9. Outdoor temperature trend
10. Outdoor humidity trend
11. Outdoor humidity
12. Indoor humidity trend
13. Indoor humidity
14. outdoor sensor low battery
15. Indoor low battery
16. Weekday Language
17. Month
18. Time zone
19. Date
20. RCC recieve
21. Alarm
22. Time
23. Enviorment comfort
24. Histoty air pressure
25. Pressure data
26. Pressure trend
27. Indoor
28. Weather forecast
29. Multicolor display mode
RST88776-Manual-2020 22.01.2020 14:02 Стр ниц 14

метеостанция RST88776 weather station RST88776
Weather forecast refers to the trend of weather conditions in the next 12 hours;
The weather is divided into 7 levels: sunny, semi-clear, cloudy, light rain, heavy rain, light snow, heavy snow
Detection method: air pressure value together with outdoor temperature and humidity
When the temperature reaches 1°C, it will show rainy days. If it is less than 1°C, it will show snow days. The temperature
will be preferentially R temperature.
Phases of the moon
Phases of the moon
The phases of the moon displayed are automatically updated with the date.
New Waxing rist Waxing ull Wanning Last Wanning
Moon Crescent quarter ibbous moon gibbous quarter crescent
Converts one mode per second, and will continue for 5 seconds when converting to the current normal moon phase.
Comfort indicator (display for indoors)
It depends on the indoor temperature and humidity and indicates the comfort degree a person would feel
Comfort symbol
Temperature range 0°C ~ 50°C 20°C to 28°C 0°C ~ 50°C
Humidity range < 40% 40% ~ 70% >70%
Degree of environment Dry Comfortable Wet
Dry: When the indoor humidity is below 40% and temperature is within 0°C to 50°C range, it indicates the indoor envi-
ronment is dry, the symbol will appear.
RST88776-Manual-2020 22.01.2020 14:02 Стр ниц 15

метеостанция RST88776 weather station RST88776
Comfortable: When the indoor temperature is within 20°C to 28°C range and humidity is within 40% to 70% range, it in
dicates the indoor environment is comfortable, the symbol will appear.
Wet: When the indoor humidity is over 70% and the temperature is within 0°C to 50°C range, it indicates the indoor en
vironment is wet, the symbol will appear.
No indicator: hen the indoor temperature is out of 20°C to 28°C but humidity is within 40% to 70%, no symbol will ap-
pear.
Languages of day of week
The language options are English (EN), German (GE), rench ( R), Italian (IT), Russian
RST88776-Manual-2020 22.01.2020 14:02 Стр ниц 16

метеостанция RST88776 weather station RST88776
Switching the light on
7-color backlight selection function
Press and hold ▼/HISTORY to enter A.B.C three backlight mode setting modes, then press ▼/HISTORY to select A.B.C
mode, and press SNOOZE·LIGHT button to select color.
A) Backlight default A mode, (7 colors switched manually) backlight color default RED
B) ive-color weather graphic (mode B )
C) 7-color backlight (mode C
When the base unit is powered through the power adapter and the power mains, the display is constantly illuminated.
RST88776-Manual-2020 22.01.2020 14:02 Стр ниц 17

метеостанция RST88776 weather station RST88776
Low battery indicator
or the base unit and the sensor, there is a separate low battery indicator .
When the low battery symbol is shown on the display, you have to replace the batteries in the base unit or the wireless
sensor with new batteries.
Note:
• When you change the batteries all the settings are lost.
• Always exchange all batteries and only use those listed in the ‘Technical Data’.
• Even if the base unit is being powered by the power mains, you should still remove any empty batteries present
from the base unit.
• Make sure that the poles of the batteries are correct (+/-) when inserting.
• Clean the battery and device contacts if necessary before inserting.
• Dispose of the old batteries in an environmentally manner.
Resetting the weather station
If the base station appears to display incorrect values, you should reset the weather station to the factory settings.
1. Take the batteries out of the weather station and put them back in again. If you are operating the device using
the power mains, remove the power adapter from the socket, then plug it back in. If additional batteries have
been inserted, these also need to be removed briefly and then reinserted.
When base unit has power again, all the symbols on the display are shown for a brief moment. The display also briefly
lights up and the unit emits a beep.
After approx. 20 seconds, the display starts to flash and the current data from the wireless sensors is retrieved.
2. Observe the values shown on the display.
3. Only if you continue to see the wrong values: Take the batteries out of all the wireless sensors in use and put them
back in.
RST88776-Manual-2020 22.01.2020 14:02 Стр ниц 18

метеостанция RST88776 weather station RST88776
Troubleshooting
Troubleshooting
Problem Possible cause and remedy
Display screen not working. - Check the batteries in main unit are inserted or power adaptor is plugged
in correctly
Device cannot receive the
DC 77 signal for the time. - Check the chosen location
- Start radio reception manually if necessary
- Set the time manually
The temperature from the sensor
seems to be too high. - Check if the sensor is exposed to direct sunlight.
The display shows HH, LL, HH.H or LL.L
instead of measured values for
temperature or humidity. - The values are above or below the measuring range,
see Technical Data.
The base unit is not receiving any s
ignal from the wireless sensor. - Make sure that there are no electrical sources of disturbance near
the wireless sensor or the base unit.
- Check the batteries in the sensor.
- Start the search for the wireless sensor manually: Press and hold
the CH button on the base unit until the display for the weather information
flashes
- Move the base unit closer to the sensor or vice versa.
The display is illegible, the function
is not clear or the values
are clearly wrong. - Reset the weather station to the factory settings
RST88776-Manual-2020 22.01.2020 14:02 Стр ниц 19

метеостанция RST88776 weather station RST88776
Cleaning
Cleaning
1. When operating using the power mains: Remove the power adapter plug from the base unit.
2. Wipe the base unit with a slightly damp cloth when required.
3. Dry off the device completely before connecting it with the power adapter again.
Technical Data
Technical Data
Base unit
Batteries: 3 x AAA / 1.5 V (Not included)
Temperature measuring range: 0°C to +50°C
Resolution: 0.1 °C
Temperature accuracy: 0°C ~ 50°C: +/-1°C, over 40°C: +/-2°C
Humidity measuring range: 20 % to 90 % relative humidity
Humidity measuring accuracy: +/- 5 % with a measuring range of 30% to 80%,
+/- 8% for other measuring range
Resolution: 1 %
In the standard mode, press “▲/MEM” to view the maximum and minimum temperature record, and return to the stan-
dard mode without pressing any key for 20 seconds.
Automatically clear the maximum and minimum temperature and humidity records every day at 0:00 in the morning;
RF sensor
Batteries: 2 x AAA / 1.5 V (Not included)
Temperature measuring range: - 50°C to 70°C
Temperature accuracy: 0°C ~ 40°C: +/-1°C, -50°C ~ 0°C and 40°C ~ 70°C: +/-2°C
Transmission frequency: 433 MHz
Range: max. 50 meters (in open area)
Power adapter
Power supply: 230-240V~, 50 Hz 50 mA
Output: 5.0V 150 mA
As our products are constantly evolving and improving, changes in the design and technology are possible.
RST88776-Manual-2020 22.01.2020 14:02 Стр ниц 20
Other manuals for meteolight Q776
1
Table of contents
Languages:
Other RST Weather Station manuals

RST
RST meteoscan 938PRO User manual

RST
RST IQ785 User manual

RST
RST METEO PROJECTION 705 User manual

RST
RST meteoscan 937PRO User manual

RST
RST meteolight Q774 User manual

RST
RST RST02559 User manual

RST
RST RST02555 User manual

RST
RST IQ552 User manual

RST
RST RST02557 User manual

RST
RST METEO PROJECTION 703 User manual
Popular Weather Station manuals by other brands

La Crosse Technology
La Crosse Technology Wireless Weather Station instruction manual

Technoline
Technoline WS 6750 user manual

La Crosse
La Crosse WS-7013U quick start guide

ACU-RITE
ACU-RITE 01518 instruction manual

Technoline
Technoline Mobile Alerts MA 10920 instruction manual

La Crosse
La Crosse WM9280 Meteotime user manual